
I’ve installed the ESlint by following these steps: https://travishorn.com/setting-up-eslint-on-vs-code-with-airbnb-javascript-style-guide-6eb78a535ba6
Now, my ESlint is working from the terminal, but errors/warnings are not displaying in the code window, here is my project structure and how it is looks like:

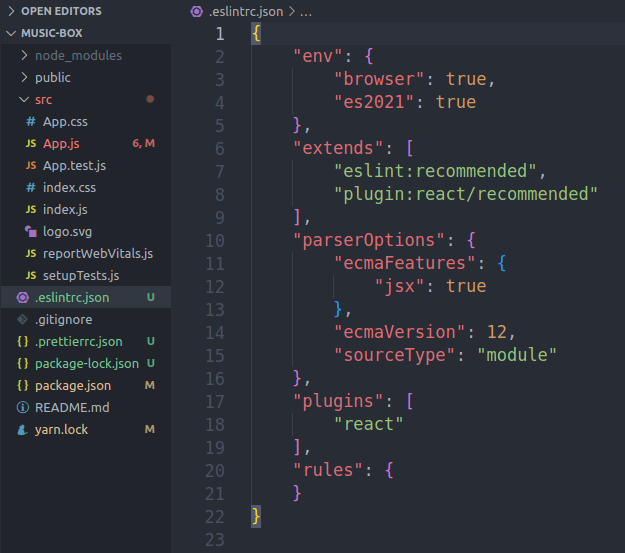
and my eslintrc configs:
module.exports = {
  env: {
    browser: true,
    commonjs: true,
    es6: true,
    node: true,
  },
  extends: [
    'airbnb-base',
  ],
  globals: {
    Atomics: 'readonly',
    SharedArrayBuffer: 'readonly',
  },
  parserOptions: {
    ecmaVersion: 2018,
  },
  rules: {
  },
};
Why it couldn’t show errors in the editor?
![]()
asked Jan 12, 2020 at 18:55
![]()
6
I ran into this recently, and fixed it by changing my .eslintrc.js file to just .eslintrc (JSON object only, no comments, everything quoted right, no extension). After restarting VSCode it picked up the file properly and gave me linter errors in VSCode.
answered Dec 18, 2020 at 16:59
![]()
radicandradicand
6,0083 gold badges26 silver badges22 bronze badges
2
I followed all the advice and still had issues. I am using Typescript + YARN 2 (w PnP).
The error I was receiving was Failed to load the ESLint library for the document [filename].ts
What fixed it for me was that I needed to create some editor SDKs and settings with the command:
yarn dlx @yarnpkg/sdks vscode.
My .vscode/settings.json for eslint looks like:
  "eslint.enable": true,
  "eslint.packageManager": "yarn",
  "eslint.alwaysShowStatus": true,
  "eslint.validate": [
    "html",
    "javascript",
    "typescript",
    "javascriptreact",
    "typescriptreact"
  ],
  "eslint.nodePath": ".yarn/sdks"
The command above added "eslint.nodePath": ".yarn/sdks"
I found this here (I followed this and this to get there).
answered Sep 8, 2022 at 20:18
![]()
MoemarsMoemars
4,6423 gold badges27 silver badges29 bronze badges
1
@alexdima
these are mine settings
{
  "breadcrumbs.filePath": "off",
  "breadcrumbs.symbolPath": "off",
  "editor.acceptSuggestionOnEnter": "smart",
  "editor.colorDecorators": false,
  "editor.cursorBlinking": "smooth",
  "editor.cursorStyle": "line-thin",
  "editor.detectIndentation": false,
  "editor.fontSize": 12,
  "editor.hover.enabled": false,
  "editor.minimap.renderCharacters": false,
  "editor.multiCursorModifier": "ctrlCmd",
  "editor.scrollBeyondLastLine": false,
  "editor.snippetSuggestions": "top",
  "editor.tabSize": 2,
  "editor.wordWrap": "on",
  "explorer.confirmDelete": false,
  "explorer.confirmDragAndDrop": false,
  "files.exclude": {
    "**/.git": true,
    "**/.svn": true,
    "**/.hg": true,
    "**/CVS": true,
    "**/.DS_Store": true,
    "**/node_modules": true,
  },
  "files.insertFinalNewline": true,
  "files.trimFinalNewlines": true,
  "files.trimTrailingWhitespace": true,
  "html.format.wrapAttributes": "force-expand-multiline",
  "window.closeWhenEmpty": true,
  "window.restoreFullscreen": true,
  "window.titleBarStyle": "custom",
  "workbench.commandPalette.history": 0,
  "workbench.editor.tabSizing": "shrink",
  "workbench.settings.editor": "json",
  "workbench.settings.useSplitJSON": true,
  "workbench.startupEditor": "newUntitledFile",
  "[javascript]": {
    "editor.defaultFormatter": "esbenp.prettier-vscode"
  },
  "[html]": {
    "editor.defaultFormatter": "esbenp.prettier-vscode"
  },
  "[javascriptreact]": {
    "editor.defaultFormatter": "esbenp.prettier-vscode"
  },
  "javascript.updateImportsOnFileMove.enabled": "always",
  "breadcrumbs.enabled": false,
  "editor.renderControlCharacters": false,
  "editor.renderWhitespace": "none",
  "[json]": {
    "editor.defaultFormatter": "esbenp.prettier-vscode"
  },
  "[typescript]": {
    "editor.defaultFormatter": "vscode.typescript-language-features"
  },
  "diffEditor.renderSideBySide": true,
  "javascript.validate.enable": false,
  "search.searchOnTypeDebouncePeriod": 500,
  "git.openDiffOnClick": false,
  "workbench.colorTheme": "GitHub Dark",
  "svg.preview.mode": "svg",
  "editor.codeActionsOnSave": {
      "source.fixAll.eslint": true
  }
}
I haven’t touched them since the last update and highlighting stopped working.
--user-data-dir with this highlighting works. soo, should I delete my settings and start over?
Настраиваем автоматическое форматирование кода и проверку на ошибки при помощи Prettier и ESLint согласно стайлгайду Airbnb.
Во время работы над последним проектом я опробовал в деле два прекрасных иструмента, ESLint и Prettier. Захотелось написать о том, что это такое, чем полезен линтер и prettier, как их настроить, и как использовать.
-
Что такое Lint?
- ESLint в Create React App и расширение для VS Code
- Настройка ESLint
-
Установка и подключение дополнительных плагинов ESLint
- eslint-plugin-react
- eslint-plugin-react-hooks
- eslint-plugin-jsx-a11y
- eslint-plugin-import
-
Prettier
- Установка Prettier в проект
- Отключаем конфликтующие с Prettier правила ESLint
- Интеграция Prettier в VS Code
- .prettierrc.json и .prettierignore
-
Установка правил Airbnb для ESLint
Что такое Lint?
Lint, или линтер — это инструмент для поиска ошибок в коде. Пример работы линтера в проекте Create React App, ниже:

Клавиатура моего ноутбука иногда срабатывает неправильно, и делает двойное нажатие клавиши, вместо однократного. В 8 и в 25 строке опечатка, вместо logo — logoo а вместо App — Appp
Линтер нашел эти ошибки и сообщил о них в терминал. Прекрасно!
Теперь можно их исправить, и все заработает как надо:

ESLint в Create React App и расширение для VS Code
В Create React App линтер уже установлен, он называется ESLint. Именно его сообщения об ошибках мы видим в терминале.
Существует так же ESLint расширение для VS Code:

Установив это расширение в VS Code, получим сообщения ESLint и подсветку ошибок в редакторе кода:

У ESLint есть конфиг, в котором находятся правила, согласно которым он выполняет проверку кода. Как я говорил ранее, ESLint уже встроен в Create React App, и использует конфиг который называется eslint-config-react-app
В Create React App этот конфиг подключается к ESLint в package.json, 22 строка:

Eslint сейчас настроен так, как решили создатели CRA. Давайте инициализируем ESLint и заново сами все настроим, так, как нам необходимо. Для этого выполним команду:
$ npx eslint --init
Enter fullscreen mode
Exit fullscreen mode
Запустится мастер настройки ESLint.
Пройдем настройку согласно предложенным вариантам:
В конце мастер создаст файл настроек линтера, .eslintrc.json:
На этом базовая настройка линтера закончена, теперь было бы неплохо расширить его конфигурацию и подключить несколько дополнительных плагинов с правилами.
Установка и подключение дополнительных плагинов ESLint
установим правила ESLint для React:
$ npm install eslint-plugin-react --save-dev
Enter fullscreen mode
Exit fullscreen mode
Если вы используете версию React старше 17, и не импортируете React from ‘react’ можно после установки этого плагина, добавить в конфиг .eslintrc.json строку «plugin:react/jsx-runtime», тогда ESLint не будет ругаться, что ‘React’ must be in scope when using JSX
В этом случае конфиг будет выглядеть так:

Установим правила для поддержки хуков React, eslint-plugin-react-hooks:
$ npm install eslint-plugin-react-hooks --save-dev
Enter fullscreen mode
Exit fullscreen mode
подключим их, добавив строку «plugin:react-hooks/recommended» в .eslintrc.json:

Установим правила доступности для людей с ограниченными возможностями eslint-plugin-jsx-a11y
$ npm install eslint-plugin-jsx-a11y --save-dev
Enter fullscreen mode
Exit fullscreen mode
добавляем «plugin:jsx-a11y/recommended» в .eslintrc.json:

установим правила, которые будут отвечать за синтаксис импортов и экспортов eslint-plugin-import
$ npm install eslint-plugin-import --save-dev
Enter fullscreen mode
Exit fullscreen mode
добавим «plugin:import/recommended» в .eslintrc.json:

С ESLint мы пока что закончили, переходим к Prettier
Prettier
Prettier. Что это такое и зачем вообще нужно?
Prettier — это инструмент для автоматического форматирования кода.
Форматирование кода — это процесс придания коду определенного вида.
Prettier берет код, который вы ему дали, и преобразует этот код к единому стилю.
Вот простой пример:

Здесь у нас стандартный файл App.js из Create React App проекта, у которого я где то убрал, а где то добавил отступы и точки с запятыми в конце строк, в некоторых местах использовал длинные, плохо читаемые строки.
Prettier автоматически исправил мой код при сохранении файла, добавил нужные отступы, точки с запятыми, а длинные линии кода разбил на более короткие и лучше читаемые блоки. Теперь все выглядит лучше и опрятнее.
Установка Prettier в проект
Установка хорошо описана в официальной документации, пройдем ее вместе, по шагам.
Первым делом устанавливаем Prettier в наш Create React App проект, локально:
$ npm install --save-dev --save-exact prettier
Enter fullscreen mode
Exit fullscreen mode
Создаем пустой конфигурационный файл, .prettierrc.json в корне проекта:
$ echo {}> .prettierrc.json
Enter fullscreen mode
Exit fullscreen mode

Отключаем конфликтующие правила ESLint
Теперь нужно сделать так, чтобы Prettier не конфликтовал с линтером. Дело в том, что когда ESLint ищет ошибки в коде, он руководствуется определенными правилами, которые хранятся в его конфиге. Эти правила отвечают как за качество кода, так и за стиль кода. Так вот, у Prettier есть свои собственные правила, которые тоже отвечают за стиль кода. Чтобы у линтера и Prettier не было конфликтов по части оформления кода, нужно отключить кофликтующие правила у линтера, чтобы за стиль кода отвечал только Prettier.
Сделать это можно очень просто, установив eslint-config-prettier
ставим:
$ npm install --save-dev eslint-config-prettier
Enter fullscreen mode
Exit fullscreen mode
Далее открываем конфиг нашего линтера, (файл .eslintrc.json), и добавляем «prettier» в конец массива:

Cтрока «prettier» в конфиге .eslintrc.json отключает конфликтующие с Prettier правила ESLint.
Теперь Prettier и линтер будут корректно работать вместе.
Мы установили Prettier в наш проект. Давайте теперь добавим поддержку Prettier в VS Code.
Интеграция Prettier в VS Code
Установим расширение Prettier для VS Code:

После того как мы установили расширение Prettier в VS Code, можно сделать так, чтобы Prettier автоматически форматировал наш код, когда мы сохраняем файл. Для этого нужно добавить два значения в JSON конфиг VS Code, (файл settings.json).
Чтобы открыть settings.json нужно, находясь в VS Code, нажать Ctrl + Shift + P, ввести в поиск «settings» и выбрать пункт Open Settings (JSON). Откроется файл settings.json.

Добавим в него следующие строки:
"editor.defaultFormatter": "esbenp.prettier-vscode",
"editor.formatOnSave": true
Enter fullscreen mode
Exit fullscreen mode
Первая строка устанавливает Prettier как инструмент форматирования кода по-умолчанию.
Вторая строка включает форматирование кода при сохранении файла.
.prettierrc.json и .prettierignore
Пара слов об этих двух файлах.
Для чего нужен .prettierrc.json?
.prettierrc.json — это файл конфигурации Prettier.
Перечислю базовые настройки, которые в него можно добавить:
{
  "trailingComma": "es5",
  "tabWidth": 4,
  "semi": false,
  "singleQuote": true
}
Enter fullscreen mode
Exit fullscreen mode
«trailingComma» — отвечает за висящие, (или «последние») запятые. Можно разрешить Prettier ставить их там, где это возможно, или отключить эту функцию
«tabWidth» — ширина отступа, в пробелах
«semi» — отвечает за добавление точек с запятыми в конце инструкций. Можно добавлять, можно не добавлять
«singleQuote» — отвечает за использование одинарных или двойные кавычек
Мой конфиг .prettierrc.json сейчас выглядит так:

В нем я запретил использование точек с запятыми в конце строк. Такое вот личное предпочтение, при работе над персональными проектами.
В итоге, когда мы сохраняем файл, Prettier будет удалять точки с запятыми в конце строк, если они были, и менять одинарные кавычки на двойные. (замена кавычек на двойные производится по умолчанию, этим поведением можно управлять при помощи параметра «singleQuote»)
вот как это выглядит:

Сохранили файл — произошло форматирование кода.
.prettierignore
Файл .prettierignore существует для того, чтобы запретить Prettier форматировать определенные файлы. Какие файлы запретить форматировать, решаете вы. Я добавил туда файл .eslintrc.json, потому что не хочу, чтобы Prettier его трогал:

Установка правил Airbnb для ESLint
Теперь, когда мы настроили ESLint и Prettier в нашем проекте, давайте установим популярный конфиг eslint-config-airbnb, который настроен с учетом стайлгайда по JavaScript от Airbnb
для этого выполним команду:
$ npm install --save-dev eslint-config-airbnb
Enter fullscreen mode
Exit fullscreen mode
и добавим «airbnb» в .eslintrc.json.
Финальный конфиг ESLint с учетом правил Airbnb будет выглядеть вот так:

Чтобы ESLint не ругался на то, что у нас JSX присутствует в файлах с расширением ‘.js’, можно добавить правило
"react/jsx-filename-extension": [1, { "extensions": [".js", ".jsx"] }]
Enter fullscreen mode
Exit fullscreen mode
в .eslintrc.json, тогда ошибки JSX not allowed in files with extension ‘.js’ не будет:
![добавили правило "react/jsx-filename-extension": [1, { "extensions": [".js", ".jsx"] }] в .eslintrc.json](https://res.cloudinary.com/practicaldev/image/fetch/s--N3-WFYng--/c_limit%2Cf_auto%2Cfl_progressive%2Cq_auto%2Cw_880/https://dev-to-uploads.s3.amazonaws.com/uploads/articles/pypss46npdep358ssoqw.png)
Установка и настройка ESLint и Prettier закончена!
Что мы сделали:
- разобрались с тем, что такое линтер
- установили и настроили ESLint в Create React App проект
- установили ESLint в VS Code
- узнали, что такое Prettier
- установили и настроили Prettier в нашем проекте
- установили расширение Prettier в VS Code и настроили форматирование кода при сохранении файла
- установили в линтер популярные правила написания JavaScript кода от Airbnb
Увидимся в новых постах!
I spent a lot of time and managed to make errors in vs code more visible. Still not in the gutter, but better then nothing. I replaced vs code squiggly error and warning underlines with background and thick underline:


(offtop: also on screenshot you can see how «Bracket Pair Colorizer» extension works
Install CSS and JS Loader and carefully follow all instructions (i had problem with link to css, which in windows must be like file:///C:/myfolder/myfile.css … better read whole extension instructions)
Create a css file with contents:
.monaco-editor.vs .squiggly-warning,
.monaco-editor.vs-dark .squiggly-warning {
  /* background */
  background: #f2e3b3;
  /* underline */
  border-bottom: 3px solid #ffc000;
}
.monaco-editor.vs .squiggly-error,
.monaco-editor.vs-dark .squiggly-error {
  /* background */
  background: #ffc7c7;
  /* underline */
  border-bottom: 4px solid #ff0000;
}
And place link to it in settings.json like said in CSS and JS Loader extension instructions
"vscode_custom_css.imports": ["file:///C:/yourfolder/youfilewithcustom.css"],
"vscode_custom_css.policy": true,
, then reload…
You can get color box around error (instead of underline, not simultaniously) if you use for example (border: instead of border-bottom: ):
border: 1px solid #ff0000;
Or you can get custom border from any side (right border alone seems to look great, tried this while writing this post)

.monaco-editor.vs .squiggly-warning,
.monaco-editor.vs-dark .squiggly-warning {
  background: #f2e3b3;
  border-right: 5px solid #ffc000;
  border-bottom: 5px solid #ffc000;
  border-top: 3px solid #ffc000;
  border-left: 1px solid #ffc000;
}
.monaco-editor.vs .squiggly-error,
.monaco-editor.vs-dark .squiggly-error {
  background: #ffc7c7;
  border-right: 5px solid #ff0000;
  border-bottom: 3px solid #ff0000;
  border-top: 3px solid #ff0000;
  border-left: 1px solid #ff0000;
}
This css will only replace squiggle color from green to yellow:
.monaco-editor.vs .squiggly-warning,
.monaco-editor.vs-dark .squiggly-warning {
/* yellow squiggly */
background: url("data:image/svg+xml;charset=utf-8,<svg xmlns='http://www.w3.org/2000/svg' height='3' width='6'><g fill='#FF0'><path d='M5.5 0l-3 3H1.1l3-3z'/><path d='M4 0l2 2V.6L5.4 0zM0 2l1 1h1.4L0 .6z'/></g></svg>") repeat-x 0 100%;
}
As you can see the name of class changed from .greensquiggly to .squiggly-warning, that’s why css from previous answer doesn’t work.
To find out new error css class i used Help -> Toggle Developer Tools, where after deleting bunch of blocks, i could find the error and warning classes.
I spent a lot of time and managed to make errors in vs code more visible. Still not in the gutter, but better then nothing. I replaced vs code squiggly error and warning underlines with background and thick underline:
(offtop: also on screenshot you can see how «Bracket Pair Colorizer» extension works
Install CSS and JS Loader and carefully follow all instructions (i had problem with link to css, which in windows must be like file:///C:/myfolder/myfile.css … better read whole extension instructions)
Create a css file with contents:
.monaco-editor.vs .squiggly-warning,
.monaco-editor.vs-dark .squiggly-warning {
  /* background */
  background: #f2e3b3;
  /* underline */
  border-bottom: 3px solid #ffc000;
}
.monaco-editor.vs .squiggly-error,
.monaco-editor.vs-dark .squiggly-error {
  /* background */
  background: #ffc7c7;
  /* underline */
  border-bottom: 4px solid #ff0000;
}
And place link to it in settings.json like said in CSS and JS Loader extension instructions
"vscode_custom_css.imports": ["file:///C:/yourfolder/youfilewithcustom.css"],
"vscode_custom_css.policy": true,
, then reload…
You can get color box around error (instead of underline, not simultaniously) if you use for example (border: instead of border-bottom: ):
border: 1px solid #ff0000;
Or you can get custom border from any side (right border alone seems to look great, tried this while writing this post)
.monaco-editor.vs .squiggly-warning,
.monaco-editor.vs-dark .squiggly-warning {
  background: #f2e3b3;
  border-right: 5px solid #ffc000;
  border-bottom: 5px solid #ffc000;
  border-top: 3px solid #ffc000;
  border-left: 1px solid #ffc000;
}
.monaco-editor.vs .squiggly-error,
.monaco-editor.vs-dark .squiggly-error {
  background: #ffc7c7;
  border-right: 5px solid #ff0000;
  border-bottom: 3px solid #ff0000;
  border-top: 3px solid #ff0000;
  border-left: 1px solid #ff0000;
}
This css will only replace squiggle color from green to yellow:
.monaco-editor.vs .squiggly-warning,
.monaco-editor.vs-dark .squiggly-warning {
/* yellow squiggly */
background: url("data:image/svg+xml;charset=utf-8,<svg xmlns='http://www.w3.org/2000/svg' height='3' width='6'><g fill='#FF0'><path d='M5.5 0l-3 3H1.1l3-3z'/><path d='M4 0l2 2V.6L5.4 0zM0 2l1 1h1.4L0 .6z'/></g></svg>") repeat-x 0 100%;
}
As you can see the name of class changed from .greensquiggly to .squiggly-warning, that’s why css from previous answer doesn’t work.
To find out new error css class i used Help -> Toggle Developer Tools, where after deleting bunch of blocks, i could find the error and warning classes.
ESLint and Prettier can make coding so much easier with VSCode. I can’t tell you how many mistakes it catches in my code that are easily fixed in the moment — but would be difficult to track down as bugs later on.
But what if your problem is getting ESLint / Prettier to work with VSCode? See below for some troubleshooting tips. I’ve sorted the tips into three general symptoms:
- Symptom 1: VSCode does not highlight errors
- Symptom 2: VSCode does not format on save
- Symptom 3: ESLint generates hundreds of “Delete
␍prettier/prettier error»s
Symptom 1: VSCode does not highlight errors
Let’s say you’ve gotten ESLint and Prettier set up, but VSCode is not highlighting errors:


Here are some things to look into:
1. ESLint and Prettier installation
Make sure ESLint and Prettier are installed for your project.
2. ESLint Plugin for VSCode
Make sure the ESLint plugin for VSCode is installed and enabled.

3. ESLint Configuration File
Make sure you have an ESLint configuration file at the top level of your project.
4. eslint-plugin-prettier
I strongly prefer to use eslint-plugin-prettier and configure Prettier within my ESLint configuration file (rather than maintain two configuration files).
5. VSCode Default Formatter Setting
Make sure the default formatter in VSCode Settings is set to ESLint. Check both the User settings and the Workspace settings (Workspace takes precedence over User).

6. VSCode “Workspace” Directory
Make sure the directory you opened in VSCode (aka the workspace) is the top level of your project. For example, say:
- your project lives at
/usr/src/my-project - your ESLint configuration file is at
/usr/src/my-project/.eslintrc.json
If you open any directory other than /usr/src/my-project as the workspace in VSCode (for example /usr/src or /usr/src/my-project/client), then VSCode won’t recognize the ESLint configuration file.
7. ESLint Configuration Errors
Check for ESLint configuration errors: open the VSCode Terminal, go to the Output tab, and choose ESLint from the dropdown:

8. ESLint overrideConfigFile Configuration
Check to see whether you have an ESLint overrideConfigFile option in VSCode settings. If this option exists, make sure there’s a configuration file in that location.

9. ESLint Working Directories in VSCode
Check to see if your file is excluded from the ESLint Working Directories in your VSCode User or Workspace settings.

Symptom 2: VSCode does not format on save
1. VSCode “Format on Save” settings
Make sure your VSCode settings:
- have “Format on Save” enabled
- have “Format on Save Mode” set to “file”

2. VSCode “code actions on save” setting
Make sure your VSCode settings include ESLint in the “code actions on save”:

In settings.json, there should be an entry like this:
"editor.codeActionsOnSave":
  {
    "source.fixAll.eslint": true
  },
Enter fullscreen mode
Exit fullscreen mode
3. Not all ESLint errors are “auto-fixable”
Note that some ESLint errors won’t be auto-fixed on save, because they are not auto-fixable. To use eslint-plugin-testing-library as an example, this error:

auto-fixes to this on save:

But this linting error:

is not auto-fixable, so doesn’t update on save.
Symptom 3: ESLint generates hundreds of “Delete ␍ prettier/prettier error”
This might occur if you are on a Windows computer, but the code was generated on a Mac or Linux computer. The error might also look like this:
![]()
Here are some things to try:
1. Run prettier from the command line
Run prettier on all of the files in the project (reference: create-react-app docs):
./node_modules/.bin/prettier --write "src/**/*.{js,jsx,ts,tsx,json,css,scss,md}"
Enter fullscreen mode
Exit fullscreen mode
2. Update the prettier/prettier “endOfLine” rule
Update the prettier/prettier rule in the ESLint configuration file (reference: StackOverflow):
"prettier/prettier": [
  "error",
  {
    "endOfLine": "auto"
  }
],
Enter fullscreen mode
Exit fullscreen mode
3. Set line endings in VSCode settings
Set the line endings in .vscode/settings.json (reference: StackOverflow):
{
    "files.eol": "n",
}
Enter fullscreen mode
Exit fullscreen mode
4. Update your global git settings
WARNING: this will update your global git settings and will affect ALL of your git projects.
Run git config --global core.autocrlf true and pull the code from GitHub again (or possibly re-clone the repo). (Reference: GitHub docs)
5. Consider using Windows Subsystem for Linux
Anecdotally, I did not get this error on my Windows laptop when using Ubuntu 20.04 on Windows Subsystem for Linux (even though other Windows users — who were likely using PowerShell — reported the error for the same GitHub repository).
Asked
6 years, 7 months ago
Viewed
3k times
I have installed the eslint extension for vscode. When it catches an error or warning it underlines the relevant code with a green or red line. If I use the mouse cursor to hover over the warning it will spawn a popup message with specifics of the error. Is it possible to have this error message spawn when the cursor is over the error so I don’t have to use the mouse?
asked Oct 27, 2016 at 15:19
![]()
2
There’s a «Show Fixes» feature in VS Code.
When the cursor is over the issue, a little light bulb is shown. If it is cicked or its hotkey (Ctrl+.) is pressed, it implicitly describes the error (e.g. «Fix this no-multi-spaces problem»).
It’s not as verbose as the description on hover but probably better then nothing and with the hotkey it can be activated without using the mouse.
EDIT
According to this comment, F8 works better, it jumps to the next error (which is the current if the cursor is on it) and shows the full description.
answered Mar 6, 2018 at 13:30
![]()
SzellemSzellem
4742 silver badges11 bronze badges
1