

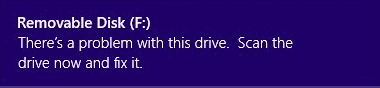
Очень часто стала встречаться ошибка при подключении внешних накопителей (флешки, жесткого диска): «Возникла проблема с этим диском, проверьте диск и исправьте ее». Проблема возникает в связи с тем, что некорректно происходит отключении USB устройства, так как в момент извлечения не все процессы жесткого диска были завершены. То есть вместо правильного безопасного извлечения дисков, пользователь просто выдергивает устройство из usb-порта.

Проблема с диском и ее решение описывается на примере Windows 10. В версиях Виндовс 7 / 8 формулировка сообщений может немного отличаться, но смысл и действия остаются прежними.
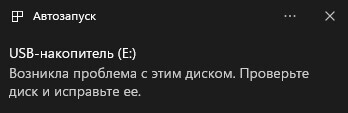
И так, у вас при подключении диска всплыло сообщение «Возникла проблема с этим диском, проверьте диск и исправьте ее». Кликните на это сообщение.

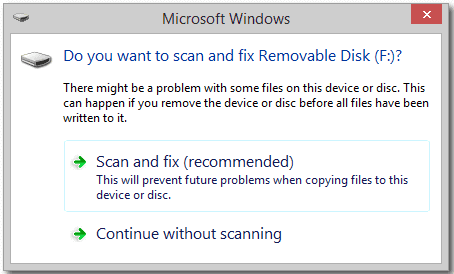
На рабочем столе появится еще одно окно «Вы хотите проверить и исправить Локальный диск?». Выбираем Проверить и исправить ошибки (рекомендуется).

В новом окне система уведомит вас об обнаружении ошибок на жестком диске и предложит восстановить его во избежание потери данных. Нажмите Восстановить диск.

Диск заблокируется, и начнется процесс проверки и восстановления, это может занять какое-то время.

Если процедура исправления жесткого диска прошла успешно, вы увидите сообщение: «Ваш диск успешно восстановлен».

Нажмите Закрыть и пользуйтесь вашим внешним устройством хранения данных.
Эта статья о решении конкретной проблемы, если у вас какие-либо другие проблемы с накопителем, рекомендую проверить состояния жесткого диска.
На чтение 4 мин. Просмотров 1.9k. Опубликовано 03.09.2019
Возникает ли ошибка «Проблема с этим диском» при подключении USB-накопителя (или флэш-накопителя) к ноутбуку или настольному компьютеру? Ошибка Windows гласит: « Проблема с этим диском. Сканируйте диск прямо сейчас и исправьте его. »Эта несколько загадочная ошибка может озадачить некоторых пользователей Windows, которые считают, что содержимое их USB-накопителей выглядит нормально. Итак, что дает?
Эта ошибка обычно возникает из-за неправильного извлечения USB или другого съемного носителя с компьютера или ноутбука. Windows ожидает, что вы отключите USB-накопители с их опциями Извлечь . Однако многие пользователи удаляют USB-накопители, не выбрав сначала параметр Извлечь . Таким образом, обычно не нужно вообще исправлять ошибку, скорее вам придется иметь дело с флешкой с поврежденной файловой системой.
Содержание
- Как я могу исправить Существует проблема с этой ошибкой диска в Windows
- 1. Выберите опцию извлечения USB-накопителя
- 2. Выберите опцию быстрого удаления
- 3. Сканирование и исправление диска
- 4. Откройте средство устранения неполадок оборудования и устройств.
- 5. Отформатируйте диск
Как я могу исправить Существует проблема с этой ошибкой диска в Windows
- Выберите опцию извлечения USB-накопителя
- Выберите опцию быстрого удаления
- Сканирование и исправление диска
- Откройте раздел «Устранение неполадок оборудования и устройств». Отформатируйте USB-накопитель.
- Форматировать диск
1. Выберите опцию извлечения USB-накопителя
Лучший способ исправить ошибку « проблема с этим диском » – извлечь USB-накопитель перед его извлечением. Вы можете сделать это, нажав стрелку вверх в правой части панели задач и щелкнув правой кнопкой мыши значок на панели задач USB-накопителя. Затем вы можете выбрать параметр Извлечь в контекстном меню USB-накопителя, как показано ниже. Выберите эту опцию и удалите флешку.

2. Выберите опцию быстрого удаления
Сначала попробуйте переключить порты, так как это иногда помогает. Если это не так, продолжайте с шагами ниже.
USB-накопители имеют параметр Быстрое удаление , который отключает кэширование записи. Выбор этого параметра также гарантирует, что вы не получите ошибку « проблема с этим диском » без предварительного отключения. Вы можете выбрать параметр Быстрое удаление следующим образом.
- Сначала нажмите кнопку Cortana на панели задач Windows 10 и введите «Диспетчер устройств» в поле поиска.
- Выберите Диспетчер устройств, чтобы открыть его окно прямо ниже.
-
Нажмите Дисководы в окне диспетчера устройств, а затем щелкните правой кнопкой мыши USB-накопитель в списке, чтобы открыть его контекстное меню.

- Выберите Свойства , чтобы открыть окно, показанное на снимке ниже.
-
Теперь перейдите на вкладку Policies в этом окне, чтобы открыть настройки, показанные ниже.
- Выберите параметр Быстрое удаление на этой вкладке и нажмите кнопку ОК , чтобы применить настройку.


3. Сканирование и исправление диска
Если вы извлекаете USB-накопитель с параметром Извлечь и по-прежнему получаете сообщение об ошибке, возможно, у него поврежденная файловая система. Вы можете отсканировать файловую систему USB-накопителя и исправить ее с помощью утилиты Check Disk в Windows следующим образом.
- Сначала нажмите кнопку Проводник на панели задач Windows 10.
- Затем щелкните правой кнопкой мыши USB-накопитель слева от окна проводника, чтобы открыть его контекстное меню, и выберите Свойства .
- Нажмите «Инструменты», чтобы открыть вкладку в снимке экрана ниже.
-
Нажмите кнопку Проверить , чтобы открыть инструмент «Проверка диска» на снимке ниже.
-
Теперь выберите вариант Сканировать и восстановить диск , чтобы исправить флэш-диск.


4. Откройте средство устранения неполадок оборудования и устройств.
-
Средство устранения неполадок оборудования и устройств – это средство Windows, которое может также выделять и исправлять ошибки с внешними устройствами, такими как USB-накопители. Чтобы открыть это средство устранения неполадок, введите «средство устранения неполадок» в поле поиска Cortana.
- Выберите Устранение неполадок, чтобы открыть окно ниже.
- Нажмите Показать все в левой части окна, чтобы открыть список устранения неполадок, который включает в себя Оборудование и устройства .
-
Вам нужно щелкнуть правой кнопкой мыши Оборудование и устройства и выбрать Запуск от имени администратора , чтобы открыть его окно.
- Нажмите Дополнительно и выберите Применить исправления автоматически.
- Теперь нажмите кнопку Далее , чтобы выполнить сканирование с использованием оборудования и устройств.


До тех пор, пока вы правильно отключите USB-накопители или выберете параметр Быстрое удаление , ошибка « Проблема с этим накопителем », вероятно, не будет возникать в Windows. Однако, если это все еще происходит, вы можете исправить USB-накопитель с помощью Check Disk.Ознакомьтесь с этой статьей Windows Report для дальнейших исправлений USB-устройств.
5. Отформатируйте диск
Наконец, если ни один из предыдущих шагов не сработал, попробуйте отформатировать диск. Если на нем нет данных или он несет в себе что-то, что вы добровольно пожертвуете ради общего блага. После форматирования диска он должен работать как прежде. Конечно, всегда есть вероятность аппаратного сбоя, хотя они появляются редко и после длительного использования на старых флэш-накопителях.
Вот как отформатировать флэш-накопитель:
- Подключите диск.
- Откройте Проводник .
- Щелкните правой кнопкой мыши диск и выберите «Формат» в контекстном меню.
- Выберите Быстрый формат и подтвердите действие.
Примечание редактора . Этот пост был первоначально опубликован в мае 2017 года и с тех пор был полностью переработан и обновлен для обеспечения свежести, точности и полноты.
A complete guide with 5 effective solutions is offered to remove this error — there is a problem with this drive on removable disks. Follow the details below:
| Workable Solutions | Step-by-step Troubleshooting |
|---|---|
| Fix 1. Recover Data with Software | Connect your USB drive to your computer. Download EaseUS Data Recovery Wizard…Full steps |
| Fix 2. Do as Recommended | On the prompted window, choose «Scan and fix (recommended)» and then click «Repair drive»…Full steps |
| Fix 3. Repair Bad Sectors | Download EaseUS Partition Master and install it. Right-click the disk that you want to check…Full steps |
| Fix 4. Run CHKDSK | Press the «Windows» key and type cmd. Right-click «Command Prompt»…Full steps |
| Fix 5. Use Troubleshooter | Type msconfig at the start and hit «Enter» to open System Configuration Utility…Full steps |
There Is a Problem with This Drive. Scan the Drive Now and Fix It
When connecting a USB flash drive to a computer, an error message suddenly pops up on the upper right of the screen, saying «There is a problem with this drive. Scan the drive now and fix it.»
So, are you seeing the exact error soon after inserting a removable storage device to the computer running Windows 10, 8.1 or 8? Similarly, users of Windows 7 and Windows Vista should face an even longer warning that implies the same trouble, which is «Do you want to scan and fix removable disk [drive letter]? There might be a problem with some files on this device or disc. This can happen if you remove the device or disc before all files have been written to it.»
Causes — Why This Error Happens
By answering the following questions, you’ll clearly figure out the reasons why Windows prompts such a scan and fix the error message and prevents you from using your device properly.
Question 1 — Did you correctly use the ‘Safely remove the hardware’ option to disconnect the USB drive? Or did you just abruptly pull it out from the USB port?
Question 2 — Did you use the USB drive across many devices, such as different PCs, cameras or game consoles?
Question 3 — Did you see other errors before ‘There is a problem with this drive’ occurs? Such as ‘The file or directory is corrupted and unreadable’ or ‘not accessible fatal device hardware error’?
In a word, general causes of the scan and fix error ‘There is a problem with this drive’ include improper removal of USB drive, virus infection, file system corruption.
Solutions — How to Fix Scan And Fix Error (5 Solutions)
We have gathered several most effective ways to help fix ‘There is a problem with this drive. Scan the drive now and fix it’ on any removable disk. So, if you’re one of the victims who saw this error every time you connected a USB flash drive or SD card to a Windows computer, don’t hesitate to help yourself out.
- 1. Recover Data from a Scan and Fix
- 2. Run Scan and Fix
- 3. Repair Bad Sectors
- 4. Use Windows Troubleshooter
- 5. Perform a Clean Boot
Solution 1: Recover Data from a Scan and Fix HDD (Very Important)
If your USB flash drive, or perhaps a memory card, only suffered a minor effect, you can simply close the error message window and continue using the storage for a while. However, for most people who accepted the scan and fix the error for the first time, they can no longer access the drive as usual. Hence, all data on the drive will be lost. So you are strongly suggested to use data recovery software to retrieve data to another location.
Your reliable choice is EaseUS Data Recovery Wizard. This easy-to-use free data recovery software can recover data from a USB hard drive which is infected with the error ‘There is a problem with this drive. Scan the drive now and fix it. Also, it has other highlights:
- Recover deleted, formatted, and inaccessible data in different data loss situations.
- Recover photos, audio, music, and emails from any storage effectively, safely, and completely.
- Recover data from the recycle bin, hard drive, memory card, flash drive, digital camera, and camcorder.
Connect your USB drive to your computer. Download EaseUS Data Recovery Wizard, and watch the video to access your USB.
Always keep the rule in mind that take the first step to rescuing data when a problem was found on a drive. What’s more, EaseUS Data Recovery Wizard can work in most data loss situations, such as access inaccessible hard disk without formatting, undelete, unformat, recover the RAW drive and so on.
Solution 2: Do as Recommended (Scan and Fix)
When the disk pops up with this error, you’ll be immediately prompted to scan and fix the removable disk before using it in Windows. And the suggested way is to scan for file system errors. Again, do it only when data has been transferred to a safe place.
Step 1: On the prompted window, choose «Scan and fix (recommended)» and then click «Repair drive».
Step 2: Wait until Windows finds and repairs file system errors. Close the window when finished.
Step 3: Restart the PC. See if the error persists.
Solution 3: Check & Repair Bad Sectors
Bad sectors are usually responsible for most of the hard drive errors, including the one we’re now talking about. You can use a tool to check if your disk has bad sectors. If there are bad sectors, then use CHKDSK to repair it.
First — Check the Bad Sectors
EaseUS free partition software is trusted and recommended by millions of users. It is a nice choice. It is able to check bad sectors for hard disk, USB flash drive, pen drive, SD memory card and other storage devices without formatting.
Step 1. Open EaseUS Partition Master. Right-click the disk that you want to check, and then click «Surface Test».
Step 2. The operation will be immediately performed and all bad sectors will be marked as red.
After the process, you could know exactly how many bad sectors are there.
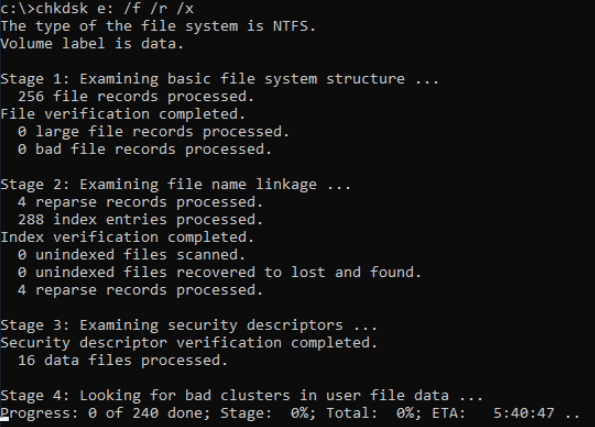
Second — Run CHKDSK
CHKDSK marks the bad sectors and prevents data corruption by fixing file system errors. Here are the steps:
Step 1: Press the «Windows» key and type cmd.
Step 2: Right-click «Command Prompt» and choose «Run as administrator».
Step 3: Enter the following command: chkdsk e: /f /r /x
«e» means the drive letter of the partition you want to repair.
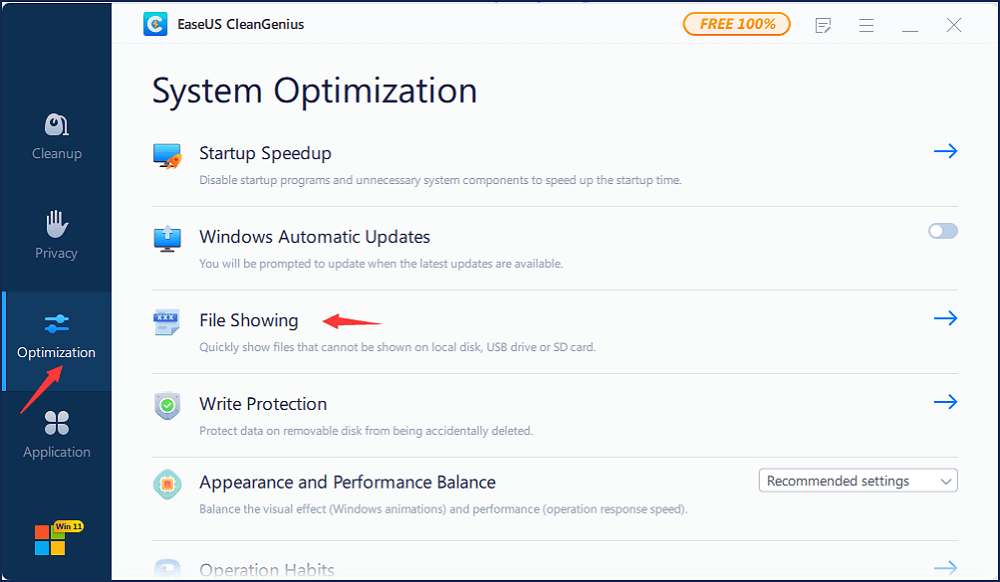
CHKDSK Alternative
If command line is not your ideal choice, you can apply this command-line alternative tool — EaseUS CleanGenius. Use this one-click tool to fix the file system error on your hard drive.
Step 1. Download EaseUS CleanGenius on your computer for free.
Step 2. Run the software. Click «Optimization» on the left panel, and then choose «File Showing» .
CHKDSK Alternative
If command line is not your ideal choice, you can apply this command-line alternative tool — EaseUS CleanGenius. Use this one-click tool to fix the file system error on your hard drive.
Step 1. Download EaseUS CleanGenius on your computer for free.
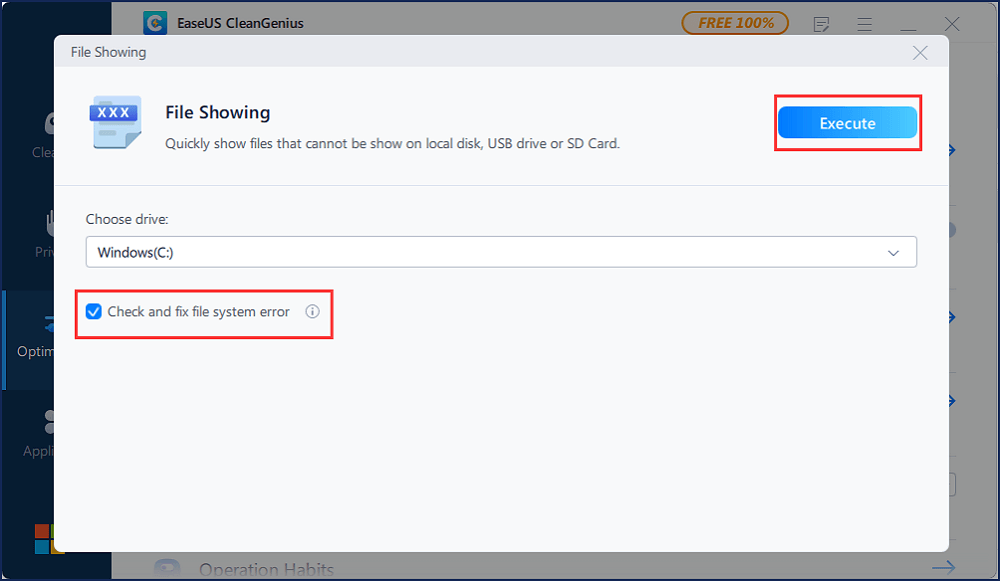
Step 2. Run the software. Click «Optimization» on the left panel, and then choose «File Showing» .
Step 3. Go to «Choose drive» and select the drive with a file system error. Check the «Check and fix file system error» option and click «Execute».
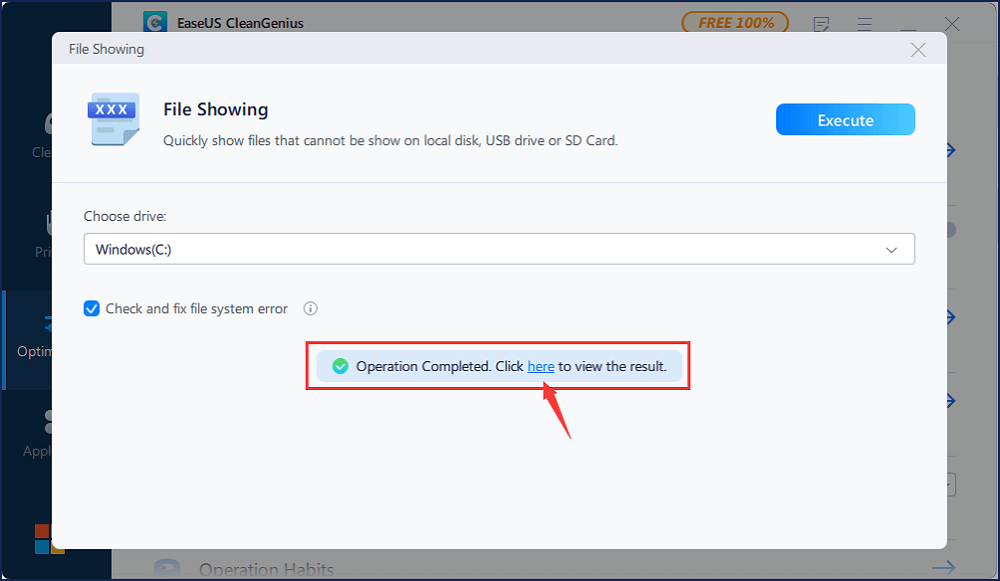
Step 4. Wait the EaseUS CleanGenius completes the repairing process. After that, click the «here» to view the result.
Step 4. Wait the EaseUS CleanGenius completes the repairing process. After that, click the «here» to view the result.
Third — Run SFC
In case of possible system file corruption, you are recommended to run the System File Checker (SFC) tool to repair missing or corrupted system files after running CHKDSK.
Open Command Prompt and type this command: sfc /scannow
Solution 4: Use Windows Troubleshooter
Do not miss the other useful tool called Hardware and Devices troubleshooter, which is also designed to fix errors on external storage devices.
Step 1: Open Control Panel and find Troubleshooter (or Troubleshooting) according to different Windows OS version.
Step 2: Click Configure a device under «Hardware and Sound» option, and then click Advanced on the window that pops up in order to apply repairs automatically.
Step 3: Click Next and follow the wizard to accomplish the repair process.
Solution 5: Perform a Clean Boot
Another possible reason as to why you’re encountering this issue is due to software conflicts. We recommend performing a clean boot. It is used to diagnose and troubleshoot advanced Windows problems. Here are the steps:
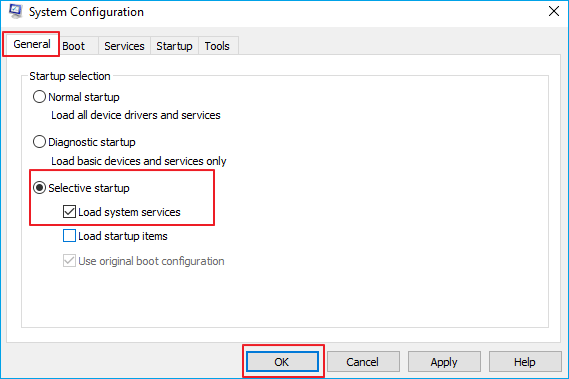
Step 1: Type msconfig at the start and hit «Enter» to open System Configuration Utility.
Step 2: Click «General», and then click «Selective Startup». Clear the Load Startup Items checkbox, and ensure that «Load System Services» and «Use Original boot configuration» are checked.
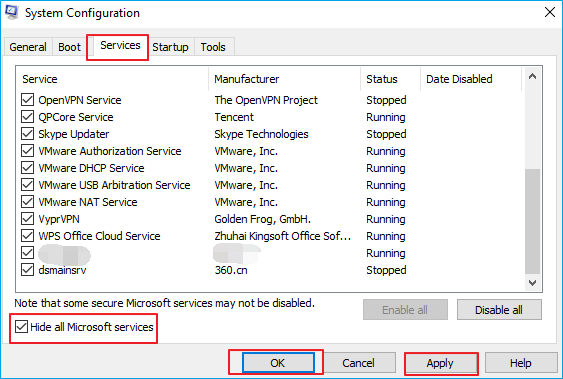
Step 3: Click the «Services» tab. Select the «Hide All Microsoft Services» checkbox. Now click «Disable all».
Step 3: Click the «Services» tab. Select the «Hide All Microsoft Services» checkbox. Now click «Disable all».
Step 4: Click «Apply»/»OK» and restart the computer. This will put Windows into a Clean Boot State.
The Bottom Line
Concluding from the post, the right steps to fix «There is a problem with this drive. Scan the drive now and fix it.» error without losing data should be like this.
Use EaseUS data recovery software to recover data from USB flash drive that is no longer accessible -> find the best solution among the suggested 5 ways to scan and fix disk bad sectors and file system errors.
There’s a Problem with This Drive FAQs
You can get further help with the questions and answers below. Read them one by one:
How do you fix there was a problem repairing this drive?
The ways to fix the problem with this drive error:
- 1. Recover Data from a Scan and Fix
- 2. Run Scan and Fix
- 3. Repair Bad Sectors
- 4. Use Windows Troubleshooter
- 5. Perform a Clean Boot
How do I scan and fix my drive?
To check and repair the file system the drive:
- 1. Right-click the USB drive or SD card and select Properties from its context menu.
- 2. Click the Tools tab and check the option under the Error-checking section.
- 3. Click Scan and repair drive option to fix the issue.
Will scan and fix erase my data?
The Scan and Fix is one of the practical features of Microsoft Windows; it will appear automatically in Windows when you connect a removable disk. Does Windows Scan and Fix delete files every time? Of course not!
Is it safe to cancel CHKDSK?
You can’t stop CHKDSK process once it started. The safe way is to wait until it completes. Stopping the computer during the check might lead to filesystem corruption.
Пользователи сообщают о проблеме, которая возникает при попытке подключить любое устройство к USB-слоту. Проблема с этим диском. Отсканируйте диск и исправьте его . Проверка того, что проблема связана с конкретной системой, заключается в подключении тех же устройств к другой системе. Если он хорошо работает с другими ПК, мы можем с уверенностью предположить, что проблема связана с обсуждаемой системой, а не с внешними устройствами.
Возникла проблема с этим диском, просканируйте диск и исправьте его

Причин может быть много, хотя, как упоминалось ранее, мы выделили тот факт, что проблема связана с вашим компьютером, а не с устройствами. Возможные причины могут быть следующими:
- Отключение USB внезапно или, по крайней мере, без использования опции «Безопасное извлечение устройства».
- Файловая система повреждена.
Ошибка может быть только временной ошибкой и может исчезнуть, если вы перезагрузите компьютер или снова подключите диск или устройство. Если проблема не устранена, вот несколько советов, которые могут вам помочь.
1] Ошибка сканирования и исправления
Интересно, что само окно ошибки дает возможность исправить ошибку. В этом всплывающем окне нажмите Сканировать диск сейчас и подождите некоторое время, пока сканирование завершит свою работу, а затем перезапустите систему, чтобы проверить, помогла ли она с проблемой. Вы также можете вручную проверить жесткий диск на наличие поврежденных секторов с помощью команды CHKDSK.
2] Запустите средство устранения неполадок оборудования
Устранение неполадок оборудования может быть полезно в решении проблемы.
1] Нажмите Пуск, а затем на символ, похожий на шестерню, чтобы открыть окно настроек.
2] Выберите «Обновление и безопасность».
3] Перейти к устранению неполадок в списке на левой стороне.
4] Выберите «Оборудование и устройства» из списка, а затем запустите средство устранения неполадок.
Разрешите специалисту по устранению неполадок выполнить свою работу, а затем перезапустите систему. Проверьте, работают ли сейчас USB-устройства или перейдите к следующему решению.
3] Запустите средство устранения неполадок USB
Сделайте так, чтобы встроенный USB-модуль устранения неполадок обнаружил и решил проблему за вас. Посмотрите, поможет ли это.
4] Переустановите драйвер USB

Откройте Диспетчер устройств из меню WinX и найдите контроллеры универсальной последовательной шины. Разверните его, чтобы найти порты USB. Щелкните правой кнопкой мыши и выберите Удалить устройство , а затем повторите то же самое для всех портов.
Теперь перезагрузите компьютер для Windows, чтобы обнаружить и переустановить драйверы.
5] Использование бесплатного программного обеспечения HDD expert
Это решение не будет работать, если ваш жесткий диск уже вышел из строя, но если вы еще не столкнулись с проблемами, вы можете рассмотреть возможность использования этого бесплатного инструмента сканирования HDD Expert и посмотреть, поможет ли он вам каким-либо образом.
Надеюсь, что что-то здесь поможет вам решить проблему.
Очень часто стала встречаться ошибка при подключении внешних накопителей (флешки, жесткого диска): «Возникла проблема с этим диском, проверьте диск и исправьте ее». Проблема возникает в связи с тем, что некорректно происходит отключении USB устройства, так как в момент извлечения не все процессы жесткого диска были завершены. То есть вместо правильного безопасного извлечения дисков, пользователь просто выдергивает устройство из usb-порта.
Проблема с диском и ее решение описывается на примере Windows 10. В версиях Виндовс 7 / 8 формулировка сообщений может немного отличаться, но смысл и действия остаются прежними.
Итак, у вас при подключении диска всплыло сообщение «Возникла проблема с этим диском, проверьте диск и исправьте ее». Кликните на это сообщение.
На рабочем столе появится еще одно окно «Вы хотите проверить и исправить Локальный диск?». Выбираем Проверить и исправить ошибки (рекомендуется).

В новом окне система уведомит вас об обнаружении ошибок на жестком диске и предложит восстановить его во избежание потери данных. Нажмите Восстановить диск.

Диск заблокируется, и начнется процесс проверки и восстановления, это может занять какое-то время.

Если процедура исправления жесткого диска прошла успешно, вы увидите сообщение: «Ваш диск успешно восстановлен».

Нажмите Закрыть и пользуйтесь вашим внешним устройством хранения данных.
Нажмите на звезду, чтобы оценить!
Прочитали: 328