
Your compiler just tried to compile the file named foo.cc. Upon hitting line number line, the compiler finds:
#include "bar"
or
#include <bar>
The compiler then tries to find that file. For this, it uses a set of directories to look into, but within this set, there is no file bar. For an explanation of the difference between the versions of the include statement look here.
How to tell the compiler where to find it
g++ has an option -I. It lets you add include search paths to the command line. Imagine that your file bar is in a folder named frobnicate, relative to foo.cc (assume you are compiling from the directory where foo.cc is located):
g++ -Ifrobnicate foo.cc
You can add more include-paths; each you give is relative to the current directory. Microsoft’s compiler has a correlating option /I that works in the same way, or in Visual Studio, the folders can be set in the Property Pages of the Project, under Configuration Properties->C/C++->General->Additional Include Directories.
Now imagine you have multiple version of bar in different folders, given:
// A/bar
#include<string>
std::string which() { return "A/bar"; }
// B/bar
#include<string>
std::string which() { return "B/bar"; }
// C/bar
#include<string>
std::string which() { return "C/bar"; }
// foo.cc
#include "bar"
#include <iostream>

int main () {
    std::cout << which() << std::endl;
}
The priority with #include "bar" is leftmost:
$ g++ -IA -IB -IC foo.cc
$ ./a.out
A/bar
As you see, when the compiler started looking through A/, B/ and C/, it stopped at the first or leftmost hit.
This is true of both forms, include <> and incude "".
Difference between #include <bar> and #include "bar"
Usually, the #include <xxx> makes it look into system folders first, the #include "xxx" makes it look into the current or custom folders first.
E.g.:
Imagine you have the following files in your project folder:
list
main.cc
with main.cc:
#include "list"
....
For this, your compiler will #include the file list in your project folder, because it currently compiles main.cc and there is that file list in the current folder.
But with main.cc:
#include <list>
....
and then g++ main.cc, your compiler will look into the system folders first, and because <list> is a standard header, it will #include the file named list that comes with your C++ platform as part of the standard library.
This is all a bit simplified, but should give you the basic idea.
Details on <>/""-priorities and -I
According to the gcc-documentation, the priority for include <> is, on a «normal Unix system», as follows:
 /usr/local/include
 libdir/gcc/target/version/include
 /usr/target/include
 /usr/include
For C++ programs, it will also look in /usr/include/c++/version, first. In the above, target is the canonical name of the system GCC was configured to compile code for; […].
The documentation also states:
You can add to this list with the -Idir command line option. All the directories named by -I are searched, in left-to-right order, before the default directories. The only exception is when dir is already searched by default. In this case, the option is ignored and the search order for system directories remains unchanged.
To continue our #include<list> / #include"list" example (same code):
g++ -I. main.cc
and
#include<list>
int main () { std::list<int> l; }
and indeed, the -I. prioritizes the folder . over the system includes and we get a compiler error.
Offline
Зарегистрирован: 17.10.2021
Всем добрый день.3 неделя в пустую сижу и не понимаю!!! Вроде все просто но нет!!! есть программа которая сто процентов работает так как 3 месяца после форматирования компа она вшилась в ардуинку. и вот собрав плату и в паяв ардуину решил поправить код, как говориться навести шик и блеск. но не успев это сделать началось ругательство ардуино иде. что только я не прововал переустанавливал менял папки библиотек. и даже другой ноут. что за фигня просто залить скеч это такая жжж….. уже все готовое от автора и скеч и библиотеки, но не могу залить. BLINK работает. помогите спасите. Заранее благодарю Arduino: 1.8.16 (Windows 7), Плата:»Arduino Nano, ATmega328P» C:Program FilesArduinoarduino-builder -dump-prefs -logger=machine -hardware C:Program FilesArduinohardware -hardware C:Users1AppDataLocalArduino15packages -tools C:Program FilesArduinotools-builder -tools C:Program FilesArduinohardwaretoolsavr -tools C:Users1AppDataLocalArduino15packages -built-in-libraries C:Program FilesArduinolibraries -libraries C:Users1DocumentsArduinolibraries -fqbn=arduino:avr:nano:cpu=atmega328 -vid-pid=1A86_7523 -ide-version=10816 -build-path C:Users1AppDataLocalTemparduino_build_783368 -warnings=none -build-cache C:Users1AppDataLocalTemparduino_cache_854966 -prefs=build.warn_data_percentage=75 -prefs=runtime.tools.arduinoOTA.path=C:Users1AppDataLocalArduino15packagesarduinotoolsarduinoOTA1.1.1 -prefs=runtime.tools.arduinoOTA-1.1.1.path=C:Users1AppDataLocalArduino15packagesarduinotoolsarduinoOTA1.1.1 -prefs=runtime.tools.avrdude.path=C:Users1AppDataLocalArduino15packagesarduinotoolsavrdude6.3.0-arduino9 -prefs=runtime.tools.avrdude-6.3.0-arduino9.path=C:Users1AppDataLocalArduino15packagesarduinotoolsavrdude6.3.0-arduino9 -prefs=runtime.tools.avr-gcc.path=C:Users1AppDataLocalArduino15packagesarduinotoolsavr-gcc4.9.2-atmel3.5.4-arduino2 -prefs=runtime.tools.avr-gcc-4.9.2-atmel3.5.4-arduino2.path=C:Users1AppDataLocalArduino15packagesarduinotoolsavr-gcc4.9.2-atmel3.5.4-arduino2 -verbose C:Users1DesktopV.A.W Metr V2.0 INA 226-20211008T162125Z-001V.A.W Metr V2.0 INA 226Скетч и БиблиотекиV.A.W_metr_INA226V.A.W_metr_INA226.ino C:Program FilesArduinoarduino-builder -compile -logger=machine -hardware C:Program FilesArduinohardware -hardware C:Users1AppDataLocalArduino15packages -tools C:Program FilesArduinotools-builder -tools C:Program FilesArduinohardwaretoolsavr -tools C:Users1AppDataLocalArduino15packages -built-in-libraries C:Program FilesArduinolibraries -libraries C:Users1DocumentsArduinolibraries -fqbn=arduino:avr:nano:cpu=atmega328 -vid-pid=1A86_7523 -ide-version=10816 -build-path C:Users1AppDataLocalTemparduino_build_783368 -warnings=none -build-cache C:Users1AppDataLocalTemparduino_cache_854966 -prefs=build.warn_data_percentage=75 -prefs=runtime.tools.arduinoOTA.path=C:Users1AppDataLocalArduino15packagesarduinotoolsarduinoOTA1.1.1 -prefs=runtime.tools.arduinoOTA-1.1.1.path=C:Users1AppDataLocalArduino15packagesarduinotoolsarduinoOTA1.1.1 -prefs=runtime.tools.avrdude.path=C:Users1AppDataLocalArduino15packagesarduinotoolsavrdude6.3.0-arduino9 -prefs=runtime.tools.avrdude-6.3.0-arduino9.path=C:Users1AppDataLocalArduino15packagesarduinotoolsavrdude6.3.0-arduino9 -prefs=runtime.tools.avr-gcc.path=C:Users1AppDataLocalArduino15packagesarduinotoolsavr-gcc4.9.2-atmel3.5.4-arduino2 -prefs=runtime.tools.avr-gcc-4.9.2-atmel3.5.4-arduino2.path=C:Users1AppDataLocalArduino15packagesarduinotoolsavr-gcc4.9.2-atmel3.5.4-arduino2 -verbose C:Users1DesktopV.A.W Metr V2.0 INA 226-20211008T162125Z-001V.A.W Metr V2.0 INA 226Скетч и БиблиотекиV.A.W_metr_INA226V.A.W_metr_INA226.ino Using board ‘nano’ from platform in folder: C:Users1AppDataLocalArduino15packagesarduinohardwareavr1.6.20 Using core ‘arduino’ from platform in folder: C:Users1AppDataLocalArduino15packagesarduinohardwareavr1.6.20 Detecting libraries used… «C:\Users\1\AppData\Local\Arduino15\packages\arduino\tools\avr-gcc\4.9.2-atmel3.5.4-arduino2/bin/avr-g++» -c -g -Os -w -std=gnu++11 -fpermissive -fno-exceptions -ffunction-sections -fdata-sections -fno-threadsafe-statics -flto -w -x c++ -E -CC -mmcu=atmega328p -DF_CPU=16000000L -DARDUINO=10816 -DARDUINO_AVR_NANO -DARDUINO_ARCH_AVR «-IC:\Users\1\AppData\Local\Arduino15\packages\arduino\hardware\avr\1.6.20\cores\arduino» «-IC:\Users\1\AppData\Local\Arduino15\packages\arduino\hardware\avr\1.6.20\variants\eightanaloginputs» «C:\Users\1\AppData\Local\Temp\arduino_build_783368\sketch\V.A.W_metr_INA226.ino.cpp» -o nul Alternatives for INA226.h: [[email protected]] ResolveLibrary(INA226.h) -> candidates: [[email protected]] «C:\Users\1\AppData\Local\Arduino15\packages\arduino\tools\avr-gcc\4.9.2-atmel3.5.4-arduino2/bin/avr-g++» -c -g -Os -w -std=gnu++11 -fpermissive -fno-exceptions -ffunction-sections -fdata-sections -fno-threadsafe-statics -flto -w -x c++ -E -CC -mmcu=atmega328p -DF_CPU=16000000L -DARDUINO=10816 -DARDUINO_AVR_NANO -DARDUINO_ARCH_AVR «-IC:\Users\1\AppData\Local\Arduino15\packages\arduino\hardware\avr\1.6.20\cores\arduino» «-IC:\Users\1\AppData\Local\Arduino15\packages\arduino\hardware\avr\1.6.20\variants\eightanaloginputs» «-IC:\Program Files\Arduino\libraries\INA226-master» «C:\Users\1\AppData\Local\Temp\arduino_build_783368\sketch\V.A.W_metr_INA226.ino.cpp» -o nul Alternatives for SPI.h: [[email protected]] ResolveLibrary(SPI.h) -> candidates: [[email protected]] «C:\Users\1\AppData\Local\Arduino15\packages\arduino\tools\avr-gcc\4.9.2-atmel3.5.4-arduino2/bin/avr-g++» -c -g -Os -w -std=gnu++11 -fpermissive -fno-exceptions -ffunction-sections -fdata-sections -fno-threadsafe-statics -flto -w -x c++ -E -CC -mmcu=atmega328p -DF_CPU=16000000L -DARDUINO=10816 -DARDUINO_AVR_NANO -DARDUINO_ARCH_AVR «-IC:\Users\1\AppData\Local\Arduino15\packages\arduino\hardware\avr\1.6.20\cores\arduino» «-IC:\Users\1\AppData\Local\Arduino15\packages\arduino\hardware\avr\1.6.20\variants\eightanaloginputs» «-IC:\Program Files\Arduino\libraries\INA226-master» «-IC:\Program Files\Arduino\libraries\SPI-master» «C:\Users\1\AppData\Local\Temp\arduino_build_783368\sketch\V.A.W_metr_INA226.ino.cpp» -o nul Alternatives for TFT_ST7735.h: [[email protected]] ResolveLibrary(TFT_ST7735.h) -> candidates: [[email protected]] «C:\Users\1\AppData\Local\Arduino15\packages\arduino\tools\avr-gcc\4.9.2-atmel3.5.4-arduino2/bin/avr-g++» -c -g -Os -w -std=gnu++11 -fpermissive -fno-exceptions -ffunction-sections -fdata-sections -fno-threadsafe-statics -flto -w -x c++ -E -CC -mmcu=atmega328p -DF_CPU=16000000L -DARDUINO=10816 -DARDUINO_AVR_NANO -DARDUINO_ARCH_AVR «-IC:\Users\1\AppData\Local\Arduino15\packages\arduino\hardware\avr\1.6.20\cores\arduino» «-IC:\Users\1\AppData\Local\Arduino15\packages\arduino\hardware\avr\1.6.20\variants\eightanaloginputs» «-IC:\Program Files\Arduino\libraries\INA226-master» «-IC:\Program Files\Arduino\libraries\SPI-master» «-IC:\Program Files\Arduino\libraries\TFT_ST7735-master» «C:\Users\1\AppData\Local\Temp\arduino_build_783368\sketch\V.A.W_metr_INA226.ino.cpp» -o nul «C:\Users\1\AppData\Local\Arduino15\packages\arduino\tools\avr-gcc\4.9.2-atmel3.5.4-arduino2/bin/avr-g++» -c -g -Os -w -std=gnu++11 -fpermissive -fno-exceptions -ffunction-sections -fdata-sections -fno-threadsafe-statics -flto -w -x c++ -E -CC -mmcu=atmega328p -DF_CPU=16000000L -DARDUINO=10816 -DARDUINO_AVR_NANO -DARDUINO_ARCH_AVR «-IC:\Users\1\AppData\Local\Arduino15\packages\arduino\hardware\avr\1.6.20\cores\arduino» «-IC:\Users\1\AppData\Local\Arduino15\packages\arduino\hardware\avr\1.6.20\variants\eightanaloginputs» «-IC:\Program Files\Arduino\libraries\INA226-master» «-IC:\Program Files\Arduino\libraries\SPI-master» «-IC:\Program Files\Arduino\libraries\TFT_ST7735-master» «C:\Program Files\Arduino\libraries\INA226-master\INA226.cpp» -o nul Alternatives for Wire.h: [] ResolveLibrary(Wire.h)nolibrariesINA226-masterINA226.cpp:16:117: fatal error: Wire.h: No such file or directory -> candidates: [] #include // I2C Library definition // ^ compilation terminated. Используем библиотеку INA226-master версии 1.0.3 из папки: C:Program FilesArduinolibrariesINA226-master Используем библиотеку SPI-master версии 1.0 из папки: C:Program FilesArduinolibrariesSPI-master Используем библиотеку TFT_ST7735-master версии 0.17 из папки: C:Program FilesArduinolibrariesTFT_ST7735-master exit status 1 Ошибка компиляции для платы Arduino Nano.
13-12-2020, 16:31
6 комментариев
Даже опытные программисты-«ардуинщики» могут столкнуться с ошибками компиляции. Исправить их не сложно, а вот найти порой не так просто. Мы решили рассказать сегодня в деталях, какие системные ошибки чаще возникают на различных платах Ардуино, как их исправить и по возможности избежать.
Для начала рассмотрим базовые, так называемые синтаксические ошибки. Они встречаются чаще всего у новичков, но и опытные электронщики с ними точно знакомы не понаслышке. Искать их обычно супер-просто – в Arduino IDE некорректный синтаксис выделяется построчно (таким образом значительно легче отыскать неточность в кодах). Обычно это: отсутствие скобки в конце команды, пропуск этой самой служебной команды или слова, нехватка важных функций, неправильное их написание и т.д.
Для быстрого поиска ошибки советуем рассмотреть строку-подсказку. Ничего не помогло? Тогда для вас наша подборка наиболее распространенных синтаксических ошибок:
С синтаксисом все понятно – вставляем пропущенные символы, убираем лишние знаки, возвращаем функции по умолчанию.
Напомним, в среде разработки Ардуино IDE можно заливать скетчи для различных микроконтроллеров. По умолчанию обычно указана плата Genuino Uno. Если вы работаете с Mega, следует выбрать именно эту платформу (меню «Сервис»), иначе вас ожидает неприятное предупреждение: “programmer is not responding”.
Ошибка компиляции для платы Arduino Uno чаще всего возникает из-за проблем, связанных с библиотеками, например, неправильно подключили, не то ПО инсталлировали. В этом случае вы увидите напоминание “fatal error: … No such file or directory” (библиотека не перенесена в папку libraries) или “redefinition of void setup”.
Обозначенная на скриншоте ERROR означает, что программирование завершилось некорректно (расшифровываем: внутренние проблемы с компилятором, не обновили версию IDE, сбой в библиотеке, неправильный выбор разрядности операционной системы и др.).
Важно! Не забывайте использовать подсказки приложения – они очень помогают. Включаем тут: Файл -> Настройки -> «Показать подробный вывод во время компиляции».
Что делать, если произошла ошибка при загрузке скетча Arduino Nano. Тут могут быть те же причины, что мы описали выше. Особых отличий в компиляции плат нет, главное, их правильный выбор первоначально. Однако часто пользователи настраивают не те показатели скорости порта: 9600 вместо необходимых 57600 либо не имеют соответствующих драйверов на устройствах – все это нужно проверить и исправить!
It’s 11 PM on a Wednesday. You’ve just spent three hours toiling on your next Arduino project, and FINALLY, you’re ready to give your sketch a whirl. You hit upload, palms sweaty with anticipation to see all your hard work come to fruition. It’s then you see the error:
No such file or directory.
Surely this is a chance aberration. “Nothing to worry about,” you mutter, sleep-starved and semi-delirious as you hit upload again. And once more, those maddening words, “no such file or directory,” stare back at you in hostile gaslighting mockery.
Have you been here?
If you’re trying to run an Arduino sketch but keep coming across the “no such file or directory” error, don’t worry. This is actually a pretty common problem, and there are two easy fixes that almost always work.
Keep on reading. We’ll show you what they are.
No such file error!
Error messages can be such a pain. They do, however, serve a useful purpose by telling us something about what went wrong. At first glance, the no such file or directory error is particularly maddening because it seems to break that useful purpose rule. Of course there’s a file or directory! You just made the thing, and it’s right there, tucked inside a directory.
But hold up, let’s take a closer look. If you look at the bottom portion of the Arduino IDE where the error message shows up, there’s this handy little button that says “copy error messages.”

Click on that now. You probably won’t fall off your chair to learn that by clicking that button, you just copied the error message from the little window at the bottom of The Serial Monitor’s UI to the clipboard of your computer.
This copy feature is ridiculously useful. You could, for example, paste the error message into Google and learn more about the error. Or you could take advantage of the active Arduino community by asking for help in a forum. For this situation, however, we can be a bit more basic. All we’re going to do is take a closer look at what the message is actually saying. To do that, just fire up your PC’s text editor and paste it into the blank screen.
Decoding the no such file error
Here it is, that pesky error in all its freshly pasted glory.

I’ll break it down for you line by line.
- The first line is easy. It’s just describing the Arduino version in use, what operating system is running, and which board you have selected.
- Line 2 begins to zero in on the problem.
- The first bit, “knob,” is referring to the name of the program. This is your sketch, basically.
- The second bit is what usually begins to confuse people, but it’s easy once you know. The “10” in this example is telling you the error occurred on line 10 of your sketch. The “19” is telling you the length of the line of code in spaces and characters. The first number is usually the more helpful of the two because you can use it to locate the error in your sketch.
- Then we get to the smoking gun of the error. It says, “servo.h: No such file or directory”.
So this thing, “Servo.h.” That’s the thing we need to fix, and thanks to line 2, we know where to find it. Line 10. It’s always line 10.
Now that we know what’s going on a bit better, let’s get down to the business of implementing a fix.
The error of our ways
Let’s lay down some scrutiny on this accursed line 10.
It says “#include <servo.h>”
When we verify this code, this line is telling the Arduino IDE compiler, “Hey, for this program to work, you need to go get this file called servo.h”.
Let’s say you had a label-making machine, and you wanted to use it to print some cool motivational labels, like “Success!” and “Keep Trying!” and “Look, Nachos!” To make that happen, you’ll first have to load in a roll of labels. No roll of labels? Well, then the label maker isn’t gonna work.
The sketch you’re trying to upload is like the label maker. The file (in our example, the file named “servo.h”) is the roll of labels.

So the error message actually is saying something useful. It’s saying, “Hey programmer, you said I needed this other file. Well, I looked for it and it’s not there. What gives?”
Now we know the error message isn’t complete gibberish, let’s look at the two most common scenarios that cause it.
Scenario 1 – Fat fingers
This sketch is one that you’ve written. You’re actually the one who wrote the “#include” line. The first thing you should check is your spelling and capitalization. Maybe you spelled the name of the library incorrectly? Or (as with the example below) perhaps you capitalized the wrong letters.

So “servo.h” should actually have a capital “S.” In full and with correct capitalization, it should read, “Servo.h.” You’ll notice above that the word servo changes color when it’s correctly capitalized. That color change signifies that the library name “Servo” is recognized as a “keyword” in the Arduino IDE.
Keep in mind that might not be the case for all the libraries you’re using. In other words, the color change won’t always indicate you’re using the right spelling or capitalization, but it’s often a helpful visual reminder.
Oh, and it’s probably good to mention that everyone in the history of Arduino programming has misspelled or incorrectly capitalized a word at some point. It’s amazing how long you can stare at a line of code and miss something like that.
So don’t sweat it.
Scenario 2 – Missing files
This brings us to the next common scenario for the “no such file or directory” error.
So often, working with Arduinos involves taking code that someone else has developed and shared online and then tailoring it to your project. That’s part of what makes it so easy to get stuff done with Arduino. One problem that frequently happens when we do that, however, is we accidentally introduce code without a matching file.
An easy way to check to see if you have the file a sketch is looking for is to navigate to Sketch > Include Library from within the Arduino IDE. Then look for the name of that library.

Whatever library the #include statement was calling for, you want to look through this big long list for a library with the exact same name. If you don’t see the file name there, this means the library isn’t installed. You’ll have to add that library before the sketch will compile without errors.
So, how do you add that library?
The easiest way is to go to Sketch > Include Library > Manage Libraries. The Arduino IDE will open up a dialogue box from which you can search for the library you need.

Make sure you type the exact word that matches the #include line. Once you find the missing library, go ahead and click Install. The Arduino IDE will let you know that it’s installing the library you requested and updating the software accordingly.
Next, just double-check that the library has been successfully installed by going to Sketch > Include Library. You should see your new library in the dropdown list.
Good news! If the library is there, you should now be able to compile your sketch error-free.
Other library locations
OK, there’s one little fly in the ointment. How do these dang ointment flies always manage to complicate things so?
Here’s the thing. Not all libraries live in this convenient pop-up window inside the Arduino IDE. The Arduino community is bubbling with clever ideas, but cleverness (unlike processed cheese) doesn’t always come in conveniently standardized, individually wrapped slices. There are tons of different ways to find Arduino libraries on the web.
If you’re downloading or copying a program from the internet, just go to the page where you got that program and take a close look at the library the author is referencing. They may, for example, have a link to GitHub, which is a place where people keep a lot of code libraries.

Wherever you find it, usually the library will be included in a .zip file package. Once you’ve downloaded the .zip file, fire up the Arduino IDE and go to Sketch > Include Library > Add .ZIP library. Then navigate to the location you downloaded the file and select it. Assuming no additional ointment flies invade your workflow, the Arduino IDE will pop up the message “Library added to your libraries” just above the dark area where the original “no such file or directory” error appeared.
Now it’s business as usual! Just go to Sketch > Include Library, and the new library will appear in the drop-down list.
As the dyslexic Frenchman once said to the oversized violinist: “Viola!”
You now know not one but two ways to add a new library. What a time to be alive!
Review
A quick recap, then.
We’ve looked at the two main scenarios that cause the “no such file or directory” error to appear after you compile your sketch:
- The fat fingers phenomenon: Check your spelling and capitalization! If you wrote the sketch, there’s a mighty good chance you introduced a tiny error. And don’t beat yourself up over it! Literally every coder has done this.
- The missing files mixup: Failing that, if you copied code from someone else check that you have the correct libraries installed. Don’t see your library? Install it using the method described above, and you should be good to go.
There may be no such thing as a free lunch, a coincidence, or a luck dragon. But rest assured. Your files and directories? They’re alive and well.
Одна из самых неприятных ошибок — это ошибка компиляции для платы Аrduino Nano, с которой вам придется столкнуться не раз.
Содержание
- Синтаксические ошибки
- Ошибки компиляции плат Arduino uno
- Ошибка exit status 1 при компиляции для плат uno, mega и nano
- Ошибки библиотек
- Ошибки компилятора Ардуино
- Основные ошибки
- Ошибка: «avrdude: stk500_recv(): programmer is not responding»
- Ошибка: «a function-definition is not allowed here before ‘{‘ token»
- Ошибка: «No such file or directory / exit status 1»
- Ошибка: «expected initializer before ‘}’ token / expected ‘;’ before ‘}’ token»
- Ошибка: «… was not declared in this scope»
Синтаксические ошибки
Ардуино – одна из наиболее комфортных сред для начинающих инженеров, в особенности программистов, ведь им не приходится проектировать свои системы управления и делать множество других действий.
Сразу же при покупке они получают готовый набор библиотек на С99 и возможность, по необходимости, подтянуть необходимые модули в опен-соурс источниках.
Но и здесь не избежать множества проблем, с которыми знаком каждый программист, и одна из самых неприятных – ошибка компиляции для платы Аrduino nano, с которой вам придется столкнуться не раз. Что же эта строчка означает, какие у неё причины появления, и главное – как быстро решить данную проблему?
Для начала стоит немного окунуться в теорию, чтобы вы понимали причину возникновения данной строчки с текстом и не грешили лишний раз, что Ардуино уно не видит компьютер.
Как несложно догадаться, компиляция – приведение кода на языке Си к виду машинного (двоичного) и преобразование множественных функций в простые операции, чтобы те смогли выполняться через встроенные операнды процессора. Выглядит всё достаточно просто, но сам процесс компиляции происходит значительно сложнее, и поэтому ошибка во время проведения оной может возникать по десяткам причин.
Все мы уже привыкли к тому, что код никогда не запускается с первого раза, и при попытке запустить его в интерпретаторе вылезает десяток ошибок, которые приходится оперативно править. Компилятор действует схожим образом, за исключением того, что причины ошибок указываются далеко не всегда. Именно поэтому рекомендуется протестировать код сначала в среде разработки, и лишь затем уже приступать к его компиляции в исполняемые файлы под Ардуино.
Мы узнали, к чему приводит данный процесс, давайте разберёмся, как он происходит:
- Первое, что делает компилятор – подгружает все инклуднутые файлы, а также меняет объявленные дефайны на значения, которое для них указано. Это необходимо затем, чтобы не нужно было по нескольку раз проходиться синтаксическим парсером в пределах одного кода. Также, в зависимости от среды, компилятор может подставлять функции на место их объявления или делать это уже после прохода синтаксическим парсером. В случае с С99, используется второй вариант реализации, но это и не столь важно.
- Далее он проверяет первичный синтаксис. Этот процесс проводится в изначальном компилируемом файле, и своеобразный парсер ищет, были ли описаны приведенные функции ранее, подключены ли необходимые библиотеки и прочее. Также проверяется правильность приведения типов данных к определенным значениям. Не стоит забывать, что в С99 используется строгая явная типизация, и вы не можете засунуть в строку, объявленную integer, какие-то буквенные значения. Если такое замечается, сразу вылетает ошибка.
- В зависимости от среды разработки, иногда предоставляется возможность последний раз протестировать код, который сейчас будет компилироваться, с запуском интерпретатора соответственно.
- Последним идет стек из различных действий приведения функций, базовых операнд и прочего к двоичному коду, что может занять какое-то время. Также вся структура файлов переносится в исполняемые exe-шники, а затем происходит завершение компиляции.
Как можно увидеть, процесс не так прост, как его рисуют, и на любом этапе может возникнуть какая-то ошибка, которая приведет к остановке компиляции. Проблема в том, что, в отличие от первых трех этапов, баги на последнем – зачастую неявные, но всё ещё не связанные с алгоритмом и логикой программы. Соответственно, их исправление и зачистка занимают значительно больше времени.
А вот синтаксические ошибки – самая частая причина, почему на exit status 1 происходит ошибка компиляции для платы Аrduino nano. Зачастую процесс дебагинга в этом случае предельно простой.
Вам высвечивают ошибку и строчку, а также подсказку от оператора EXCEPTION, что конкретно не понравилось парсеру. Будь то запятая или не закрытые скобки функции, проблема загрузки в плату Аrduino возникнет в любом случае.
Решение предельно простое и логичное – найти и исправить непонравившийся машине синтаксис. Зачастую такие сообщения вылезают пачками, как на этапе тестирования, так и компилирования, поэтому вы можете таким образом «застопорить» разработку не один раз.
Не стоит этого страшиться – этот процесс вполне нормален. Все претензии выводятся на английском, например, часто можно увидеть такое: was not declared in this scope. Что это за ошибка arduino – на самом деле ответ уже скрыт в сообщении. Функция или переменная просто не были задекларированы в области видимости.
Ошибки компиляции плат Arduino uno
Другая частая оплошность пользователя, которая порождает вопросы вроде, что делать, если Аrduino не видит порт, заключается в том, что вы попросту забываете настроить среду разработки. IDE Ардуино создана под все виды плат, но, как мы указывали, на каждом контроллере помещается лишь ограниченное количество библиотек, и их наполнение может быть различным.
Соответственно, если в меню среды вы выбрали компиляцию не под тот МК, то вполне вероятно, что вызываемая вами функция или метод просто не будет найдена в постоянной памяти, вернув ошибку. Стандартно, в настройках указана плата Ардуино уно, поэтому не забывайте её менять. И обратная ситуация может стать причиной, по которой возникает проблема загрузки в плату на Аrduino uno.
Ошибка exit status 1 при компиляции для плат uno, mega и nano
И самое частое сообщение, для пользователей уно, которое выскакивает в среде разработки – exit 1. И оно же самое дискомфортное для отладки приложения, ведь тут необходимо учесть чуть ли не ядро системы, чтобы понять, где же кроется злополучный баг.
В документации указано, что это сообщение указывает на то, что не запускается ide Аrduino в нужной конфигурации, но на деле есть ещё десяток случаев, при которых вы увидите данное сообщение. Однако, действительно, не забывайте проверять разрядность системы, IDE и просматривать, какие библиотеки вам доступны для обращения на текущий момент.
Ошибки библиотек
Если произошла ошибка при компиляции скетча Ардуино, но не выводилось ни одно из вышеописанных сообщений, то можете смело искать баг в библиотеках МК. Это наиболее неприятное занятие для большинства программистов, ведь приходится лазить в чужом коде, но без этого никак.
Ведь банально причина может быть в устаревшем синтаксисе скачанного плагина и, чтобы он заработал, необходимо переписать его практически с нуля. Это единственный выход из сложившейся ситуации. Но бывают и более банальные ситуации, когда вы подключили библиотеку, функции из которой затем ни разу не вызвали, или просто перепутали название.
Ошибки компилятора Ардуино
Ранее упоминался финальный стек действий, при прогонке кода через компилятор, и в этот момент могут произойти наиболее страшные ошибки – баги самого IDE. Здесь конкретного решения быть не может. Вам никто не запрещает залезть в ядро системы и проверить там всё самостоятельно, но куда эффективнее будет откатиться до предыдущей версии программы или, наоборот, обновиться.
Основные ошибки
Ошибка: «avrdude: stk500_recv(): programmer is not responding»
Смотрим какая у нас плата? Какой порт используем? Сообщаем ардуино о правильной плате и порте. Возможно, что используете Nano, а указана Mega. Возможно, что указали неверный порт. Всё это приводит к сообщению: «programmer is not responding».
Решение:
В Arduino IDE в меню «Сервис» выбираем плату. В меню «Сервис → Последовательный порт» выбираем порт.
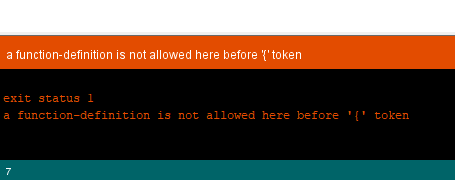
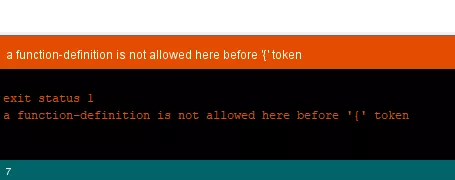
Ошибка: «a function-definition is not allowed here before ‘{‘ token»
Забыли в коде программы (скетча) закрыть фигурную скобку }.
Решение:
Обычно в Ардуино IDE строка с ошибкой подсвечивается.
Ошибка: «No such file or directory / exit status 1»
Подключаемая библиотека отсутствует в папке libraries.
Решение:
Скачать нужную библиотеку и скопировать её в папку программы — как пример — C:Program FilesArduinolibraries. В случае наличия библиотеки — заменить файлы в папке.
Ошибка: «expected initializer before ‘}’ token / expected ‘;’ before ‘}’ token»
Забыли открыть фигурную скобку {, если видим «initializer before». Ошибка «expected ‘;’ before ‘}’ token» — забыли поставить точку с запятой в конце командной строки.
Решение:
Обычно в Ардуино IDE строка с ошибкой подсвечивается.
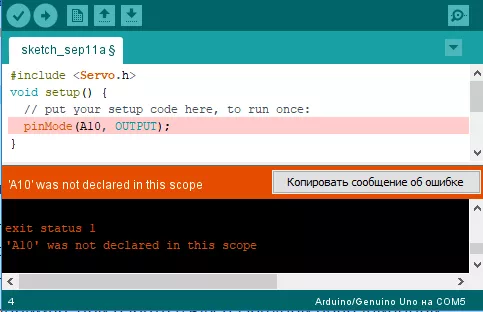
Ошибка: «… was not declared in this scope»
Arduino IDE видит в коде выражения или символы, которые не являются служебными или не были объявлены переменными.
Решение:
Проверить код на использование неизвестных выражений или лишних символов.
17 июля 2018 в 13:23
| Обновлено 7 ноября 2020 в 01:20 (редакция)
Опубликовано:
Статьи, Arduino