
I am using centos linux.
I had python 2.6 with django and now i upgraded to python 2.7.
Python 2.6 is located in /usr/lib/python2.6.
Python 2.7 is located in /usr/local/lib/python2.7.
They both have site-packages directory and they both contain django 1.2.
If i run python i get the 2.7 version.
My problem is that if try to import django i get
ImportError: No module named django
I am not sure where is my PYTHONPATH defined and if this is what i need to change.
anyone ?
i ended up making a symbolic link to the 2.6 site-packages directory.
![]()
Mariusz Jamro
30.4k24 gold badges119 silver badges159 bronze badges
asked Feb 27, 2012 at 8:48
![]()
I had the same error, and this fix my issue
python -m pip install django
 Done!
Done!
answered Oct 30, 2017 at 12:58
![]()
accimeesterlinaccimeesterlin
4,4562 gold badges25 silver badges18 bronze badges
3
To check your path, you can use the following code:
import sys
print(sys.path)
If you already know where django is installed, it should be easy to test if the desired directory is in your path with directory in sys.path.
Regarding where your PYTHONPATH is defined, note that it’s an environment variable, so you can check its value (if defined) with: echo $PYTHONPATH
![]()
xskxzr
12.3k12 gold badges37 silver badges76 bronze badges
answered Feb 27, 2012 at 8:53
![]()
jcolladojcollado
39.2k8 gold badges102 silver badges133 bronze badges
4
Under linux, you can set the PYTHONPATH environment variable in your .profile or .bashrc. You can either edit it directly from the terminal by changing to your home directory (cd ~), and then edit the file (nano .bashrc), or by opening the file with gtkedit or vim or whatever, and add:
PYTHONPATH=/usr/local/lib/python2.7/site-packages:/another/path/etc
If you want to test this before editing your profile, you can export this from the terminal as:
export PYTHONPATH=/local/lib/python2.7/site-packages
I’m assuming you’re running this straight from the command line. If you’re running it as a wsgi module in apache, you can add this to your syspath from your wsgi file as:
import sys
sys.path.append('/usr/local/lib/python2.7/site-packages')
answered Feb 27, 2012 at 9:08
![]()
Adam MorrisAdam Morris
8,22512 gold badges45 silver badges68 bronze badges
2
try
pip freeze
this command show which packages are installed in your system
then run with root privilege
pip install django
then create a new project with command
django-admin.py startproject mysite
then start your project
cd path/to/mysite
./manage.py runserver
in file wsgi.py add this lines
import os
import sys
DJANGO_PATH =  os.path.join(os.path.abspath(os.path.dirname(__file__)), '..')
sys.path.append(DJANGO_PATH)
answered Apr 30, 2016 at 8:25
![]()
Try printing sys.path to see what’s in your path. Django need to be in one of the dirs listed. Example on Windows:
>>> import sys
>>> for p in sys.path: print p

C:Python27Libidlelib
C:Windowssystem32python27.zip
C:Python27DLLs
C:Python27lib
C:Python27libplat-win
C:Python27liblib-tk
C:Python27
C:Python27libsite-packages
>>>
answered Feb 27, 2012 at 8:56
![]()
Mariusz JamroMariusz Jamro
30.4k24 gold badges119 silver badges159 bronze badges
1
django went missing with an upgrade to python 3.7
pip3 install django
fixed the problem.
answered Aug 7, 2020 at 15:10
![]()
700L700L
861 silver badge4 bronze badges
python3 -m django --version1
for me it was that^
answered Mar 21, 2021 at 22:34
![]()
smatthewenglishsmatthewenglish
2,8114 gold badges35 silver badges72 bronze badges
If you are using a environment use:
$ <environment_location>/<environment_name>/bin/python manage.py runserver
answered Jun 9, 2020 at 19:44
![]()
I also had same error but easily solved it .those who are using version 4 and above of Django and python 3.0 can do the following(for windows)
pip install virtualenv #installs virtual environment in pc
py -m venv myvenv #creates virtual environment named myvenv inside folder
myvenv/Scripts/activate # activates the virtual environment
You are now ready to go.
pip install django # pip install django
python -m django —version # checks the version of installed django
![]()
4b0
21.7k30 gold badges95 silver badges142 bronze badges
answered Sep 11, 2022 at 13:58
![]()

Every django developer has experience of facing this issue. It is one of the most common errors you will face when running your first migration. This error can also produce other errors such as «TemplateDoesNotExist«.
In this article we will see two most common reasons that cause Django Import Error: No module named
1. Forgot to put app name to installed_apps list?
The most common mistake that beginners make is that they forget to list their apps in INSTALLED_APPS which is present in the settings.py file.
Therefore, please make sure that your app is listed in the INSTALLED_APPS. Example:
Suppose, I have a newly started app called users within a project named polls project then I would navigate to pollsproject/settings.py and will search for INSTALLED_APPS and will append ‘users‘ or ‘users.apps.UsersConfig‘ to it.
INSTALLED_APPS = [
   'users.apps.UsersConfig', # added users app here
   'django.contrib.admin',
   'django.contrib.auth',
   'django.contrib.contenttypes',
   'django.contrib.sessions',
   'django.contrib.messages',
   'django.contrib.staticfiles',
]
Enter fullscreen mode
Exit fullscreen mode
This is the most common solution for TemplateDoesNotExist error as well so make sure you have not committed this mistake.
Now, let’s look at another most common mistake that a beginner makes which results in this error.
2. App is not in the root directory of your project.
If you have listed your apps inside INSTALLED_APPS but still you are facing the *Django Import Error: No module named * error then it might be due to django could not find your app within the root directory.
Your apps can be place anywhere, but Django by default starts to search app from the project’s root directory and if it does not find the app there then it will throw the same ImportError error.
Therefore, please make sure that your app is located in the same directory where manage.py file is located. For example, for a random project named pollsproject, I have created an app called users, then the whole tree structure of my project would look like:
polls-project/
├── env/
├── pollsproject/
│   ├── pollsproject/
│   │   ├── __init__.py
│   │   ├── asgi.py
│   │   ├── settings.py
│   │   ├── urls.py
│   │   └── wsgi.py
│   ├── users/
│   │   ├── migrations/
│   │   ├── __init__.py
│   │   ├── admin.py
│   │   ├── apps.py
│   │   ├── models.py
│   │   ├── tests.py
│   │   └── views.py
│   ├── db.sqlite3
│   └── manage.py
├── .gitignore
├── requirements.txt
Enter fullscreen mode
Exit fullscreen mode
The main cause of this problem is that when you start a fresh project and then you start an app using the django-admin command from the same location from where you run the startproject command. This will create an app outside the project’s root directory. Therefore, to avoid this issue use python manage.py startapp instead of «django-admin startapp or make sure you’re in the same directory as manage.py
The good news is that Django’s apps are «Pluggable» therefore, you can just move your app to the directory same as manage.py and it should work.
Let me know if none of these two worked for you, I will be more than glad to help you.
Happy Coding 🧡
Picture this: you’ve collected yourself, thrown away your blanket, and sat down ready to create the next big thing with Django. And BAM!, you try to run your Django development server or create a new Django project, and you get some “ModuleNotFoundError: No module named ‘django’” error. You feel like going back to that warm blanket and continue sleeping.
Oh, buoy! Don’t do that, I got you.
Fixing No Module named ‘django’ when working with Python projects is a straightforward process that won’t that much of your time. With the right knowledge and mindset, you can have your Python Django web development project up and running in no time.
What is “No module named ‘django’” ModuleNotFoundError in Python?
“No module named ‘django’” is an exception in Python, specifically a ModuleNotFoundError, which shows that the Python interpreter in your virtual or system-wide environment cannot find the installation location of Django. When Python cannot locate the specified Django module in the module search path, it will throw ModuleNotFoundError: No module named ‘django’.
The simple message indicates that Django has not been installed or its path has not been configured properly. Here are other reasons why you may get the exception in Python.
Reasons why “No module named ‘django’” error occurs
- Forgetting to install Django in your Python environment: If your active virtual environment does not have Django, definitely Python interpreter will throw a ModuleNotfoundError exception.
- Installing Django in the incorrect environment: Activating an incorrect Python virtual environment that does not have Django installed will result in No Module named ‘django’ error.
- Your IDE does not have an active or correct virtual environment with Django installed.
- Installing Django in an incorrect Python interpreter: When you have both Python 2 and Python 3 interpreters, you may be using pip to install Django while using Python 3 as the interpreter for your Django project.
How to fix “No module named ‘django’” error in Python
- Approach 1: Install Django
- Approach 2: Make sure Django is installed on a global environment
- Approach 3: Use pip3 to install Django if you are using Python 3
- Approach 4: Activate the correct virtual environment in your Terminal or IDE
Approach 1: Install Django
Having not installed Django is the main culprit to having the No module named ‘django’. Because one thing you should do is install Django. Here are the steps you need to take to install Django:
Step I: Open the Terminal
Step II: Run pip3 install django if you’re using a system-wide environment
If you’re using the system-wide environment for your Django project, you need to have Django installed. One simple way is to open a Terminal window and execute the following command;
pip install django

OR

pip3 install django
If you’re using a virtual environment to install Django, check steps III and IV.
Step III: Activate the correct virtual environment for your Django project
Most likely, you will be using an isolated Python virtual environment for your Django project. If you’re getting No module named ‘django’ error, you should check that you have an active virtual environment. You can run the following command to check if you have an active Python virtual environment:
echo $VIRTUAL_ENVAn active environment will print the path to the virtual environment directory.
Otherwise, activate the correct virtual environment you’re using for your Django project using the source env/bin/activate command.
source path_to_env/bin/activate

# e.g in your project folder

source my_env/bin/activate
Step IV: Install Django using pip install django command
After activating the correct virtual environment, install Django by running the following command:
pip3 install djangoIf you’re using Python 2 interpreter and you have both Python 2 and Python 3, use pip install django command:
pip install djangoStep V: Verify Django has been installed
Once the installation has been completed, type pip freeze or django-admin --version to check if Django has been installed successfully.
pip freezeThe command should list Django and its version if it has been installed.
OR
django-admin --versionRunning the command should display the currently installed Django version indicating that Django is installed in the currently active virtual environment.
Approach 2: Make sure Django is installed on a global environment
When you are working on a Django project and you do not want to create a virtual environment, you’re likely to face ModuleNotFoundError: No module named ‘django’. The cause for the error is that you do not have Django installed in your system-wide environment.
Choosing a system-wide Django installation for your Django project could be the reason why you’re having No module named django error because the system-level Python cannot find any Django package.
Installing Django in a global environment makes Django available to all your Django projects and will fix the ModuleNotFoundError: No module name ‘django’.
Here are the simple steps you need to take to install Django globally:
1. Open a new Terminal window
2. Type pip3 install django and press Enter
pip3 install django3. Verify installation by running django-admin --version
django-admin --versionA successful Django installation will show the version of Django installed on a system-level Python environment.
For detailed steps on how to install Django on a system-wide environment and why it is not recommended, check out this article I have written on that: Should I install Django globally?
Approach 3: Use pip3 to install Django if you are using Python 3
If you have both Python version 2 and version 3 in your system, you could be using Python 2 to install Django while in your project, you are using Python 3. If you use pip and you do not have any alias that points to pip3, you could be installing Django using the wrong Python interpreter.
For that, you need to install Django using pip3 instead of pip which points to Python 2 interpreter.
Python 3 uses a different version of pip, called pip3, which is designated to work with Python 3. If your Django project is using Python 3, make sure to use pip3 to install Django. Installing Django using pip3 in an environment using Python 3 as the default interpreter will fix the ModuleNotFoundError: No module named ‘django’ error.
Here are the steps to install Django using pip3:
Step 1: Open the Terminal
Step 2: Activate virtual environment for your Django project
source env_folder/bin/activateStep 3: Type pip3 install django and press Enter
pip3 install djangoStep 4: Verify Django installation by running pip freeze command
pip freezeThe pip freeze command should list Django and its version if it is installed in the current Python virtual environment.
You can also create an alias that points to pip3 so that whenever you are using the pip command, it uses pip3 to install Python packages. Here’s how to do that:
Open the Terminal and type
alias pip=pip3Press Enter and continue installing Django using the pip command:
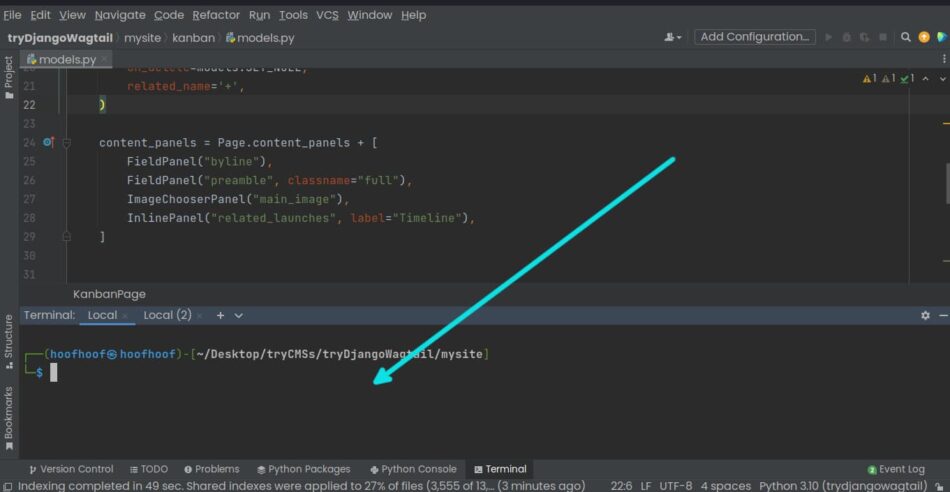
pip install djangoApproach 4: Activate the correct virtual environment in your Terminal, VS code, or Pycharm
If you have Django installed in a virtual environment, it’s crucial to ensure that the virtual environment is active in your terminal and the IDE you’re using. Failing to activate the virtual environment will result in ModulenNotFoundError: No module named ‘django’
If you have a system-wide Django installation, you should not get No module named ‘django’ error.
How to activate virtual environment in Terminal
Follow these steps to activate Python virtual environment for your Django project using the Terminal:
Step 1: Open the Terminal window
Step 2: Change into the virtual environment directory using cd command
Using the cd command, navigate to the directory that has your virtual environment files. This can be inside your project directory or any directory that you have designated for strong all your virtual environments.
cd path_to_env

# if the env is inside your project directory, use

cd path_to_project_directory/env_folder
Step 3: Activate the virtual environment using source command
Once inside the directory with your Python virtual environment, run source bin/activate command to activate the virtual environment.
source bin/activateStep 4: Verify that the active virtual environment has Django
Once you have successfully activated the virtual environment, check that Django is installed by running django-admin --version command.
django-admin --versionOtherwise, install Django using the pip install django command.
pip install djangoHow to activate virtual environment in vs code
To activate a virtual environment in Visual Studio Code, you can follow these steps:
1. Open the Terminal in Visual Studio Code by selecting View > Terminal from the main menu OR CTRL + `
You should see a Terminal window at the bottom of your vs code window like the one should below.

2. Change the directory to your virtual environment using the cd command
Once you have the terminal window open, use the cd command to navigate to the location of the Python virtual environment you created for your Django project.
cd path_to_env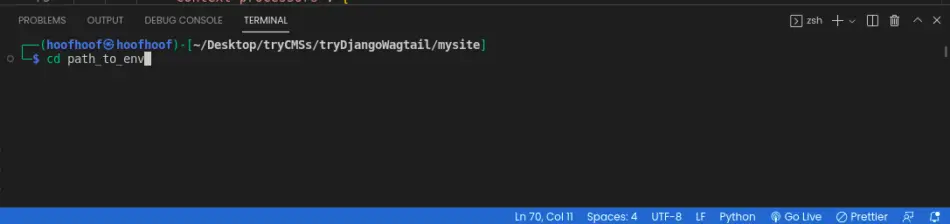
3. Activate the virtual environment by typing source bin/activate
After navigating into the virtual environment directory, use the source bin/activate command to activate the virtual environment.
source bin/activate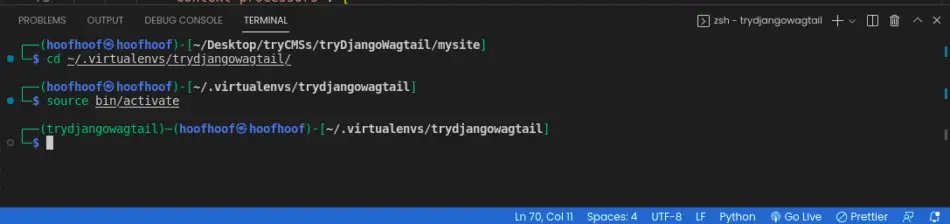
You should see the name of your virtual environment in the terminal prompt indicating that the virtual environment is active.
How to activate virtual environment in Pycharm
To activate a virtual environment in Pycharm, follow these steps:
1. Open the terminal in PyCharm by selecting View > Tool Windows > Terminal from the main menu or press ALT + F12.
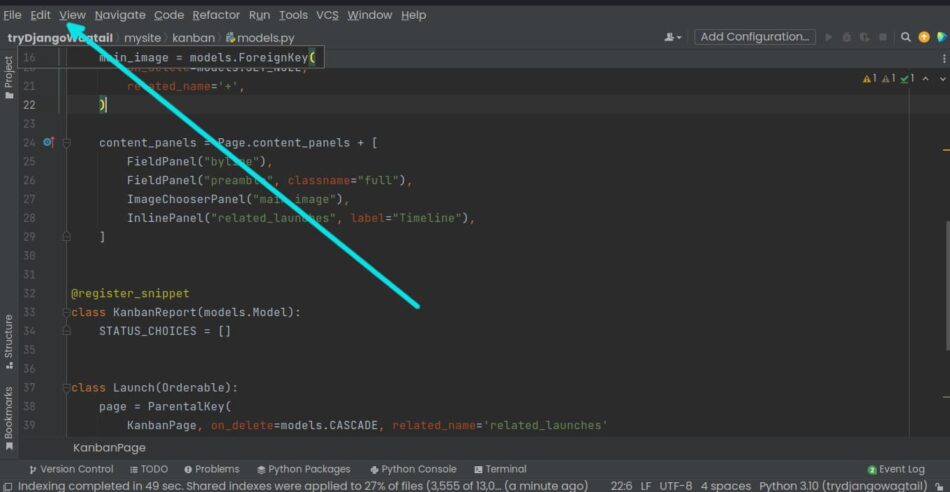
You should see a Terminal window at the bottom of your Pycharm window like the one should below.
2. Change the directory to your virtual environment using the cd command
Once you have the terminal window open, use the cd command to navigate to the location of the Python virtual environment you created for your Django project.
cd path_to_env
3. Activate the virtual environment by typing source bin/activate
After navigating into the virtual environment directory, use the source bin/activate command to activate the virtual environment.
source bin/activate
You should see the name of your virtual environment in the Terminal prompt indicating that the virtual environment is active.
In Pycharm, you can also use the GUI method to select the preferred Python interpreter in a virtual environment. To do that, follow these steps:
Step 1: In Pycharm, go to File > Settings > Project: <project_name> > Project Interpreter.
Step 2: Select the virtual environment that you’re using for your Django project
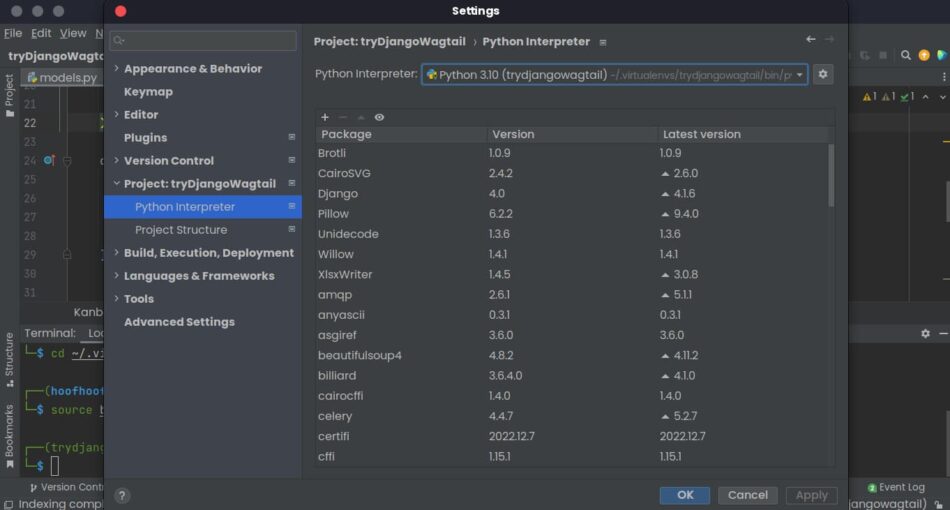
Step 3: Press Apply then OK to save the changes
How to verify that the No module named ‘django’ error has been fixed?
Verify using pip freeze command
If you run pip freeze command in your Terminal and you see Django and its version listed, you should be sure that “No module named ‘django’” has been fixed.
pip freezeVerify by creating a new Django project
Another sure way to verify if the ModuleNotFoundError has been fixed is to create a new project with Django. If the django-admin startproject project_name command executes successfully, then the ModuleNotFoundError must be fixed.
Steps to create a new Django project
- Navigate into the directory where you want to create the project using the
cdcommand. - Create a new Django project using the command
django-admin startproject project_name. Replace project_name with the desired name for your project. - Navigate into the project directory using the
cd project_directorycommand. Replaceproject_directorywith the name of your project. - Run the development server by executing
python manage.py runservercommand.
If the commands above executes successfully, you are assured that your ModuleNotFoundError: No module named ‘django’ is resolved.
Troubleshooting No module named ‘django’ in the future
Checklist to ensure “ModuleNotFoundError: No module named ‘django’” does not occur again in the future.
- Check that you have installed Django in your active virtual environment or global Python environment.
- If you have both Python 2 and Python 3 installed on your system, make sure you are using pip3 to install Django.
- Make sure the IDE you’re using to write Django code uses the correct Python environment. Besides, you can restart the IDE to fix the ModuleNotFoundError.
- Reinstall Django if the error still persists by activating the virtual environment and running
pip3 install django. - Uninstall Django by running the command
pip3 uninstall djangoand then install the Django by executing:pip3 install django. - Restart the Django development server if it is still running.
Recap
The “No Module named ‘django’” error can be resolved in several ways, including installing Django in a virtual environment, making sure that Django is installed in a virtual or global environment, using pip3 to install Django if you are using Python 3, and activating the correct virtual environment. Activating virtual environments in VS Code and PyCharm can be done using the terminal and the appropriate command line interface.
Creating a new Django project successfully, locating Django and its version in a pip freeze command, and checking Django version installed in your Python environment assures you that the error has been fixed.
Django is a popular Python web framework that allows developers to create robust and scalable web applications. However, sometimes developers encounter the dreaded ModuleNotFoundError: No module named 'Django' error. This guide will help you understand why this error occurs and provide you with simple solutions to fix it.
Table of Contents
- Understanding the Error
- Solutions
- Install Django
- Verify Django Installation
- Check Virtual Environment
- Update Python Path
- FAQ
Understanding the Error
The ModuleNotFoundError: No module named 'Django' error typically occurs when Python cannot find the Django module in its module search path.
There are several reasons why this error may occur:
- Django is not installed on your system
- Django is installed, but not in the Python path
- Django is installed in a virtual environment, and the environment is not active
Solutions
Install Django
Before you can import and use Django in your project, you must install it. You can install Django using pip, the Python package manager. Open a terminal window and run the following command:
pip install django
This command installs the latest version of Django. If you need a specific version, you can specify it like this:
pip install django==3.2
Verify Django Installation
Once you have installed Django, you can verify the installation by running the following command in your terminal:
python -m django --version
If Django is installed correctly, this command should output the installed version of Django. If you still encounter the error, proceed to the next step.
Check Virtual Environment
Python developers often use virtual environments to isolate project dependencies. If you have installed Django in a virtual environment, you need to activate the environment before you can use Django.
To activate a virtual environment, navigate to the directory containing the environment and run the appropriate command for your operating system:
- Windows:
.venvScriptsactivate
- macOS/Linux:
source venv/bin/activate
Replace venv with the name of your virtual environment directory, if different.
Once the virtual environment is active, you should be able to import and use Django without any issues.
Update Python Path
If you have installed Django but Python still cannot find it, you may need to update your Python path. You can do this by adding the path to the Django installation to the PYTHONPATH environment variable.
- Windows:
set PYTHONPATH=%PYTHONPATH%;C:pathtodjango
- macOS/Linux:
export PYTHONPATH="$PYTHONPATH:/path/to/django"
Replace /path/to/django with the actual path to the Django installation on your system.
FAQ
1. How do I find the path to my Django installation?
To find the path to your Django installation, run the following command in your terminal:
python -c "import django; print(django.__path__)"
This command will print the path to the Django module on your system.
2. Can I use Django with Python 2?
Django 2.0 and later versions do not support Python 2. If you want to use Django with Python 2, you need to install Django 1.11, which is the last version to support Python 2:
pip install django==1.11
3. How do I update Django to the latest version?
To update Django to the latest version, run the following command:
pip install --upgrade django
4. How do I uninstall Django?
To uninstall Django, run the following command:
pip uninstall django
5. How can I check if Django is installed in my virtual environment?
To check if Django is installed in your virtual environment, activate the environment and run the following command:
pip freeze
This command will list all the installed packages in your virtual environment. If Django is installed, you should see it in the list.
- Django Project Official Website
- Django Documentation
- Python Virtual Environments: A Primer
| Python не находит Django | |
| Disallowed host | |
| Не работает runserver | |
| Web application could not be started | |
|
You have X unapplied migrations |
|
|
ERROR: Can not perform a ‘—user’ install |
Python не находит Django
(docker) andreyolegovich.ru@server:~/HelloDjango [0] $ python3 manage.py runserver
Traceback (most recent call last):
File «manage.py», line 8, in <module>
from django.core.management import execute_from_command_line
ModuleNotFoundError: No module named ‘django’
The above exception was the direct cause of the following exception:
Traceback (most recent call last):
File «manage.py», line 14, in <module>
) from exc
ImportError: Couldn’t import Django. Are you sure it’s installed and available on your PYTHONPATH environment variable? Did you forget to activate a virtual environment?
Причина в том, что в PATH не прописан путь до python. Вернитесь к шагу
PATH
Disallowed host
Вы можете запустить Django с помощью
python3 manage.py runserver
И прописали в
settings.py
свои хосты, например так
ALLOWED_HOSTS = ['http://www.andreyolegovich.ru','127.0.0.1','localhost','andreyolegovich.ru','www.andreyolegovich.ru']
Но при обращении к домену в браузере появляется ошибка DisallowedHost
DisallowedHost at /
Invalid HTTP_HOST header: ‘www.andreyolegovich.ru’. You may need to add ‘www.andreyolegovich.ru’ to ALLOWED_HOSTS.
Request Method: GET
Request URL: http://www.andreyolegovich.ru/
Django Version: 2.1.5
Exception Type: DisallowedHost
Exception Value:
Invalid HTTP_HOST header: ‘www.andreyolegovich.ru’. You may need to add ‘www.andreyolegovich.ru’ to ALLOWED_HOSTS.
Exception Location: /home/a/andreyolegovichru/.local/lib/python3.7/site-packages/django/http/request.py in get_host, line 106
Python Executable: /home/a/andreyolegovichru/.local/bin/python3.7
Python Version: 3.7.0
Python Path:
[‘/home/a/andreyolegovichru/andreyolegovich.ru/public_html/HelloDjango’,
‘/home/a/andreyolegovichru/.local/lib/python3.7/site-packages’,
‘/home/a/andreyolegovichru/andreyolegovich.ru’,
‘/opt/passenger40/helper-scripts’,
‘/home/a/andreyolegovichru/.local/lib/python37.zip’,
‘/home/a/andreyolegovichru/.local/lib/python3.7’,
‘/home/a/andreyolegovichru/.local/lib/python3.7/lib-dynload’,
‘/home/a/andreyolegovichru/.local/lib/python3.7/site-packages’]
Server time: Sun, 3 Feb 2019 20:07:57 +0000
Проверьте, всё ли правильно прописали в
settings.py
ALLOWED_HOSTS.
Выключите Django, закройте все консоли подключенные к хостингу или все консоли на локальной машине.
Очистите кэш браузера или откройте url другим браузером.
Не работает runserver Django
Если Вы выполняете команду
python3 manage.py runserver
И ничего не происходит, или например, у Вас работал самый первый проект, а запустить
второй не получается — скорее всего дело в хостинге. На нём может быть закрыта
возможность слушать порты и выбор рабочего проекта происходит с помощью
какого-то скрипта.
Если Вы, как и я, пользуетесь
хостингом beget
, тот этот скипт будет называться
passenger_wsgi.py
и лежать будет на одном уровне с директорией public_html.
Пропишите в нём
os.environ[‘DJANGO_SETTINGS_MODULE’] = ‘Название_нового_прокта.settings’
Web application could not be started
Если Вы хотите переключиться между проектами и уже обновили скрипе passenger_wsgi.py
но получили ошибку
Web application could not be started
Скорее всего Вы забыли пересоздать файл tmp/restart.txt
(docker) andreyolegovich@server:~/andreyolegovich.ru [0] $ touch tmp/restart.txt
Также советую перепроверить не забыли ли Вы поменть системный путь на нужный Вам проект.
При смене проекта обычно нужно делать два изменения в файле passenger_wsgi.py
# -*- coding: utf-8 -*-
import os, sys
sys.path.insert(0, ‘/home/a/andreyolegovich/andreyolegovich.ru/public_html/Project_1’)
#sys.path.insert(0, ‘/home/a/andreyolegovich/andreyolegovich.ru/public_html/Project_2’)
sys.path.insert(1, ‘/home/a/andreyolegovich/.local/lib/python3.7/site-packages’)
os.environ[‘DJANGO_SETTINGS_MODULE’] = ‘Project_1.settings’
#os.environ[‘DJANGO_SETTINGS_MODULE’] = ‘Project_2.settings’
from django.core.wsgi import get_wsgi_application
application = get_wsgi_application()
Ещё одна возможная причина — незаданные переменные в файле
manage.py
You have 18 unapplied migration(s). Your project may not work properly until you apply the migrations for app(s): admin, auth, contenttypes, sessions.
Run ‘python manage.py migrate’ to apply them.
python3 manage.py migrate
ERROR: Can not perform a ‘—user’ install. User site-packages are not visible in this virtualenv.
Если вы пользуетесь виртуальным окружением флаг —user вам скорее всего вообще не нужен.