
The problem
In some cases, it is possible that PostgreSQL tables get corrupted. This can happen in case of hardware failures (e.g. hard disk drives with write-back cache enabled, RAID controllers with faulty/worn out battery backup, etc.), as clearly reported in this wiki page. Furthermore, it can happen in case of incorrect setup, as well.
One of the symptoms of such corruptions is the following message:
ERROR: missing chunk number 0 for toast value 123456 in pg_toast_45678
This almost surely indicates that a corrupted chunk is present within a table file. But there is a good way to get rid of it.
The solution
Let’s suppose that the corrupted table is called mytable.
Many articles on the Internet suggest to fire the following query against the database:
psql> select reltoastrelid::regclass from pg_class where relname = 'mytable';

 reltoastrelid
-------------------------
 pg_toast.pg_toast_40948
(1 row)
and then to fire the following commands:
REINDEX table mytable;
REINDEX table pg_toast.pg_toast_40948;
VACUUM analyze mytable;
But in my case this was not enough.
Then, I computed the number of rows in mytable:
psql> select count(*) from mytable;

 count
-------
 58223
To find the corruption, it is possible to fetch data from the table until getting the ‘Missing chunk…’ error. So the following group of queries does the job:
select * from mytable order by id limit 5000 offset 0;
select * from mytable order by id limit 5000 offset 5000;
select * from mytable order by id limit 5000 offset 10000;
select * from mytable order by id limit 5000 offset 15000;
select * from mytable order by id limit 5000 offset 20000;
...
…and so on until getting the error. In this example, if you reach the offset of 55000 (55000 + 5000 is 60000 which exceeds the total number of records) without getting the error, then your table is not corrupted. The order by clause is necessary to make your query repeatable, i.e. assure that the query does not randomly return rows, and limit and offset clauses work as expected. If your table does not have an id field, you have to find a good field to order by. For performance reasons, it is preferable to select an indexed field.
In order to go faster and not get your console dirty, the query can be directly triggered from the console, redirecting the output to /dev/null and printing an error message only in case of error found:
psql -U pgsql -d mydatabase -c "select * from mytable order by id limit 5000 offset 0" > /dev/null || echo "Corrupted chunk read!"
The above syntax means: execute the query and redirect the output to /dev/null or, in case of error (||), write an error message.
Let’s suppose that the first query giving the error is the following:
select * from mytable order by id limit 5000 offset 10000;
Corrupted chunk read!
>
Now, you know that the corrupted chunk is in the rows between 10000 and 14999. So, you can narrow the search by halving the query LIMIT clause.
select * from mytable order by id limit 2500 offset 10000;
Corrupted chunk read!
>
So, the error happens to be in the rows between 10000 and 12499. We halve again the rows limit.
select * from mytable order by id limit 1250 offset 10000;
>
Fetching the rows between 10000 and 12499 does not return any error. So the error must be in the rows between 11250 and 12499. We can confirm this by firing the query:
select * from mytable order by id limit 1250 offset 11250;
Corrupted chunk read!
>
So, we halve again the limit.
select * from mytable order by id limit 625 offset 11250;
>
select * from mytable order by id limit 625 offset 11875;
Corrupted chunk read!
>
...
You should continue narrowing until exactly finding the corrupted row:
...
select * from mytable order by id limit 1 offset 11963;
Corrupted chunk read!
>
Note that in this last query the LIMIT 1 clause exactly identifies only one row.
Finally, you have to find the id of the corrupted row and delete it (obviously you have a data loss):
psql> select id from mytable order by id limit 1 offset 11963;
   id
--------
 121212

psql> delete from mytable where id = 121212;
DELETE 1
>
During the search of the corrupted row, consider that, most likely, the corruption is in the last inserted/updated records, even if this is not a general rule. So you can choose a sort key that respects the physical insert/update so to lower the scan time.
If you prefer to fully automate the corrupted row search, consider using the following script (in csh syntax):
#!/bin/csh
set j = 0
while ($j < 58223) //here the total number of table rows
  psql -U pgsql -d mydatabase -c "SELECT * FROM mytable LIMIT 1 offset $j" >/dev/null || echo $j
  @ j++
end
This script prints the number of all the corrupted rows. In case of long tables, it can take long time since it performs as many queries as the number of table rows.
xyhtac wrote a tool that implements this algorithm with a binary search enhancement (way faster). You can find it here.
Credits
Credits to this post and to this tweet.
I’m using PostgreSQL 8.4.15. While running pg_dump to backup a database, I got the following error:
pg_dump: SQL command failed
pg_dump: Error message from server: ERROR:  missing chunk number 0 for toast value 123456789 in pg_toast_987654321
pg_dump: The command was: COPY public.my_table (id, .... all the columns ...)
When searching for this error message, I found a couple of references (here and here) that suggested to reindex the table. (In these discussions, there was a reference to querying the pg_class table to find the right pg_toast_XXXXXX value, but it seemed that it was because it wasn’t displayed in their error messages. I skipped this part because I had a value displayed in the error message. I guess it might be a convenience due to a later version of PostgreSQL.)
I ran the following:
REINDEX table pg_toast.pg_toast_987654321;
VACUUM ANALYZE my_table;
I’m now able to use pg_dump without errors.
What’s pg_toast and what did these commands actually do? Are these merely about simple cleanup or could they have got rid of some rows in that table? What could have caused the problem in the first place?
There are about 300000 rows in this table, but I would expect there to be only about 250 new rows since the previous successful backup (this table is only used for INSERT/SELECT, no UPDATEs).
Let’s suppose that the corrupted table is called mytable.
Many articles on the Internet suggest to fire the following query against the database:
psql> select reltoastrelid::regclass from pg_class where relname = 'mytable';

 reltoastrelid
-------------------------
 pg_toast.pg_toast_40948
(1 row)
and then to fire the following commands:
REINDEX table mytable;
REINDEX table pg_toast.pg_toast_40948;
VACUUM analyze mytable;
But in my case this was not enough.
Then, I computed the number of rows in mytable:
psql> select count(*) from mytable;

 count
-------
 58223
To find the corruption, it is possible to fetch data from the table until getting the ‘Missing chunk…’ error. So the following group of queries does the job:
select * from mytable order by id limit 5000 offset 0;
select * from mytable order by id limit 5000 offset 5000;
select * from mytable order by id limit 5000 offset 10000;
select * from mytable order by id limit 5000 offset 15000;
select * from mytable order by id limit 5000 offset 20000;
...
…and so on until getting the error. In this example, if you reach the offset of 55000 (55000 + 5000 is 60000 which exceeds the total number of records) without getting the error, then your table is not corrupted. The order by clause is necessary to make your query repeatable, i.e. assure that the query does not randomly return rows, and limit and offset clauses work as expected. If your table does not have an id field, you have to find a good field to order by. For performance reasons, it is preferable to select an indexed field.
In order to go faster and not get your console dirty, the query can be directly triggered from the console, redirecting the output to /dev/null and printing an error message only in case of error found:
psql -U pgsql -d mydatabase -c "select * from mytable order by id limit 5000 offset 0" > /dev/null || echo "Corrupted chunk read!"
The above syntax means: execute the query and redirect the output to /dev/null or, in case of error (||), write an error message.
Let’s suppose that the first query giving the error is the following:
select * from mytable order by id limit 5000 offset 10000;
Corrupted chunk read!
>
Now, you know that the corrupted chunk is in the rows between 10000 and 14999. So, you can narrow the search by halving the query LIMIT clause.
select * from mytable order by id limit 2500 offset 10000;
Corrupted chunk read!
>
So, the error happens to be in the rows between 10000 and 12499. We halve again the rows limit.
select * from mytable order by id limit 1250 offset 10000;
>
Fetching the rows between 10000 and 12499 does not return any error. So the error must be in the rows between 11250 and 12499. We can confirm this by firing the query:
select * from mytable order by id limit 1250 offset 11250;
Corrupted chunk read!
>
So, we halve again the limit.
select * from mytable order by id limit 625 offset 11250;
>
select * from mytable order by id limit 625 offset 11875;
Corrupted chunk read!
>
...
You should continue narrowing until exactly finding the corrupted row:
...
select * from mytable order by id limit 1 offset 11963;
Corrupted chunk read!
>
Note that in this last query the LIMIT 1 clause exactly identifies only one row.
Finally, you have to find the id of the corrupted row and delete it (obviously you have a data loss):
psql> select id from mytable order by id limit 1 offset 11963;
   id
--------
 121212

psql> delete from mytable where id = 121212;
DELETE 1
>
During the search of the corrupted row, consider that, most likely, the corruption is in the last inserted/updated records, even if this is not a general rule. So you can choose a sort key that respects the physical insert/update so to lower the scan time.
If you prefer to fully automate the corrupted row search, consider using the following script (in csh syntax):
#!/bin/csh
set j = 0
while ($j < 58223) //here the total number of table rows
  psql -U pgsql -d mydatabase -c "SELECT * FROM mytable LIMIT 1 offset $j" >/dev/null || echo $j
  @ j++
end
This script prints the number of all the corrupted rows. In case of long tables, it can take long time since it performs as many queries as the number of table rows.
I posted this same problem in a gist of mine, here.
Время на прочтение
9 мин
Количество просмотров 34K
Хочу поделиться с вами моим первым успешным опытом восстановления полной работоспособности базы данных Postgres. С СУБД Postgres я познакомился пол года назад, до этого опыта администрирования баз данных у меня не было совсем.

Я работаю полу-DevOps инженером в крупной IT-компании. Наша компания занимается разработкой программного обеспечения для высоконагруженных сервисов, я же отвечаю за работоспособность, сопровождение и деплой. Передо мной поставили стандартную задачу: обновить приложение на одном сервере. Приложение написано на Django, во время обновления выполняются миграции (изменение структуры базы данных), и перед этим процессом мы снимаем полный дамп базы данных через стандартную программу pg_dump на всякий случай.
Во время снятия дампа возникла непредвиденная ошибка (версия Postgres – 9.5):
pg_dump: Oumping the contents of table “ws_log_smevlog” failed: PQgetResult() failed.
pg_dump: Error message from server: ERROR: invalid page in block 4123007 of relatton base/16490/21396989
pg_dump: The command was: COPY public.ws_log_smevlog [...]
pg_dunp: [parallel archtver] a worker process dled unexpectedly
Ошибка «invalid page in block» говорит о проблемах на уровне файловой системы, что очень нехорошо. На различных форумах предлагали сделать FULL VACUUM с опцией zero_damaged_pages для решения данной проблемы. Что же, попрробеум…
Подготовка к восстановлению
ВНИМАНИЕ! Обязательно сделайте резервную копию Postgres перед любой попыткой восстановить базу данных. Если у вас виртуальная машина, остановите базу данных и сделайте снепшот. Если нет возможности сделать снепшот, остановите базу и скопируйте содержимое каталога Postgres (включая wal-файлы) в надёжное место. Главное в нашем деле – не сделать хуже. Прочтите это.
Поскольку в целом база у меня работала, я ограничился обычным дампом базы данных, но исключил таблицу с повреждёнными данными (опция -T, —exclude-table=TABLE в pg_dump).
Сервер был физическим, снять снепшот было невозможно. Бекап снят, двигаемся дальше.
Проверка файловой системы
Перед попыткой восстановления базы данных необходимо убедиться, что у нас всё в порядке с самой файловой системой. И в случае ошибок исправить их, поскольку в противном случае можно сделать только хуже.
В моём случае файловая система с базой данных была примонтирована в «/srv» и тип был ext4.
Останавливаем базу данных: systemctl stop postgresql@9.5-main.service и проверяем, что файловая система никем не используется и её можно отмонтировать с помощью команды lsof:
lsof +D /srv
Мне пришлось ещё остановить базу данных redis, так как она тоже исползовала «/srv». Далее я отмонтировал /srv (umount).
Проверка файловой системы была выполнена с помощью утилиты e2fsck с ключиком -f (Force checking even if filesystem is marked clean):
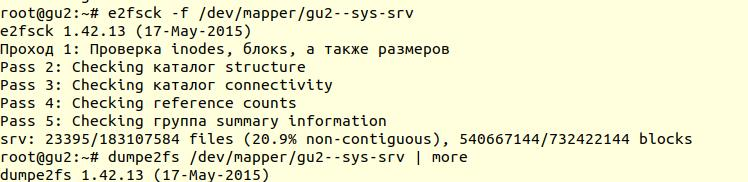
Далее с помощью утилиты dumpe2fs (sudo dumpe2fs /dev/mapper/gu2—sys-srv | grep checked) можно убедиться, что проверка действительно была произведена:

e2fsck говорит, что проблем на уровне файловой системы ext4 не найдено, а это значит, что можно продолжать попытки восстановить базу данных, а точнее вернуться к vacuum full (само собой, необходимо примонтирвоать файловую систему обратно и запустить базу данных).
Если у вас сервер физический, то обязательно проверьте состояние дисков (через smartctl -a /dev/XXX) либо RAID-контроллера, чтобы убедиться, что проблема не на аппаратном уровне. В моём случае RAID оказался «железный», поэтому я попросил местного админа проверить состояние RAID (сервер был в нескольких сотнях километров от меня). Он сказал, что ошибок нет, а это значит, что мы точно можем начать восстановление.
Попытка 1: zero_damaged_pages
Подключаемся к базе через psql аккаунтом, обладающим правами суперпользователя. Нам нужен именно суперпользователь, т.к. опцию zero_damaged_pages может менять только он. В моём случае это postgres:
psql -h 127.0.0.1 -U postgres -s [database_name]
Опция zero_damaged_pages нужна для того, чтобы проигнорировать ошибки чтения (с сайта postgrespro):
При выявлении повреждённого заголовка страницы Postgres Pro обычно сообщает об ошибке и прерывает текущую транзакцию. Если параметр zero_damaged_pages включён, вместо этого система выдаёт предупреждение, обнуляет повреждённую страницу в памяти и продолжает обработку. Это поведение разрушает данные, а именно все строки в повреждённой странице.
Включаем опцию и пробуем делать full vacuum таблицы:
VACUUM FULL VERBOSE
К сожалению, неудача.
Мы столкнулись с аналогичной ошибкой:
INFO: vacuuming "“public.ws_log_smevlog”
WARNING: invalid page in block 4123007 of relation base/16400/21396989; zeroing out page
ERROR: unexpected chunk number 573 (expected 565) for toast value 21648541 in pg_toast_106070
pg_toast – механизм хранения «длинных данных» в Postgres, если они не помещаются в одну страницу (по умолчанию 8кб).
Попытка 2: reindex
Первый совет из гугла не помог. После нескольких минут поиска я нашёл второй совет – сделать reindex повреждённой таблицы. Этот совет я встречал во многих местах, но он не внушал доверия. Сделаем reindex:
reindex table ws_log_smevlog
reindex завершился без проблем.
Однако это не помогло, VACUUM FULL аварийно завершался с аналогичной ошибкой. Поскольку я привык к неудачам, я стал искать советов в интернете дальше и наткнулся на довольно интересную статью.
Попытка 3: SELECT, LIMIT, OFFSET
В статье выше предлагали посмотреть таблицу построчно и удалить проблемные данные. Для начала необходимо было просмотреть все строки:
for ((i=0; i<"Number_of_rows_in_nodes"; i++ )); do psql -U "Username" "Database Name" -c "SELECT * FROM nodes LIMIT 1 offset $i" >/dev/null || echo $i; doneВ моём случае таблица содержала 1 628 991 строк! По-хорошему необходимо было позаботиться о партициирвоании данных, но это тема для отдельного обсуждения. Была суббота, я запустил вот эту команду в tmux и пошёл спать:
for ((i=0; i<1628991; i++ )); do psql -U my_user -d my_database -c "SELECT * FROM ws_log_smevlog LIMIT 1 offset $i" >/dev/null || echo $i; doneК утру я решил проверить, как обстоят дела. К моему удивлению, я обнаружил, что за 20 часов было просканировано только 2% данных! Ждать 50 дней я не хотел. Очередной полный провал.
Но я не стал сдаваться. Мне стало интересно, почему же сканирование шло так долго. Из документации (опять на postgrespro) я узнал:
OFFSET указывает пропустить указанное число строк, прежде чем начать выдавать строки.
Если указано и OFFSET, и LIMIT, сначала система пропускает OFFSET строк, а затем начинает подсчитывать строки для ограничения LIMIT.Применяя LIMIT, важно использовать также предложение ORDER BY, чтобы строки результата выдавались в определённом порядке. Иначе будут возвращаться непредсказуемые подмножества строк.
Очевидно, что вышенаписанная команда была ошибочной: во-первых, не было order by, результат мог получиться ошибочным. Во-вторых, Postgres сначала должен был просканировать и пропустить OFFSET-строк, и с возрастанием OFFSET производительность снижалась бы ещё сильнее.
Попытка 4: снять дамп в текстовом виде
Далее мне в голову пришла, казалось бы, гениальная идея: снять дамп в текстовом виде и проанализировать последнюю записанную строку.
Но для начала, ознакомимся со структурой таблицы ws_log_smevlog:

В нашем случае у нас есть столбец «id», который содержал уникальный идентификатор (счётчик) строки. План был такой:
- Начинаем снимать дамп в текстовом виде (в виде sql-команд)
- В определённый момент времени снятия дампа бы прервалось из-за ошибки, но тектовый файл всё равно сохранился бы на диске
- Смотрим конец текстового файла, тем самым мы находим идентификатор (id) последней строки, которая снялась успешно
Я начал снимать дамп в текстовом виде:
pg_dump -U my_user -d my_database -F p -t ws_log_smevlog -f ./my_dump.dumpСнятия дампа, как и ожидалось, прервался с той же самой ошибкой:
pg_dump: Error message from server: ERROR: invalid page in block 4123007 of relatton base/16490/21396989
Далее через tail я просмотрел конец дампа (tail -5 ./my_dump.dump) обнаружил, что дамп прервался на строке с id 186 525. «Значит, проблема в строке с id 186 526, она битая, её и надо удалить!» – подумал я. Но, сделав запрос в базу данных:
«select * from ws_log_smevlog where id=186529» обнаружилось, что с этой строкой всё нормально… Строки с индексами 186 530 — 186 540 тоже работали без проблем. Очередная «гениальная идея» провалилась. Позже я понял, почему так произошло: при удаленииизменении данных из таблицы они не удаляются физически, а помечаются как «мёртвые кортежи», далее приходит autovacuum и помечает эти строки удалёнными и разрешает использовать эти строки повторно. Для понимания, если данные в таблице меняются и включён autovacuum, то они не хранятся последовательно.
Попытка 5: SELECT, FROM, WHERE id=
Неудачи делают нас сильнее. Не стоит никогда сдаваться, нужно идти до конца и верить в себя и свои возможности. Поэтому я решил попробовать ешё один вариант: просто просмотреть все записи в базе данных по одному. Зная структуру моей таблицы (см. выше), у нас есть поле id, которое является уникальным (первичным ключом). В таблице у нас 1 628 991 строк и id идут по порядку, а это значит, что мы можем просто перербрать их по одному:
for ((i=1; i<1628991; i=$((i+1)) )); do psql -U my_user -d my_database -c "SELECT * FROM ws_log_smevlog where id=$i" >/dev/null || echo $i; doneЕсли кто не понимает, команда работает следующим образом: просматривает построчно таблицу и отправляет stdout в /dev/null, но если команда SELECT проваливается, то выводится текст ошибки (stderr отправляется в консоль) и выводится строка, содержащая ошибку (благодаря ||, которая означает, что у select возникли проблемы (код возврата команды не 0)).
Мне повезло, у меня были созданы индексы по полю id:

А это значит, что нахождение строки с нужным id не должен занимать много времени. В теории должно сработать. Что же, запускаем команду в tmux и идём спать.
К утру я обнаружил, что просмотрено около 90 000 записей, что составляет чуть более 5%. Отличный результат, если сравнивать с предыдущим способом (2%)! Но ждать 20 дней не хотелось…
Попытка 6: SELECT, FROM, WHERE id >= and id <
У заказчика под БД был выделен отличный сервер: двухпроцессорный Intel Xeon E5-2697 v2, в нашем расположении было целых 48 потоков! Нагрузка на сервере была средняя, мы без особых проблем могли забрать около 20-ти потоков. Оперативной памяти тоже было достаточно: аж 384 гигабайт!
Поэтому команду нужно было распараллелить:
for ((i=1; i<1628991; i=$((i+1)) )); do psql -U my_user -d my_database -c "SELECT * FROM ws_log_smevlog where id=$i" >/dev/null || echo $i; doneТут можно было написать красивый и элегантный скрипт, но я выбрал наиболее быстрый способ распараллеливания: разбить диапазон 0-1628991 вручную на интервалы по 100 000 записей и запустить отдельно 16 команд вида:
for ((i=N; i<M; i=$((i+1)) )); do psql -U my_user -d my_database -c "SELECT * FROM ws_log_smevlog where id=$i" >/dev/null || echo $i; doneНо это не всё. По идее, подключение к базе данных тоже отнимает какое-то время и системные ресурсы. Подключать 1 628 991 было не очень разумно, согласитесь. Поэтому давайте при одном подключении извлекать 1000 строк вместо одной. В итоге команда преобразилоась в это:
for ((i=N; i<M; i=$((i+1000)) )); do psql -U my_user -d my_database -c "SELECT * FROM ws_log_smevlog where id>=$i and id<$((i+1000))" >/dev/null || echo $i; doneОткрываем 16 окон в сессии tmux и запускаем команды:
1) for ((i=0; i<100000; i=$((i+1000)) )); do psql -U my_user -d my_database  -c "SELECT * FROM ws_log_smevlog where id>=$i and id<$((i+1000))" >/dev/null || echo $i; done
2) for ((i=100000; i<200000; i=$((i+1000)) )); do psql -U my_user -d my_database  -c "SELECT * FROM ws_log_smevlog where id>=$i and id<$((i+1000))" >/dev/null || echo $i; done
…
15) for ((i=1400000; i<1500000; i=$((i+1000)) )); do psql -U my_user -d my_database -c "SELECT * FROM ws_log_smevlog where id>=$i and id<$((i+1000))" >/dev/null || echo $i; done
16) for ((i=1500000; i<1628991; i=$((i+1000)) )); do psql -U my_user -d my_database  -c "SELECT * FROM ws_log_smevlog where id>=$i and id<$((i+1000))" >/dev/null || echo $i; done
Через день я получил первые результаты! А именно (значения XXX и ZZZ уже не сохранились):
ERROR:  missing chunk number 0 for toast value 37837571 in pg_toast_106070
829000
ERROR:  missing chunk number 0 for toast value XXX in pg_toast_106070
829000
ERROR:  missing chunk number 0 for toast value ZZZ in pg_toast_106070
146000
Это значит, что у нас три строки содержат ошибку. id первой и второй проблемной записи находились между 829 000 и 830 000, id третьей – между 146 000 и 147 000. Далее нам предстояло просто найти точное значение id проблемных записей. Для этого просматриваем наш диапазон с проблемными записями с шагом 1 и идентифицируем id:
for ((i=829000; i<830000; i=$((i+1)) )); do psql -U my_user -d my_database -c "SELECT * FROM ws_log_smevlog where id=$i" >/dev/null || echo $i; done
829417
ERROR:  unexpected chunk number 2 (expected 0) for toast value 37837843 in pg_toast_106070
829449
for ((i=146000; i<147000; i=$((i+1)) )); do psql -U my_user -d my_database -c "SELECT * FROM ws_log_smevlog where id=$i" >/dev/null || echo $i; done
829417
ERROR:  unexpected chunk number ZZZ (expected 0) for toast value XXX in pg_toast_106070
146911
Счастливый финал
Мы нашли проблемные строки. Заходим в базу через psql и пробуем их удалить:
my_database=# delete from ws_log_smevlog where id=829417;
DELETE 1
my_database=# delete from ws_log_smevlog where id=829449;
DELETE 1
my_database=# delete from ws_log_smevlog where id=146911;
DELETE 1
К моему удивлению, записи удалились без каких-либо проблем даже без опции zero_damaged_pages.
Затем я подключился к базе, сделал VACUUM FULL (думаю делать было необязательно), и, наконец, успешно снял бекап с помощью pg_dump. Дамп снялся без каких либо ошибок! Проблему удалось решить таким вот тупейшим способом. Радости не было предела, после стольких неудач удалось найти решение!
Благодарности и заключение
Вот такой получился мой первый опыт восстановления реальной базы данных Postgres. Этот опыт я запомню надолго.
Ну и напоследок, хотел бы сказать спасибо компании PostgresPro за переведённую документацию на русский язык и за полностью бесплатные online-курсы, которые очень сильно помогли во время анализа проблемы.
If you have encountered error messages related to missing chunk number 0 for toast value when trying to launch an application, you are in the right place to resolve them. A chunk number is a unique number that is assigned to each element in a given file. When this number is missing, it can lead to various errors. In this guide, we’ll explain what the missing chunk number 0 for toast value means and how you can resolve it.
A missing chunk number 0 for toast value error is a system error. It appears when an application fails to identify the correct version of a file. This error occurs because a particular file contains a chunk of memory with a missing chunk number 0.
Causes of a Missing Chunk Number 0 for Toast Value
In some cases, the cause of this error can be attributed to a bug in the software or hardware that you are using. In other cases, the cause may be due to corrupted or incomplete application files. In some cases, the cause may also be related to a third-party utility or program that is conflicting with the main application.
How to Resolve a Missing Chunk Number 0 for Toast Value
To fix this issue, you should first try resetting the application and rebooting your computer. If this does not resolve the issue, then you can try uninstalling and reinstalling the program.
If that does not work, then you can try running a system scan with an antivirus program. This should detect and remove any malicious files that could be causing the error. If none of these methods work, then you may need to update the application manually or contact the support team of the software to help you resolve the issue.
FAQ
What is a Chunk Number?
A chunk number is a unique number that is assigned to an element within a file. This number helps applications identify the correct version of the file.
What Does a Missing Chunk Number 0 for Toast Value Error Mean?
A missing chunk number 0 for toast value error typically occurs when an application fails to identify the correct version of a file because it is missing a chunk of memory with a number 0.
How Can I Resolve a Missing Chunk Number 0 for Toast Value Error?
The best way to resolve a missing chunk number 0 for toast value error is to try resetting the application. If this does not work, then you can try uninstalling and reinstalling the program. If none of these methods work, then you may need to update the application manually or contact the software’s support team.
Yes, in some cases the cause may be due to corrupted or incomplete application files, which can lead to this error.
Yes, in some cases the cause may also be related to a third-party utility or program that is conflicting with the main application.
- https://dba.stackexchange.com/questions/31008/pg-dump-and-error-missing-chunk-number-0-for-toast-value