
I am new to kernel module development. So I started with simple hello world kernel module
I am using «The Linux Kernel Module Programming Guide» book for the reference (it is addressing to kernel 2.6).
I installed kernel-devel and kenel headers with yum. I am using fedora 17.
I found that a symlink
/lib/modules/3.3.4-5.fc17.x86_64/build -> /usr/src/kernels/3.3.4-5.fc17.x86_64
Now, I have one hello-1.c (the simple kernel module and a Makefile in my working directory)
The Makefile is:
obj-m += hello-1.o
all:
    make -C /lib/modules/$(shell uname -r)/build M=$(PWD) modules
clean:
    make -C /lib/modules/$(shell uname -r)/build M=$(PWD) clean
when in $make i get error:
make -C /lib/modules/3.3.4-5.fc17.x86_64/build M=/root/kerneldev modules
make: *** /lib/modules/3.3.4-5.fc17.x86_64/build: No such file or directory.  Stop.
make: *** [all] Error 2
I make same program on Centos-5.x it run successfully , because the /lib/modules/3.3.4-5.fc17.x86_64/build was containing the actual module (not a symlink).
What should be problem ? why such difference?
asked Jan 30, 2013 at 12:36
![]()
Nikhil RupanawarNikhil Rupanawar
4,03110 gold badges34 silver badges51 bronze badges
1
The message
make: *** /lib/modules/3.3.4-5.fc17.x86_64/build: No such file or directory. Stop.
Is telling you that the directory path after the *** does not exist. Make issues this exact format of error when the -C directory doesn’t exist. Other non-existent path situations will result in more words. For example, if the /lib/modules/3.3.4-5.fc17.x86_64/build directory does exist but it contains no makefile, make will specifically say no makefile found.
So the other answers are giving you ideas to help you create that directory with its proper contents.
And this answer is intended to also help people who have the above form of error message and for whom installing ‘kernel-devel’ will not help, by explaining the message itself.
answered Feb 20, 2020 at 18:46
![]()
I have few doubts like, where your issuing the make command.
Your current directory seems to be
M=/root/kerneldev
whether your hello-1.c is in /root/kerneldev folder.
answered Jan 30, 2013 at 19:25
![]()
kzskzs
1,7733 gold badges24 silver badges44 bronze badges
try «yum install kernel-devel»(for kernel headers)
answered Jul 16, 2013 at 9:50
![]()
Время на прочтение
6 мин
Количество просмотров 13K
Методы отладки
В этой части поговорим об общих методах и проблемах отладки. В конечном итоге, отладка — это солянка из всего, что работает в данной конкретной ситуации. Эти методы работают для меня и мне приходится полагаться на них даже в случае проблем с простейшими makefile. Может быть, они помогут и тебе тоже.
Отладка Makefile /часть 1/
Один из очень раздражающих багов в make 3.80 был в сообщении об ошибке в makefile, где make указывал номер строки, и обычно этот номер строки был неверный. Я не удосужился исследовать из-за чего эта проблема возникает: из-за импортируемых файлов, присваиваний многострочных переменных или из-за пользовательских макросов. Обычно, make дает номер строки больше чем должен был бы. В сложных makefile бывает что номер не совпадает на 20 строк.
Часто наиболее простой путь увидеть значение переменной это напечатать его в ходе выполнения цели. И хотя распечатать легко можно с помощью warning, в долгой перспективе поможет сэкономить много времени немного усилий на добавление общей цели debug для вывода переменных. Вот примерный код цели debug:
debug:
       $(for v,$(V),
         $(warning $v = $($v)))
Для того чтобы использовать её, нужно перечислить имена переменных которые надо распечатать в командной строке и собрать debug цель:
$ make V="USERNAME SHELL" debug
makefile:2: USERNAME = Owner
makefile:2: SHELL = /bin/sh.exe
make: debug is up to date.
Если уж совсем делать всё волшебно, то можно использовать MAKECMDGOALS переменную, чтобы избежать присвоения переменной V:
debug:
       $(for v,$(V) $(MAKECMDGOALS),
         $(if $(filter debug,$v),,$(warning $v = $($v))))
Теперь можно выводить переменные просто перечислив их в командной строке. Однако, я не рекомендую этот способ, так как предупреждения make о невозможности обновлении переменных (так как они указаны как цели) могут сбить с толку:
$ make debug PATH SHELL
makefile:2: USERNAME = Owner
makefile:2: SHELL = /bin/sh.exe
make: debug is up to date.
make: *** No rule to make target USERNAME. Stop.
В то время как make выводит команды из сценариев цели до их выполнения, он не выводит команды выполняющиеся в shell функции. Часто эти команды сложные и неуловимые в том плане, что могут выполняться как незамедлительно, так и в отложенной манере, если они были вызваны в значении рекурсивной переменной. Один из способов увидеть эти команды — включить отладку в самой оболочке:
DATE := $(shell date +%F)
OUTPUT_DIR = out-$(DATE)
make-directories := $(shell [ -d $(OUTPUT_DIR) ] || mkdir -p $(OUTPUT_DIR))
all: ;
Если это запустить с опцией отладки sh, мы увидим:
$ make SHELL="sh -x"
+ date +%F
+ '[' -d out-2004-05-11 ']'
+ mkdir -p out-2004-05-11
Можно заметить, что также выводятся значения всех переменных и выражений.
Часто встречаются сильно вложенные выражения, например, для оперирования с именами файлов:
FIND_TOOL = $(firstword $(wildcard $(addsuffix /$(1).exe,$(TOOLPATH))))Ничего хорошего в отладке таких выражений нет. Один из разумных подходов будет их разворот и печать каждого подвыражения:
$(warning $(TOOLPATH))
$(warning $(addsuffix /$(1).exe,$(TOOLPATH)))
$(warning $(wildcard $(addsuffix /$(1).exe,$(TOOLPATH))))
Весьма нудно, но без настоящего отладчика это лучший путь (иногда единственный) для определения значений различных подвыражений.
Общие сообщения об ошибках
В руководстве make есть замечательный раздел со списком сообщений об ошибках make и их причин. Мы рассмотрим немного из наиболее часто встречаемых. Некоторые описанные проблемы, строго говоря, не являются ошибками make, такие как синтаксические в командных сценариях, но все же обычными проблемами для разработчиков. Полный список смотри в руководстве.
Сообщение make об ошибке имеет стандартный формат:
makefile:n: *** message. Stopили:
make:n: *** message. Stop.где makefile строка — это имя файла или импортированного файла в котором произошла ошибка. Следующая часть — номер строки, в которой произошла ошибка, далее следуют три звездочки, и, наконец, само сообщение.
Заметим, что это задача make запускать другие программы и таким образом, если при этом возникают ошибки, скорее всего проблемы в твоём makefile вызвали ошибки в этих других программах. Для примера, ошибки оболочки могут быть из-за плохо сформированных командных сценариев, или ошибок компилятора из-за некорректных аргументов командной строки. Выяснение того, какая программа выдала сообщение об ошибке — первоочередная задача при решении проблемы. К счастью, сообщения make довольно очевидны.
Синтаксические ошибки
Обычно это типографические ошибки: пропущенные скобки, пробелы после запятых в параметрах функции, и так далее.
Одна из наиболее частых ошибок для новых пользователей make это опускание скобок вокруг имен переменных:
foo:
     for f in $SOURCES;
     do
        …
     done
Скорее всего, make развернёт переменную $S в ничего, и оболочка выполнит цикл только раз со значением OURCES в f. В зависимости от того, что ты собрался делать с f, можно получить забавные сообщения оболочки:
OURCES: No such file or directoryно можно и не получить сообщения вовсе. Помни — имена переменных обрамляются скобками.
missing separator
Сообщение:
makefile:2:missing separator. Stop.или (в GNU make — пер.):
makefile:2:missing separator (did you mean TAB instead of 8 spaces?). Stop.обычно означает make искал разделитель, такой как :, =, или табуляцию и не нашел ни одного. Вместо этого, он нашел что-то что он не понял.
commands commence before first target
Эта ошибка появляется в основном в середине makefile, когда строка вне командного сценария начинается с отступа (пробелы или символ табуляции). make сделает все возможное, чтобы устранить неоднозначность этой ситуации, но если строка не может быть идентифицирована как присваивание значения, условное выражение или многострочное определение макроса, make решит что это неправильно размещенная команда.
unterminated variable reference
Это простая, но распространённая ошибка. Она означает, что ты забыл закрыть имя переменной или вызов функции правильным количеством скобок. С сильно вложенными вызовами функций и именами переменных make файлы становятся похожими на Lisp! Избежать этого поможет хороший редактор, который умеет сопоставлять скобки, такой как Emacs.
Ошибки в командных сценариях
Есть три типа частых ошибок в командных сценариях: пропущенная точка с запятой в многострочных командах, незаконченная или неверная переменная пути, или просто команда, которая просто обнаружила проблему в ходе выполнения.
Мы обсуждали пропущенные точки с запятыми в разделе «лучшие практики», поэтому не будем на этом останавливаться здесь.
Классическое сообщение:
bash: foo: command not foundвыводится, когда оболочка не смогла найти команду foo. Так, оболочка поискала в каждой папке из переменной PATH исполняемый файл и не нашла совпадений. Чтобы исправить такую ошибку, нужно обновить PATH переменную, обычно в .profile (Bourne shell), .bashrc (bash) или .cshrc (C shell). Конечно, можно также установить PATH в самом makefile, и экспортировать PATH из make.
Если же команда завершилась с ошибкой, она выходит с ненулевым статусом выхода. В этом случае, make отчитается об ошибке со следующим сообщением:
$ make
touch /foo/bar
touch: creating /foo/bar: No such file or directory
make: *** [all] Error 1
Здесь touch команда не сработала, что напечатало своё собственное сообщение объясняющее сбой. Следующая строка — это итоговая ошибка make. Упавшая цель в makefile указана в квадратных скобках, а затем статус выхода упавшей программы. Если программа вышла по сигналу, а не с ненулевым статусом выхода, то make напечатает более подробное сообщение.
Заметим также, что команды под знаком @ также могут упасть. В этом случае сообщение об ошибке может возникнуть как будто оно из ниоткуда.
В обоих случаях ошибка происходит из программ запускаемых make, нежели от самого make.
No Rule to Make Target
Это сообщение имеет две формы:
make: *** No rule to make target XXX. Stop.и:
make: *** No rule to make target XXX, needed by YYY. Stop.Это означает, что make решил обновить файл XXX, но make не смог найти ни одного правила для выполнения работы. make ищет во всех явных и неявных правилах в его базе данных прежде чем сдаться и вывести это сообщение.
Есть три причины для этой ошибки:
- В твоем makefile отсутствует необходимое правило для обновления файла. В этом случае тебе необходимо добавить правило с описанием как построить цель.
- В makefile — опечатка. Или
makeищет неверный файл или в правиле построения этого файла указан неверный файл. Если в makefile используются переменные, то опечатки становится еще труднее отыскать. Иногда единственный путь быть точно уверенным в значении сложного имени файла это напечатать его или печатая переменную напрямую или исследуя внутреннюю базу данныхmake. -
Файл должен быть, но
makeне находит его или из-за того, что его нет, илиmakeне знает где его искать. Конечно, иногдаmakeабсолютно прав. Файла нет — похоже мы забыли его скачать из VCS. Еще чаще,makeне может найти файл из-за того, что исходник расположен где-то еще. Иногда исходник в другом дереве исходников, или может файл генерируется другой программой и создался в папке артефактов сборки.Overriding Commands for Target
makeпозволяет только один командный сценарий для цели (за исключением «::» правил, которые редко используются). Если встретится больше чем один командный сценарий для одной цели,makeвыведет предупреждение:makefile:5: warning: overriding commands for target fooТакже он может вывести сообщение:
makefile:2: warning: ignoring old commands for target fooПервое предупреждение показывает строку, на которой был найден второй сценарий команд; тогда как второе предупреждение указывает на позицию исходного переопределённого командного сценария.
В сложных makefile цели часто определены несколько раз, каждый раз добавляя еще собственные требования. Одно из этих определений цели обычно содержит командный сценарий, но в ходе разработки или отладки очень легко добавить еще один и не заметить, что существующий набор команд уже переопределен.
Например, мы могли бы определить общную цель во включаемом файле:
# Create a jar file.
$(jar_file):
        $(JAR) $(JARFLAGS) -f $@ $^
и позволим нескольким отдельным makefile добавить свои собственные требования. Мы могли бы записать в makefile:
# Set the target for creating the jar and add prerequisites
jar_file = parser.jar
$(jar_file): $(class_files)
Если непреднамеренно добавить командный сценарий в такой makefile, make выдаст предупреждение переопределения.
I am trying to create a Makefile target which first checks to see if my Docker container exists. If it exists then I want to issue the Docker Container Restart command otherwise I want to issue the Docker Run command to create and start the container.
I have coded the below but am getting the error shown below. The result = 1 is correct as I do have a container running. I have removed the container and tested that the result then becomes 0 which is also correct. The problem seems to be when I try to use result in the ifeq statement. Can someone please advise me what I am doing wrong? (I have temporarily commented out the docker commands and replaced them with echo true / false just while I am debugging).
start_docker_myapp:
    result = $(shell (docker ps -a | grep myapp ) | wc -l )
    ifeq (${result}, 1)
        @echo 'true'
# docker restart ${IMAGE}
    else
        @echo 'false'
# docker run -v ${DIR}/var/log/docker:/var/log/myapp -p 1812:1812/udp  -p 1813:1813/udp --detach  --name ${IMAGE} $(REGISTRY)/$(IMAGE):$(TAG)
    endif
Output from Terminal
$ make start_docker_myapp
result =        1
make: result: No such file or directory
make: *** [start_docker_myapp] Error 1
$
asked May 28, 2019 at 14:34
![]()
5
There are a number of issues with your Makefile (beyond the question of whether a Makefile is the appropriate solution):
- conditional directives aren’t part of a recipe, so they mustn’t start with a tab;
- conditional directives are evaluated as the Makefile is read, so variables must be assigned previously and can’t be target-specific;
docker ps -areturns information on all known containers, including non-running containers;- phony targets should be declared as such.
The following works:
result = $(shell docker ps -f name=myapp -q | wc -l)
start_docker_myapp:
ifeq ($(strip $(result)),1)
    @echo true
else
    @echo false
endif

.PHONY: start_docker_myapp
answered May 28, 2019 at 15:01
![]()
Stephen KittStephen Kitt
403k54 gold badges1039 silver badges1139 bronze badges
1
To set a variable value inside a target, you must use the eval syntax:
start_docker_myapp:
    $(eval result = $(shell (docker ps -a | grep myapp ) | wc -l ))
    @echo "result is " result
    endif
Alternatively, you can evaluate this variable outside a rule:
result = $(shell (docker ps -a | grep myapp ) | wc -l )

start_docker_myapp:
    @echo "result is " result
    endif
answered May 28, 2019 at 14:53
![]()
MathieuMathieu
2,6691 gold badge20 silver badges25 bronze badges
1
Instead of implementing a mix of shell script code and make variables I suggest to implement this as a pure shell script integrated in the Makefile.
Instead of checking the output of grep with wc and comparing the number you can simply check grep‘s exit code.
# don't forget to declare start_docker_myapp as a phony target
.PHONY: start_docker_myapp

# Assuming you intended to use Make variables everywhere, I changed all ${VAR} to $(VAR).
# If your grep supports option -q you can use this instead of redirection to /dev/null.

start_docker_myapp:
    if docker ps -a | grep myapp >/dev/null;
    then
        echo 'true';
        # docker restart $(IMAGE);
    else
        echo 'false';
        # docker run -v $(DIR)/var/log/docker:/var/log/myapp -p 1812:1812/udp  -p 1813:1813/udp --detach  --name $(IMAGE) $(REGISTRY)/$(IMAGE):$(TAG);
    fi
Or with boolean operators instead of if...then...
.PHONY: start_docker_myapp

start_docker_myapp:
    docker ps -a | grep myapp >/dev/null && docker restart $(IMAGE) || docker run -v $(DIR)/var/log/docker:/var/log/myapp -p 1812:1812/udp  -p 1813:1813/udp --detach  --name $(IMAGE) $(REGISTRY)/$(IMAGE):$(TAG)
answered May 28, 2019 at 15:40
![]()
BodoBodo
5,84416 silver badges27 bronze badges
1
You must log in to answer this question.
Not the answer you’re looking for? Browse other questions tagged
.
Not the answer you’re looking for? Browse other questions tagged
.
Утилита make в Linux используется для сборки и компиляции программ из исходных файлов. Инструкции о компиляции утилита берет из файла makefile. В некоторых дистрибутивах Linux утилита make не установлена по умолчанию (например, в Linux CentOS 8), поэтому при запуске команды сборки, вы увидеть ошибку:
bash: make: command not found
![]()
Или
bash: /usr/bin/make: No such file or directory
В консоли Ubuntu появляется уведомление:
The program 'make' is currently not installed. You can install it by typing:
sudo apt install make
Проверьте, что команда make установлена и путь к ней есть в PATH
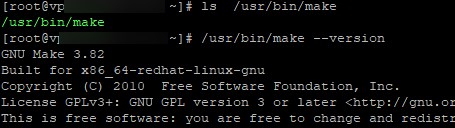
В первую очередь проверьте, что команда make установлена в вашем дистрибутиве Linux и путь к ее директории указан в переменной окружения PATH.В большинстве случае файл make должен находится в директории /usr/bin или /usr/local/bin. Проверьте, есть ли исполняемый бинарный файл make в этих каталогах:
$ ls /usr/bin/make
Если вы нашли исполняемый файл make в этой директории, проверьте что вы можете запустить его с абсолютным путем:
$ /usr/bin/make –version
GNU Make 3.82
Built for x86_64-redhat-linux-gnu
Copyright (C) 2010  Free Software Foundation, Inc.
Затем проверьте, что путь к директории с файлом make указан в переменной окружения PATH:
$ which make
$ echo "$PATH"
/usr/local/sbin:/usr/local/bin:/usr/sbin:/usr/bin:/sbin:/bin:/usr/games:/usr/local/games:/snap/bin

В нашем примере путь /usr/bin содержится в переменной окружения PATH. Чтобы добавить в PATH новую директорию, используйте команду:
export PATH=$PATH:/path_to/dir
Чтобы сделать это изменение постоянным для текущего пользователя, отредактируйте файл ~/.bashrc:
$ nano ~/.bashrc
Добавьте в конец строку:
export PATH=$PATH:/path_to/dir
Как установить команду make в различных ОС?
Если утилита действительно отсутствует на вашем компьютере, ниже мы покажем установить команду make в разных версиях Linux.
В Fedora, Oracle/Rocky Linux, CentOS, Fedora и RHEL утилита make можно установить отдельно с помощью команды:
# yum install make
или
# dnf install make

Или в составе группы пакетов Development tools (потребуется около 500 Мб на диске).
# dnf groupinstall "Development tools" (в RHEL/CentOS 
или
# yum groupinstall "Development tools"
Если make уже установлен, но не работает, можете переустановить его:
# yum reinstall make
В deb-based дистрибутивах, таких Ubuntu, Debian, Raspbian, Kali Linux можно установить пакет make с помощью команд:
#apt-get install make
Также команда make содержится в метапакете build-essential. Для его установки выполните:
# apt-get install build-essential
Для переустановки пакета make, выполните:
# apt-get install --reinstall make
Или
# sudo dpkg-reconfigure make
Или:
# apt-get remove make
# apt-get install make
В дистрибутивах на основе Arch (Arch Linux, Manjaro) утилиту make можно установить отдельно:
$ sudo pacman –Syu
$ sudo pacman -S make
Или вместе с пакетом base-devel:
$sudo pacman -Sy base-devel
Для автоматической установки команды make и средств разработки в Docker контейнере можно добавить в docker файл инструкцию:
RUN apt-get install -y build-essential
В Windows можно установить команду make с помощью менеджера пакета Chocolatey. Установите choco (если не установлен):
PS> Set-ExecutionPolicy Bypass -Scope Process -Force; [System.Net.ServicePointManager]::SecurityProtocol = [System.Net.ServicePointManager]::SecurityProtocol -bor 3072; iex ((New-Object System.Net.WebClient).DownloadString('https://community.chocolatey.org/install.ps1'))
Затем можете установить make в Windows:
PS> choco install make
Для сборки из исходников также используется команда CMake. Если она не установлена, появится ошибка cmake command not found.
This typically indicates that you haven’t installed some dependency of the program you are trying to compile. Depending on the header file in question and the program you are trying to compile, you have a couple of options:
Target software exists in the Ubuntu repositories
Sometimes you want to compile from source a package already provided by Ubuntu (to get a different version, perhaps, or to patch it). If the software hasn’t changed too much, you can use apt to get the dependencies:
sudo apt-get build-dep <package-name>
This should install all the packages needed to build the Ubuntu package of that software (which may have fewer or more packages than what your source package actually needs).
If you only need to make some minor change in the source, or apply a patch, you might even be able to save a significant bit of effort by letting apt and dpkg do the legwork:
sudo apt-get build-dep <package-name>
apt-get source <package-name>
This will download the source files of the package, including everything needed to make a package of it. The files will be in a directory named <package-name>-<some-version>. Enter it, make all the changes you want, and then do:
sudo dpkg-buildpackage -b -us -uc
This creates unsigned binary package(s) in the parent directory (cd ..). You can then use dpkg to install these packages:
sudo dpkg -i <package-name>_<some-version>_<architecture>.deb
Examples:
- Changing one build option in a package
- Can’t edit plugins/sudoers/ins_*.h
Target software is not present in the Ubuntu repositories
You can still try your luck with the specific header file missing. Use either the Ubuntu Packages index (the option to search the contents of packages) or apt-file to search for the file. Sometimes multiple packages may provide similarly named files, in which case, prefer:
- Files in
/usr/include. - Packages of your architecture (use
uname -mto know what your architecture is). - Any specific versions your software depends on (such as Qt4 instead of Qt5) — check the
READMEandINSTALLfiles in the source (if present). - Packages whose names end in
-dev, which typically include headers needed for compiling.
See: How do I find the package that provides a file?
The make tool in Linux is used to build and compile programs from source files. The utility takes instructions for compilation from the makefile. In some Linux distributions, the make command is not installed by default (for example, in Linux CentOS 8), so when you run the build command, you will see an error:
bash: make: command not found
![]()
Or:
bash: /usr/bin/make: No such file or directory
The Ubuntu console will display a message:
The program 'make' is currently not installed. You can install it by typing:

sudo apt install make
How to Fix the ‘Make: Command Not Found’ in Linux?
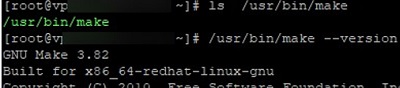
First of all, make sure that the make command is installed on your Linux distribution and that the path to its directory is included in the PATH environment variable. In most cases, the make file should be located in /usr/bin or /usr/local/bin. Check if these directories contain an executable make binary:
$ ls /usr/bin/makeIf you find a make executable in this directory, check to see if you can run it using an absolute path:
$ /usr/bin/make –versionGNU Make 3.82 Built for x86_64-redhat-linux-gnu
Check that the make directory path is in the PATH environment variable:
$ which make
$ echo "$PATH"
/usr/local/sbin:/usr/local/bin:/usr/sbin:/usr/bin:/sbin:/bin:/usr/games:/usr/local/games:/snap/bin

In this example, the /usr/bin path is included in the PATH environment variable. To add a new directory to PATH, use the command:
$ export PATH=$PATH:/path_to/dirEdit the ~/.bashrc file to make this change permanent for the current user:
$ nano ~/.bashrcAdd a line to the end of file:
export PATH=$PATH:/path_to/dir
How to Install Make on Different Operating Systems?
If you really do not have this utility on your computer, here is how to install the make command on various versions of Linux.
On rpm-based Linux distribution ( Fedora, Oracle/Rocky Linux, CentOS, Fedora, and RHEL), you can install the make tool using the command:
# yum install makeor
# dnf install make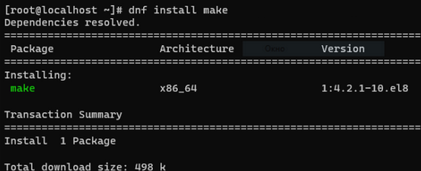
Or as part of the Development tools package group (requires about 500 MB of disk space).
# dnf groupinstall "Development tools" (on RHEL/CentOS
or
# yum groupinstall "Development tools" (in previous RPM versions of Linux distros)
If make is already installed but doesn’t work, you can reinstall it:
# yum reinstall makeOn deb-based distros such as Ubuntu, Debian, Raspbian, Kali Linux, you can install the make package using the command:
# apt-get install makeThe make command is also contained in the build-essential metapackage. To install it run:
# apt-get install build-essentialTo reinstall the make command, run:
# apt-get install --reinstall makeOr:
# sudo dpkg-reconfigure makeor:
# apt-get remove make
# apt-get install make
On Arch-based distributions (Arch Linux, Manjaro), the make utility can be installed as follows:
$ sudo pacman –Syu
$ sudo pacman -S make
Or together with the base-devel package:
$ sudo pacman -Sy base-develTo automatically install the make command and development tools in a Docker container, you can add the following directive to the docker file:
RUN apt-get install -y build-essentialOn Windows, you can install the make command using the Chocolatey package manager. Install choco (if not already installed):
PS> Set-ExecutionPolicy Bypass -Scope Process -Force; [System.Net.ServicePointManager]::SecurityProtocol = [System.Net.ServicePointManager]::SecurityProtocol -bor 3072; iex ((New-Object System.Net.WebClient).DownloadString('https://community.chocolatey.org/install.ps1'))You can then install the make package on Windows:
PS> choco install makeThe CMake command is also used to build from source in Linux. If it is not installed, an error cmake command not found will appear.
![]()
Im new to this project and im having some trouble getting the blink example compiled and uploaded for a windows/cygwin setup. Here is the makefile im attempting to use (note: i didnt do any symbolic linking because my Arduino library isnt installed to the default location and is instead on my D: drive):
# Arduino Make file. Refer to https://github.com/sudar/Arduino-Makefile

ARDUINO_DIR   = D:/Arduino
BOARD_TXT	= D:/Arduino/hardware/arduino/avr
BOARD_TAG    = uno
include ../../Arduino.mk


# --- leonardo (or pro micro w/leo bootloader)
#BOARD_TAG    = leonardo
#MONITOR_PORT = /dev/ttyACM0
#include /usr/share/arduino/Arduino.mk

# --- mega2560 ide 1.0
#BOARD_TAG    = mega2560
#ARDUINO_PORT = /dev/ttyACM0
#include /usr/share/arduino/Arduino.mk

# --- mega2560 ide 1.6
#BOARD_TAG    = mega
#BOARD_SUB    = atmega2560
#MONITOR_PORT = /dev/ttyACM0
#ARDUINO_DIR  = /where/you/installed/arduino-1.6.5
#include /usr/share/arduino/Arduino.mk

# --- nano ide 1.0
#BOARD_TAG    = nano328
#MONITOR_PORT = /dev/ttyUSB0
#include /usr/share/arduino/Arduino.mk

# --- nano ide 1.6
#BOARD_TAG   = nano
#BOARD_SUB   = atmega328
#ARDUINO_DIR = /where/you/installed/arduino-1.6.5
#include /usr/share/arduino/Arduino.mk

# --- pro mini
#BOARD_TAG    = pro5v328
#MONITOR_PORT = /dev/ttyUSB0
#include /usr/share/arduino/Arduino.mk

# --- sparkfun pro micro
#BOARD_TAG         = promicro16
#ALTERNATE_CORE    = promicro
#BOARDS_TXT        = $(HOME)/arduino/hardware/promicro/boards.txt
#BOOTLOADER_PARENT = $(HOME)/arduino/hardware/promicro/bootloaders
#BOOTLOADER_PATH   = caterina
#BOOTLOADER_FILE   = Caterina-promicro16.hex
#ISP_PROG          = usbasp
#AVRDUDE_OPTS      = -v
#include /usr/share/arduino/Arduino.mk

# --- chipkit
#BOARD_TAG = mega_pic32
#MPIDE_DIR = /where/you/installed/mpide-0023-linux64-20130817-test
#include /usr/share/arduino/chipKIT.mk

# --- pinoccio
#BOARD_TAG         = pinoccio256
#ALTERNATE_CORE    = pinoccio
#BOOTLOADER_PARENT = $(HOME)/arduino/hardware/pinoccio/bootloaders
#BOOTLOADER_PATH   = STK500RFR2/release_0.51
#BOOTLOADER_FILE   = boot_pinoccio.hex
#CFLAGS_STD        = -std=gnu99
#CXXFLAGS_STD      = -std=gnu++11
#include /usr/share/arduino/Arduino.mk

# --- fio
#BOARD_TAG = fio
#include /usr/share/arduino/Arduino.mk

# --- atmega-ng ide 1.6
#BOARD_TAG    = atmegang
#BOARD_SUB    = atmega168
#MONITOR_PORT = /dev/ttyACM0
#ARDUINO_DIR  = /where/you/installed/arduino-1.6.5
#include /usr/share/arduino/Arduino.mk

# --- teensy3
#BOARD_TAG   = teensy31
#ARDUINO_DIR = /where/you/installed/the/patched/teensy/arduino-1.0.6
#include /usr/share/arduino/Teensy.mk

# --- mighty 1284p
#BOARD_TAG         = mighty_opt
#BOARDS_TXT        = $(HOME)/arduino/hardware/mighty-1284p/boards.txt
#BOOTLOADER_PARENT = $(HOME)/arduino/hardware/mighty-1284p/bootloaders
#BOOTLOADER_PATH   = optiboot
#BOOTLOADER_FILE   = optiboot_atmega1284p.hex
#ISP_PROG          = usbasp
#AVRDUDE_OPTS      = -v
#include /usr/share/arduino/Arduino.mk

# --- mightycore
#ALTERNATE_CORE = MightyCore
#BOARD_TAG = 1284
#MCU = atmega1284p
#BOARD_TAG = 644
#MCU = atmega644p
#VARIANT = standard
#F_CPU = 16000000L
#include /usr/share/arduino/Arduino.mk

# ---  megacore
#BOARD_TAG      = 128
#ALTERNATE_CORE = megacore
#F_CPU          = 16000000L
#include /usr/share/arduino/Arduino.mk

# --- sanguino 644p
#BOARD_TAG      = atmega644p
#ALTERNATE_CORE = sanguino
#ISP_PROG       = usbasp
#AVRDUDE_OPTS   = -v
#include /usr/share/arduino/Arduino.mk

# --- atmega328p on breadboard
#BOARD_TAG    = atmega328bb
#ISP_PROG     = usbasp
#AVRDUDE_OPTS = -v
#BOARDS_TXT   = $(HOME)/arduino/hardware/breadboard/boards.txt
#include /usr/share/arduino/Arduino.mk
and here is the console output of a make upload:
D:DocumentsCompSciArduinoArduino-MakefileexamplesBlink>make upload
-------------------------
Arduino.mk Configuration:
- [AUTODETECTED]       CURRENT_OS = WINDOWS
- [USER]               ARDUINO_DIR = D:/Arduino
- [COMPUTED]           ARDMK_DIR = /cygdrive/d/Documents/CompSci/Arduino/Arduino-Makefile (relative to Common.mk)
- [AUTODETECTED]       ARDUINO_VERSION = 189
- [DEFAULT]            ARCHITECTURE = avr
- [DEFAULT]            ARDMK_VENDOR = arduino
- [DEFAULT]            ARDUINO_SKETCHBOOK = C:UsersZee/Documents/Arduino
- [COMPUTED]           ARDUINO_VAR_PATH = D:/Arduino/hardware/arduino/avr/variants (from ARDUINO_DIR)
- [COMPUTED]           BOARDS_TXT = D:/Arduino/hardware/arduino/avr/boards.txt (from ARDUINO_DIR)
- [BUNDLED]            AVR_TOOLS_DIR = D:/Arduino/hardware/tools/avr (in Arduino distribution)
- [COMPUTED]           ARDUINO_LIB_PATH = D:/Arduino/libraries (from ARDUINO_DIR)
- [COMPUTED]           ARDUINO_PLATFORM_LIB_PATH = D:/Arduino/hardware/arduino/avr/libraries (from ARDUINO_DIR)
- [DEFAULT]            USER_LIB_PATH = C:UsersZee/Documents/Arduino/libraries (in user sketchbook)
- [DEFAULT]            PRE_BUILD_HOOK = pre-build-hook.sh
- [USER]               BOARD_TAG = uno
- [COMPUTED]           CORE = arduino (from build.core)
- [COMPUTED]           VARIANT = standard (from build.variant)
- [COMPUTED]           OBJDIR = build-uno (from BOARD_TAG)
- [COMPUTED]           ARDUINO_CORE_PATH = D:/Arduino/hardware/arduino/avr/cores/arduino (from ARDUINO_DIR, BOARD_TAG and boards.txt)
- [ASSUMED]            MONITOR_BAUDRATE = 9600
- [DEFAULT]            OPTIMIZATION_LEVEL = s
- [DEFAULT]            MCU_FLAG_NAME = mmcu
- [DEFAULT]            CFLAGS_STD = -std=gnu11
- [DEFAULT]            CXXFLAGS_STD = -std=gnu++11
- [AUTODETECTED]       DEVICE_PATH =
- [DEFAULT]            FORCE_MONITOR_PORT =
- [AUTODETECTED]       Size utility: AVR-aware for enhanced output
- [COMPUTED]           BOOTLOADER_PARENT = D:/Arduino/hardware/arduino/avr/bootloaders (from ARDUINO_DIR)
- [COMPUTED]           ARDMK_VERSION = 1.6
- [COMPUTED]           CC_VERSION = 5.4.0 (avr-gcc)
-------------------------
mkdir -p build-uno
make reset
make[1]: Entering directory '/cygdrive/d/Documents/CompSci/Arduino/Arduino-Makefile/examples/Blink'
/cygdrive/d/Documents/CompSci/Arduino/Arduino-Makefile/bin/ard-reset-arduino
D:Python 3.6.4python.exe: can't open file '/cygdrive/d/Documents/CompSci/Arduino/Arduino-Makefile/bin/ard-reset-arduino': [Errno 2] No such file or directory
make[1]: *** [../../Arduino.mk:1737: reset] Error 2
make[1]: Leaving directory '/cygdrive/d/Documents/CompSci/Arduino/Arduino-Makefile/examples/Blink'
make: *** [../../Arduino.mk:1694: upload] Error 2
Im thinking the problem is related to improper installation of the dependancies? I got cygwin and the make and Perl packages. I have a windows installation of python (which im thinking may be the problem though i dont want to install a cygwin package of python because i worry about conflicts with my windows installation) and used pip install pyserial. Im confused by what is meant by «Alternatively, if you have setup Cygwin to use a Windows Python installation, simply install using pip:» in the readme. What is meant by setup? Did i miss a step where i should be telling cygwin about my windows installation of python? which python in the cygwin terminal gives `/cygdrive/d/Python 3.6.4/python’ so I feel like cygwin is finding my python correctly. After installing cygwin I also added the following to the Path environment variable: D:cygwinbin (if thats relevant).
![]()
![]()
Copy link
Contributor
Author
Thanks for the confirmation. I installed the cygwin python3 binary but im still getting the same error.
make reset
make[1]: Entering directory '/cygdrive/d/Documents/CompSci/Arduino/Arduino-Makefile/examples/Blink'
/cygdrive/d/Documents/CompSci/Arduino/Arduino-Makefile/bin/ard-reset-arduino
D:Python 3.6.4python.exe: can't open file '/cygdrive/d/Documents/CompSci/Arduino/Arduino-Makefile/bin/ard-reset-arduino': [Errno 2] No such file or directory
make[1]: *** [../../Arduino.mk:1737: reset] Error 2
make[1]: Leaving directory '/cygdrive/d/Documents/CompSci/Arduino/Arduino-Makefile/examples/Blink'
make: *** [../../Arduino.mk:1694: upload] Error 2
It seems that its still trying to use my windows installation of python and not the cygwin one. Any thoughts on what i need to do to force the make/cygwin to use only the cygwin python installation?
Im assuming it would have to be a change to a path. Im looking at https://cygwin.com/cygwin-ug-net/setup-env.html where it says: «The PATH environment variable is used by Cygwin applications as a list of directories to search for executable files to run. This environment variable is converted from Windows format (e.g. C:Windowssystem32;C:Windows) to UNIX format (e.g., /cygdrive/c/Windows/system32:/cygdrive/c/Windows) when a Cygwin process first starts. Set it so that it contains at least the x:cygwinbin directory where «x:cygwin is the «root» of your cygwin installation if you wish to use cygwin tools outside of bash. This is usually done by the batch file you’re starting your shell with».
https://www.cygwin.com/cygwin-ug-net/using-effectively.html says: «A few Windows tools, such as find.exe, link.exe and sort.exe, may conflict with the Cygwin versions make sure that you use the full path (/usr/bin/find) or that your Cygwin bin directory comes first in your PATH «.
Is there a specific cygwin path or are these referring to editing the windows path variable? It seems like its saying that i need to make sure that D:cygwinbin, which is currently included in my windows path, is the first directory in the path list? Does that mean any time i need to work with the windows version i need to edit my windows path so that the cygwin directory isnt at the top of the path anymore and vice versa if i want to work with the cygwin installation?
![]()
Copy link
Contributor
Author
So digging into Arduino.mk it contains the following for reset code:
| # Reset | |
| ifndef RESET_CMD | |
| ARD_RESET_ARDUINO := $(shell which ard-reset-arduino 2> /dev/null) | |
| ifndef ARD_RESET_ARDUINO | |
| # same level as *.mk in bin directory when checked out from git | |
| # or in $PATH when packaged | |
| ARD_RESET_ARDUINO = $(ARDMK_DIR)/bin/ard-reset-arduino | |
| endif | |
| ifneq (,$(findstring CYGWIN,$(shell uname -s))) | |
| # confirm user is using default cygwin unix Python (which uses ttySx) and not Windows Python (which uses COMx) | |
| ifeq ($(shell which python),/usr/bin/python) | |
| RESET_CMD = $(ARD_RESET_ARDUINO) $(ARD_RESET_OPTS) $(DEVICE_PATH) | |
| else | |
| RESET_CMD = $(ARD_RESET_ARDUINO) $(ARD_RESET_OPTS) $(call get_monitor_port) | |
| endif | |
| else | |
| RESET_CMD = $(ARD_RESET_ARDUINO) $(ARD_RESET_OPTS) $(call get_monitor_port) | |
| endif | |
| endif | |
| ifneq ($(CATERINA),) | |
| ERROR_ON_CATERINA = $(error On $(BOARD_TAG), raw_xxx operation is not supported) | |
| else | |
| ERROR_ON_CATERINA = | |
| endif |
Im very unfamiliar with makefile syntax so forgive me but it looks like line 864 is checking the output of the which python command. For me i get this when inside the cygwin terminal:
$ which python
/cygdrive/d/Python 3.6.4/python
To get the cygwin installation path i need to do:
Zee@MSI ~
$ which python3
/usr/bin/python3
I assume im entering the else in line 866 because its not finding the cygwin path that it wants but im not sure what line 867 is doing then… What should i be changing so that which python gives the cygwin path in the cygwin terminal?
![]()
The reset script calls /usr/bin/env python, which means on your system, the Windows python which python is being invoked.
It seems like its saying that i need to make sure that D:cygwinbin, which is currently included in my windows path, is the first directory in the path list? Does that mean any time i need to work with the windows version i need to edit my windows path so that the cygwin directory isnt at the top of the path anymore and vice versa if i want to work with the cygwin installation?
Correct, welcome to the pain of Windows and Cygwin installations! I would suggest using Windows Subsystem Linux (WSL) instead — it’s a much better solution and what I have moved to when I need to use a Windows system. The snippet you shared has no influence on the script path resolution, only the port, which is different even still with a Cygwin Python so is irrelevant.
There is a lot of confusion here a out of the scope really of an issue with this project. You should be able to get it sorted however, if you get which python to result in /usr/bin/python.
![]()
Copy link
Contributor
Author
The problem is fixed if you download the cygwin python2 package instead of python27 or some other variant…
![]()
Copy link
Contributor
Author
Running into a new error with pyserial. With the following makefile settings:
ARDUINO_DIR   = D:/Arduino
BOARD_TXT	= D:/Arduino/hardware/arduino/avr
BOARD_TAG    = uno
MONITOR_PORT = com4
ARCHITECTURE = avr
include ../../Arduino.mk
I get the following error:
make reset
make[1]: Entering directory '/cygdrive/d/Documents/CompSci/UABiomed/exoskeleton/setup/Arduino-Makefile/examples/Blink'
/cygdrive/d/Documents/CompSci/UABiomed/exoskeleton/setup/Arduino-Makefile/bin/ard-reset-arduino  /dev/ttyS3
Traceback (most recent call last):
  File "/cygdrive/d/Documents/CompSci/UABiomed/exoskeleton/setup/Arduino-Makefile/bin/ard-reset-arduino", line 133, in <module>
    ser = serial.Serial(args.port[0], 115200)
  File "/usr/lib/python2.7/site-packages/serial/serialutil.py", line 240, in __init__
    self.open()
  File "/usr/lib/python2.7/site-packages/serial/serialposix.py", line 272, in open
    self._reconfigure_port(force_update=True)
  File "/usr/lib/python2.7/site-packages/serial/serialposix.py", line 326, in _reconfigure_port
    raise SerialException("Could not configure port: {}".format(msg))
serial.serialutil.SerialException: Could not configure port: (22, 'Invalid argument')
make[1]: *** [../../Arduino.mk:1737: reset] Error 1
make[1]: Leaving directory '/cygdrive/d/Documents/CompSci/UABiomed/exoskeleton/setup/Arduino-Makefile/examples/Blink'
make: *** [../../Arduino.mk:1694: upload] Error 2
Any idea what the issue is here?
![]()
Copy link
Contributor
Author
As an update: a partner found that this issue is resolved when you first upload a blank sketch through the arduino IDE. So after uploading a blank sketch through the IDE you can do make upload and it will properly upload the blink sketch…
Does anyone have any idea why this is a problem?
Error: This tutorial will explain how to fix “Can’t exec make: No such file or directory at /usr/share/perl/5.14/CPAN/Distribution.pm” error while executing a Perl program.
Can't exec "/usr/bin/make": No such file or directory at
> /usr/share/perl/5.14/CPAN/Distribution.p
Solution:
If you get this error while compiling an application or executing a Perl program, then here’s how you can solve it.
Looking at the error message "Can't exec /usr/bin/make", it’s clear that the OS is missing 'make'. Run the below command to see if make is installed in the system.
# whereis make
If there are no results displayed, then install make as shown below:
On Ubuntu variants:
# apt-get install build-essential
The build-essential package will install other tools that are required along with make.
On CentOS/Fedora/RedHat variants:
# yum groupinstall "Development Tools"
The "Development Tools" package will install tools that are required along with make.
Check if make is installed by typing 'make' command or using whereis command.
$ whereis make
make: /usr/bin/make /usr/share/man/man1/make.1.gz
That’s it!