Kodi is a useful open-source media player software. The application makes it easier to share media across multiple devices but some users have been reaching out to us with Kodi Error 2 Share Not Available message that they see on their screens. This error prevents users from being able to share or access files on different devices.

Make sure to implement all the solutions that we have listed in this article and also to read through the reasons due to which the error occurs in the first place. In addition to that, start implementing the solutions in the same manner in which they have been presented and stop when you have fixed the error 2 share not available Kodi issue.
What Causes the Kodi Error 2 Share Not Available Issue?
After going through the majority of the listed solutions, we concluded that the following must be the paramount reasons due to which it is triggered.
- Account Permissions: It is possible that you haven’t properly given permissions due to which the Kodi Error 2 Share Not Available issue is being seen. Therefore, we suggest that you try and fix this issue by applying the solution that we have mentioned below.
- Network Connection: The network connection that you are using might also be responsible in certain cases for this error. In order to circumvent or confirm this, you can follow the solution below to identify errors with your network connection.
Now that we have taken you through almost all of the listed solutions, you can finally start implementing the solutions.
Fixing Kodi Error 2 Share Not Available issue:
Solution 1: Look Into Account Permissions
Changing some permission settings might help you solve this error. The error might be occurring due to certain devices not having permission. Perform these checks for ensuring the account permissions:
- Check the “Settings” of the shared folder to ensure that the account the other device is signed in to has access to the shared folder.
- Make sure that the device “Permission Settings” allow these devices to access the shared folder.
Solution 2: Try Rebooting
If you are facing the Kodi error 2 for the first time in a long time, then it might be that a small bug or error is causing this share not available message. The solution, in this case, is easier than most of the troubleshooting procedures:
- Turn your device “OFF” and do not turn it “ON” for 5-10 minutes.

Turn OFF Kodi Device - Plug the device back in and turn it “ON”.

Doing this alone might be able to trigger some connection to the network and solve the share not available error.
Solution 3: Log Out Of Your Kodi Account
If turning the device off doesn’t help to solve the error, then logging out of your Kodi account might do it. Follow the steps below:
- “Log Out” of the Kodi account from the device on which you’re facing the error and restart the device.

Logout Kodi Account - “Log In” to the Kodi account from the device and try to open the shared folder.

This is a relatively simple solution to try and has been reported quite effective by the users to resolve the error 2 share not available kodi.
Solution 4: Check the Network Connection
To access a shared folder on some device, Kodi requires the device on which the media is stored and the device on which it is to be accessed to have the same network connection. This is an important condition due to security reasons. So you could be getting the Kodi error 2 just because your devices are not connected to the same network. Make sure that the device you wish to access the media from and the device it is stored in, are both connected to the same network.
Solution 5: Add SMB to Kodi
- Go to the bottom of the “Browse For New Shares” list and select “Add Network Location”.
- In the add network window, select “Windows Network (SMB)” for the protocol option and then select the server name.

Choosing the Windows Network Option - For the “Type In the Network Address Of Your Server” option type, type in your device name.
Note: If you do not know your device name follow these steps:

Press the “Window + I” keys together to go to Settings and then select “System>About” from the left pane.

On the very top of the window, you will see the “Device Name” under Device Specifications.
- Once you know the device name then in the “Shared Folder” option mention the name of the folder you wish to add.
- Sharing the folder might require a “Username & Password”, enter the credentials if needed and select “OK”.
- Now you should be able to see the shared file in the “Browse For A New Share” list.
Following these steps, you can add an SMB source to Kodi. In some cases this procedure solved the Kodi share not available error quite effectively.
Follow the above-indexed procedures to get rid of the problem but for any further queries or concerns feel free to Contact Us here.

Alan is a hardcore tech enthusiast that lives and breathes tech. When he is not indulged in playing the latest video games, he helps users with technical problems that they might run into. Alan is a Computer Science Graduate with a Masters in Data Science.

Несмотря на то, что Kodi является стабильным приложением, иногда могут появляться проблемы, как и с любым программным обеспечением.
Я написал эту статью, чтобы помочь пользователям устранить неполадки просто и быстро.
Используйте эти ссылки, чтобы перейти к нужной части руководства:
Содержание
- Kodi не запускается (сбой при запуске)
- Kodi виснет, лагает и прекращает работать
- Kodi не может подключиться к источнику (веб-сайту)
- В Kodi не работает плагин
- Бесплатное ПО для удаленного доступа
- Установка и настройка Kodi
- Выбираем правильную версию
- Устанавливаем Kodi
- Запускаем Kodi и меняем язык
- Добавляем музыкальные файлы и фотографии
- Добавляем в медиатеку фильмы и сериалы
- Воспроизводим фильмы и сериалы
- Рекомендуем к прочтению
- Загрузите последнюю версию Visual C++
Если у вас есть новый компьютер с Windows 10, или если вы недавно переустановили систему, Коди иногда может не запускаться. Вместо этого программа аварийно завершает работу при запуске, не давая вам сообщение об ошибке.
Во многих случаях установка Visual C++ может решить эту проблему. Итак, перейдите на веб-сайт Microsoft и загрузите последнее обновление.
- Обновите Kodi до последней доступной версии
С каждым новым обновлением плеер получает множество исправлений багов. Возможно, та проблема, которая вызывает сбои, уже решена в новой версии.
Повторите эти действия:
- Откройте официальный сайт и выберите операционную систему в разделе «Choose Your Weapon».
- Загрузите нужный файл и установите поверх старой версии. (Её не нужно удалять.)
- Отключите аппаратное ускорение
Зависание и лаги можно устранить путём отключения аппаратного ускорения. Особенно часто эта проблема встречается на устройствах на базе Андроид, на телевизорах и приставках в том числе.
- Перейдите в Настройки — Проигрыватель.
- Откройте вкладку Видео и включите экспертный режим (нажмите на иконку шестерёнки в левом нижнем углу).
- Отключите параметр, как показано на скриншоте.
- Перезагрузите программу.

Kodi не может подключиться к источнику (веб-сайту)
Каждый раз, когда вы хотите добавить внешний источник, нужно добавлять адрес сайта (URL).
Например, это происходит при установке дополнения или добавлении IPTV-плейлиста. Если Коди не удаётся открыть URL-адрес, всплывает уведомление о том, что невозможно подключиться к сайту.
Что можно сделать:
- В первую очередь проверьте, правильно ли введён адрес источника.
- Проверьте, начинается ли URL-адрес с «HTTP» или «HTTPS» и наличие прописных или строчных букв.
Если вы на 100% уверены, что правильно набрали адрес, то проблема на стороне сайта (он временно не работает или отключён навсегда).
В этом случае попробуйте установить дополнение или плейлист из другого источника.
В Kodi не работает плагин
- Обновите дополнение
После запуска приложение будет пытаться искать новые версии дополнений. Если есть доступные обновления, их можно увидеть в разделе дополнений под логотипом Kodi.
Вы узнаете этот значок в виде круговой стрелки. Нажмите на неё, чтобы выполнить ручное обновление.

Время от времени проверяйте наличие новых обновлений. Убедитесь, что часто используемые дополнения постоянно обновляются.
Если плагин берёт информацию со стороннего сервера (например, торренты, погодные и новостные дополнения), то он может быть неисправным из-за отключения сайта или удаления файла на сервере.

Представьте себе сцену … На вашем домашнем ПК у вас есть мультимедийная библиотека, настроенная внутри KODI, и теперь вы хотели бы иметь эту же коллекцию на другом устройстве или лучше получить доступ к одной совместной библиотеке. Таким образом, у нас будет доступ к нему с нашего смартфона, планшета, ноутбука, AndroidTV, другого ПК и т . Д. Вопрос прост, можем ли мы получить доступ ко всей этой коллекции совместно с другим устройством?
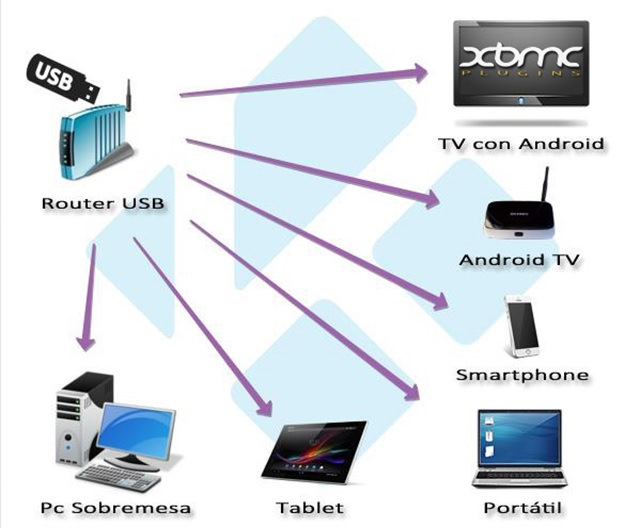
устройство логически всегда должно быть включено, чтобы доступ к библиотеке был … Я думал о домашнем ПК, который мы обычно включаем почти ежедневно, но мне что-то гораздо лучше … Использование маршрутизатор как устройство
«мать», в основном потому, что у нас всегда есть это, и потому что у него есть USB-порт для подключения пэндре. Внутри pendrive мы можем разместить библиотеку и таким образом всегда иметь доступ к ней с любого устройства.
2. Начнем с того, что нам нужно в качестве основного дополнения к последней версии Beta3 версии Pelisalacarta, которая поддерживает, поскольку я упоминал о совместимости с SMB для обнаружения файлов . STRM .
Мы скачать аддон отсюда и установите его .
3. Как только мы его установим, мы входим и переходим в раздел КОНФИГУРАЦИЯ / ПРЕДПОЧТЕНИЯ и вводим раздел МАРШРУТЫ :
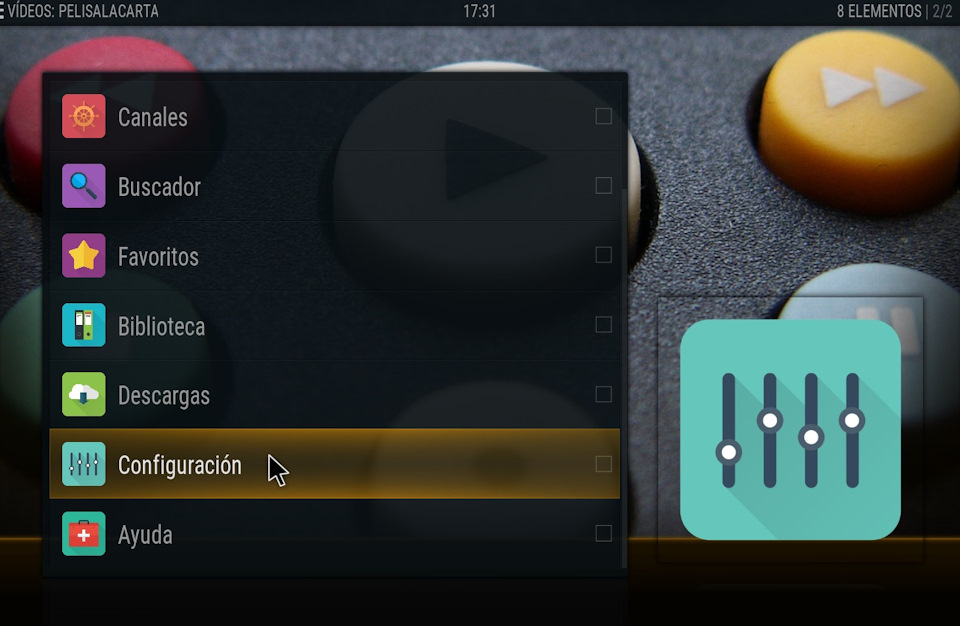

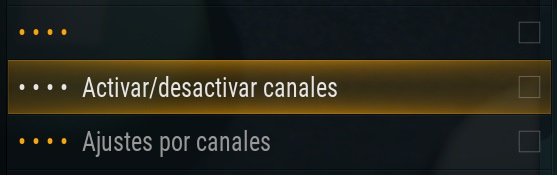
после этого мы оставим клик на OK и вернемся к предыдущему меню … Прежде чем продолжить комментировать план информации о том, что эта последняя версия Addon содержит интересный вариант для активации или деактивации каналов:
Для этого мы перейдем к VIDEOS / FILES / Add Videos / Search
и найдите путь к двум папкам (в моем случае smb: // COMTREND / Usb1_1 ).
Когда же мы присвоить имя нажмите на OK и видимчто он создал новый значок с именем присвоенной. Мы вошли внутрь, и если все пойдет хорошо, мы увидим две папки (серия и кино).
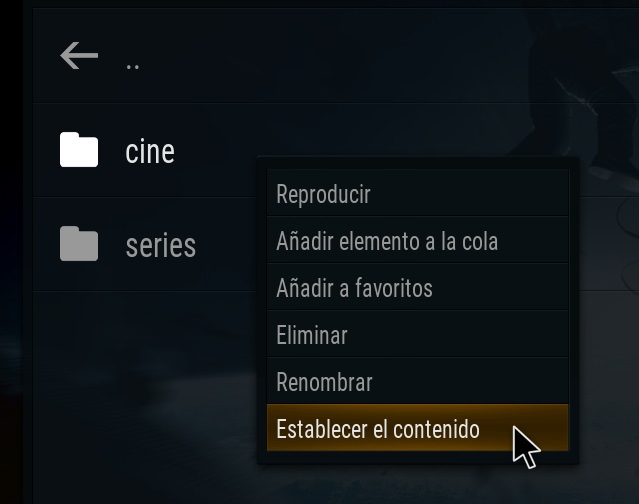
Теперь мы скажем KODI, что каждая папка, чтобы он мог правильно читать информацию каждый раз, когда мы добавляем содержимое в библиотеку. Например, для папки SERIES мы разместим себя над папкой и правой кнопкой мыши или клавишей C на клавиатуре или нажав в течение 2 секунд. на сенсорных экранах мы получим доступ к выпадающему меню следующим образом:

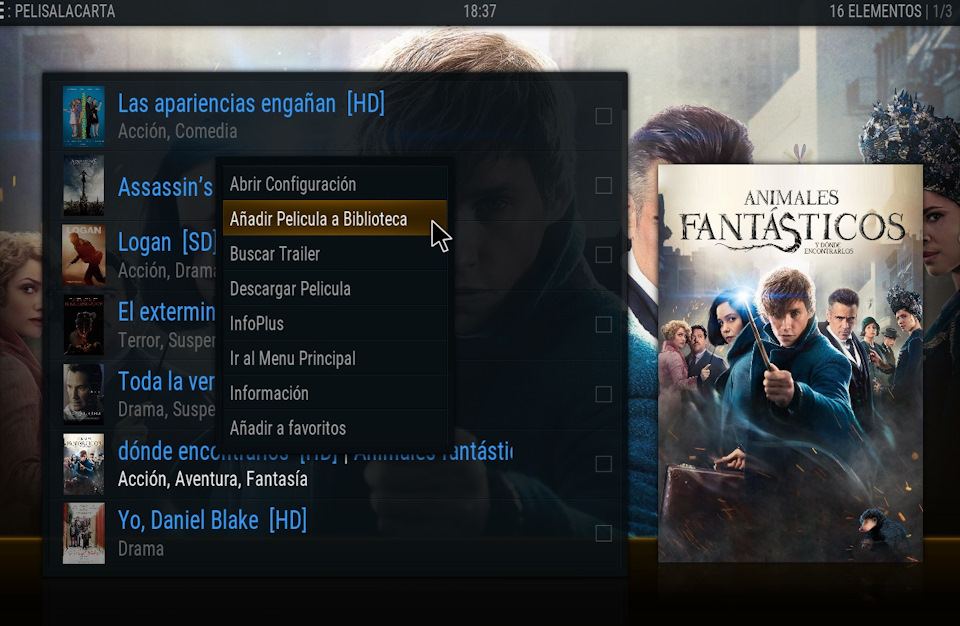
откройте раздел Addic Pelisalacarta, Movies и выберите любой канал.
В общем, мы можем добавить этот контент двумя способами: один — до ввода содержимого из раскрывающегося меню или добавления его один раз внутри, как вы можете видеть в этих двух снимках: после добавления он запустит процесс и закончит сообщением о том, что содержимое «x» было успешно добавлено в библиотеку. 6. У нас уже есть первый контент, добавленный в библиотеку, чтобы убедиться, что он был добавлен хорошо, мы можем перейти к«матерному»маршруту, который мы установили в разделе 3, внутри мы должны иметь две подпапки (фильмы и сериалы)

7. Мы видели, как добавить контент и обновить его на остальных устройствах, но если мы хотим сделать обратное, это означает, что нам нужно использовать другой аддон под названием LIBRARY AUTO UPDATER который будет отвечать за сканирование библиотеки устройств с целью устранения всего, что мы ранее удалили на маршруте «мать».
Например, вы используете планшет, и вы удаляете серию, которую вы уже видели ( чтобы удалить ее из коллекции, вы должны поместить ее правой кнопкой мыши или клавишей C, а в появившемся меню мы выбираем MANAGE и DELETE из коллекции ).
Теперь вы включаете ПК, и Auto Updater библиотеки дополнений начнет работать, когда вы проверите, что серия, которую мы удалили с планшета, не находится на пути « мать », она также удалит ее из коллекции, размещенной на ПК, и все это, потому что помните, что мы всегда используем один и тот же маршрут для всех устройств.
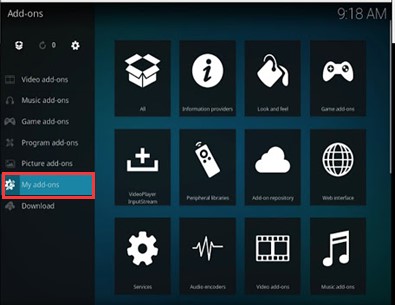
Чтобы установить этот аддон, мы должны перейти к:
ADJUSTMENTS / ADDONS / Install from Repository.
Прибыв сюда, мы выбираем официальный репозиторий KODI под названием « Kodi Add-on Repository », который уже предварительно установлен, затем переходим к « Addons of Programs » и ищем БИБЛИОТЕКА Auto Updater .

Хотите слушать музыку и смотреть видео в своей домашней беспроводной сети? Хорошим и, без сомнения, многофункциональным решением в этом случае будет Kodi. Как настроить программу, читайте в нашей статье.
Kodi представляет собой оптимальное решение для всех пользователей, которые хотят управлять своими изображениями, коллекцией музыкальных треков и видеофайлов на ПК и при этом иметь возможность воспроизводить контент на другом стационарном компьютере, ноутбуке, или телевизоре. При этом не имеет значения, где хранятся мультимедийные файлы: на локальном жестком диске, USB-накопителе или в NAS-сервере.
Еще один плюс: Kodi не стоит ни копейки. Функциональность росла на протяжении лет и расширялась за счет многочисленных инструментов. Кроме того, бесплатные дополнения усиливают дополнительные функции. Прекрасно и то, что Kodi загружает информацию, постеры и фоновую графику из Интернета и включает их в базу данных. Если Kodi неправильно распознает фильм или сериал, можно исправить ошибку вручную.
Еще одна причина популярности: программное обеспечение доступно для систем NAS, Raspberry Pi, а также для планшетов, смартфонов и приставок, которые работают на базе ОС Android. Мы покажем вам, как установить Kodi в Windows 10, настроить параметры и записать мультимедийные файлы в базу данных для расширения дополнительной информации и потоковой передачи в сети Wi-Fi.
Бесплатное ПО для удаленного доступа
Если вы хотите использовать медиацентр Kodi не только для воспроизведения мультимедийных файлов непосредственно на ПК, но и для проигрывания музыки, фильмов и сериалов на включенных в домашнюю сеть телевизионных устройствах — используйте гаджет на Android или iOS в качестве пульта дистанционного управления. Это необычайно облегчает навигацию. Для этого установите одно из двух бесплатных приложений: Official Kodi Remote для iOS или Kore, Official Remote for Kodi для Android.
Функциональность приложений для медиацентра чрезвычайно широка. Вы можете перемещаться по управляемым с помощью Kodi коллекциям фотографий, музыки и видео, составлять плейлисты, управлять воспроизведением и удобно переключаться между соответствующими меню Kodi.
Тем, кто любит снабжать свой архив кино и сериалов обложками и постерами или кадрами из фильмов, понравится, что приложение отображает в списке видео не только заголовки, но и картинки. Так что можно выбирать сериалы по постеру или раскадровке — и выглядит это весьма привлекательно. Выбор облегчают и всплывающие описания фильмов и сериалов. О том, насколько просто дистанционно управлять Kodi с помощью официального приложения для Android, вы сможете прочесть на следующей странице.
К сожалению, в официальных приложениях для дистанционного управления Kodi придется отказаться от функции потокового воспроизведения, с помощью которой можно воспроизводить мультимедийные файлы под управлением Kodi на ПК непосредственно на смартфонах и планшетах. Если потоковая передача играет для вас решающую роль, стоит обратить внимание на приложение Yatse, The XBMC/Kodi Remote в Google Play Store. Функция потоковой передачи данных здесь поддерживается, но она платная.
Установка и настройка Kodi
Тот, кто хочет испытать на практике, как работает Kodi, может скачать программу с официального сайта разработчика. Установка выполняется легко и быстро. Тем не менее при первом запуске стоит учесть некоторые моменты.
Выбираем правильную версию
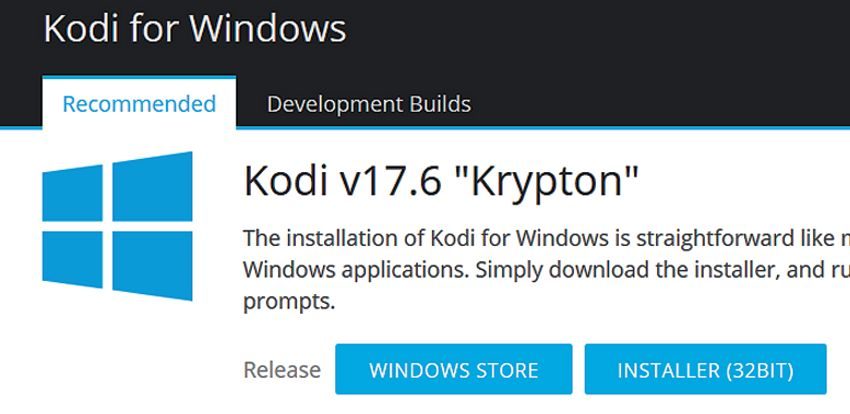 Для установки многофункционального медиацентра у вас есть два способа. В Windows 10 просто запустите установочный файл. Также можно скачать программу со страницы производителя kodi.tv, если вам нужен вариант для Linux или Mac OS Х. На главной странице сайта выберите вкладку «Download», чтобы перейти к соответствующему разделу.
Устанавливаем Kodi
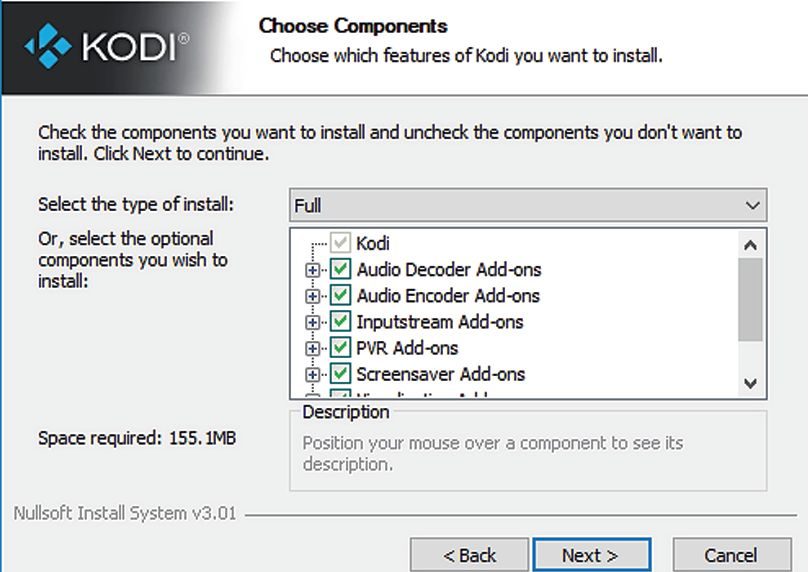 Мастер настройки Kodi поможет вам при установке. В первом диалоговом окне нажмите на кнопку «Next» и подтвердите ознакомление с условиями лицензионного соглашения, нажав кнопку «I Agree». На следующем шаге «Choose Components» выберите, какие компоненты Kodi должны быть установлены.
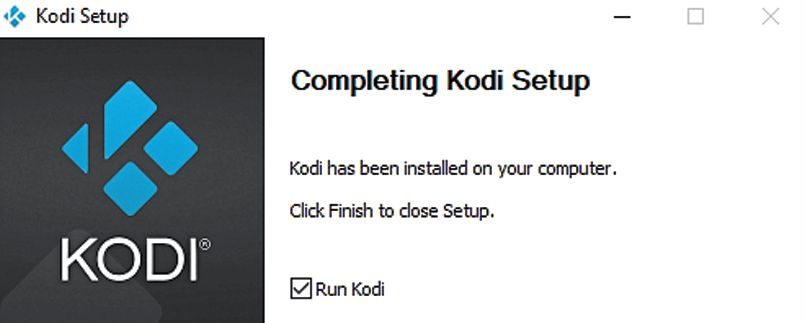 При первоначальной установке программного обеспечения, для медиацентра рекомендуется выбрать значение «Full», чтобы установить все элементы. В следующем окне нажмите «Next», выберите «Install» и дождитесь установки программы с настройками по умолчанию. На последнем шаге отметьте галочкой пункт «Run Kodi» и нажмите «Finish».
Запускаем Kodi и меняем язык
 Если после запуска Kodi дает о себе знать брандмауэр Windows 10, выберите «Разрешить доступ», чтобы открыть для Kodi доступ в Интернет. После этого вам нужно выбрать язык пользовательского интерфейса.
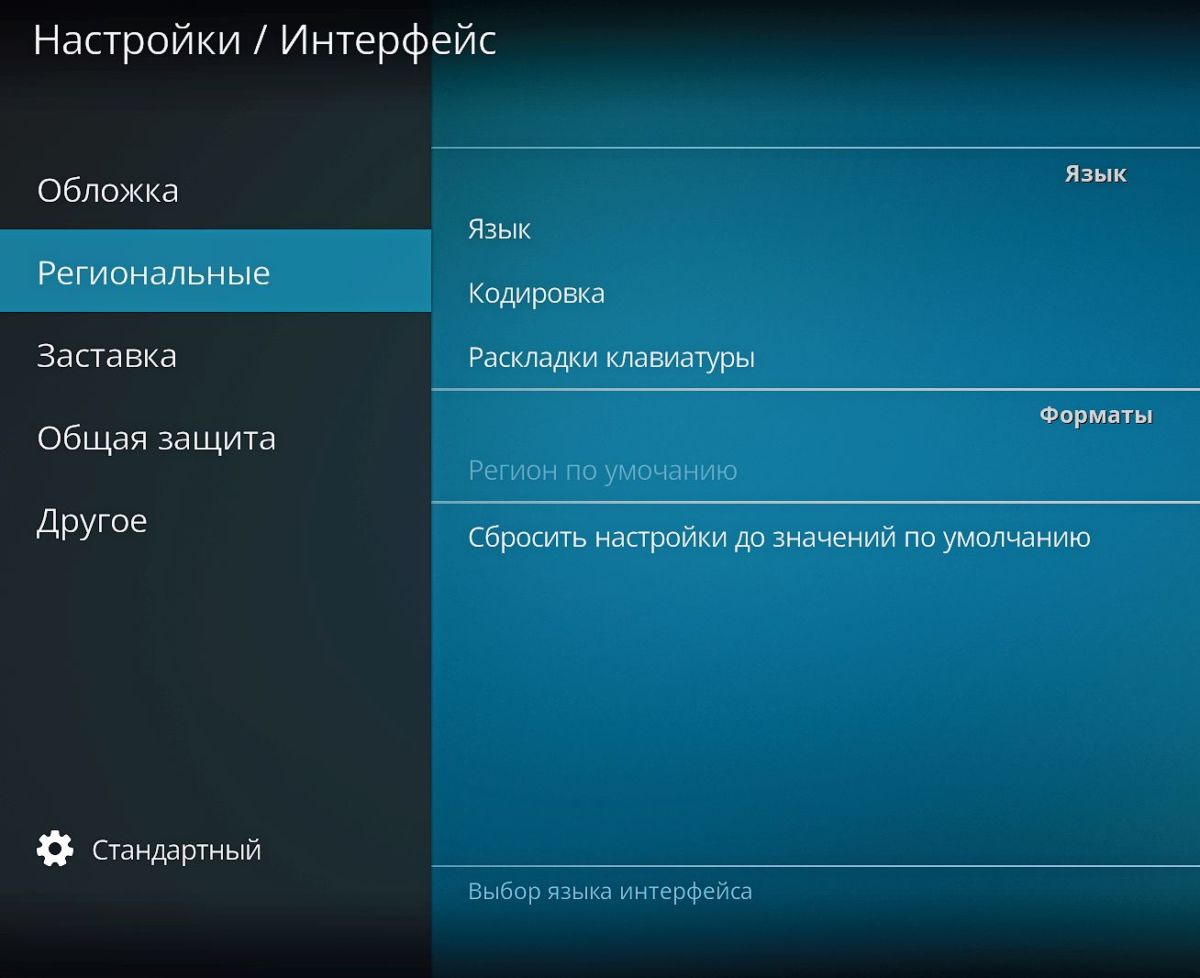
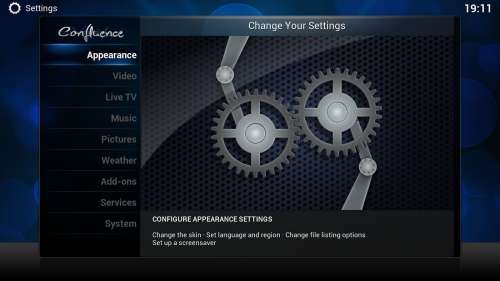
На начальном экране нажмите на значок шестеренки, чтобы открыть настройки. Затем перейдите в «Interface Settings» и «Regional». Выберите Россию, и Kodi сразу же загрузит русскоязычный интерфейс. Затем в разделе «Региональные» установите для пункта «Раскладка клавиатуры» значение «Russian АБВ».
Добавляем музыкальные файлы и фотографии
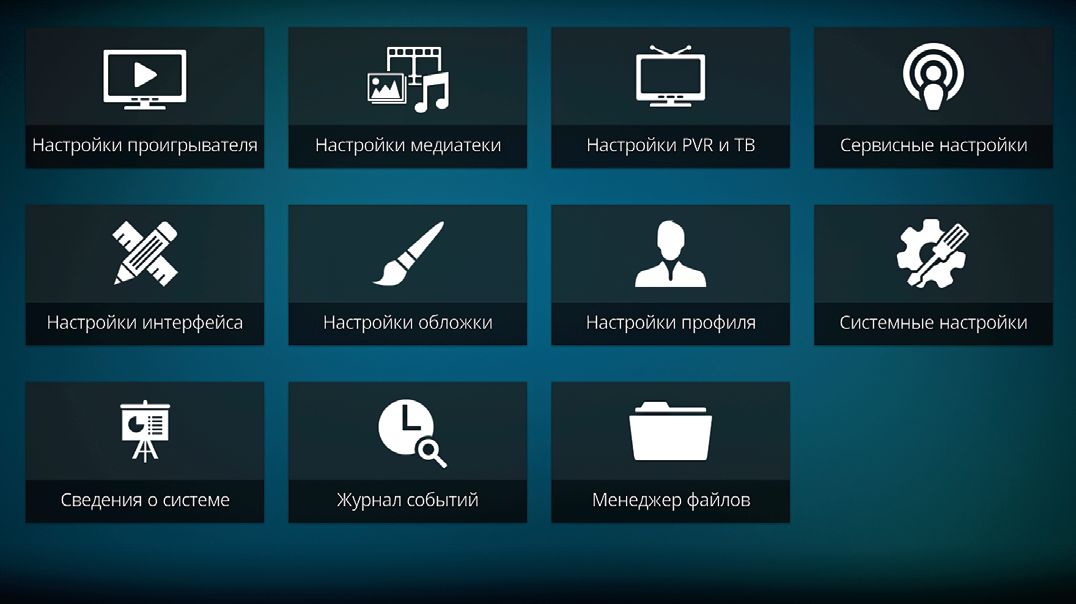 Если вы хотите использовать медиацентр Kodi для воспроизведения вашей музыкальной коллекции, нужно указать программе место хранения этого типа файлов. Для этого выберите в меню настроек «Настройки медиатеки | Музыка…» и нажмите «Файлы | Добавить музыку». В диалоговом окне «Добавить аудиоисточник» нажмите кнопку «Обзор».
 Большой плюс кроется в том, что Kodi поддерживает не только локальные папки, но и предоставляет доступ к общим сетевым ресурсам. Это позволяет легко управлять содержимым, хранящимся на других компьютерах и NAS-серверах. Выберите папку с музыкой и подтвердите действие нажатием кнопки «OK». В следующем диалоговом окне укажите имя для выбранного источника музыкальных файлов, а для завершения операции снова нажмите кнопку «ОК».
После этих действий начнется подгрузка сведений о музыкальных файлах, которая может занять некоторое время (особенно если файлов много, а их емкость измеряется десятками гигабайт). В случае если вы хотите загружать свои фотографии с помощью Kodi, сначала в меню глобальных настроек вам нужно выбрать пункт «Настройки медиатеки | Изображения…», а потом повторить вышеперечисленные действия: они будут аналогичными.
Добавляем в медиатеку фильмы и сериалы
 Добавление фильмов и сериалов отличается от добавления музыки и изображений только некоторыми деталями. В главном меню выберите пункт «Видео» и укажите путь к папке с видеофайлами, как описано в предыдущем шаге.
После настройки имени источника мультимедиа Kodi нужно будет получить информацию о том, какие именно видеофайлы хранятся в выбранной папке. Это различие важно, поскольку Kodi автоматически загружает из Интернета информацию, отображаемую программой в режиме воспроизведения. Эта информация включает в себя данные о медиаконтенте, а также постеры, с которыми оформление будущей медиаколлекции смотрится гораздо интереснее, нежели в виде файлов с рандомным кадром на превью.
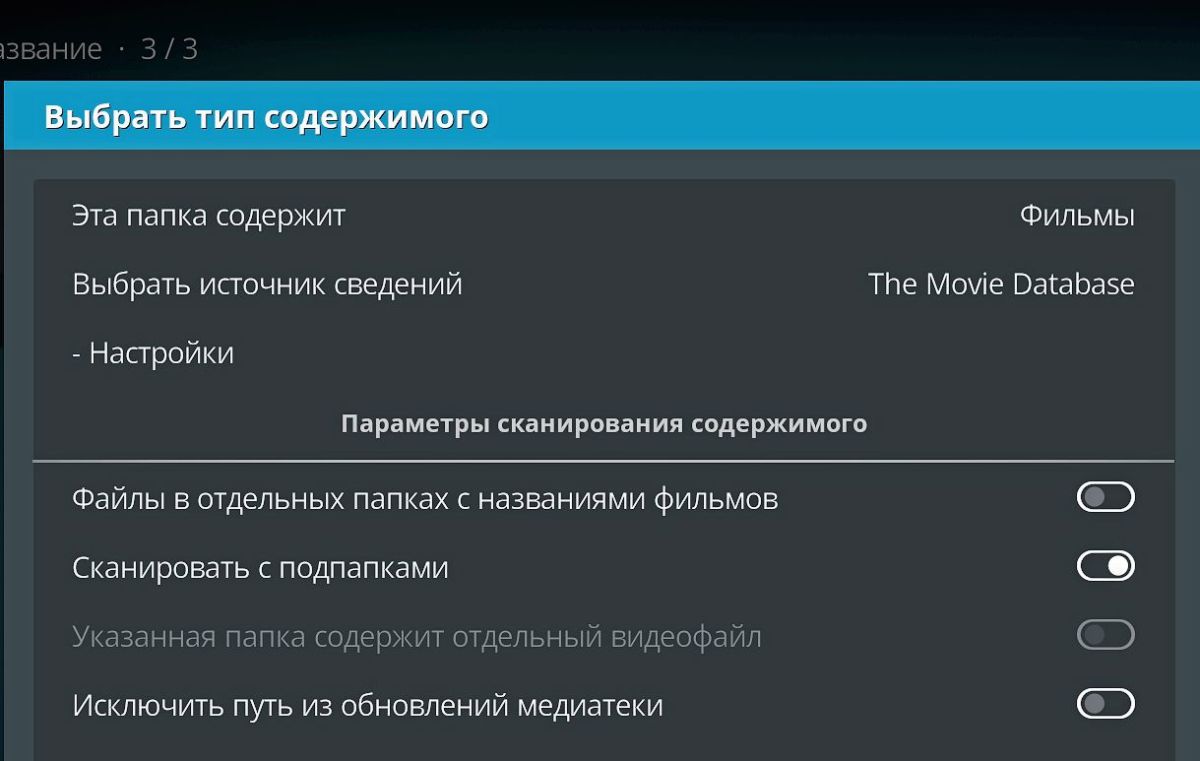
Если вы выбираете категорию «Фильмы», то в диалоговом окне «Выбрать тип содержимого» напротив пункта «Выбрать источник сведений» укажите «The Movie Database», а затем нажмите «Настройки». Здесь, рядом с «Предпочтительный язык», нужно выбрать вариант «ru», чтобы загружать русскоязычные данные. Напротив пункта «Default Rating from» необходимо активировать «TMDb», чтобы Kodi мог извлечь данные из этого источника.
Воспроизводим фильмы и сериалы
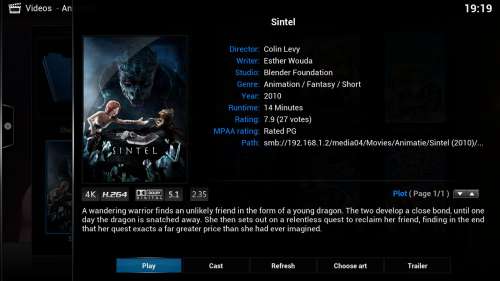
 Локальное воспроизведение мультимедийного контента, управляемого Kodi, сложностей не вызовет. В главном меню выберите пункт «Фильмы» и кликните по нему два раза, чтобы перейти к списку соответствующего контента. Здесь вы можете определить способ представления списка фильмов, нажав на кнопку «Параметры», незаметно расположенную в левом нижнем углу.
Сразу кликайте по строке «Вид» в открывшемся разделе, иначе меню может «убежать» при перемещении курсора. Данное меню предлагает выбрать различные варианты отображения обложек: «Стена информации», «Широкий список» «Фанарт», «Постер» и т. п. Закончив с настройкой, выберите серию или фильм, а затем кликните по его названию, чтобы запустить воспроизведение. Поставить воспроизведение на паузу можно с помощью клавиши «Пробел».
Читайте также:
Фото: компании-производители; SONY EUROPE LIMITED
Hello reader! I’m back again with yet another troubleshooting procedure for Kodi. And this time, I’ll cover the Kodi SMB not working error.
Habitual SMB users on Kodi need no explanation about SMB. However, for the benefit of the new SMB users, I’ll glance through SMB for Kodi.
Server Message Block (SMB) or Windows File Sharing is a client-server protocol Windows uses to share resources over a local network. All the Windows PCs are equipped with SMB and a home user can easily set it up. What makes SMB the best network protocol is its versatility. It can be accessed by any operating system to stream content on any Network Attached Storage (NAS) or other external remote hardware.
In the following sections, you will learn:
- How to access local files on Kodi via SMB?
- How to fix the Kodi SMB not working issue?
- Bonus Kodi SMB tips
- SMB alternatives for Kodi
- Frequently Asked Questions About Kodi SMB
How to access local files on Kodi via SMB?
There are two basic ways to add a remote media folder to Kodi via SMB. You need to give the folder containing media files Read/Write permission to add the Source Folder to Kodi.
Note: SMB v1 is no longer supported on Kodi. Make sure you are using SMB v2 or higher.
SMB v1 had security issues on Windows and was thus slashed off Windows. The only available option to access shares was to input the IP address or the device name with the path.
To enable browsing SMB shares again, Kodi v19.1 implemented the WS-Discovery protocol (a multicast delivery protocol to access files on a local network). Follow these steps to add a share to Kodi with Windows Network (SMB).
Step 1:
Go to Settings and select File manager
Step 2:
Select Browse source
Step 3:
Select Browse for new shares
Step 4:
From the list of options, choose Windows Network (SMB)
Step 5:
Now, navigate to the source folder path and select it
Step 6:
Hit OK to add the folder to Kodi
If the Windows Network (SMB) method doesn’t work for you, try adding the source folder with the device’s IP address or name. Here’s how to do it!
To add a source folder using the IP address or device name, follow these steps.
Step 1:
Reserve a static IP address for your hardware.
To create a static IP address, add the MAC address of the device to the router’s Reservation list after logging in.
Step 2:
Under Browse for new shares list in Kodi, select Add network location
Step 3:
In the Add network location window, set the protocol to Windows Network (SMB)
Step 4:
Select Server name and input the reserved static IP address of the hardware or the device name (use any one of the two methods)
Step 5:
In the Shared folder field, type in the name of the folder you would like to add as it is saved in the device along with the drive location letter (for IP address method) or just type in the folder name without drive location letter (for device name method)
Step 6:
Type in the username and password if prompted in the same window
Step 7:
Hit OK to complete adding the source media folder
Your share will appear in the Browse for new shares list. Depending on the method you used, you would either see the IP address or the device name for the share.
Before we get started with troubleshooting, make sure you are using SMBv2 or higher. These steps might help you fix the SMB not working error on Kodi 19.
Step 1:
Open Kodi on your PC and go to Settings
Step 2:
Go to Services
Step 3:
On the left pane, select SMB client. If you don’t see the SMB client option on the left pane, make sure you have enabled the Expert settings.
Step 4:
Under SMB client, set the Minimum protocol version to SMB v1 if it is set as None or other
Step 5:
Check the Maximum protocol version and change it to SMB v3. Some Kodi users suggest using SMBv1 for maximum requirement but it is considered to be not as secure as the SMBv3.
Step 6:
Go back to the Library to update the share path
Step 7:
Select a media type and go to files
Step 8:
If you have an existing path in the selected media type, click and hold and select Edit source. Otherwise, select the Add [media type] option
Step 9:
In the Add [media type source] window, click on Browse
Step 10:
If you have the shares added to Kodi, select one. Otherwise, go to Add network location.
Step 11:
Follow the above steps to add a share using the IP address or device name. Make sure to use the same username and password as that of your computer.
This will resolve the ‘Operation not permitted’ error and SMB will be up and running on Kodi in no time. You can now easily access old SMB network locations with the set username and password.
Bonus Kodi SMB Tips
If the above troubleshooting method doesn’t fix the Kodi SMB not working issue, try these fixes.
- Turn on the Use legacy security option under SMB client and restart the system and check the folder you are looking for.
- Change the WINS server under SMB client to the same IP address as your router and retry
- If all the above methods fail, downgrade to Kodi v18. Go to Settings > File manager > Add source > Windows Network (SMB) > WORKGROUP. Under WORKGROUP, you’ll see all the SMB compliant devices connected to your network. Select a device and add the share. You might have to compromise on the new features though.
If you are an avid Kodi streamer, you might want to check out the Best Kodi tips.
SMB alternatives
SMB has been the standard client-server protocol on Windows and DOS since 1992. However, there are quite a few SMB alternatives you might want to consider to enable sharing local files to Kodi. Check them out!
Univention Corporate Server
UCS is an integrated identity and infrastructure management system used to administer users and applications. It is compatible with Windows, Mac OS X, and Linux. It uses Extensive Directory functions to allow integration in Windows.
NQE
NQE is one of the best embedded implementations of the SMB protocol. It is also known as Common Internet File System (CIFS) which is a network file system protocol for providing shared access to files and printers between devices on the same network. With the help of CIFS, you can edit, add, and remove files from the Kodi library.
FAQs
To add a share on Kodi, go to Settings > File manager > Browse source > Browse for new shares > Windows Network (SMB). Finally, navigate to the folder path and hit OK.
Which is better: SMB or NFS?
SMB and NFS are network protocols used to access files over a network. With NFS, every user on an authenticated system can access a specific share as it uses the host-based authentication system. This is not possible with SMB as it uses user-based authentication, by which it is possible to separate multiple users from a single authenticated machine and enable file and printer sharing to all users at once. SMB is the ideal solution for Windows servers, whereas unencrypted NFS is the first-choice protocol for the Linux OS.
Does Windows 10 use SMB?
Currently, SMBv1, SMBv2, and SMBv3 work with Windows. However, the configuration requirements might vary from server to server.
Fix ‘Kodi SMB not working’ error
SMB not working has been a pressing issue on Kodi recently, especially after the release of Kodi 19. Kodi 18 didn’t have any issues with SMB but a lot of Kodi 19 users had trouble with using Kodi for folder share.
The above troubleshooting method should help you fix this burning issue. If not, contact Kodi support. Let us know in the comments section down below if this method worked for you.
Kodi ошибка 2 ресурс недоступен
Новые темы необходимо создавать только в корневом разделе! В дальнейшем они будут обработаны модераторами.
Если Вы выложили новую версию программы, пожалуйста, сообщите об этом модератору нажав на вашем сообщении кнопку «Жалоба».
Последнее обновление программы в шапке: 11.03.2020

Краткое описание:
Кросс-платформенный медиацентра XBMC.
Бесплатный кроссплатформенный медиаплеер и программное обеспечение для организации HTPC с открытым исходным кодом. Графический интерфейс программы позволяет легко управлять видеофайлами, фотографиями и музыкой, находящимися на компьютере, оптическом диске, в интернете или в локальной сети. Может управляться с помощью ПДУ.
Android 4.2+:
версия: 16.1 Jarvis for Windows Kodi (Пост _SERGEYX_ #56018605)
версия: 16.0 Jarvis Kodi (Пост fack1900 #47300196)
версия: 16.0 Jarvis x86 Kodi (Пост ROMANFIONOV #47315630)
версия: 15.2 final Kodi (Пост grey684 #43824098)
версия: 15.2 + кэш Kodi (Пост fack1900 #44038040)
версия: 14.2 (x86) Stable kodi-14.2-Helix-x86.apk ( 61,12 МБ )
версия: 14.2 (windows) Stable kodi-14.2-Helix.exe ( 67,82 МБ )
версия: 15.1.1 Kodi (Пост grey684 #42405075)
версия: 15.1 + кэш Kodi (Пост fack1900 #42280136)
версия: 15 + кэш Kodi (Пост fack1900 #41793816)
версия: 15.0 + кэш KODI (XBMC) (Пост fack1900 #41260543)
версия: 14.2 (arm) Stable kodi-14.2-Helix-armeabi-v7a.apk ( 59,74 МБ )
версия: 13 Stable XBMC (Пост #31290789)
версия: 13 XBMC (Пост #31210770)
версия: 12.2 //4pda.ru/forum/dl/post/2915114/xbmc-12.2-Frodo-armeabi-v7a.apk
версия: 12.1 xbmc-12.1-Frodo-armeabi-v7a.apk
версия: 12.0 http://mirrors.xbmc.org/releases/android/x. armeabi-v7a.apk
NEON Devices (Nexus 7 / Tegra3 / Newer Samsung Devices): xbmcapp-armeabi-v7a-debug-08-22-full-neon.apk
Non-NEON Devices (Tegra2 / A500 / A100 / Thrive): xbmcapp-armeabi-v7a-debug-08-22-no-neon.apk
версия: n/axbmcapp_armeabi_v7a_debug_20120714.apk ( 39,01 МБ )
Сообщение отредактировал iMiKED — 23.03.20, 11:18
Не отображаются общие папки, сетевые компьютеры, флешки, диски на вкладке «Сеть» проводника Windows
Привет! Для тех кто не в теме, начну из далека. На компьютерах и ноутбуках с установленной Windows в проводнике есть отдельная вкладка «Сеть». На этой вкладке отображаются устройства из сетевого окружения. То есть, открыв вкладку «Сеть» мы там можем наблюдать компьютеры, сетевые хранилища (NAS), устройства мультимедиа (DLNA), флешки и внешние диски, которые подключены к роутеру и к которым настроен общий доступ. Проще говоря, те устройства, которые подключены через один роутер (находятся в одной сети) и на которых включена функция сетевого обнаружения (устройства, которые могут быть обнаружены в локальной сети) . Там так же может отображаться наш маршрутизатор (раздел «Сетевая инфраструктура») и другие устройства.
Сейчас поясню что и как, и почему я вообще решил написать эту статью. У меня роутер ASUS, к которому я подключил USB флешку, и настроил общий доступ к этой флешке для всех устройств в сети. И что вы думаете, в разделе «Сеть» на всех компьютерах появился этот сетевой накопитель (он там отображается как «Компьютер») , а на моем компьютере он не отображался. То есть, мой компьютер не видел ни флешку подключенную к роутеру, ни другие компьютеры в этой сети. Зато отображался DLNA-сервер запущен на том же роутере. Но это ничего не меняет, так как мне нужен обычный сетевой доступ к накопителю.

Так же я не мог получить доступ к флешке, когда набирал ее адрес //192.168.1.1 в проводнике. Сразу этот адрес открывался через браузере. И мне не удалось подключить этот накопитель как сетевой диск. Его просто не было в списке доступных устройств в сетевом окружении.
Такая проблема, когда Windows 7, Windows 8, или Windows 10 не видит сетевые устройства – не редкость. Это не обязательно должна быть флешка, или внешний HDD, который вы подключили к своему маршрутизатору, как в моем случае. Чаще всего настраивают общий доступ между компьютерами в локальной сети. И точно так же сталкиваются с проблемой, когда компьютеры подключены к одной сети (к одному роутеру) , настройки общего доступа выставлены правильно, а на вкладке «Сеть» пусто. Или отображается только маршрутизатор и ваш компьютер.
Так как причин и соответственно решений может быть много, то я наверное начну с самых простых (которые мне не помогли) и в конце этой статьи поделюсь решением, которое помогло в моем случае. В итоге мой ноутбук все таки увидел все устройства в сети. В том числе сетевой накопитель и другой компьютер, который так же подключен к этой сети.

Но это не значит, что у вас такой же случай. Поэтому, советую проверить все настройки по порядку.
Проверяем настройки общего доступа
Мы будем рассматривать два случая:
- Когда компьютеры не видят друг друга в локальной сети.
- Общий доступ к сетевому накопителю. Это у нас может быть флешка, или жесткий диск который подключен к роутеру, или отдельный накопитель (он же NAS) .
Первый случай
Чтобы компьютеры могли видеть друг друга и отображаться в проводнике в разделе «Сеть», они должны быть подключены через один маршрутизатор. Или соединены напрямую (кабелем, или по Wi-Fi) . Проще говоря, они должны находится в одной локальной сети.
Дальше, на всех компьютерах (не знаю, сколько их там у вас) , желательно присвоить статус сети «Домашняя» (частная). Как это сделать в Windows 10, я писал в статье домашняя (частная) и общественная (общедоступная) сеть Windows 10. В Windows 7 достаточно зайти в «Центр управления сетями и общим доступом» и сменить там статус текущего подключения.

Если после этого по прежнему компьютер не обнаруживает другие компьютеры (или наоборот) , то давайте еще проверим параметры общего доступа.
Для этого, в окне «Центр управления сетями и общим доступом» (если не знаете как открыть его в Windows 10, то смотрите эту статью) нажимаем на пункт «Изменить дополнительные параметры общего доступа».

И для текущего профиля (обычно это «Частная») выставляем параметры как на скриншоте ниже.

Делаем это на всех компьютерах в локальной сети.
Статьи по этой теме:
Как правило, эти советы решают все проблемы с обнаружением компьютеров в локальной сети.
Второй случай
Когда у вас проблемы с доступом к сетевому накопителю. Как в моем случае. Windows 10 не видела USB накопитель, который был подключен к роутеру ASUS. Сейчас много маршрутизаторов имеют USB-порт для подключения накопителей и других устройств, так что тема актуальная.
Нужно убедится, что в настройках роутера этот накопитель определен, и общий доступ к нему включен. Понятно, что на разных маршрутизаторах, это делается по-разному. На роутерах ASUS, например, это выглядит вот так:

Не путайте настройки общего доступа с настройками FTP. Настройки FTP-сервера на роутере в данном случае не при чем.
Ну и если другие устройства видят сетевой накопитель и имеют к нему доступ, а на каком-то конкретном компьютере доступа к нему нет, то значит проблема не на стороне роутера. Перебирайте настройки «проблемного» ПК по этой статье.
Антивирус или брандмауэр может блокировать сетевые устройства
Если вашему антивирусу, или брандмауэру (фаерволу) , который установлен на вашем компьютере что-то не понравилось, то он легко может сделать так, что ни вы не сможете видеть другие устройства в сетевом окружении, ни вас никто не сможет обнаружить.
Правда, у меня после отключения встроенного в антивирусе фаервола проблема не была решена (значит, проблема скорее всего не в нем) , но все ровно мне кажется, что в моем случае без участия антивируса не обошлось.
Поэтому, попробуйте на время полностью остановить работу антивируса, или хотя бы отключить встроенный в него фаервол (межсетевой экран) . В NOD 32 это делается вот так:

Для проверки это нужно сделать на всех компьютерах, которые будут участвовать в локальной сети.
Вполне возможно, что у вас установлены еще какие-то программы, которые могут мониторить сеть и управлять сетевыми соединениями.
Если окажется, что проблема в антивирусе, то нужно добавить свою сеть в исключения. Запретить фаерволу блокировать саму сеть, или сетевые устройства.
Если у вас нет антивируса, то можно поэкспериментировать с отключением/включением брандмауэра встроенного в Windows.
Рабочая группа
Рабочая группа должна быть одинаковой на всех устройствах. Как правило, так и есть. Но желательно проверить. Для этого откройте свойства компьютера «Система» и перейдите в «Дополнительные параметры системы».
Там будет указана «Рабочая группа». Чтобы изменить ее, нужно нажать на кнопку «Изменить».

Еще раз: имя рабочей группы должно быть одинаковым на всех компьютерах.
Если у вас проблема с доступом к сетевому накопителю (к флешке через маршрутизатор) , то в настройках общего доступа на том же роутере ASUS так же указана рабочая группа. Можете посмотреть на скриншоте выше в статье. Она должна быть такой же, как на компьютере.
Проблема с доступом к общей сетевой папке по SMB1 в Windows 10 (мое решение)
Вернемся конкретно к моей проблеме. Все что я описал выше, проверил и перепроверил уже по 10 раз. Пару раз сделал сброс сетевых настроек, но Windows 10 так и не видела другие компьютеры в сети и что самое главное – в проводнике так и не появлялась общая папка в виде флеши подключенной к роутеру. А на других устройствах в сети все определялось без проблем. В том числе мой ноутбук.
Где-то я прочитал, что можно попробовать открыть общую папку через окно «Выполнить». Нажал сочетание клавиш Win + R, ввел адрес сетевой папки //192.168.1.1 (он же адрес роутера) .
Доступ к накопителю я не получил, но появилась интересная ошибка:
Вы не можете подключиться к общей папке, так как она небезопасна. Эта общая папка работает по устаревшему протоколу SMB1, который небезопасен и может подвергнуть вашу систему риску атаки.
Вашей системе необходимо использовать SMB2 или более позднюю версию.
И ссылка, которую нужно вручную набирать

Это уже интересно. Хоть что-то.
Начал искать. И оказывается, что в Windows 10 отказались от протокола SMB1. Из-за безопасности. А установленный на моем роутере пакет программ Samba походу работает по протоколу SMB1. Поэтому Windows 10 его не видит. Но другие компьютеры, которые так же работают на Windows 10 у меня так же не отображались на вкладке «Сеть».
Так как обновить протокол к SMB2 в настройках роутера я не мог, то решил что нужно как-то включить поддержку SMB1 в Windows 10. И как оказалось, это без проблем можно сделать. В итоге, после подключения компонента «Клиент SMB 1.0/CIFS» у меня все заработало. Система увидела общие папки на компьютерах в сети и сетевую папку настроенную на самом роутере.
Как включить SMB1 в Windows 10?
Через поиск найдите и откройте старую «Панель управления».

Переключитесь на «Мелкие значки» и откройте «Программы и компоненты».

Открываем «Включение или отключение компонентов Windows». Находим пункт «Поддержка общего доступа к файлам SMB 1.0/CIFS». Открываем его и ставим галочку возле «Клиент SMB 1.0/CIFS». Нажимаем Ok.

Если компьютер выдаст запрос на перезагрузку, то перезагрузите его. Если окна с предложением не будет, то выполните перезагрузку вручную.
После перезагрузки, на вкладке «Сеть» – «Компьютер» должны появится все доступные устройства в вашей сети.
Буду рад, если эта статья кому-то пригодится и поможет решить возникшую проблему. Не забудьте написать в комментариях о результатах. Или задать вопрос, куда же без них
|
|
#1 |
|
Junior Member Регистрация: 30.09.2018 Сообщений: 3 |
Всем доброго времени суток. Подскажите… |

|
|


|
|
#2 |
|
Junior Member Регистрация: 21.03.2012 Сообщений: 7 |
Может все от версии Samba (на Win10 версия 1-отключена: надо включать руками). |
|
|
|
|
|
#3 |
|
Junior Member Регистрация: 30.09.2018 Сообщений: 3 |
Цитата:
Сообщение от rubicon Может все от версии Samba (на Win10 версия 1-отключена: надо включать руками). Вроде все включено Миниатюры
|
|
|
|


|
|
#4 |
|||||||||||||||||||||||||||||||||||||||||||||||||||||||||||||||||||||||
|
Senior Member
Alan is a hardcore tech enthusiast that lives and breathes tech. When he is not indulged in playing the latest video games, he helps users with technical problems that they might run into. Alan is a Computer Science Graduate with a Masters in Data Science. Несмотря на то, что Kodi является стабильным приложением, иногда могут появляться проблемы, как и с любым программным обеспечением. Я написал эту статью, чтобы помочь пользователям устранить неполадки просто и быстро. Используйте эти ссылки, чтобы перейти к нужной части руководства: Содержание
Если у вас есть новый компьютер с Windows 10, или если вы недавно переустановили систему, Коди иногда может не запускаться. Вместо этого программа аварийно завершает работу при запуске, не давая вам сообщение об ошибке. Во многих случаях установка Visual C++ может решить эту проблему. Итак, перейдите на веб-сайт Microsoft и загрузите последнее обновление.
С каждым новым обновлением плеер получает множество исправлений багов. Возможно, та проблема, которая вызывает сбои, уже решена в новой версии. Повторите эти действия:
Зависание и лаги можно устранить путём отключения аппаратного ускорения. Особенно часто эта проблема встречается на устройствах на базе Андроид, на телевизорах и приставках в том числе.
Kodi не может подключиться к источнику (веб-сайту)Каждый раз, когда вы хотите добавить внешний источник, нужно добавлять адрес сайта (URL). Например, это происходит при установке дополнения или добавлении IPTV-плейлиста. Если Коди не удаётся открыть URL-адрес, всплывает уведомление о том, что невозможно подключиться к сайту. Что можно сделать:
В этом случае попробуйте установить дополнение или плейлист из другого источника. В Kodi не работает плагин
После запуска приложение будет пытаться искать новые версии дополнений. Если есть доступные обновления, их можно увидеть в разделе дополнений под логотипом Kodi. Вы узнаете этот значок в виде круговой стрелки. Нажмите на неё, чтобы выполнить ручное обновление.
Если плагин берёт информацию со стороннего сервера (например, торренты, погодные и новостные дополнения), то он может быть неисправным из-за отключения сайта или удаления файла на сервере.
Представьте себе сцену … На вашем домашнем ПК у вас есть мультимедийная библиотека, настроенная внутри KODI, и теперь вы хотели бы иметь эту же коллекцию на другом устройстве или лучше получить доступ к одной совместной библиотеке. Таким образом, у нас будет доступ к нему с нашего смартфона, планшета, ноутбука, AndroidTV, другого ПК и т . Д. Вопрос прост, можем ли мы получить доступ ко всей этой коллекции совместно с другим устройством?
устройство логически всегда должно быть включено, чтобы доступ к библиотеке был … Я думал о домашнем ПК, который мы обычно включаем почти ежедневно, но мне что-то гораздо лучше … Использование маршрутизатор как устройство «мать», в основном потому, что у нас всегда есть это, и потому что у него есть USB-порт для подключения пэндре. Внутри pendrive мы можем разместить библиотеку и таким образом всегда иметь доступ к ней с любого устройства. 2. Начнем с того, что нам нужно в качестве основного дополнения к последней версии Beta3 версии Pelisalacarta, которая поддерживает, поскольку я упоминал о совместимости с SMB для обнаружения файлов . STRM .
после этого мы оставим клик на OK и вернемся к предыдущему меню … Прежде чем продолжить комментировать план информации о том, что эта последняя версия Addon содержит интересный вариант для активации или деактивации каналов:
Для этого мы перейдем к VIDEOS / FILES / Add Videos / Search Теперь мы скажем KODI, что каждая папка, чтобы он мог правильно читать информацию каждый раз, когда мы добавляем содержимое в библиотеку. Например, для папки SERIES мы разместим себя над папкой и правой кнопкой мыши или клавишей C на клавиатуре или нажав в течение 2 секунд. на сенсорных экранах мы получим доступ к выпадающему меню следующим образом:
откройте раздел Addic Pelisalacarta, Movies и выберите любой канал. В общем, мы можем добавить этот контент двумя способами: один — до ввода содержимого из раскрывающегося меню или добавления его один раз внутри, как вы можете видеть в этих двух снимках: после добавления он запустит процесс и закончит сообщением о том, что содержимое «x» было успешно добавлено в библиотеку. 6. У нас уже есть первый контент, добавленный в библиотеку, чтобы убедиться, что он был добавлен хорошо, мы можем перейти к«матерному»маршруту, который мы установили в разделе 3, внутри мы должны иметь две подпапки (фильмы и сериалы)
7. Мы видели, как добавить контент и обновить его на остальных устройствах, но если мы хотим сделать обратное, это означает, что нам нужно использовать другой аддон под названием LIBRARY AUTO UPDATER который будет отвечать за сканирование библиотеки устройств с целью устранения всего, что мы ранее удалили на маршруте «мать». Например, вы используете планшет, и вы удаляете серию, которую вы уже видели ( чтобы удалить ее из коллекции, вы должны поместить ее правой кнопкой мыши или клавишей C, а в появившемся меню мы выбираем MANAGE и DELETE из коллекции ). Теперь вы включаете ПК, и Auto Updater библиотеки дополнений начнет работать, когда вы проверите, что серия, которую мы удалили с планшета, не находится на пути « мать », она также удалит ее из коллекции, размещенной на ПК, и все это, потому что помните, что мы всегда используем один и тот же маршрут для всех устройств. Чтобы установить этот аддон, мы должны перейти к: ADJUSTMENTS / ADDONS / Install from Repository. Прибыв сюда, мы выбираем официальный репозиторий KODI под названием « Kodi Add-on Repository », который уже предварительно установлен, затем переходим к « Addons of Programs » и ищем БИБЛИОТЕКА Auto Updater .
Хотите слушать музыку и смотреть видео в своей домашней беспроводной сети? Хорошим и, без сомнения, многофункциональным решением в этом случае будет Kodi. Как настроить программу, читайте в нашей статье. Kodi представляет собой оптимальное решение для всех пользователей, которые хотят управлять своими изображениями, коллекцией музыкальных треков и видеофайлов на ПК и при этом иметь возможность воспроизводить контент на другом стационарном компьютере, ноутбуке, или телевизоре. При этом не имеет значения, где хранятся мультимедийные файлы: на локальном жестком диске, USB-накопителе или в NAS-сервере. Еще один плюс: Kodi не стоит ни копейки. Функциональность росла на протяжении лет и расширялась за счет многочисленных инструментов. Кроме того, бесплатные дополнения усиливают дополнительные функции. Прекрасно и то, что Kodi загружает информацию, постеры и фоновую графику из Интернета и включает их в базу данных. Если Kodi неправильно распознает фильм или сериал, можно исправить ошибку вручную. Еще одна причина популярности: программное обеспечение доступно для систем NAS, Raspberry Pi, а также для планшетов, смартфонов и приставок, которые работают на базе ОС Android. Мы покажем вам, как установить Kodi в Windows 10, настроить параметры и записать мультимедийные файлы в базу данных для расширения дополнительной информации и потоковой передачи в сети Wi-Fi. Бесплатное ПО для удаленного доступаЕсли вы хотите использовать медиацентр Kodi не только для воспроизведения мультимедийных файлов непосредственно на ПК, но и для проигрывания музыки, фильмов и сериалов на включенных в домашнюю сеть телевизионных устройствах — используйте гаджет на Android или iOS в качестве пульта дистанционного управления. Это необычайно облегчает навигацию. Для этого установите одно из двух бесплатных приложений: Official Kodi Remote для iOS или Kore, Official Remote for Kodi для Android. Функциональность приложений для медиацентра чрезвычайно широка. Вы можете перемещаться по управляемым с помощью Kodi коллекциям фотографий, музыки и видео, составлять плейлисты, управлять воспроизведением и удобно переключаться между соответствующими меню Kodi. Тем, кто любит снабжать свой архив кино и сериалов обложками и постерами или кадрами из фильмов, понравится, что приложение отображает в списке видео не только заголовки, но и картинки. Так что можно выбирать сериалы по постеру или раскадровке — и выглядит это весьма привлекательно. Выбор облегчают и всплывающие описания фильмов и сериалов. О том, насколько просто дистанционно управлять Kodi с помощью официального приложения для Android, вы сможете прочесть на следующей странице. К сожалению, в официальных приложениях для дистанционного управления Kodi придется отказаться от функции потокового воспроизведения, с помощью которой можно воспроизводить мультимедийные файлы под управлением Kodi на ПК непосредственно на смартфонах и планшетах. Если потоковая передача играет для вас решающую роль, стоит обратить внимание на приложение Yatse, The XBMC/Kodi Remote в Google Play Store. Функция потоковой передачи данных здесь поддерживается, но она платная. Установка и настройка KodiТот, кто хочет испытать на практике, как работает Kodi, может скачать программу с официального сайта разработчика. Установка выполняется легко и быстро. Тем не менее при первом запуске стоит учесть некоторые моменты. Выбираем правильную версию
Устанавливаем Kodi
Запускаем Kodi и меняем язык
На начальном экране нажмите на значок шестеренки, чтобы открыть настройки. Затем перейдите в «Interface Settings» и «Regional». Выберите Россию, и Kodi сразу же загрузит русскоязычный интерфейс. Затем в разделе «Региональные» установите для пункта «Раскладка клавиатуры» значение «Russian АБВ». Добавляем музыкальные файлы и фотографии
После этих действий начнется подгрузка сведений о музыкальных файлах, которая может занять некоторое время (особенно если файлов много, а их емкость измеряется десятками гигабайт). В случае если вы хотите загружать свои фотографии с помощью Kodi, сначала в меню глобальных настроек вам нужно выбрать пункт «Настройки медиатеки | Изображения…», а потом повторить вышеперечисленные действия: они будут аналогичными. Добавляем в медиатеку фильмы и сериалы
После настройки имени источника мультимедиа Kodi нужно будет получить информацию о том, какие именно видеофайлы хранятся в выбранной папке. Это различие важно, поскольку Kodi автоматически загружает из Интернета информацию, отображаемую программой в режиме воспроизведения. Эта информация включает в себя данные о медиаконтенте, а также постеры, с которыми оформление будущей медиаколлекции смотрится гораздо интереснее, нежели в виде файлов с рандомным кадром на превью. Если вы выбираете категорию «Фильмы», то в диалоговом окне «Выбрать тип содержимого» напротив пункта «Выбрать источник сведений» укажите «The Movie Database», а затем нажмите «Настройки». Здесь, рядом с «Предпочтительный язык», нужно выбрать вариант «ru», чтобы загружать русскоязычные данные. Напротив пункта «Default Rating from» необходимо активировать «TMDb», чтобы Kodi мог извлечь данные из этого источника. Воспроизводим фильмы и сериалы
Сразу кликайте по строке «Вид» в открывшемся разделе, иначе меню может «убежать» при перемещении курсора. Данное меню предлагает выбрать различные варианты отображения обложек: «Стена информации», «Широкий список» «Фанарт», «Постер» и т. п. Закончив с настройкой, выберите серию или фильм, а затем кликните по его названию, чтобы запустить воспроизведение. Поставить воспроизведение на паузу можно с помощью клавиши «Пробел». Читайте также: Фото: компании-производители; SONY EUROPE LIMITED Hello reader! I’m back again with yet another troubleshooting procedure for Kodi. And this time, I’ll cover the Kodi SMB not working error. Habitual SMB users on Kodi need no explanation about SMB. However, for the benefit of the new SMB users, I’ll glance through SMB for Kodi. Server Message Block (SMB) or Windows File Sharing is a client-server protocol Windows uses to share resources over a local network. All the Windows PCs are equipped with SMB and a home user can easily set it up. What makes SMB the best network protocol is its versatility. It can be accessed by any operating system to stream content on any Network Attached Storage (NAS) or other external remote hardware. In the following sections, you will learn:
How to access local files on Kodi via SMB?There are two basic ways to add a remote media folder to Kodi via SMB. You need to give the folder containing media files Read/Write permission to add the Source Folder to Kodi. Note: SMB v1 is no longer supported on Kodi. Make sure you are using SMB v2 or higher. SMB v1 had security issues on Windows and was thus slashed off Windows. The only available option to access shares was to input the IP address or the device name with the path. To enable browsing SMB shares again, Kodi v19.1 implemented the WS-Discovery protocol (a multicast delivery protocol to access files on a local network). Follow these steps to add a share to Kodi with Windows Network (SMB). Step 1:Go to Settings and select File manager Step 2:Select Browse source Step 3:Select Browse for new shares Step 4:From the list of options, choose Windows Network (SMB) Step 5:Now, navigate to the source folder path and select it Step 6:Hit OK to add the folder to Kodi If the Windows Network (SMB) method doesn’t work for you, try adding the source folder with the device’s IP address or name. Here’s how to do it! To add a source folder using the IP address or device name, follow these steps. Step 1:Reserve a static IP address for your hardware. To create a static IP address, add the MAC address of the device to the router’s Reservation list after logging in. Step 2:Under Browse for new shares list in Kodi, select Add network location Step 3:In the Add network location window, set the protocol to Windows Network (SMB) Step 4:Select Server name and input the reserved static IP address of the hardware or the device name (use any one of the two methods) Step 5:In the Shared folder field, type in the name of the folder you would like to add as it is saved in the device along with the drive location letter (for IP address method) or just type in the folder name without drive location letter (for device name method) Step 6:Type in the username and password if prompted in the same window Step 7:Hit OK to complete adding the source media folder Your share will appear in the Browse for new shares list. Depending on the method you used, you would either see the IP address or the device name for the share. Before we get started with troubleshooting, make sure you are using SMBv2 or higher. These steps might help you fix the SMB not working error on Kodi 19. Step 1:Open Kodi on your PC and go to Settings Step 2:Go to Services Step 3:On the left pane, select SMB client. If you don’t see the SMB client option on the left pane, make sure you have enabled the Expert settings. Step 4:Under SMB client, set the Minimum protocol version to SMB v1 if it is set as None or other Step 5:Check the Maximum protocol version and change it to SMB v3. Some Kodi users suggest using SMBv1 for maximum requirement but it is considered to be not as secure as the SMBv3. Step 6:Go back to the Library to update the share path Step 7:Select a media type and go to files Step 8:If you have an existing path in the selected media type, click and hold and select Edit source. Otherwise, select the Add [media type] option Step 9:In the Add [media type source] window, click on Browse Step 10:If you have the shares added to Kodi, select one. Otherwise, go to Add network location. Step 11:Follow the above steps to add a share using the IP address or device name. Make sure to use the same username and password as that of your computer. This will resolve the ‘Operation not permitted’ error and SMB will be up and running on Kodi in no time. You can now easily access old SMB network locations with the set username and password. Bonus Kodi SMB TipsIf the above troubleshooting method doesn’t fix the Kodi SMB not working issue, try these fixes.
If you are an avid Kodi streamer, you might want to check out the Best Kodi tips. SMB alternativesSMB has been the standard client-server protocol on Windows and DOS since 1992. However, there are quite a few SMB alternatives you might want to consider to enable sharing local files to Kodi. Check them out! Univention Corporate ServerUCS is an integrated identity and infrastructure management system used to administer users and applications. It is compatible with Windows, Mac OS X, and Linux. It uses Extensive Directory functions to allow integration in Windows. NQENQE is one of the best embedded implementations of the SMB protocol. It is also known as Common Internet File System (CIFS) which is a network file system protocol for providing shared access to files and printers between devices on the same network. With the help of CIFS, you can edit, add, and remove files from the Kodi library. FAQsTo add a share on Kodi, go to Settings > File manager > Browse source > Browse for new shares > Windows Network (SMB). Finally, navigate to the folder path and hit OK. Which is better: SMB or NFS?SMB and NFS are network protocols used to access files over a network. With NFS, every user on an authenticated system can access a specific share as it uses the host-based authentication system. This is not possible with SMB as it uses user-based authentication, by which it is possible to separate multiple users from a single authenticated machine and enable file and printer sharing to all users at once. SMB is the ideal solution for Windows servers, whereas unencrypted NFS is the first-choice protocol for the Linux OS. Does Windows 10 use SMB?Currently, SMBv1, SMBv2, and SMBv3 work with Windows. However, the configuration requirements might vary from server to server. Fix ‘Kodi SMB not working’ errorSMB not working has been a pressing issue on Kodi recently, especially after the release of Kodi 19. Kodi 18 didn’t have any issues with SMB but a lot of Kodi 19 users had trouble with using Kodi for folder share. The above troubleshooting method should help you fix this burning issue. If not, contact Kodi support. Let us know in the comments section down below if this method worked for you. Kodi ошибка 2 ресурс недоступенНовые темы необходимо создавать только в корневом разделе! В дальнейшем они будут обработаны модераторами. Если Вы выложили новую версию программы, пожалуйста, сообщите об этом модератору нажав на вашем сообщении кнопку «Жалоба». Последнее обновление программы в шапке: 11.03.2020
Краткое описание: Бесплатный кроссплатформенный медиаплеер и программное обеспечение для организации HTPC с открытым исходным кодом. Графический интерфейс программы позволяет легко управлять видеофайлами, фотографиями и музыкой, находящимися на компьютере, оптическом диске, в интернете или в локальной сети. Может управляться с помощью ПДУ. Android 4.2+: версия: 14.2 (windows) Stable kodi-14.2-Helix.exe ( 67,82 МБ ) версия: 15.1.1 Kodi (Пост grey684 #42405075) версия: 13 Stable XBMC (Пост #31290789) Сообщение отредактировал iMiKED — 23.03.20, 11:18 Не отображаются общие папки, сетевые компьютеры, флешки, диски на вкладке «Сеть» проводника WindowsПривет! Для тех кто не в теме, начну из далека. На компьютерах и ноутбуках с установленной Windows в проводнике есть отдельная вкладка «Сеть». На этой вкладке отображаются устройства из сетевого окружения. То есть, открыв вкладку «Сеть» мы там можем наблюдать компьютеры, сетевые хранилища (NAS), устройства мультимедиа (DLNA), флешки и внешние диски, которые подключены к роутеру и к которым настроен общий доступ. Проще говоря, те устройства, которые подключены через один роутер (находятся в одной сети) и на которых включена функция сетевого обнаружения (устройства, которые могут быть обнаружены в локальной сети) . Там так же может отображаться наш маршрутизатор (раздел «Сетевая инфраструктура») и другие устройства. Сейчас поясню что и как, и почему я вообще решил написать эту статью. У меня роутер ASUS, к которому я подключил USB флешку, и настроил общий доступ к этой флешке для всех устройств в сети. И что вы думаете, в разделе «Сеть» на всех компьютерах появился этот сетевой накопитель (он там отображается как «Компьютер») , а на моем компьютере он не отображался. То есть, мой компьютер не видел ни флешку подключенную к роутеру, ни другие компьютеры в этой сети. Зато отображался DLNA-сервер запущен на том же роутере. Но это ничего не меняет, так как мне нужен обычный сетевой доступ к накопителю.
Так же я не мог получить доступ к флешке, когда набирал ее адрес //192.168.1.1 в проводнике. Сразу этот адрес открывался через браузере. И мне не удалось подключить этот накопитель как сетевой диск. Его просто не было в списке доступных устройств в сетевом окружении. Такая проблема, когда Windows 7, Windows 8, или Windows 10 не видит сетевые устройства – не редкость. Это не обязательно должна быть флешка, или внешний HDD, который вы подключили к своему маршрутизатору, как в моем случае. Чаще всего настраивают общий доступ между компьютерами в локальной сети. И точно так же сталкиваются с проблемой, когда компьютеры подключены к одной сети (к одному роутеру) , настройки общего доступа выставлены правильно, а на вкладке «Сеть» пусто. Или отображается только маршрутизатор и ваш компьютер. Так как причин и соответственно решений может быть много, то я наверное начну с самых простых (которые мне не помогли) и в конце этой статьи поделюсь решением, которое помогло в моем случае. В итоге мой ноутбук все таки увидел все устройства в сети. В том числе сетевой накопитель и другой компьютер, который так же подключен к этой сети.
Но это не значит, что у вас такой же случай. Поэтому, советую проверить все настройки по порядку. Проверяем настройки общего доступаМы будем рассматривать два случая:
Первый случайЧтобы компьютеры могли видеть друг друга и отображаться в проводнике в разделе «Сеть», они должны быть подключены через один маршрутизатор. Или соединены напрямую (кабелем, или по Wi-Fi) . Проще говоря, они должны находится в одной локальной сети. Дальше, на всех компьютерах (не знаю, сколько их там у вас) , желательно присвоить статус сети «Домашняя» (частная). Как это сделать в Windows 10, я писал в статье домашняя (частная) и общественная (общедоступная) сеть Windows 10. В Windows 7 достаточно зайти в «Центр управления сетями и общим доступом» и сменить там статус текущего подключения.
Если после этого по прежнему компьютер не обнаруживает другие компьютеры (или наоборот) , то давайте еще проверим параметры общего доступа. Для этого, в окне «Центр управления сетями и общим доступом» (если не знаете как открыть его в Windows 10, то смотрите эту статью) нажимаем на пункт «Изменить дополнительные параметры общего доступа».
И для текущего профиля (обычно это «Частная») выставляем параметры как на скриншоте ниже.
Делаем это на всех компьютерах в локальной сети. Статьи по этой теме: Как правило, эти советы решают все проблемы с обнаружением компьютеров в локальной сети. Второй случайКогда у вас проблемы с доступом к сетевому накопителю. Как в моем случае. Windows 10 не видела USB накопитель, который был подключен к роутеру ASUS. Сейчас много маршрутизаторов имеют USB-порт для подключения накопителей и других устройств, так что тема актуальная. Нужно убедится, что в настройках роутера этот накопитель определен, и общий доступ к нему включен. Понятно, что на разных маршрутизаторах, это делается по-разному. На роутерах ASUS, например, это выглядит вот так:
Не путайте настройки общего доступа с настройками FTP. Настройки FTP-сервера на роутере в данном случае не при чем. Ну и если другие устройства видят сетевой накопитель и имеют к нему доступ, а на каком-то конкретном компьютере доступа к нему нет, то значит проблема не на стороне роутера. Перебирайте настройки «проблемного» ПК по этой статье. Антивирус или брандмауэр может блокировать сетевые устройстваЕсли вашему антивирусу, или брандмауэру (фаерволу) , который установлен на вашем компьютере что-то не понравилось, то он легко может сделать так, что ни вы не сможете видеть другие устройства в сетевом окружении, ни вас никто не сможет обнаружить. Правда, у меня после отключения встроенного в антивирусе фаервола проблема не была решена (значит, проблема скорее всего не в нем) , но все ровно мне кажется, что в моем случае без участия антивируса не обошлось. Поэтому, попробуйте на время полностью остановить работу антивируса, или хотя бы отключить встроенный в него фаервол (межсетевой экран) . В NOD 32 это делается вот так:
Для проверки это нужно сделать на всех компьютерах, которые будут участвовать в локальной сети. Вполне возможно, что у вас установлены еще какие-то программы, которые могут мониторить сеть и управлять сетевыми соединениями. Если окажется, что проблема в антивирусе, то нужно добавить свою сеть в исключения. Запретить фаерволу блокировать саму сеть, или сетевые устройства. Если у вас нет антивируса, то можно поэкспериментировать с отключением/включением брандмауэра встроенного в Windows. Рабочая группаРабочая группа должна быть одинаковой на всех устройствах. Как правило, так и есть. Но желательно проверить. Для этого откройте свойства компьютера «Система» и перейдите в «Дополнительные параметры системы». Там будет указана «Рабочая группа». Чтобы изменить ее, нужно нажать на кнопку «Изменить».
Еще раз: имя рабочей группы должно быть одинаковым на всех компьютерах. Если у вас проблема с доступом к сетевому накопителю (к флешке через маршрутизатор) , то в настройках общего доступа на том же роутере ASUS так же указана рабочая группа. Можете посмотреть на скриншоте выше в статье. Она должна быть такой же, как на компьютере. Проблема с доступом к общей сетевой папке по SMB1 в Windows 10 (мое решение)Вернемся конкретно к моей проблеме. Все что я описал выше, проверил и перепроверил уже по 10 раз. Пару раз сделал сброс сетевых настроек, но Windows 10 так и не видела другие компьютеры в сети и что самое главное – в проводнике так и не появлялась общая папка в виде флеши подключенной к роутеру. А на других устройствах в сети все определялось без проблем. В том числе мой ноутбук. Где-то я прочитал, что можно попробовать открыть общую папку через окно «Выполнить». Нажал сочетание клавиш Win + R, ввел адрес сетевой папки //192.168.1.1 (он же адрес роутера) . Доступ к накопителю я не получил, но появилась интересная ошибка:
Вашей системе необходимо использовать SMB2 или более позднюю версию. И ссылка, которую нужно вручную набирать
Это уже интересно. Хоть что-то. Начал искать. И оказывается, что в Windows 10 отказались от протокола SMB1. Из-за безопасности. А установленный на моем роутере пакет программ Samba походу работает по протоколу SMB1. Поэтому Windows 10 его не видит. Но другие компьютеры, которые так же работают на Windows 10 у меня так же не отображались на вкладке «Сеть». Так как обновить протокол к SMB2 в настройках роутера я не мог, то решил что нужно как-то включить поддержку SMB1 в Windows 10. И как оказалось, это без проблем можно сделать. В итоге, после подключения компонента «Клиент SMB 1.0/CIFS» у меня все заработало. Система увидела общие папки на компьютерах в сети и сетевую папку настроенную на самом роутере. Как включить SMB1 в Windows 10?Через поиск найдите и откройте старую «Панель управления».
Переключитесь на «Мелкие значки» и откройте «Программы и компоненты».
Открываем «Включение или отключение компонентов Windows». Находим пункт «Поддержка общего доступа к файлам SMB 1.0/CIFS». Открываем его и ставим галочку возле «Клиент SMB 1.0/CIFS». Нажимаем Ok.
Если компьютер выдаст запрос на перезагрузку, то перезагрузите его. Если окна с предложением не будет, то выполните перезагрузку вручную. После перезагрузки, на вкладке «Сеть» – «Компьютер» должны появится все доступные устройства в вашей сети. Буду рад, если эта статья кому-то пригодится и поможет решить возникшую проблему. Не забудьте написать в комментариях о результатах. Или задать вопрос, куда же без них
Posts: 188 Joined: Dec 2017 Reputation: I’ve spent hours on this one. I have Kodi on my Android Smart TV and Tablet. Works fine connecting to one of my MyCloud NAS units. Decided to setup a «volume 2» with another MyCloud NAS I have. Keep trying to add it to Kodi and get Error 2: Share Not Available. I have compared both MyCloud devices settings by settings and they are the same. I can see the second MyCloud on my Windows 10 PC, on my Android device with ES Explorer and I can even open files on my tablet to it. But for the life of me, I cannot get it added to my video streaming in Kodi via SMB. I give it the server name, tried browsing, added the ip address instead, added the shared folder and I get the Error 2: Share Not Available. What could I be doing wrong? Thank you!
Posts: 13,643 Joined: Nov 2009 Reputation:
Klojum Team-Kodi Member
So do we, explaining to people what changed and why in the latest Kodi stable and nightly builds In short, Kodi recently started using SMBv2 instead of the ‘ancient’ SMBv1. The old Samba version simply allowed way too much in all kinds of ways (remember the worldwide WannaCry attack?). For correct SMBv2 usage, you need a Windows user with full credentials, meaning a password is required. It is very much possible that your other devices are still using/supporting the SMBv1 protocol. Kodi decided to take the more secure step in SMB networking.
Posts: 188 Joined: Dec 2017 Reputation: I can appreciate your frustration with users asking the same questions or being ignorant. [I work full time in IT and see this everyday. I have to remember why I am there and they are my ‘ministry’ so to speak.] I did spend several hours looking even on this site and just didn’t find the information. Obviously I missed it. I was back on this post ironically to say I got it to work just now. But the only thing I did was change the share name and device name. Go figure. Didn’t have to enter any credentials or make any other changes. I do appreciate your quick response!
Posts: 13,643 Joined: Nov 2009 Reputation:
Klojum Team-Kodi Member
Then you are probably still on a SMBv1 network. The walls have ears/eyes…
Posts: 293 Joined: Dec 2015 Reputation:
mazey
is 17.6 on android running smb2 because for awhile network share browsing comes up empty have to add manually which is fine. im sharing from a windows 10 pro updated machine. so i guess its using smb2? it would be nice if it showed the smb version in kodi information in the network tab so we didnt need to guess.
Posts: 785 Joined: Feb 2015 Reputation:
Rechi Team-Kodi Member Kodi 17.6 (and lower) on android has only support for SMBv1.
Posts: 1 Joined: Feb 2020 Reputation:
USE THIS So, add source Your welcome, all these convoluted explanations, just tell me the steps and stop yammering on. Spent hours trying to read all these forums with no luck, figured it out myself. Doinkmiester our
Posts: 13,643 Joined: Nov 2009 Reputation:
Klojum Team-Kodi Member
Why are you starting your first post in an almost 2 yr old thread, and mentioning an IP address that leads to nowhere…
Hmmm… Tell Microsoft to do just that when bringing up network connectivity. It would save us a lot of time and effort as well.
Posts: 160 Joined: May 2015 Reputation:
The latest KODi 19 builds have smb share issues too. The build from 25.01.2020 is working, after this no connections. Log https://paste.kodi.tv/winuxikeja.kodi or https://pastebin.com/MrRaWF49
Posts: 1 Joined: May 2020 Reputation:
Thank you very much your answer was so easy to follow and worked first time after weeks of following other leads
Posts: 13,643 Joined: Nov 2009 Reputation:
Klojum Team-Kodi Member
Useless quoting of posts is not appreciated. Also this being your first posts, which is also based on nothing (the post you quoted contained no useful info whatsoever), will keep you on our radar for the time being.
Posts: 1 Joined: Jul 2020 Reputation:
I have also spent a lot of time on this one…
Posts: 1 Joined: Aug 2020 Reputation:
Hello everybody, matteo
Posts: 1 Joined: Mar 2017 Reputation:
Im also getting this error. Does the user need to be an administrator on the windows machine?
Posts: 188 Joined: Dec 2017 Reputation:
I found the best solution to go to File Manager and add the source there first. Once it is recognized there, it seems to be able to be added as a source under Videos with no real issues.
Kodi is open-source software that is available free of cost and is made for home entertainment purposes. Being one of the oldest software to exist for sharing files across devices, it has made an entire crowd of users and developers who prefer using this software. Sometimes, you may come across Error 2 on the screen while using this software due to which you will be unable to share or access any files on devices connected. In this article, we will list down every method to fix this Kodi Error 2 for you to fix this issue with ease and not have to fret over it time and again if you come across the error in the future. What Causes the Kodi Error 2 Share Not Available Issue?Before we dive deep into the solution part of the article, we must figure out why this Kodi error 2 shows up on the screen. The two reasons we could find were the network connectivity fault and failure in account permissions to the software. If you haven’t given the appropriate permissions to Kodi then you may find the error of Kodi smb not working popping on your screen now and then. The network misconnection may also be one good reason why your software may be displaying that message so you may want to check with your network provider once. Now that we know about the basic reasons behind Kodi SMB share not working, we have listed down 5 different methods to fix this issue. Fixing Kodi Error 2 Share Not Available issue:Solution 1: Checking Account PermissionsResetting the account permissions for some devices may fix the error of Kodi SMB share not working. At times, the devices may not receive the correct permissions required to run some software and programs thus resulting in the error appearing. To check for the account permissions, follow the steps listed down:
Solution 2: Try RestartingGiving a reboot to your software will remove any bug or error that it may be facing so this method will fix any inlaid problem to make your Kodi run error-free again. To do this, follow the steps given ahead:
Solution 3: Sign Out Of Your Kodi AccountTrying out this method may be a good option if the previous two have failed to work. Logging into your Kodi account may give you a chance for your system to fix the Kodi Error 2 on your software. The steps to be followed are extremely easy to be followed through:
Solution 4: Check the Network ConnectionThe Kodi software generally requires the device in which your media files are kept and your access device to have the same network connection to share files cross-platform. Now if you have some issues with your network connection, chances are you may be greeted with the Kodi SMB not working error on your screen. The changes in your network connection may be a result of your security system so we recommend you check whether both the devices are connected to the same network or not. Solution 5: Add SMB to KodiThis last method is quite effective to fix the problem of Kodi SMB shares not being available. If your device lacks SMB connectivity then you can manually add it to your Kodi software. To do this, follow the guide given below:
Now you can give a restart to your device and check for the Kodi error 2 problems persisting or not. ConclusionIn this article, we have discussed with you the reasons why your device may be showing Kodi error 2 share not available and have listed down all the possible methods to fix the error effectively. We hope this has been helpful for you and you can share and transfer files with ease between your devices again! Read:
Hi, I am Sumit Bagga, a tech blogger, writer, and SEO. I write troubleshooting guides and product reviews helping readers across the world. Hello reader! I’m back again with yet another troubleshooting procedure for Kodi. And this time, I’ll cover the Kodi SMB not working error. Habitual SMB users on Kodi need no explanation about SMB. However, for the benefit of the new SMB users, I’ll glance through SMB for Kodi. Server Message Block (SMB) or Windows File Sharing is a client-server protocol Windows uses to share resources over a local network. All the Windows PCs are equipped with SMB and a home user can easily set it up. What makes SMB the best network protocol is its versatility. It can be accessed by any operating system to stream content on any Network Attached Storage (NAS) or other external remote hardware. In the following sections, you will learn:
How to access local files on Kodi via SMB?There are two basic ways to add a remote media folder to Kodi via SMB. You need to give the folder containing media files Read/Write permission to add the Source Folder to Kodi. Note: SMB v1 is no longer supported on Kodi. Make sure you are using SMB v2 or higher. SMB v1 had security issues on Windows and was thus slashed off Windows. The only available option to access shares was to input the IP address or the device name with the path. To enable browsing SMB shares again, Kodi v19.1 implemented the WS-Discovery protocol (a multicast delivery protocol to access files on a local network). Follow these steps to add a share to Kodi with Windows Network (SMB). Step 1:Go to Settings and select File manager Step 2:Select Browse source Step 3:Select Browse for new shares Step 4:From the list of options, choose Windows Network (SMB) Step 5:Now, navigate to the source folder path and select it Step 6:Hit OK to add the folder to Kodi If the Windows Network (SMB) method doesn’t work for you, try adding the source folder with the device’s IP address or name. Here’s how to do it! To add a source folder using the IP address or device name, follow these steps. Step 1:Reserve a static IP address for your hardware. To create a static IP address, add the MAC address of the device to the router’s Reservation list after logging in. Step 2:Under Browse for new shares list in Kodi, select Add network location Step 3:In the Add network location window, set the protocol to Windows Network (SMB) Step 4:Select Server name and input the reserved static IP address of the hardware or the device name (use any one of the two methods) Step 5:In the Shared folder field, type in the name of the folder you would like to add as it is saved in the device along with the drive location letter (for IP address method) or just type in the folder name without drive location letter (for device name method) Step 6:Type in the username and password if prompted in the same window Step 7:Hit OK to complete adding the source media folder Your share will appear in the Browse for new shares list. Depending on the method you used, you would either see the IP address or the device name for the share. Before we get started with troubleshooting, make sure you are using SMBv2 or higher. These steps might help you fix the SMB not working error on Kodi 19. Step 1:Open Kodi on your PC and go to Settings Step 2:Go to Services Step 3:On the left pane, select SMB client. If you don’t see the SMB client option on the left pane, make sure you have enabled the Expert settings. Step 4:Under SMB client, set the Minimum protocol version to SMB v1 if it is set as None or other Step 5:Check the Maximum protocol version and change it to SMB v3. Some Kodi users suggest using SMBv1 for maximum requirement but it is considered to be not as secure as the SMBv3. Step 6:Go back to the Library to update the share path Step 7:Select a media type and go to files Step 8:If you have an existing path in the selected media type, click and hold and select Edit source. Otherwise, select the Add [media type] option Step 9:In the Add [media type source] window, click on Browse Step 10:If you have the shares added to Kodi, select one. Otherwise, go to Add network location. Step 11:Follow the above steps to add a share using the IP address or device name. Make sure to use the same username and password as that of your computer. This will resolve the ‘Operation not permitted’ error and SMB will be up and running on Kodi in no time. You can now easily access old SMB network locations with the set username and password. Bonus Kodi SMB TipsIf the above troubleshooting method doesn’t fix the Kodi SMB not working issue, try these fixes.
If you are an avid Kodi streamer, you might want to check out the Best Kodi tips. SMB alternativesSMB has been the standard client-server protocol on Windows and DOS since 1992. However, there are quite a few SMB alternatives you might want to consider to enable sharing local files to Kodi. Check them out! Univention Corporate ServerUCS is an integrated identity and infrastructure management system used to administer users and applications. It is compatible with Windows, Mac OS X, and Linux. It uses Extensive Directory functions to allow integration in Windows. NQENQE is one of the best embedded implementations of the SMB protocol. It is also known as Common Internet File System (CIFS) which is a network file system protocol for providing shared access to files and printers between devices on the same network. With the help of CIFS, you can edit, add, and remove files from the Kodi library. FAQsTo add a share on Kodi, go to Settings > File manager > Browse source > Browse for new shares > Windows Network (SMB). Finally, navigate to the folder path and hit OK. Which is better: SMB or NFS?SMB and NFS are network protocols used to access files over a network. With NFS, every user on an authenticated system can access a specific share as it uses the host-based authentication system. This is not possible with SMB as it uses user-based authentication, by which it is possible to separate multiple users from a single authenticated machine and enable file and printer sharing to all users at once. SMB is the ideal solution for Windows servers, whereas unencrypted NFS is the first-choice protocol for the Linux OS. Does Windows 10 use SMB?Currently, SMBv1, SMBv2, and SMBv3 work with Windows. However, the configuration requirements might vary from server to server. Fix ‘Kodi SMB not working’ errorSMB not working has been a pressing issue on Kodi recently, especially after the release of Kodi 19. Kodi 18 didn’t have any issues with SMB but a lot of Kodi 19 users had trouble with using Kodi for folder share. The above troubleshooting method should help you fix this burning issue. If not, contact Kodi support. Let us know in the comments section down below if this method worked for you.
By Amy | Follow | Recently, Kodi couldn’t connect to network server error is heatedly discussed. Many people wonder why the error occurs and how to fix it. Today, MiniTool would focus on this error and provide you with several solutions. Fix 1: Check the Internet ConnectionAs the error message “This could be due to the network not being connected” indicates, the “couldn’t connect to network server” error might occur due to the connection of Internet. Hence, you should check if there is something go wrong with your Internet connection when encountering the error. Tip: No matter you use a Fire TV/Stick, Android TV Box, or computer, they must be connected to Kodi via Wi-Fi. To check the errors with network configuration, you can run Windows Network Diagnostics utility. During the running process, it troubleshoots issues and detect errors. Recommended reading: Easily Fix Windows Was Unable to Connect to This Network Error Fix 2: Utilize VPNIf you don’t utilize VPN is likely that your Internet Service Provider (ISP), government, or app developer access your activity and block your traffic directed to the specific IP address. Based on that, you are recommended to utilize a VPN to avoid the Kodi couldn’t connect to network server error. Fix 3: Check the Running Status of the SourceIf you add the URL but it doesn’t work properly, it might result in Kodi unable to connect to the network server error. Besides, Kodi will keep changing URLs when a domain is shot down. Hence, you need to know the new URL for the add-ons you want to install. You are able to check the status of URL by searching the link in a web browser. If it works properly, you can see a page containing the add-on. On the contrary, if it is closed or down, you will see a page containing an error message. Fix 4: Update Add-onsThe outdated Kodi version is also responsible for the Kodi couldn’t connect to network server firestick error. Though Kodi can update itself automatically in most cases, it sometimes may have errors. Given to that fact, you should check the updates manually. Step 1: Launch Kodi to access its main interface and then click Add-ons. Step 2: In the expanded menu, click My add-ons to continue.
Step 3: Click the Check for Updates option. Then Kodi will install the latest version automatically. Step 4: After installation, restart Kodi. Fix 5: Reinstall KodiIf the “couldn’t connect to network server Kodi” error still persists after executing the above fixes, try reinstalling Kodi. This method is simple and effective. Firstly, uninstall Kodi and delete all files of Kodi. Usually, you can find it in C:UsersfredeAppDataRoamingKodi. After uninstallation, restart your computer. Then, click here to download and install Kodi. Finally, run Kodi to see if the error is solved completely. Are you still looking for methods for the Kodi couldn’t connect to network server error? Here are 5 available fixes. All of them are easy to operate. You can try them one by one until the error is fixed successfully. About The Author
Position: Columnist Having writing articles about computer tech for a long time, I am rather experienced especially on the aspect of computer optimization, PC enhancement, as well as tech terms explanation. The habit of looking through tech forums makes me a great computer issues collector. And then, many articles related to these issues are released, which benefit plenty of users. Professional, effective, and innovative are always the pursuit of an editing worker.
 Kodi is the best solution for you if you are looking for something seamless, easy to operate and have thing best performance. It is basically an open-source media platform, so obviously it is free and you can use it for all sorts of media applications. It is the best thing that you can have, as it supports the TVs and remote controls as well. Overall, Kodi is just the perfect thing to have for the elderly and all those who want to get an easy-to-use interface and get their desired streaming experience feasibly. Kodi is pretty stable, and there are not many problems that you will have to face while using it. Yet, there are some errors that you need to know about so you can fix them up easily. Kodi Error 2: Share not available is one such error message that will hinder your experience with Kodi. Basically, Kodi allows you to have a shared folder that has the content you can access easily on all the devices you are using on the Kodi platform. If that is not working for you, here are a few things that you will need to check upon. 1) Check Account Permissions There are a few permissions that you will have to check upon. It is not that simple, as you can either use a single account on all the Kodi devices across your place, or choose to have different devices with different accounts and still have access to the same resources on the network. This feature helps you with parental controls and keeping some devices off the restricted content if you need to. First of all, you should be checking the settings for your Shared Folder and make sure that the account your other device has signed in, is allowed to access the shared folder. This will most of the times solve this problem optimally for you and the error message will most likely be gone. Another thing that you will need to check on is the device permissions. You also need to allow the device that is trying to connect to access these shared resources. Despite the fact, that all the devices are using the same Kodi account, you will have to allow each device to access the shared folder to make it work. 2) Power Cycle If you have been using your device for some time over the same network and have not faced this problem earlier, then there might be some bug or temporary error that could be the reason behind this error message. Luckily, it is easier to fix and there are not many extensive troubleshooting steps that you will have to go through. All you have to do is turn your device off, and leave it be for a minute or two. After that, you can plug it back in and then turn it on again. This will retrigger an attempt to be connected over the network and will help you optimally in getting rid of the problem without causing many troubles for you on the shared folder access. 3) Re-log If a simple reboot is not working out for you, and you are still facing the same folder. Then there might be some other problem with the Kodi account that you are using on the specific device. The best way to get it sorted out is to logout of your Kodi account and then restart your device once. After that, you can log back in on your Kodi account and try accessing the folder again. This will optimally solve the problem for you most of the time without causing you much trouble. 4) Check the Network You will also need to be careful about the network that you are using. To have Kodi Shared folder access across your devices, the device you are trying to access the folder on, and the device it is stored on should be connected on the same network and have internet access for validity. This is done for the security reasons, and if you are facing the Error 2: Share not available on your Kodi interface, you must check it once and by connecting both devices on the same network is going to solve the problem for you. Возможно, вам также будет интересно:
Подписаться
авторизуйтесь
0 комментариев
Старые
|