
Самым надежным вариантом тестирования оперативной памяти является программа MemTest86+.
Нам необходимо записать утилиту Memtest86 на DVD диск либо флешку или создать загрузочную флешку, в состав которой входит данная программа. Читаем статью “Как создать мультизагрузочную флешку“, следуем пошаговой инструкции. После того как создана загрузочная флешка производим загрузку с неё, обычно для этого я использую “горячие клавиши” F8, F12, F11, Esc+клавиша отвечающая за быструю загрузку, в зависимости от модели мат. платы на компьютере/ноутбуке. После загрузки видим окно:

Заходим в дополнительные утилиты и выбираем Memtest86. Если все прошло успешно видим такую картинку:

После запуска программа будет проверять вашу оперативную память бесконечно, пока вы её не остановите клавишей ESC. Проверять можно как все модули памяти сразу, так и по одной. Проверяя все модули памяти, программа не скажет на какой именно ошибки, так что если есть ошибки, проверяйте лучше по одному модулю. Для проверки лучше сделать несколько циклов. А для максимального эффекта, лучше поставить проверку на ночь . Поле Pass означает количество проделанных циклов. Если у вас будут ошибки в памяти (колонка Error), вы увидите следующее:

Исправить оперативную память при наличии ошибок в программе невозможно. Это не как в жестком диске затереть битые сектора. Я рекомендую вот что:
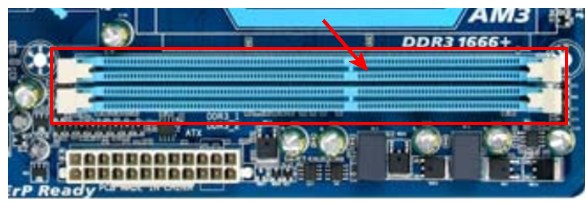
Самое распространённое – это выход из строя модуля оперативной памяти. Тестируем по одному модулю. Сначала этот модуль ставим в слот под оперативную память №1.
Тестируем,смотрим результат. Если ошибки есть как показано на рис. выше (там где выделено красным в программе Memtest), то ставим этот модуль слот под оперативную память №2. Тестируем,смотрим результат. Если ничего не изменилось,то модуль неисправен и подлежит замене. Меняем или ставим другой модуль памяти,тестируем. Если модуль памяти исправен,по окончанию теста в видим следующее:

Бывает что неисправен слот для оперативной памяти на мат. плате. В этом случае подключаем модуль в другой свободный слот, далее рассматриваем целесообразность работы компьютера в данной конфигурации с неисправным слотом под оперативную память, целесообразность замены материнской платы, а может вас и так всё устроит, и объёма памяти вам будет достаточно.
В программе — 9 тестов:
Test 0 — [Address test, walking ones, no cache] – тестирования для выяснения проблем в адресе памяти.
Test 1 — [Addresstest, ownaddress] – глубокий тест для выявления ошибок в адресационной прописки памяти
Test 2 — [Movinginversions, ones&zeros] – проверка на трудноуловимые и аппаратные ошибки.
Test 3 — [Movinginversions, 8 bitpat] – как и предыдущий тест, только в нем используется алгоритм в 8ми битном подходе от 0 до 1. Тестируется 20 различных методов.
Test 4 — [Moving inversions, random pattern] – Выявление ошибок связанных с data sensitive. В этом тесте 60 различных методов.
Test 5 — [Block move, 64 moves] – Поиск проблем в схемах оперативной памяти.
Test 6 — [Moving inversions, 32 bit pat] – Самый долгий тест для выявления data sensitive errors.
Test 7 — [Randomnumbersequence] – Проверка ошибок в записи памяти.
Test 8 — [Modulo 20, ones&zeros] – Выявление скрытых ошибок в оперативной памяти с помощью буферизации и кеша.
Test 9 — [Bit fade test, 90 min, 2 patterns] – Тест может быть включен вручную. Он записывает адреса в памяти, после чего уходит в сон на 1.5 часа. После выхода из сна, сверяет биты в адресах, на схожесть. Клавишей C для ручного запуска. Тест требует около 3х часов времени.
Теперь вы увидели как проводится тестирование оперативной памяти, как восстановить её работоспособность самостоятельно и проверить с помощью программы Memtest86 с приведенной инструкцией.
ram
0
3
Други, добрый день
Подскажите, как такое возможно и что делать?
Есть машина с 64 ГБ оперативки, 4×16Гб (заняты все 4 слота)
Запустил тест памяти memtest86 и по ходу теста посыпались ошибки.
Ок, протестировал каждую планку поотдельности (каждую в своем слоте), думал найду битую. Хрена с два! Все планки проходят тесты по отдельности.
Поставил их снова в комп все 4, но уже в другие слоты. Опять лезут ошибки.
Что посоветуете?
- Ссылка
Вы не можете добавлять комментарии в эту тему. Тема перемещена в архив.
Похожие темы
Troubleshooting Memory Errors
- MemTest86 detected errors in my memory. Is there something wrong with my RAM?
- Why am I only getting errors during Test 13 Hammer Test?
- Why do I get errors only when testing RAM modules together, and not when individually tested?
- MemTest86 reported the memory address of the failure. What does this mean?
- How does MemTest86 report ECC errors?
- If I know the address decoding scheme, can I configure MemTest86 to report the failing module?
- How do I know which RAM module is failing?
- How do I fix the memory errors?
Below is a video overview on how to troubleshoot bad RAM with MemTest86.
Download
Right-click to download, MP4 format, 9MB
MemTest86 detected errors in my memory. Is there something wrong with my
RAM?
Please be aware that not all errors reported by MemTest86 are due to bad memory. The
test implicitly tests the CPU, L1 and L2 caches as well as
the motherboard. It is impossible for the test to determine what causes the failure to
occur. However, most failures will be due to a problem
with memory module. When it is not, the only option is to replace parts until the
failure is corrected.
Sometimes memory errors show up due to component incompatibility. A memory module may
work fine in one system and not in another.
This is not uncommon and is a source of confusion. In these situations the components
are not necessarily bad but have marginal
conditions that when combined with other components will cause errors.
Often the memory works in a different system or the vendor insists that it is good. In
these cases the memory is not necessarily bad
but is not able to operate reliably at full speed. Sometimes more conservative memory
timings on the motherboard will correct these errors.
In other cases the only option is to replace the memory with better quality, higher
speed memory. Don’t buy cheap memory and expect it to work
reliably. On occasion «block move» test errors will occur even with name brand memory
and a quality motherboard. These errors are legitimate and
should be corrected.
All valid memory errors should be corrected. It is possible that a particular error will
never show up in normal operation. However, operating
with marginal memory is risky and can result in data loss and even disk corruption. Even
if there is no overt indication of problems you cannot
assume that your system is unaffected. Sometimes intermittent errors can cause problems
that do not show up for a long time. You can be sure that
Murphy will get you if you know about a memory error and ignore it.
We are often asked about the reliability of errors reported by MemTest86. In the vast
majority of cases errors reported by the test are valid.
There are some systems that cause MemTest86 to be confused about the size of memory and
it will try to test non-existent memory. This will cause a
large number of consecutive addresses to be reported as bad and generally there will be
many bits in error. If you have a relatively small number
of failing addresses and only one or two bits in error you can be certain that the
errors are valid. Also intermittent errors are without exception
valid. Frequently memory vendors question if MemTest86 supports their particular memory
type or a chipset. MemTest86 is designed to work with all
memory types and all chipsets.
MemTest86 cannot diagnose many types of PC failures. For example a faulty CPU that causes
Windows to crash will most likely just cause MemTest86 to crash in the same way.
Why am I only getting errors during Test 13 Hammer Test?
The Hammer Test is designed to detect RAM modules that are susceptible to disturbance
errors caused by charge leakage. This phenomenon is characterized
in the research paper
Flipping Bits in Memory
Without Accessing Them: An Experimental Study of DRAM Disturbance Errors
by
Yoongu Kim et al.
According to the research, a significant number of RAM modules manufactured 2010 or
newer are affected by this defect. In simple terms, susceptible RAM modules can be
subjected to disturbance errors
when repeatedly accessing addresses in the same memory bank but different rows in a
short period of time. Errors occur when the repeated access causes charge loss in a
memory cell, before the cell contents
can be refreshed at the next DRAM refresh interval.
Starting from MemTest86 v6.2, the user may see a warning indicating that the RAM may be
vulnerable to high frequency row hammer bit flips.
This warning appears when errors are detected during the first pass (maximum hammer
rate) but no errors are detected during the second pass (lower hammer rate).
See MemTest86 Test Algorithms for a description of
the two passes that are performed during the Hammer Test (Test 13).
When performing the second pass, address pairs are hammered only at the rate deemed as
the maximum allowable by memory vendors (200K accesses per 64ms).
Once this rate is exceeded, the integrity of memory contents may no longer be
guaranteed. If errors are detected in both passes, errors are reported as normal.
The errors detected during Test 13, albeit exposed only in extreme memory access cases,
are most certainly real errors. During typical home PC usage (eg. web browsing, word
processing, etc.),
it is less likely that the memory usage pattern will fall into the extreme case that
make it vulnerable to disturbance errors. It may be of greater concern if you were
running highly sensitive equipment
such as medical equipment, aircraft control systems, or bank database servers. It is
impossible to predict with any accuracy if these errors will occur in real life
applications. One would need
to do a major scientific study of 1000 of computers and their usage patterns, then do a
forensic analysis of each application to study how it makes use of the RAM while it
executes. To date, we have only
seen 1-bit errors as a result of running the Hammer Test.
There are several actions that can be taken when you discover that your RAM modules are
vulnerable to disturbance errors:
- Do nothing
- Replace the RAM modules
- Use RAM modules with error-checking capabilities (eg. ECC)
Depending on your willingness to live with the possibility of these errors manifesting
itself as real problems,
you may choose to do nothing and accept the risk. For home use you may be willing to
live with the errors. In our experience, we have several machines that have been stable
for home/office use despite experiencing errors in the Hammer Test.
You may also choose to replace the RAM with modules that have been known to pass the
Hammer Test. Choose RAM modules of different brand/model as it is likely that the RAM
modules with the same model would still fail the Hammer test.
For sensitive equipment requiring high availability/reliability, you would replace the
RAM without question and would probably switch to RAM with error correction such as ECC
RAM. Even a 1-bit error can result in catastrophic consequences for say,
a bank account balance. Note that not all motherboards support ECC memory, so consult
the motherboard specifications before purchasing ECC RAM.
Detection and mitigation of row hammer errors
The ability of MemTest86 to detect and report on row hammer errors depends on several
factors and what mitigations are in place. To generate errors adjacent memory
rows must be repeatedly accessed. But hardware features such as multiple channels,
interleaving, scrambling,
Channel Hashing, NUMA & XOR schemes make it nearly impossible (for an arbitrary CPU &
RAM stick) to know which memory addresses correspond to which rows in the RAM.
Various mitigations might also be in place. Different BIOS firmware might set the
refresh interval to different values (tREFI). The shorter the interval the more
resistant the RAM will be to errors.
But shorter intervals result in higher power consumption and increased processing
overhead. Some CPUs also support pseudo target row refresh (pTRR) that can be used in
combination with pTRR-compliant RAM.
This field allows the RAM stick to indicate the MAC (Maximum Active Count) level which
is the RAM can support. A typical value might be 200,000 row activations.
Some CPUs also support the Joint Electron Design Engineering Council (JEDEC) Targeted
Row Refresh (TRR) algorithm. The TRR is an improved version of the previously
implemented
pTRR algorithm and does not inflict any performance drop or additional power usage.
As a result the row hammer test implemented in MemTest86 maybe not be the worst case
possible and vulnerabilities in the underlying RAM might be undetectable due to the
mitigations in
place in the BIOS and CPU.
Why do I get errors only when testing RAM modules together, and not
when individually tested?
Most memory systems nowadays operate in multiple channel mode in order to increase the
transfer rate between the RAM modules and the memory
controller. It is recommended that modules with identical specifications (ie. «matching
modules») when running in multi-channel mode. Some motherboards
also have compatibility issues with certain brand/models of RAM when running in
multi-channel mode.
When you see errors while running MemTest86 with multiple RAM modules installed, but not
when they are tested individually, it is likely that the multi-channel
configuration is the culprit. This could be due to mismatched RAM specifications, or
simply using brands/models of RAM that is incompatible with the motherboard.
Most motherboard vendors release a list of known compatible RAM models that have been
tested to work with your motherboard. Replace the modules with a matching set of
known good ones and see if you get better results.
MemTest86 reported the memory address of the failure. What does this
mean?
When MemTest86 detects errors during the memory tests, the memory address, actual and
expected data are reported to the user. The memory address is the location in system
memory where the data contained does not match what was expected.
This is the address that is specified by the CPU to the memory controller when
requesting data from DRAM. The memory controller then decodes this memory address to
identify the specific channel, DIMM, rank, DRAM chip, bank, row and column in DRAM using
a chipset-specific address decoding scheme.
The address decoding scheme is the process used by the memory controller to generate the
appropriate address signals to the DRAM chip. Depending on the memory controller, this
process can get fairly complex as it is not simply a a direct mapping of the system
address bits to the DRAM address bits. In order to increase
the memory performance, strategies such as channel interleaving (for Dual, Tri and Quad
channel setups), rank/bank/row interleaving, and address swizzling are used to increase
the concurrency of memory accesses. For some chipsets such as AMD, the address decoding
scheme can be configured/determined via PCI registers as
described in the chipset specifications. For other chipsets (eg. Intel), however, the
address decoding scheme is proprietary and not made available to the public. This makes
identifying the DRAM address and correspondingly, the failing module, much more
difficult. For that reason, MemTest86 only has the capability to report DRAM addresses
for supported hardware configurations.
How does MemTest86 report ECC errors?
Refer to ECC Technical Information for ECC reporting in MemTest86 and other ECC technical details.
If I know the address decoding scheme, can I configure MemTest86 to
report the failing module?
For systems where the address decoding scheme is known, MemTest86 provides several configuration file parameters to aid users in
determining the faulty module that corresponds to the memory address:
  ADDR2CHBITS=12,9,7
  ADDR2SLBITS=3,4
  ADDR2CSBITS=8
For each of these 3 parameters, a list of bit positions can be used to specify which
address bits of a memory address to exclusive-or (XOR) in order to determine the
corresponding [memory channel|slot|chip select (CS)] (0 or 1) of the failing module.
This is only useful if you know that the memory controller maps a particular address to
a [memory channel|slot|chip select (CS)] using this XOR-based decoding scheme. If these
parameters are specified and MemTest86 detects a memory error, the [memory
channel|slot|chip select (CS)] will be calculated and displayed along with the faulting
address.
How do I know which RAM module is failing?
Once a memory error has been detected, determining the failing SIMM/DIMM module is not a
clear cut procedure. Different CPUs map memory addresses
to physical memory sticks in different ways. Features like dual channel RAM (with
interleaving), channel hashing and NUMA make the mapping of addresses
to modules, banks & rows very difficult. Due to the large number of CPUs and motherboard
vendors and potential combinations of memory slots we do not have a general solution, though in some cases limited decode is possible. However, there are
steps that may be taken to determine the failing module. Here are some techniques that
you may wish to use:
-
Removing modules
This is simplest method for isolating a failing modules, but may only be
employed when one or more modules can be removed from the system. By
selectively removing modules from the system and then running the test you will
be able to find the bad modules.
Be sure to note exactly which modules are in the system when the test passes and
when the test fails. -
Rotating modules
When none of the modules can be removed then you may wish to rotate modules to
find the failing one. This technique can only be used if there
are three or more modules in the system. Change the location of two modules at a
time. For example put the module from slot 1 into slot 2
and put the module from slot 2 in slot 1. Run the test and if either the failing
bit or address changes then you know that the failing module
is one of the ones just moved. By using several combinations of module movement
you should be able to determine which module is failing. -
Replacing modules
If you are unable to use either of the previous techniques then you are left to
selective replacement of modules to find the failure.
How do I fix the memory errors?
Depending on what is causing the memory errors, you can try the following options:
- Replace the RAM modules (most common solution)
- Set default or conservative RAM timings
- Increase the RAM voltage levels
- Decrease the CPU voltage levels
- Apply BIOS update to fix incompatibility issues
- Flag the address ranges as ‘bad’
Once you have determined with certainty which RAM module(s) have failed, replacing them
with a new set of RAM modules usually fixes the errors. When choosing
which modules to use as a replacement, consider using one that is listed as compatible
by the motherboard vendor as it would have been verified by the vendor
itself.
Sometimes, memory errors only manifest themselves when RAM timings are set too
aggressively in the BIOS (eg. overclocking). For certain modules that support
higher performance XMP timings, consider using standard, non-XMP timings to see if you
get better results. Consult your motherboard manual on how to set or
reset your RAM timings to default settings.
For certain configurations (especially when using aggressive RAM timings), higher
voltage may be required in order to operate the RAM in stable conditions.
If you are using non-standard RAM timings, slightly increasing the voltage (eg. from
1.5V to 1.55V) may increase the stability. Increase the voltage at your
own risk as excessive voltage may damage the components of your system
A higher CPU voltage may cause overheating, resulting in memory errors that lead to system hangs/crashes.
Check with the motherboard vendor for instructions on configuring CPU voltage levels.
In certain cases, RAM incompability issues can be fixed with a BIOS update. Check the
motherboard vendor for updated BIOS with RAM compaibiliy fixes.
Several operating systems allow the user to pass in a list of ‘bad’ memory ranges to
prevent the operating system to use or allocate memory in that range.
See Blacklisting RAM Pages for more details.
Memtest86 – одна из лучших бесплатных программ для проверки оперативной памяти. Позволяет проводить диагностику в двух режимах: ручном и автоматическом. Главной ее особенностью является работа из-под DOS, благодаря этому исчезает необходимость установки на компьютер, тем самым пропадает зависимость от установленной версии Windows.
К сожалению, приложение доступно только на английском языке. Для работы с утилитой понадобится загрузочная флешка или диск. Подробнее с тем, как это сделать правильно и каков порядок работы с утилитой, можно ознакомиться, изучив информацию ниже.
Содержание статьи
- Как записать Memtest86 на USB-флешку или диск
- Как пользоваться Memtest86 (инструкция)
- Список доступных тестов
- Способы устранения ошибок
- Проблемы при работе с программой
- Восстанавливаем прежний объем флешки
- Подведение итогов
- Подробный видео урок по использованию Memtest86
- Комментарии пользователей

Для начала нужно разобраться, как записать рассматриваемую утилиту на накопитель, поскольку других способов воспользоваться ею не существует. Порядок действий следующий:
- В первую очередь необходимо зайти на официальный сайт программы Memtest86 и скачать утилиту по предложенной ссылке «Download (Version 9.1 Build 1000)».

Внимание! Скачивать программу следует исключительно с официального сайта. Иначе есть высокий риск того, что вместе с ней на компьютер будут загружены вредоносные программы, способные не только нарушить работу системы, но и украсть персональные данные пользователя.
- По умолчанию скачивается архив в формате «.zip«. Нажмите по нему правой кнопкой мыши и выберите «Извлечь в …«.

- Войти в папку с утилитой. В ней будет находиться ISO образ, необходимый для создания загрузочной флешки. Запускаем приложение «imageUSB«.

- В главном окне выберите флешку, оставив все другие настройки по умолчанию и нажмите на кнопку «Write» (Записать). Учтите, что вся информация, находящаяся на накопителе будет удалена. Некоторые пользователи отмечают, что после записи объем накопителя уменьшается, скажем с 4 ГБ до 50 МБ. Как это исправить, я расскажу ниже.

- Подтвердите действие, нажав «Yes».

- Нажмите «Да».

- После завершения записи необходимо перезагрузить компьютер и войти в биос.

- Измените настройки загрузки, выставив в качестве первого загрузочного устройства USB флешку. Обычно подобные настройки меняются в разделе «Boot».
- Сохранить настройки и перезапустить ПК.


Важно! Иногда в процессе записи программы Memtest86 на флешку через родную утилиту «imageUSB by PassMark» возникают ошибки. В таком случае воспользуйтесь «UltraISO«. Это более функциональное приложение, способное также записать ее на диск.
Если у вас современная версия биоса «UEFI», то приоритет загрузки легко поменять с помощью «Boot Manager». Для этого сразу после включения ПК начните нажимать одну из клавиш: F8, F9, F11 или F12, до появления меню с устройствами. Выберите накопитель с помощью стрелок и нажмите «Enter».

Как пользоваться Memtest86 (инструкция)
После запуска Memtest86 с загрузочной флешки, тестирование оперативной памяти запустится в автоматическом режиме со стандартными настройками через 10 секунд. В таком случае проверка пройдет в базовом режиме. В большинстве случаев этого бывает достаточно.

Однако, если вы хотите изменить некоторые настройки, то нажмите клавишу «ESC» для остановки теста. Затем нажмите цифру «3» для открытия главного меню.
В главном меню Memtest86 отобразятся доступные разделы со своими опциями для индивидуальной настройки проверки оперативной памяти:

- System Info – отобразит общую информацию о системе.
- Test Selection – отвечает за настройку тестов.
- Address Range – позволяет задать начальный и конечный адрес памяти.
- Cpu Selection – позволяет выбрать режим проверки (циклический, последовательный или параллельный).
- Start test – запустить тестирование оперативной памяти.
- Ram Benchmark – сравнительный тест с выводом результатов в виде графика.
- Settings – раздел общих настроек.
- Exit – выход.
Чтобы начать проверку в ручном режиме, нужно выбрать виды тестов, которые будут задействованы в процессе сканирования памяти. Для этого в Mentest86 откройте раздел «Test Selection», нажав клавишу в кавычках, в данном случае это «T» и обозначьте необходимые пункты.

Обычно тест длится несколько часов, однако точное время полной проверки оперативной памяти назвать сложно, поскольку это зависит от установленного объема ОЗУ. Дождитесь завершения тестирования и проверьте результат. В случае найденных ошибок, в графе «Error» отобразится их число.

Также в общем списке добавятся новые строки с отображением адреса, в чтении которого произошла ошибка.
Список доступных тестов
В разделе «Test Selection» вы найдете ряд тестов, которые можно отключать и включать по своему усмотрению.

- Test 0 – Проверяются адреса памяти.
- Test 1 – Глубокий вариант «Test 0». Используется для выявления ошибок в адресе.
- Test 3 – Вариант анализа адреса с использованием всех ядер процессора.
- Test 4 – Поиск трудноуловимых и аппаратных ошибок.
- Test 5 – Аналог предыдущего теста «Test 4» с использованием 8 битного алгоритма.
- Test 6 – Анализ схем ОЗУ.
- Test 7 – Выявление неисправностей вида «data sensitive».
- Test 8 – Выявление ошибок в процессе записи.
- Test 9 – Анализ с использованием метода буферизации и кэша.
- Test 10 – Выполняется запись адресов в оперативную память, по завершении уходит в режим сна на 1 час. По истечении обозначенного времени происходит сверка битов в адресах на схожесть.
- Test 13 – Выявление глобальных проблем.
Данные типы тестов присутствуют в Memtest86 v9.1 Free. Это самая последняя версия на момент публикации данной статьи. Возможно в других версиях произойдут изменения и некоторые пункты поменяются местами, обязательно учитывайте этот момент.
Способы устранения ошибок
Если программой Memtest86 были найдены ошибки, это не всегда значит, что планка памяти повреждена. Очень часто причиной проблемы является банальная загрязненность контактов, вследствие которой технические элементы не соприкасаются друг с другом должным образом.

Поэтому я предлагаю сделать следующее:
- Выньте модуль из разъема и протрите его от пыли чистой тряпочкой. Контакты желательно протереть школьным ластиком, после этого медицинским спиртом.
- Очистите от пыли слоты DDR на материнской плате.
- Аккуратно вставьте планку обратно в разъем. Также если используется один модуль, то можно его установить в другой слот материнской платы.
После выполнения всех пунктов повторите диагностику. Если результаты останутся такими же, то замените модуль.
Для информации! Иногда помогает поднятие напряжения, особенно если речь идет об оверклокерской памяти. Для ее правильной работы необходимо напряжение 2.2, а не стандартное 1.8.
Еще реже причиной появления ошибок становится разгон ОЗУ, в таком случае рекомендую вернуть ей прежние значения. Вероятно, текущая «память» не способна выдавать желаемые производственные характеристики.
Проблемы при работе с программой
Опишу решения нескольких распространенных проблем с которыми сталкиваются пользователи при работе с Memtest86.
- Не запускается с флешки (мигает курсор). Попробуйте перезаписать приложение через стандартный софт, идущий в комплекте архива или «Universal Usb Installer». Еще один вариант — провести низкоуровневое форматирование накопителя.
- Тест памяти зависает на отметке 15-25% или длится очень долго. Чтобы ускорить его и предотвратить зависания, просто не включайте «SMP» режим в начале тестирования.
Важно! Иногда может показаться, что при выполнении какой-то из задач компьютер завис. Это далеко не всегда так. В большинстве случаев нужно лишь немного подождать.
Восстанавливаем прежний объем флешки
Восстановить оригинальной объем флешки достаточно легко. Для этого мы будем использовать «imageUSB.exe», которая по умолчанию шла в архиве вместе с образом утилиты Memtets86, скачанного с официального сайта.
Подробная инструкция:
- Запускаем «imageUSB by PassMark», в разделе «Step 2» выставляем опцию «Reformat USB» и указываем необходимую файловую систему (желательно NTFS).

- Нажимаем кнопку «Reformat».
- Ждем окончания процесса, в результате которого будет возвращен прежний объем.

Также можно провести обычное форматирование через проводник Windows 10.
Подведение итогов
Скажу несколько слов о способности выявления дефектов приложением Memtets86.
- Приложение не видит проблему, если неисправна материнская плата или какой-либо ее компонент, например, слот DDR.
- Также дефекты не отображаются при несовместимости модулей DDR с материнской платой.
В целом Memtets86 является мощным инструментом для полной диагностики оперативной памяти, который регулярно использую в своей практике. А периодические обновления и бесплатность делают его незаменимым помощником. Поэтому, рекомендую.
Подробный видео урок по использованию Memtest86

Всем привет, в общем проблема в названии. Неделю назад обновил компьютер, купил новую оперативную память и вот на днях хотел идти уже за второй плажкой.
Комп:
Проц Intel Core i5-8400 @ 2.80GHz
Мать Gigabyte B360M H
Память CRUCIAL CT8G4DFS8266 DDR4 8GB
БП FSP PNR 500W [ATX-500PNR]
Сначала начну с того, почему я решил вообще сделать этот тест. Купил я оперативку на ддр4 в прошлый четверг (была до этого ддр3) на 8гб, проц, мать и по мелочи еще (куллера и тд). После сборки сел поиграть в ассасина последнего, и получил вылеты игры. Причем вылет может быть после часа-двух, а бывает после 15 минут игры. Вылеты продолжались с четверга по сей день, но особо я этому не придавал значение, т.к. вин 10 стоит мб уже больше 3-ех лет, многие драйвера могли быть несовместимы и т.д. Но сегодня у меня случился совсем редкий случай, синий экран. До этого он у меня был всего 1 раз на моей памяти, а тут и недели не прошло с момента обновления компа и даже после этого, я не сразу подумал на оперативку, т.к. в ошибки было сказано что-то про «хард драйв». но посмотрев дамп с помощью BlueScreenViewer и почитав в инете инфу насчет этого, я понял, что проблема может быть и также в оперативке. Прикреплю скрин, мб что-то там разглядите.
В общем скачал я Memtest, и на 3 прогоне всех тестов оперативка запоролась на 7 тесте, было обнаружено 8 ошибок, также прикреплю скрины
Что примечательно, после этого я сделал еще 4 прогона именно теста номер 7 по два раза, т.е. 8 тестов в общем и ни разу не показало ошибку
ПС. Также, стоит отметить, что после ошибок по советам обновил биос, но сомневаюсь, что в перетестах не показало ошибок именно из-за обновлений, т.к. прошлый биос был не такой старый, от августа 18 года