
Для Minecraft лучше использовать актуальные драйвера вашей видеокарты, иногда старые драйвера приводят к крашу игры. В данном гайде рассмотрим решение данной проблемы у встроенного видеоадаптера Intel G41. Используется в различных процессорах, к примеру: и так далее.
В первую очередь, нужно узнать, что у вас именно видеокарта G41, для этого открываем «Пуск» и в поиск пишем «Диспетчер устройств», заходим данную программу и открываем вкладку «Видеоадаптеры»:
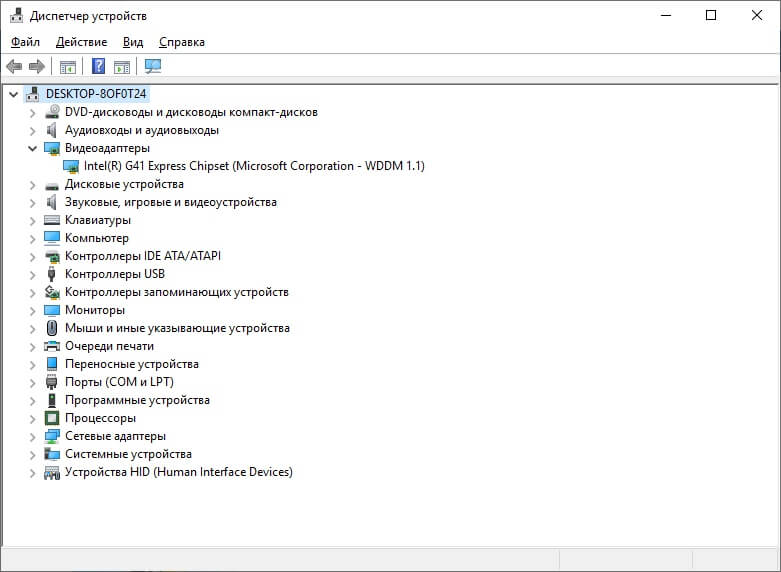
Будет как на скриншоте, конкретно указан данный видеоадаптер, если у вас отличается, вам нужно воспользоваться другим гайдом. А у кого именно он, делают дальше по инструкции.
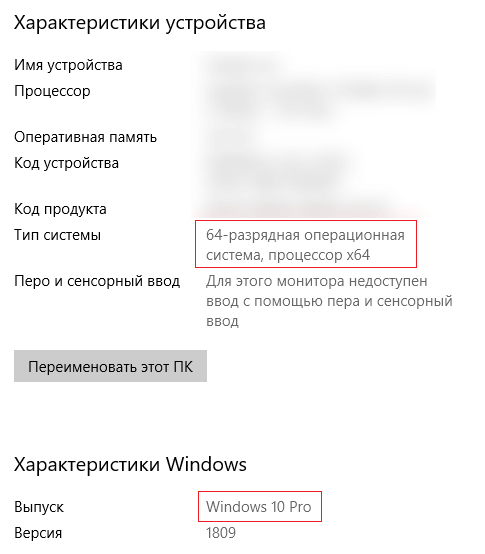
Плюс, Вам нужно узнать версию Windows и её разрядность. Открываем «Мой компьютер» -> «Свойства системы». Находим версию системы и разрядность, на скриншоте, это Windows 10 и 64 разрядность.
Содержание:
Решение для Windows 7, Vista
Решение для Windows 10, 8
Решение для Windows XP
Решение проблемы видеодрайвера у Intel G41 в Windows 7, Vista
1) Скачиваем рабочий драйвер видеокарты G41 — 15.22.58.2993 для Minecraft:
32-бит (разрядность) — Скачать с официального сайта Intel (x32) | (Зеркало x32)
64-бит (разрядность) — Скачать с официального сайта Intel (x64) | (Зеркало x64)
*На сайте Intel справа нажать на голубую кнопку «Загрузить».
*Файлы для зеркал взяты с сайта Intel, не были изменены и подписаны цифровой подписью Intel.
2) Устанавливаем скаченный драйвер, можно просто «Далее» нажимать. Готово! Можете пробовать играть.
Решение проблемы видеодрайвера у Intel G41 в Windows 10, 8
Так как драйвера от самого Intel для видеоадаптера G41 для Windows 10 просто нет, а тот который идёт с самой системой, не поддерживает графику OpenGL (крашит при запуске игры), то самыми простыми решениями будут:
1. Переустановить Windows установив 7 или XP.
2. Если есть возможность, приобрести видеокарту. Даже самая простая сможет запускать игру.
Решение проблемы видеодрайвера у Intel G41 в Windows XP
1) Скачиваем рабочий драйвер видеокарты G41 — 14.42.15.5420 для Minecraft:
32-бит (разрядность) — Скачать с официального сайта Intel (x32) | Зеркало x32
64-бит (разрядность) — Скачать с официального сайта Intel (x64) | Зеркало x64
2) Устанавливаем скаченный драйвер, можно просто «Далее» жать. Готово! Можете пробовать играть.
Если Ваша проблема остаётся актуальной, запросите поддержку у TLauncher:
Написать разработчикам с помощью VK.com
-
Partition Wizard
-
Partition Magic
- Minecraft Not Using GPU-Top 4 Methods to Fix This Issue
By Ariel | Follow |
Last Updated December 01, 2020
Have you come across the Minecraft not using GPU issue? This issue often occurs after updating the graphics card driver. How to fix Minecraft not using GPU? If you are also searching for the answer, this post of MiniTool is what you need.
The Minecraft not using GPU issue usually happens on a dual graphics card laptop. A dual graphics card laptop includes an integrated Intel GPU and a dedicated NVidia or AMD GPU. Some dual GPU users are troubled by the Minecraft not using dedicated GPU issue when playing the game.
Another situation is that the Minecraft not using GPU happens after they update the graphics card driver. How to make Minecraft use GPU? Here we will walk you through a full guide to fix the problem.
Fix 1. Use the NVidia GPU for Minecraft
If you encounter the Minecraft not using NVidia GPU issue, you can configure it through the NVidia control panel. To do so, follow the steps below:
Step 1. Right-click on the desktop and select the NVidia Control Panel.
Step 2. Click on Manage 3D Settings at the left window, and then locate the Global Settings tab and select the High-performance NVidia processor from the drop-down menu.

Step 3. Then navigate to the Program Settings tab to allow the NVidia GPU more specifically for Minecraft, and click on the Add button.
Step 4. In the pop-up window, click on the Browse button.
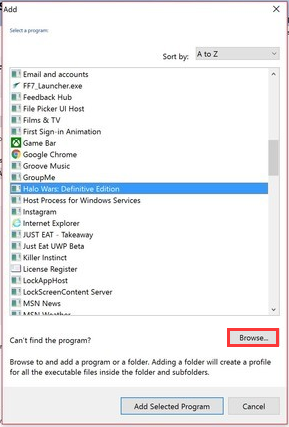
Step 5. Open the Minecraft folder in the Add window, and then find the bin subfolder and select the Javaw.exe file in the folder and click on Open button.
Tip: The bin folder is located in the C:Program Files (x86)Minecraftruntimejre-x641.8.0_25bin by default.
Step 6. After that, click on the Select the preferred graphics card for this program from the drop-down menu.
Step 7. Select the High-performance NVidia processor option and click on Apply to execute the changes.
Now, you can check if the Minecraft not using GPU issue is fixed.
Fix 2. Use the AMD GPU for Minecraft
If you are using the AMD graphics card, you can set it as GPU for Minecraft. Here’s how to make Minecraft use GPU:
Step 1. Right-click on the desktop and select the AMD Radeon Settings option.
Step 2. Navigate to the System tab and click on the Switchable Graphics option.
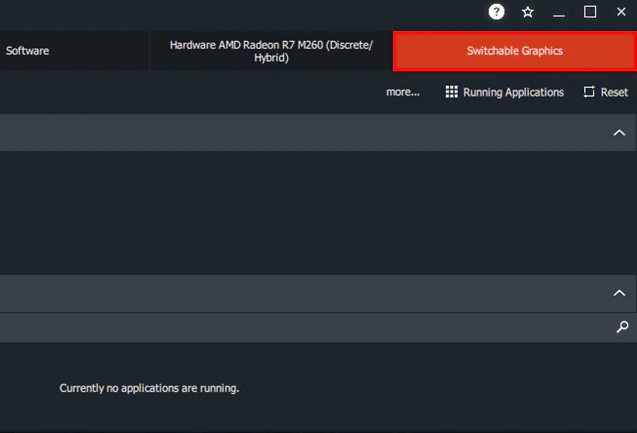
—image from amd.com
Step 3. Click on the Installed Profile Applications option to overview the installed software.
Step 4. Click on Browse to select the Javaw.exe file for Minecraft.
Step 5. Select the High Performance for the dedicated GPU.
Fix 3. Set High-Performance GPU via Settings
In addition to the above 2 methods, you can set high-performance GPU for Minecraft using the Windows 10 Settings app. For that:
Step 1. Type graphics in the search box and then select the Graphics Settings app from the best match.
Step 2. If you got the Minecraft from Microsoft store, select the Universal app from the drop-down menu.
Step 3. Click on Select an app menu and select Minecraft from the list of apps.
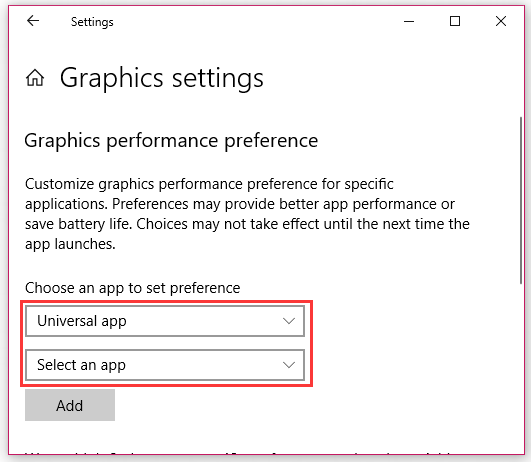
Step 4. Click on the Options button for Minecraft.
Step 5. Select the High performance and click on Save button.
Now, restart your computer and check if the Minecraft not using dedicated GPU is fixed or not.
Fix 4. Perform a System Restore to Undo These Changes
Many users report that they encounter the Minecraft not using GPU issue after updating the graphics card driver. To resolve the problem, you can try performing a system restore to undo these changes. If you don’t how to perform a system restore, you can refer to this post in which detailed steps are provided.
About The Author

Position: Columnist
Ariel has been working as a highly professional computer-relevant technology editor at MiniTool for many years. She has a strong passion for researching all knowledge related to the computer’s disk, partition, and Windows OS. Up till now, she has finished thousands of articles covering a broad range of topics and helped lots of users fix various problems. She focuses on the fields of disk management, OS backup, and PDF editing and provides her readers with insightful and informative content.
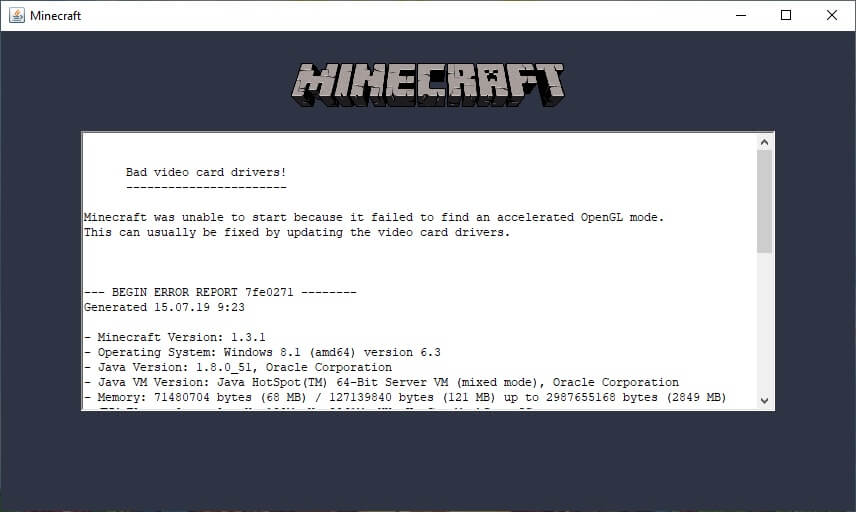
При открытии Minecraft может выдаваться уведомление BAD VIDEO CARD DRIVERS, из-за чего невозможно начать играть. Причина — драйвера видеоадаптера устарели.
Способы решения ошибки BAD VIDEO CARD DRIVERS
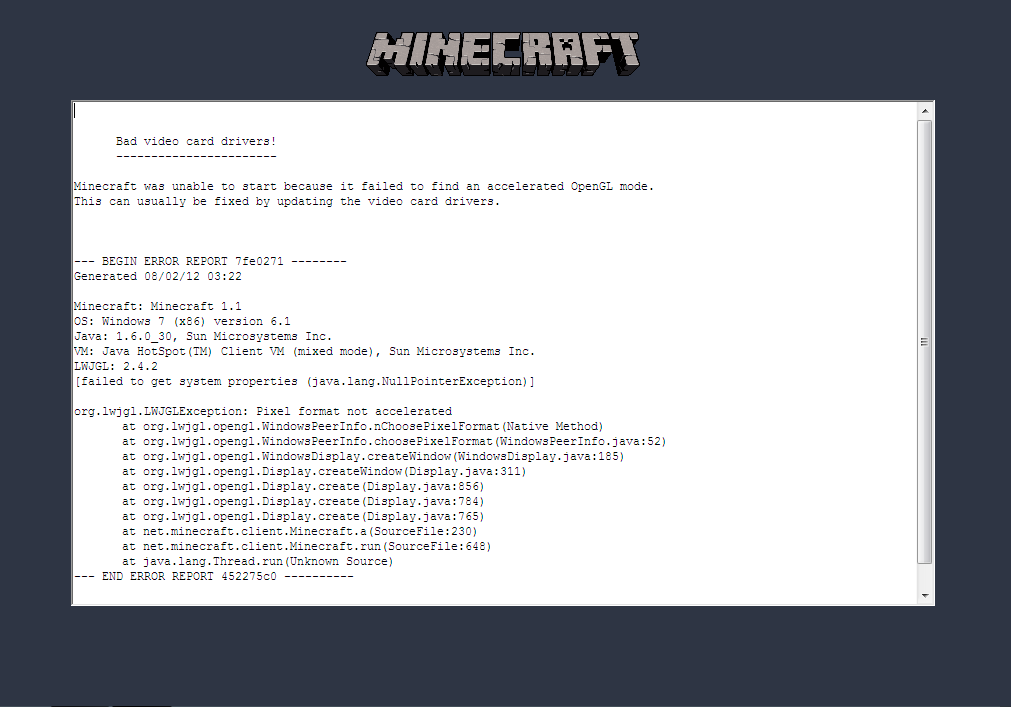
Решается проблема следующими способами:
- Обновиться вручную. Для этого откройте «Диспетчер задач», в разделе «Видеоадаптеры» правой кнопкой мышки клацните на названии видеокарты и следуйте по пути «Свойства» => «Драйвер» => «Обновить».
- Обновиться автоматически. Убедитесь, что в Центре обновлений активирована опция автоматической установки апдейтов.
- Скачать драйвера с сайта производителя видеокарты. Для этого нужно лишь знать название видеокарты, которое проверяется открытием Диспетчера задач. Потом посетите раздел поддержки (загрузок) на сайте производителя видеокарты и введите там название устройства. После сохраните и установите новый драйвер, что избавит от ошибки BAD VIDEO CARD DRIVERS.