
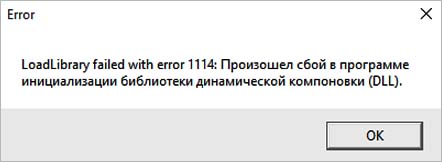
С ошибкой «LoadLibrary Failed with the Error 1114: Произошел сбой в программе инициализации библиотеки динамической компоновки (DLL)» чаще всего пользователи сталкиваются при запуске игр. Также она может препятствовать запуску программ обработки анимации и изображений, таких как Photoshop и Autodesk 3ds Max. Иногда из-за этой ошибки не удается использовать Вайбер или некоторые приложения Windows.
Самые распространенные причины связаны с настройками питания видеокарты или повреждением файлов DLL.
Изменения параметров электропитания
В большинстве случаев ошибку «LoadLibrary Failed with the Error 1114» удается исправить изменением параметров питания видеокарты. Процесс заключается в изменении настроек с оптимальной на максимальную производительность. В сбалансированном режиме Windows пытается снизить энергопотребление путем замедления или остановки некоторых процессов, которые требуются для работы программ.
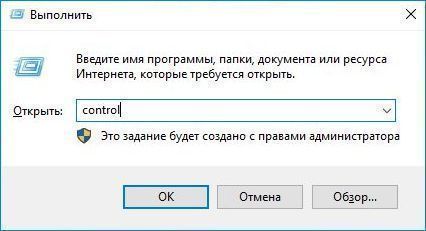
Откройте Панель управления командой control, запущенной из окна Win + R.
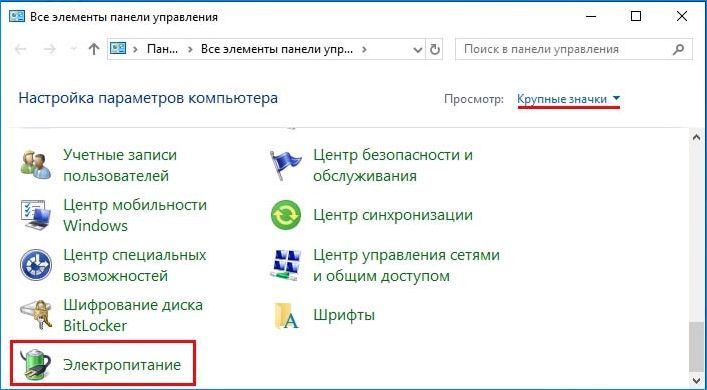
Переключите просмотр на крупные значки и перейдите в раздел Электропитания.
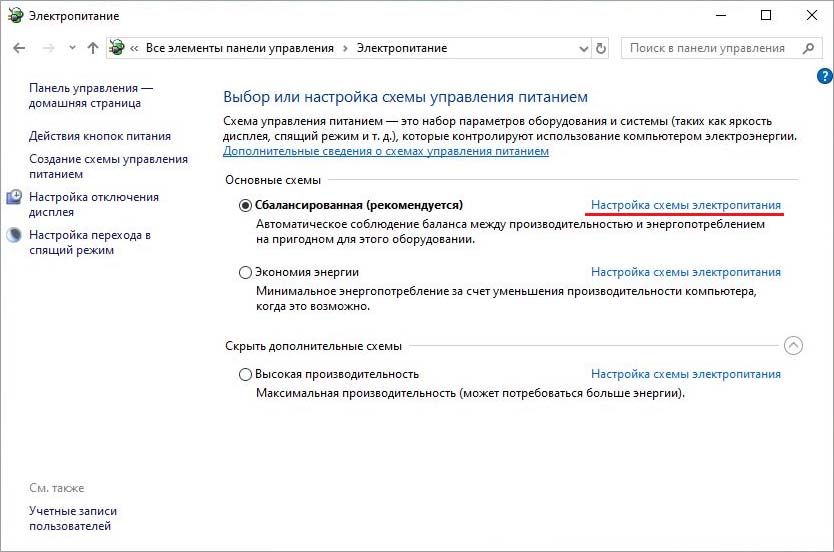
Нажмите на кнопку настройки схемы электропитания в соответствии с используемым планом.
В следующем окне кликните на «Изменить дополнительные параметры питания».
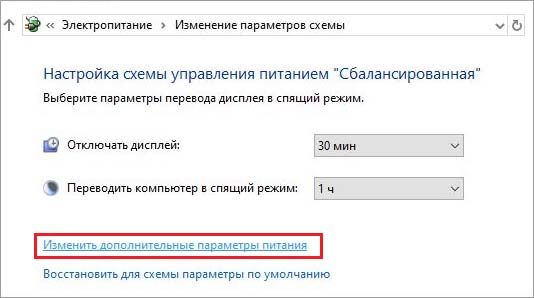
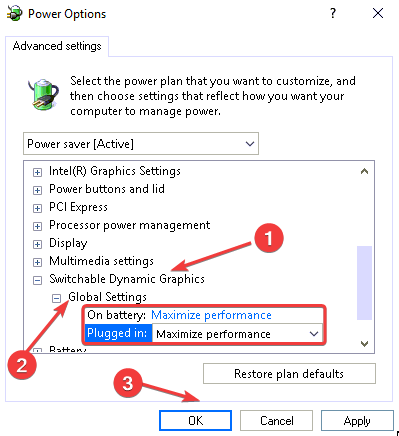
В списке разверните вкладки: Переключаемые графические адаптеры – Глобальные параметры. Щелкните поочередно на раскрывающие списки от батареи и то сети и измените значение из оптимальной на максимальную производительность.

Примените правки, и перезагрузите компьютер. Попробуйте запустить то приложение, которое вызывало сбой в программе инициализации библиотеки с кодом 1114.
Примечание: Если вкладка «Переключаемые графические адаптеры» отсутствует в списке, попробуйте активировать схему электропитания «Высокая производительность» и проверьте, решена ли проблема.
Установите автоматический запуск службы политики диагностики
Служба политики диагностики позволяет обнаруживать неполадки и устранять их. Поэтому она должна быть включена, чтобы разрешить операционной системе выполнять диагностику и предоставлять решения для устранения имеющихся проблем. В этом случае активируем этот процесс, чтобы автоматически ОС попыталась исправить сбой в программе инициализации LoadLibrary Failed with Error 1114.
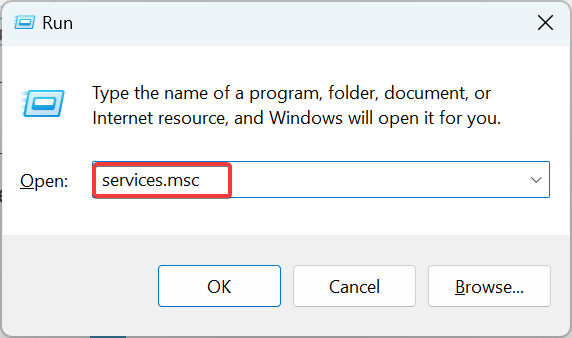
Откройте системные службы командой services.msc, запущенной из окна Win + R.

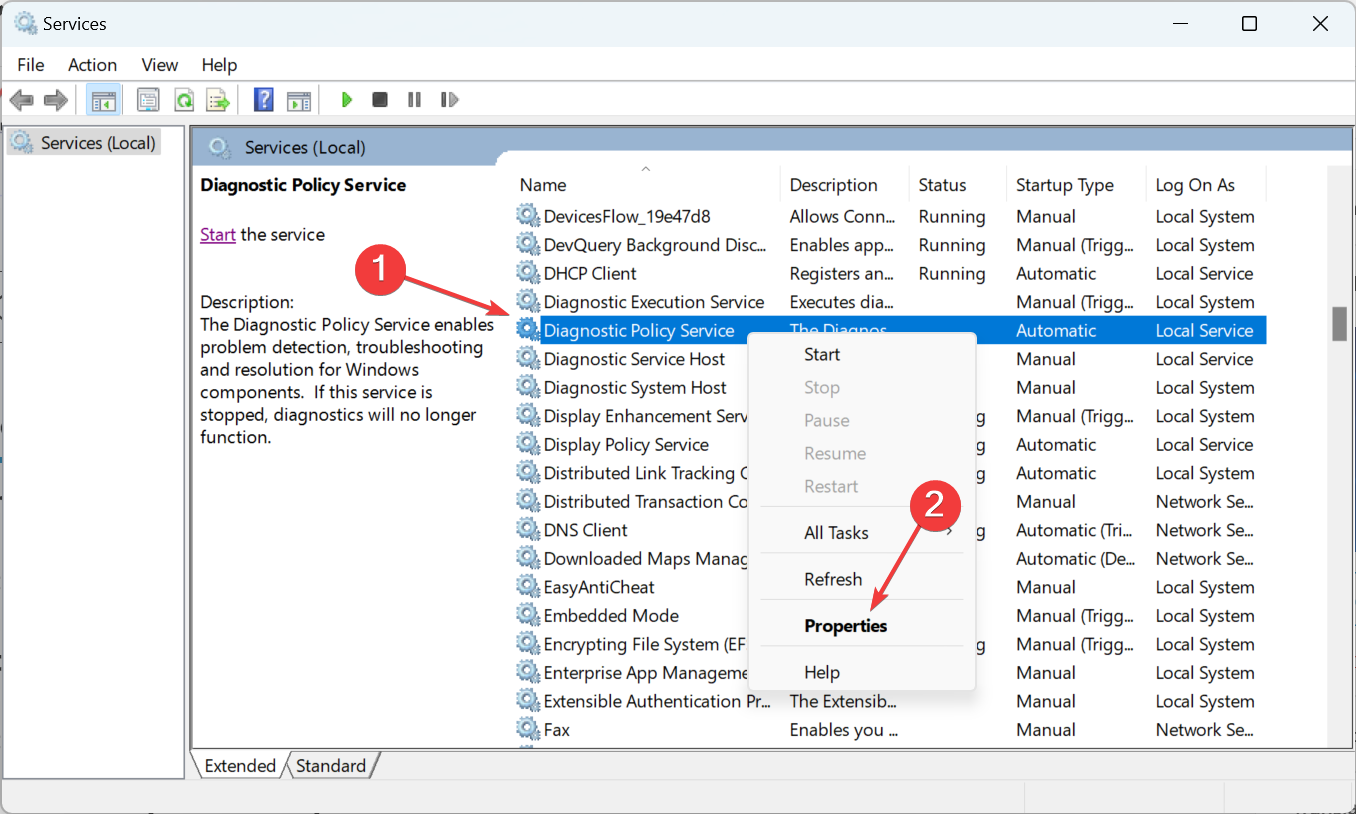
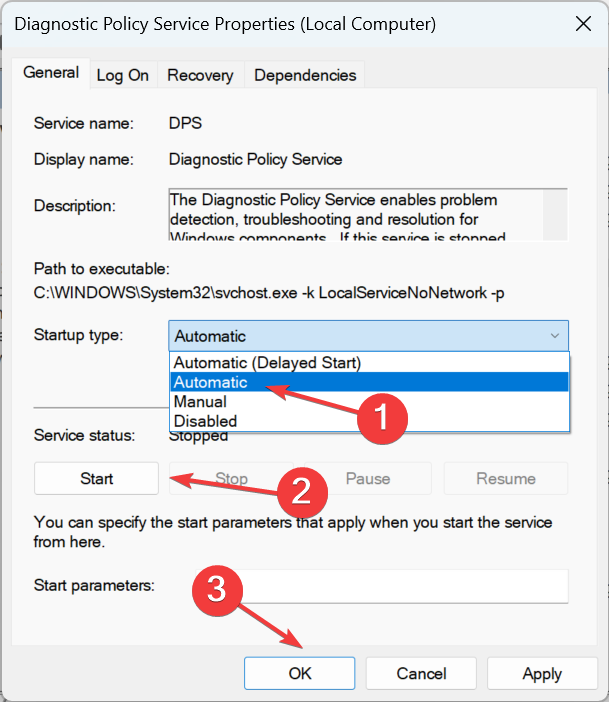
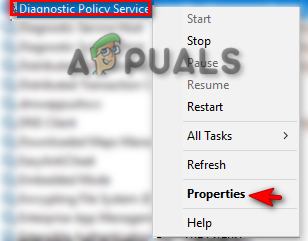
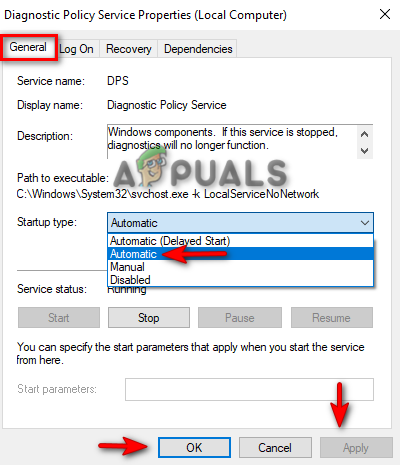
Найдите службу политики диагностики, щелкните на ней правой кнопкой мыши и выберите «Свойства». Затем щелкните на раскрывающий список типа запуска и выберите значение «Автоматически». Нажмите на кнопку «Запустить» и примените изменения.
Перезапустите ПК и откройте программное обеспечение, которое вызывало ошибку с кодом 1114.
Проверка системных файлов
Ошибку могут вызвать поврежденные файлы Windows, в частности библиотеки динамической компоновки DLL. Для проверки целостности системы используем утилиты SFC и DISM, которые работают через консоль командной строки.
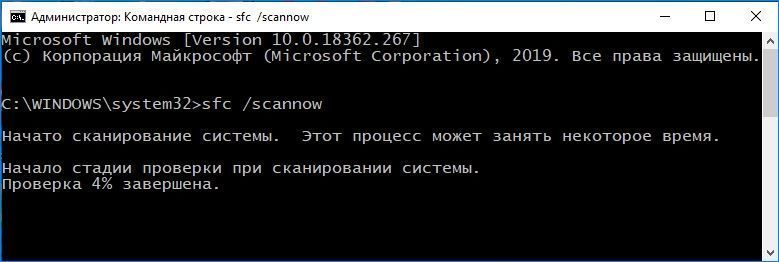
Запустите командную строку от имени администратора с помощью поиска Windows.

Запустите в консоли сканирование sfc /scannow и дождитесь его завершения.
Обычно этой команды достаточно, чтобы исправить ошибку 1114. Если проблема остается, после перепуска компьютера вернитесь в командную строку (администратор) и выполните следующую команду:
dism /online /cleanup-image /restorehealth
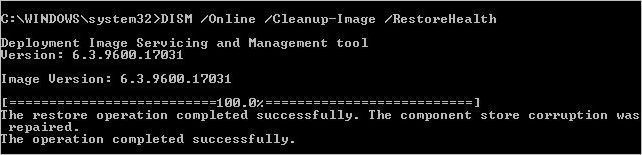
Перед выполнением проверьте подключение к интернету. Не прерывайте сканирование, пока процесс не достигнет 100%.
После завершения перезапустите ПК и выполните то действие, которое приводило к ошибке LoadLibrary Failed with Error 1114.
Проблема
При запуске Lightroom Classic или Lightroom 6 на компьютере с ОС Windows отображается сообщение об ошибке:
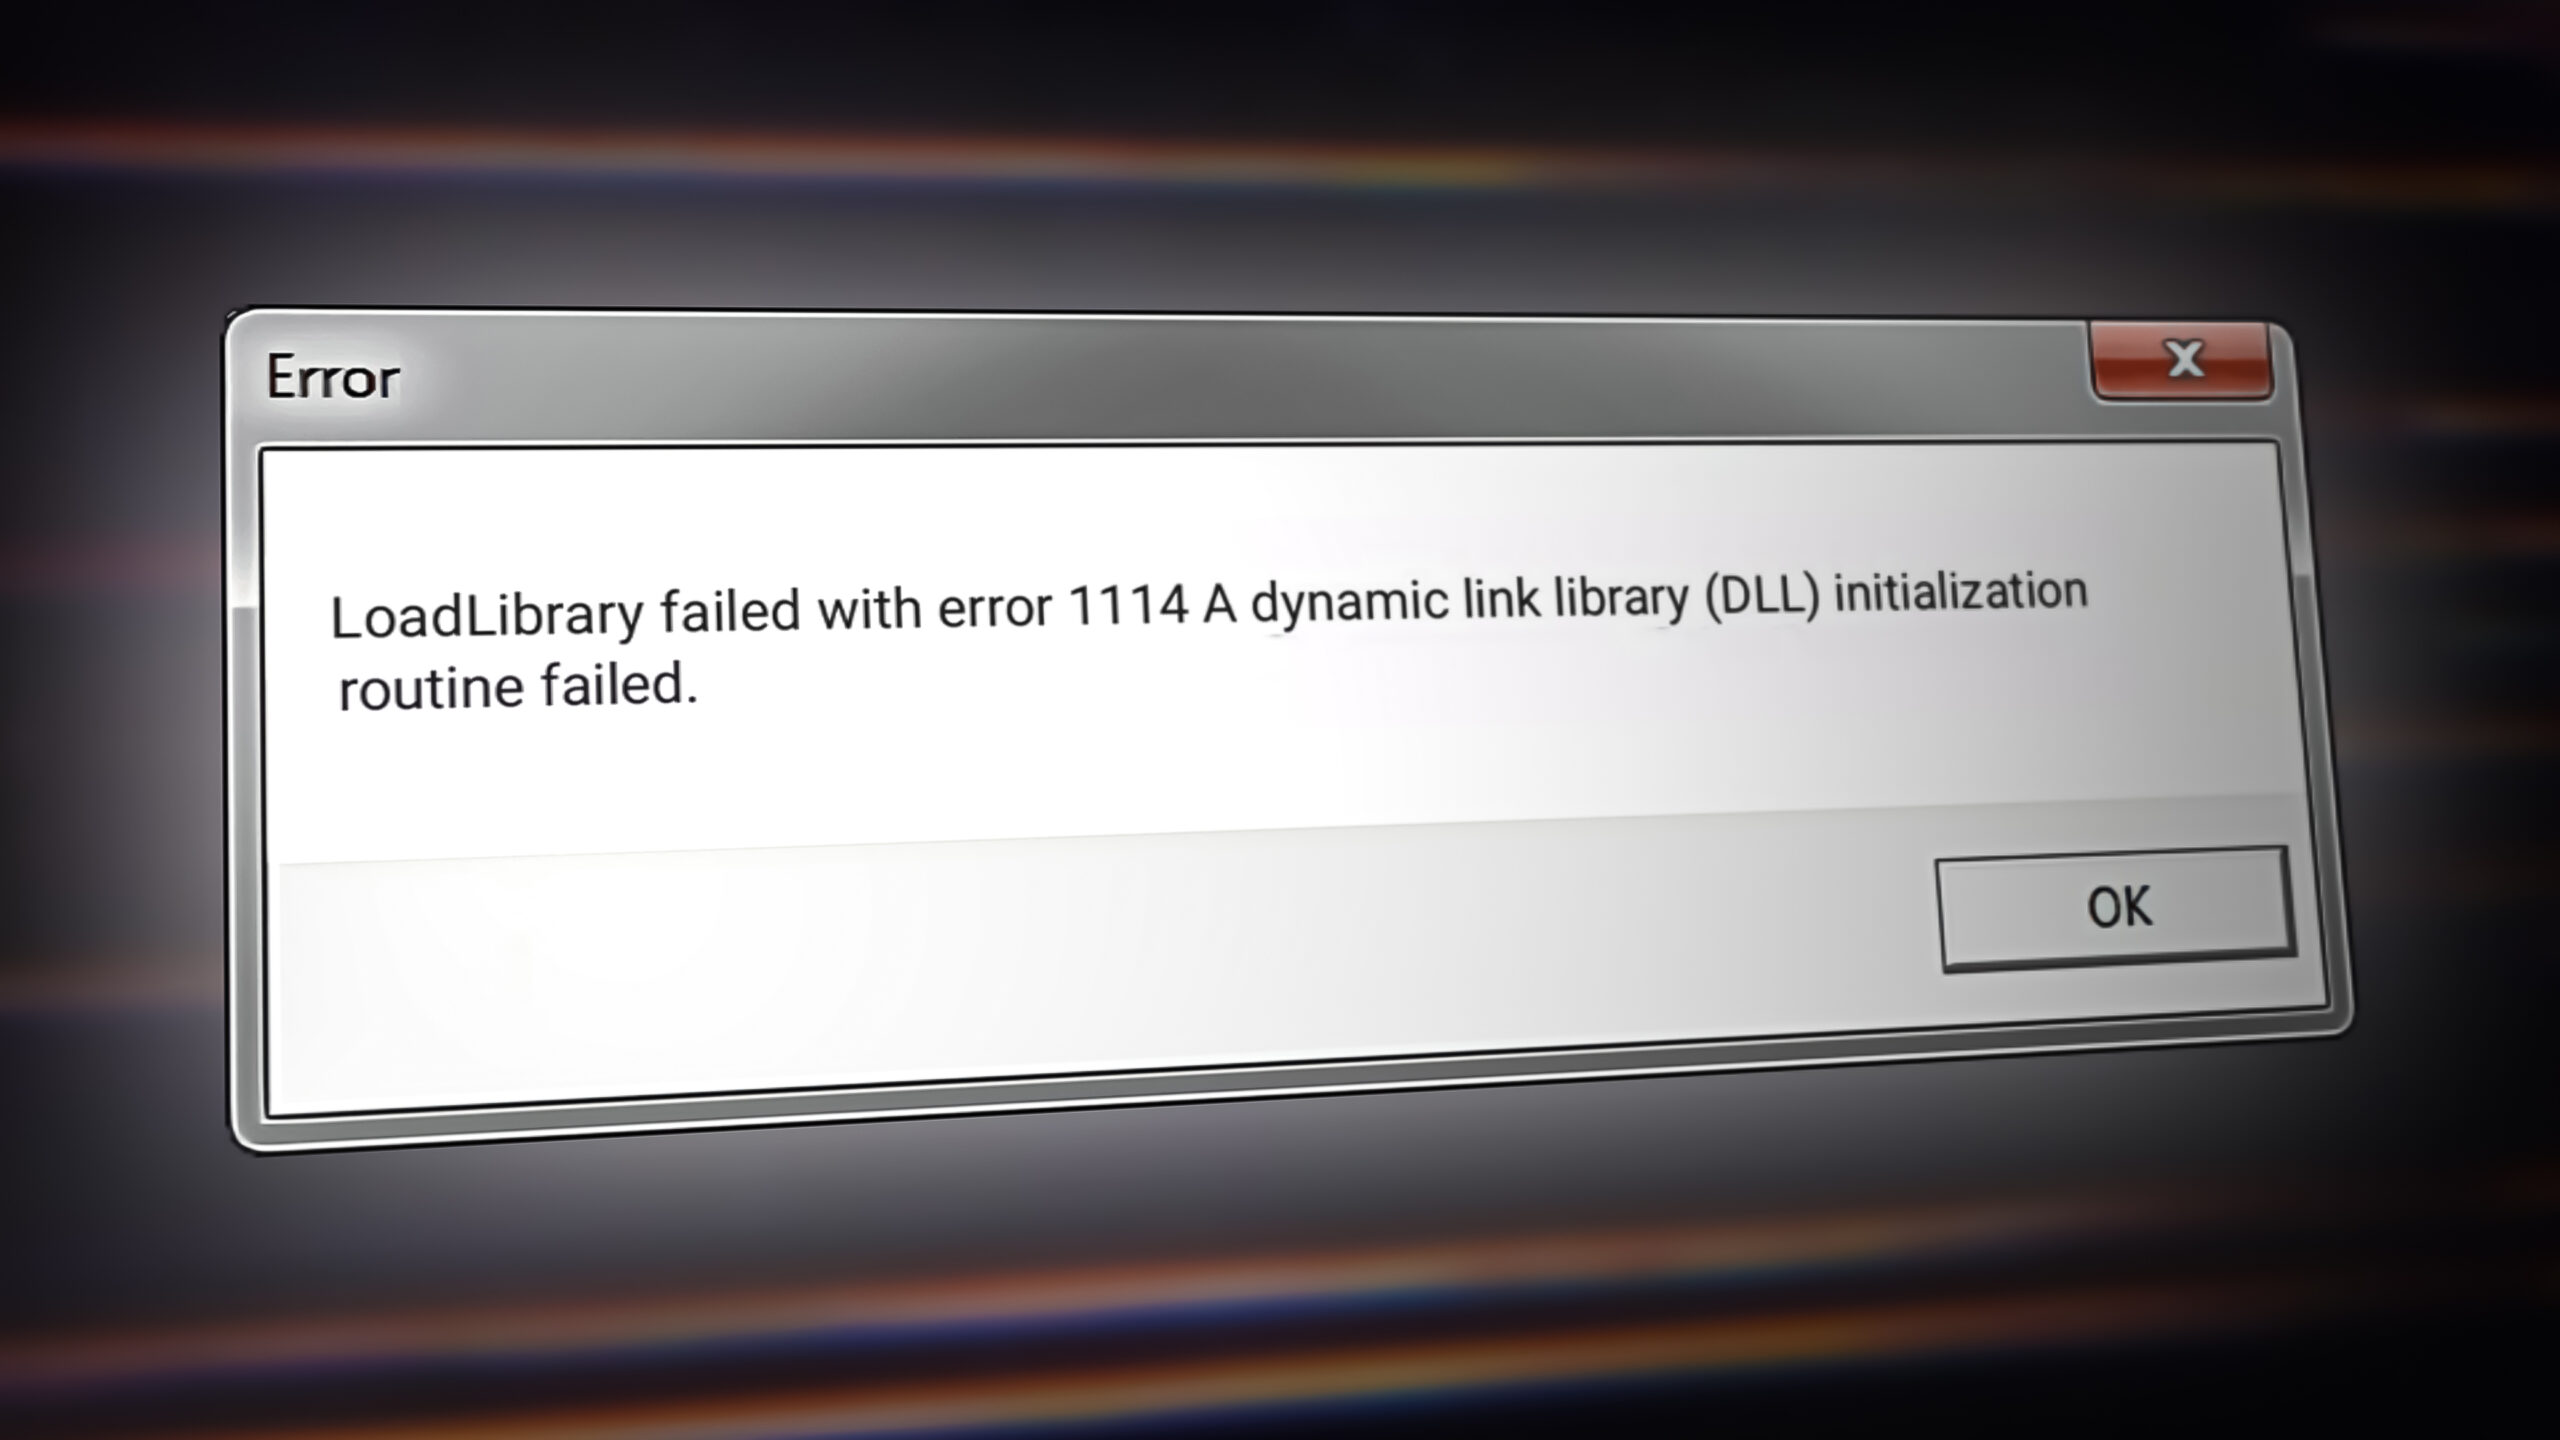
Сбой LoadLibrary с ошибкой 1114: Произошел сбой в программе инициализации библиотеки динамической компоновки (DLL).
Затронутые версии продуктов
Lightroom Classic и Lightroom 6
Операционная система
Windows 7 и более поздние версии
Причина
Эта проблема возникает на ноутбуках с ОС Windows с видеокартой AMD или NVIDIA, когда для параметра производительности Lightroom в программном обеспечении видеокарты задано значение Оптимизировать графическую производительность.
Вы можете столкнуться с этой проблемой на ПК с ОС Windows, если используется несколько видеокарт. Для устранения проблем, возникающих в связи с конфликтами графических драйверов, выполните Шаг 5 и Шаг 6 решения 3 «Шаги по устранению неполадок в работе графического процессора (ГП) и графического драйвера».
Решение
Чтобы устранить эту проблему на ноутбуке с ОС Windows, выполните следующие действия в указанном ниже порядке.
Для параметра «Графика» в Lightroom установите значение «Высокая производительность»
В программных настройках видеокарты измените параметр графики для Lightroom Classic или Lightroom 6 на «Высокая производительность».
Видеокарта AMD
- Нажмите правой кнопкой мыши в любой области рабочего стола и выберите AMD Catalyst Control Center или Настройки переключаемой графики.
- Нажмите «Обзор», добавьте файл Lightroom.exe в список приложений, а затем выберите «Высокая производительность» вместо «Энергосбережение».
См. справочную документацию AMD: Назначение приложений графическим процессорам.
Видеокарта NVIDIA
- Нажмите правой кнопкой мыши в любой области рабочего стола и выберите «Панель управления NVIDIA».
- Нажмите «Управление настройками 3D».
- Нажмите Настройки программы и добавьте Lightroom.exe. В качестве приоритетного графического процессора выберите Высокопроизводительный графический процессор NVIDIA.
Дополнительные сведения см. в справочной документации NVIDIA: Как создать настройки Optimus для новой программы?
Установите для параметра питания «Переключение динамической графики» значение «Максимальная производительность»
Щелкните правой кнопкой мыши значок Windows. В появившемся списке щелкните «Электропитание».
После этого откроется окно параметров питания и спящего режима. Выберите параметр «Дополнительные параметры питания», который отображается под пунктом «Связанные параметры».
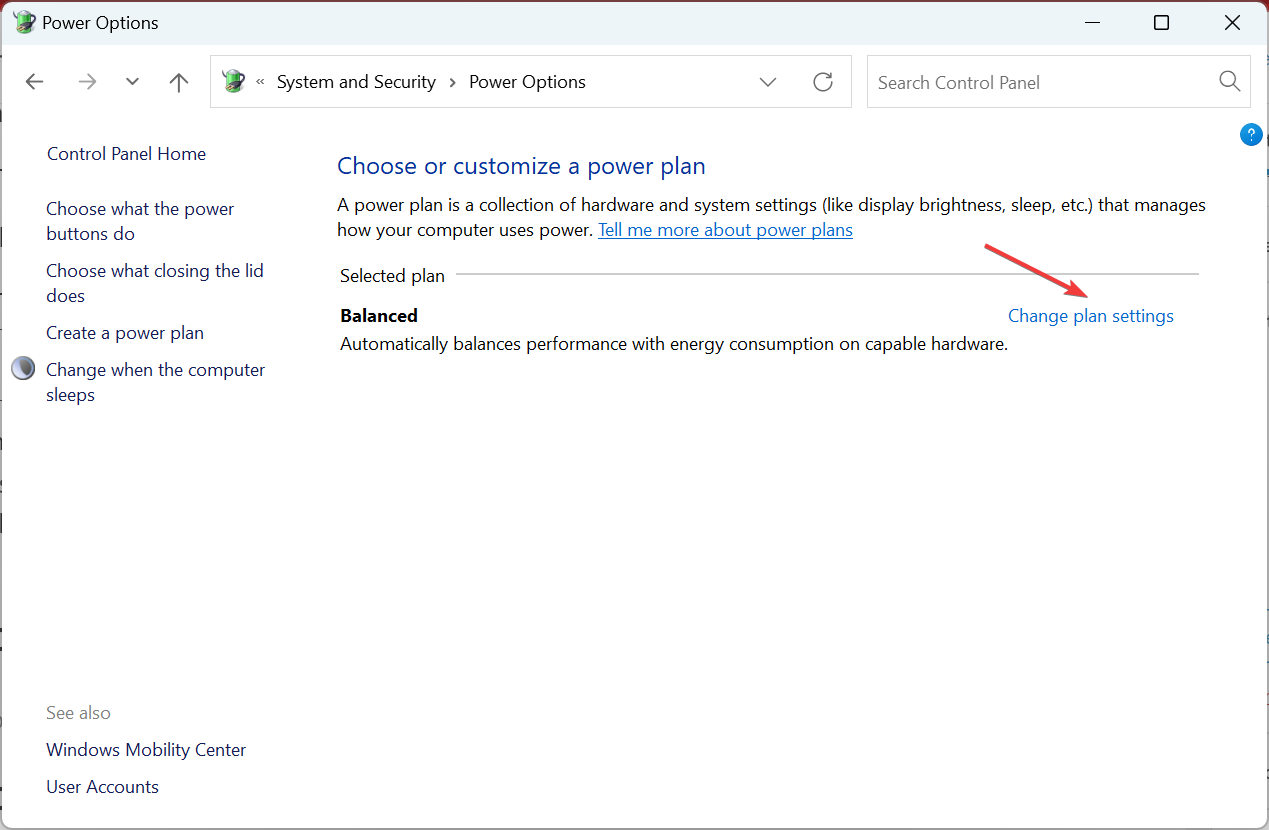
После этого отобразится окно «Электропитание». Выберите пункт «Изменить настройки плана» для активного плана. Активный план электропитания отмечен черной точкой.
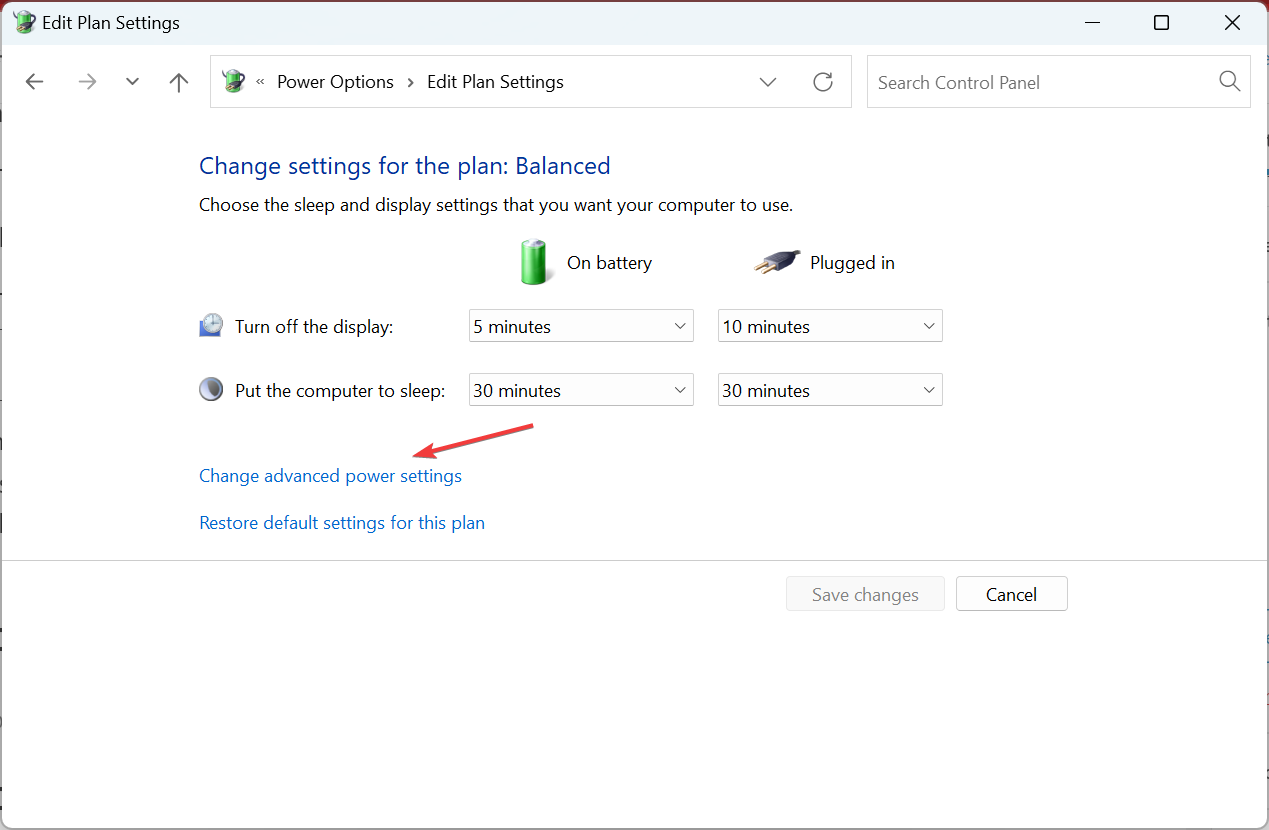
На следующем экране выберите «Изменить дополнительные параметры питания».
В появившемся диалоговом окне «Электропитание» найдите и разверните параметр «Переключение динамической графики».
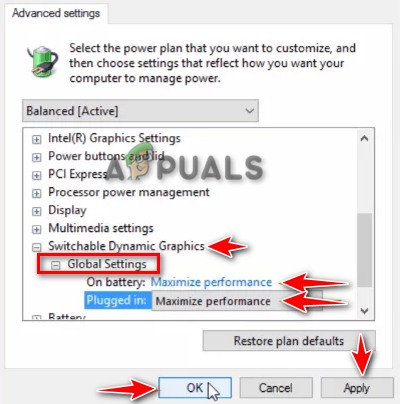
Затем разверните вкладку «Общие настройки», которая отображается в разделе «Переключение динамической графики».
После развертывания общих настроек отобразятся два параметра: «От аккумулятора» и «От сети». Для обоих этих параметров нажмите на раскрывающийся список и выберите «Максимально увеличить производительность».
Нажмите кнопку «Применить», а затем «ОК».
Check the solutions that worked for other users
by Matthew Adams
Matthew is a freelancer who has produced a variety of articles on various topics related to technology. His main focus is the Windows OS and all the things… read more
Updated on March 15, 2023
Reviewed by
Alex Serban

After moving away from the corporate work-style, Alex has found rewards in a lifestyle of constant analysis, team coordination and pestering his colleagues. Holding an MCSA Windows Server… read more
- The LoadLibrary failed with error 1114 is usually encountered on NVIDIA and AMD graphics.
- Usually, it’s the misconfigured power or graphics settings to blame though some users found outdated drivers to be the culprit.
- To fix things, update the OS and the affected app, or manually secure the missing DLL, amongst other solutions.

XINSTALL BY CLICKING THE DOWNLOAD FILE
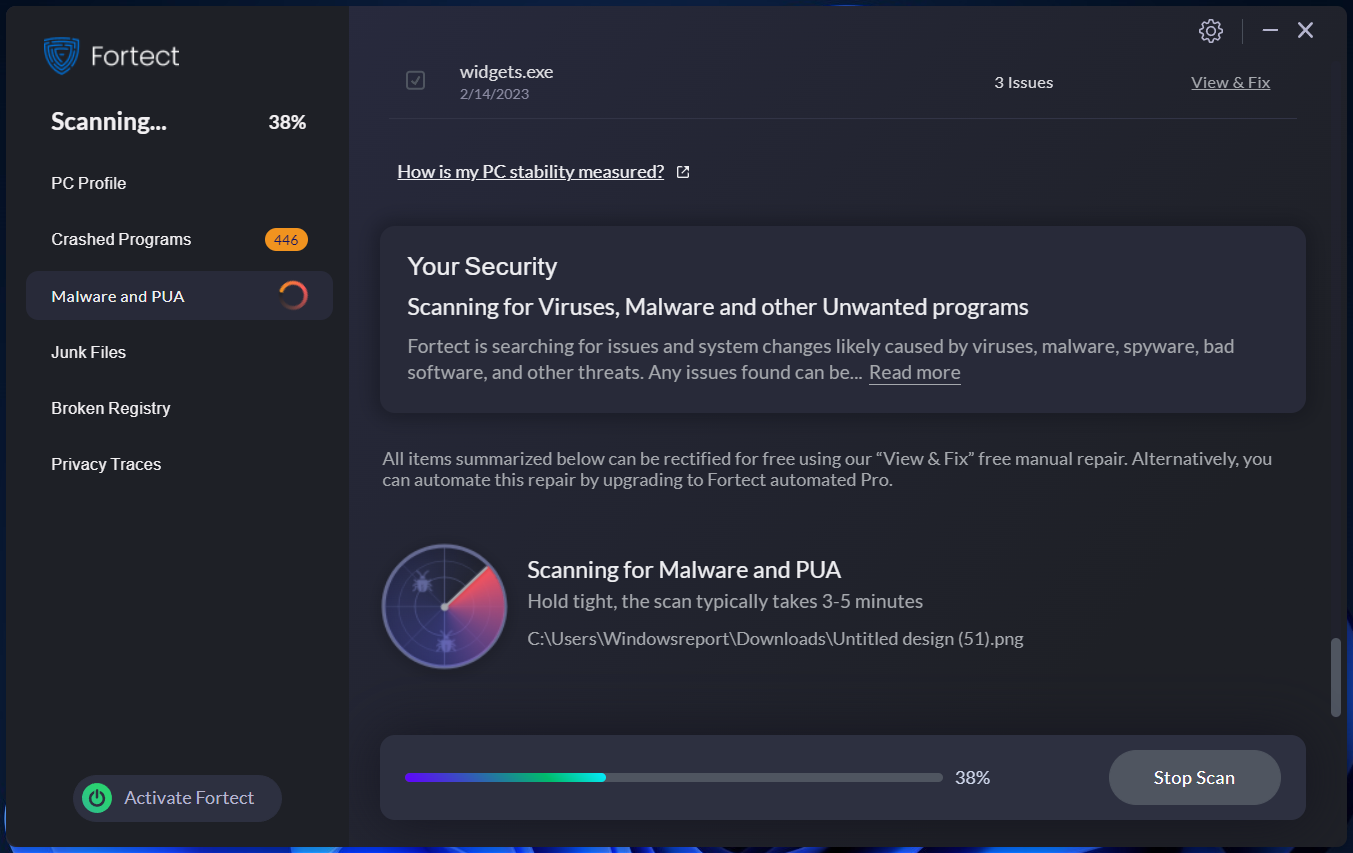
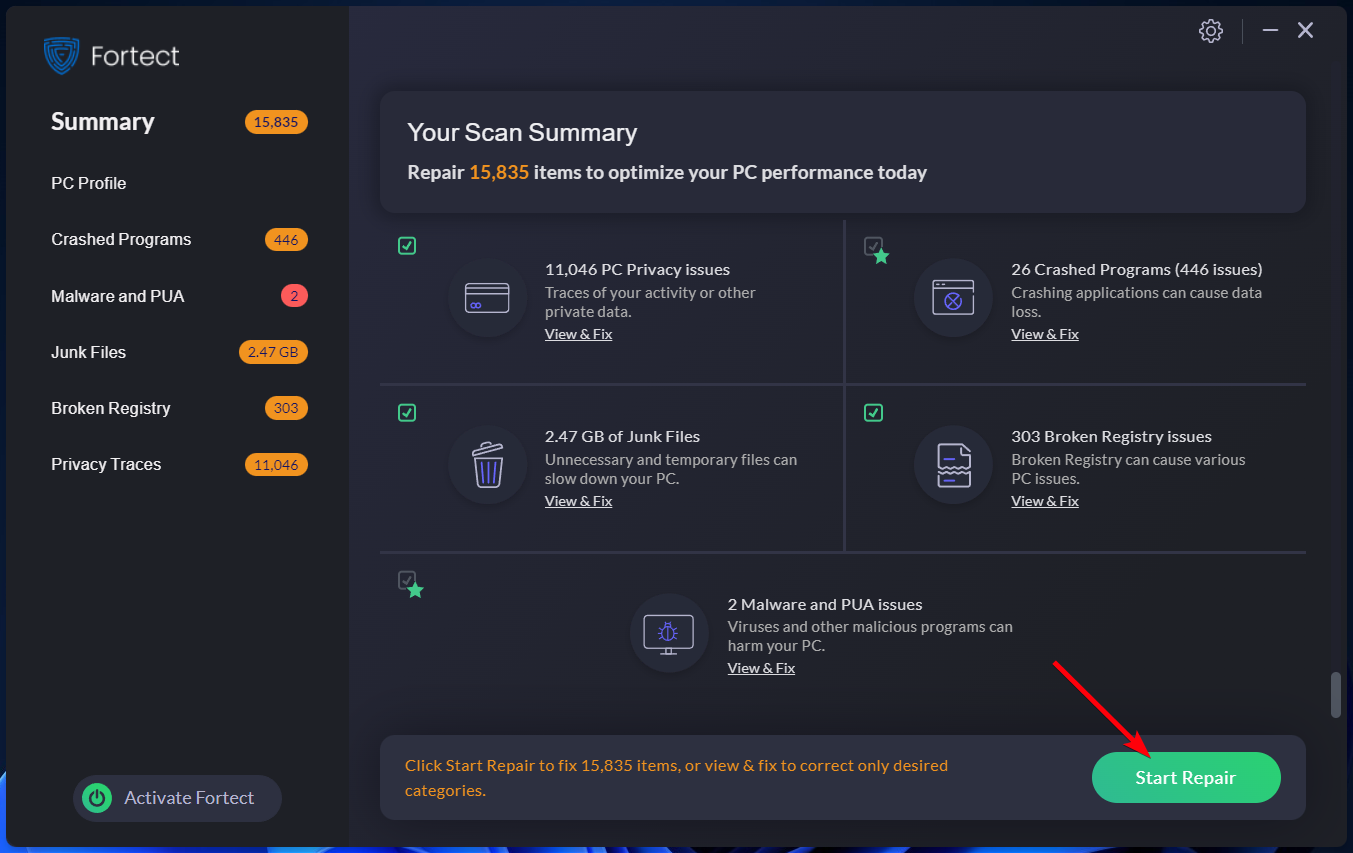
Fortect is a system repair tool that can scan your complete system for damaged or missing OS files and replace them with working versions from its repository automatically.
Boost your PC performance in three easy steps:
- Download and Install Fortect on your PC.
- Launch the tool and Start scanning
- Right-click on Repair, and fix it within a few minutes
- 0 readers have already downloaded Fortect so far this month
Encountering errors in Windows is common, and we get a lot of them. But, LoadLibrary failed with error 1114 is one that prevents apps from launching on PCs running Nvidia and AMD graphics.
The complete error message reads, LoadLibrary failed with error 1114: A dynamic link library (DLL) initialization routine failed. So, let’s find out how you can fix things in no time.
Why is LoadLibrary failing with error 1114?
LoadLibrary is employed by processes to access or link to a DLL file. And when it fails, the corresponding application fails to launch. It could fail with several error codes, with 1114 being one of them.
Here are some of the reasons you are getting the error:
- Misconfigured graphics settings – In most cases, misconfigured graphics settings were responsible for the error.
- Incorrect power settings – If you have a power saving setting turned on, it might lead to issues with the graphics.
- Missing DLL files – Oftentimes, the DLL files were missing, which led to trouble accessing them, and as a result, the LoadLibrary failed with error 1114 showed up.
- Corrupt system files – When the system files are corrupt, it leads to issues with OS, including this error.
Besides, here are some of the cases you may encounter the error:
- AMD Driver LoadLibrary failed with error 1114 – The error is usually encountered due to issues with the AMD graphics driver.
- Autodesk LoadLibrary failed with error 1114 – Autodesk applications often throw the error, but the solutions remain the same.
- Minecraft LoadLibrary failed with error 1114 – Some users had trouble with Minecraft but reinstalling it usually did the trick.
- Raft Failed to load DLL from the list error code 1114 – Many also reported the error with Raft, and our solutions would help in this case.
How can I fix Failed to load dll from the list error code 1114?
Before we try the slightly complex solutions, here are a few quick ones that might fix things:
- Restart the computer.
- Update Windows and the program that throws the error.
- Uninstall the app installed recently in case the error starts appearing after you downloaded it.
1. Get the DLL file
The easiest way to fix the error is to get the missing DLL file. You can perform this manually and identify the missing files triggering the error, or better use dedicated software to fix any DLL file issues.
Thus, the most practical method you can employ is using an expert system repair tool that can detect and solve broken DLL files or damaged system files like Fortect.
- Download Fortect on your PC.
- After installing, open the program to start the scan.

- Wait for less than 5 minutes until the scanning is complete.
- Afterward, click on Start Repair to solve missing DLL issues or other problems.
After this process, you can proceed to repair missing or broken DLL files by replacing the faulty software files with healthy components from its vast database.
2. Change power plan settings
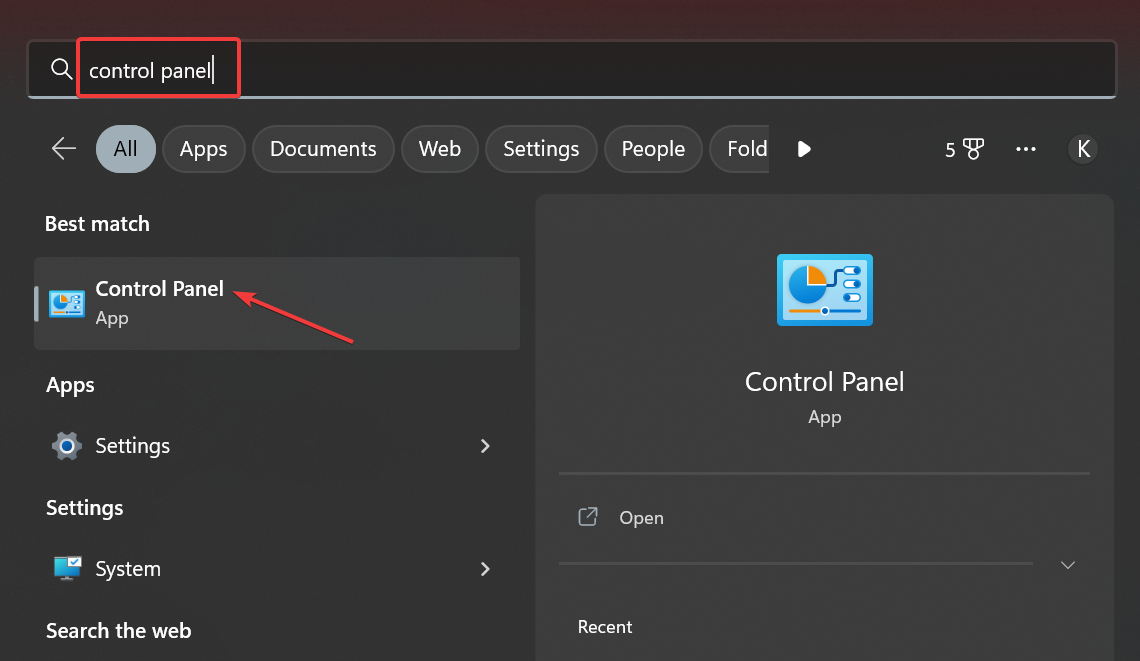
- Press Windows + S to open Search, type Control Panel in the text field, and click on the relevant search result.

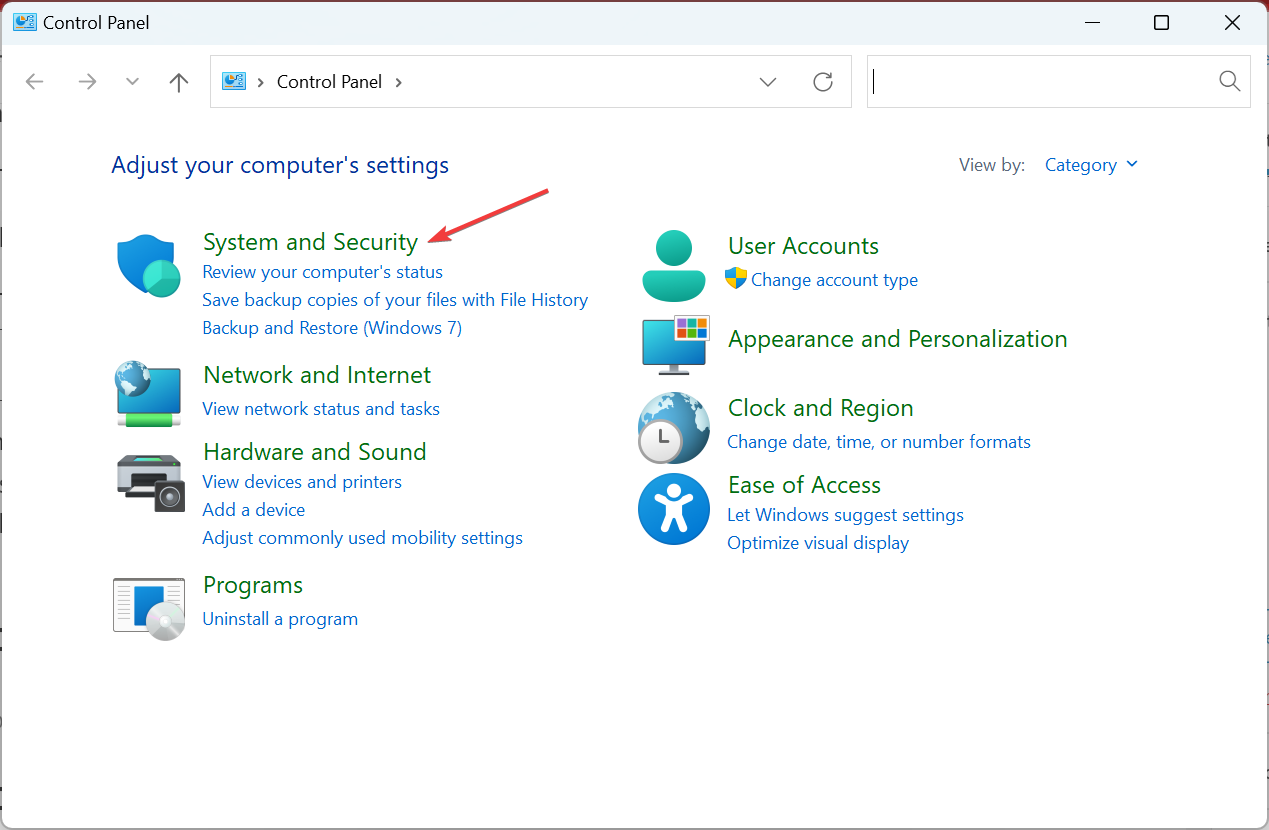
- Now, click on System and Security.

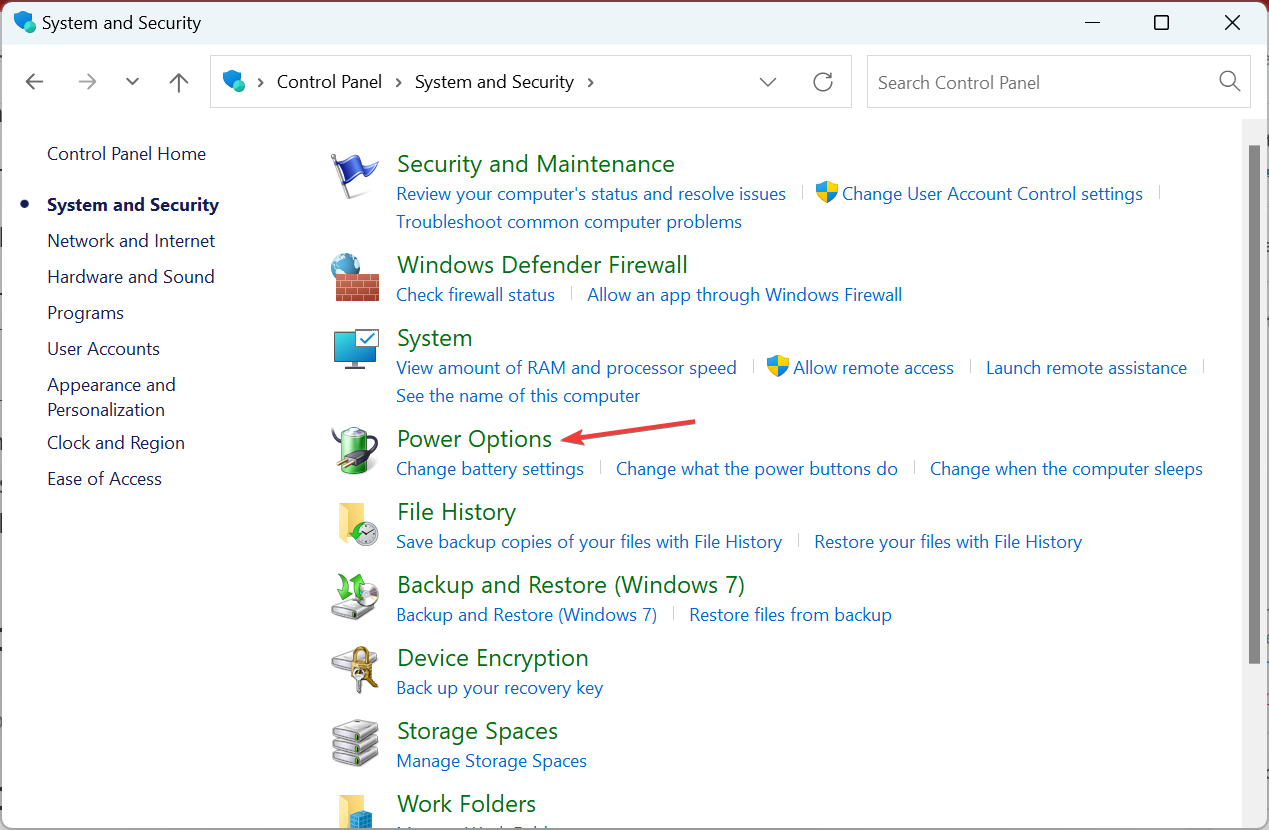
- Click on Power Options.
- Click on Change plan settings next to the current plan.
- Now, choose Change advanced power settings.
- Expand Switchable Dynamic Graphics, double-click on Global settings, choose Maximize performance for both On battery and Plugged in, and then click OK to save the changes.

3. Run the Diagnostic Policy Service
- Press Windows + R to open Run, type services.msc, and hit Enter.

- Locate the Diagnostic Policy Service, right-click on it, and select Properties.

- Select Automatic from the Startup type dropdown menu, click on Start to run the service, and then on OK to save the changes.

Once done, restart the computer for the changes to come into effect and verify if the LoadLibrary failed with error 1114 dialog disappears for good.
- Fix: Page Fault in Nonpaged Area on Windows 10
- Bindflt.sys Blue Screen: How to Fix It in 5 Steps
4. Update the graphics driver
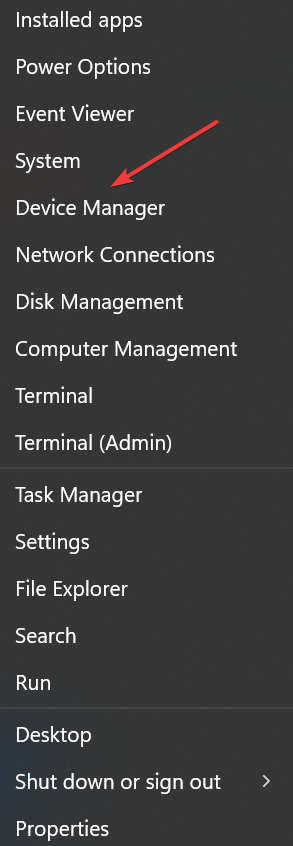
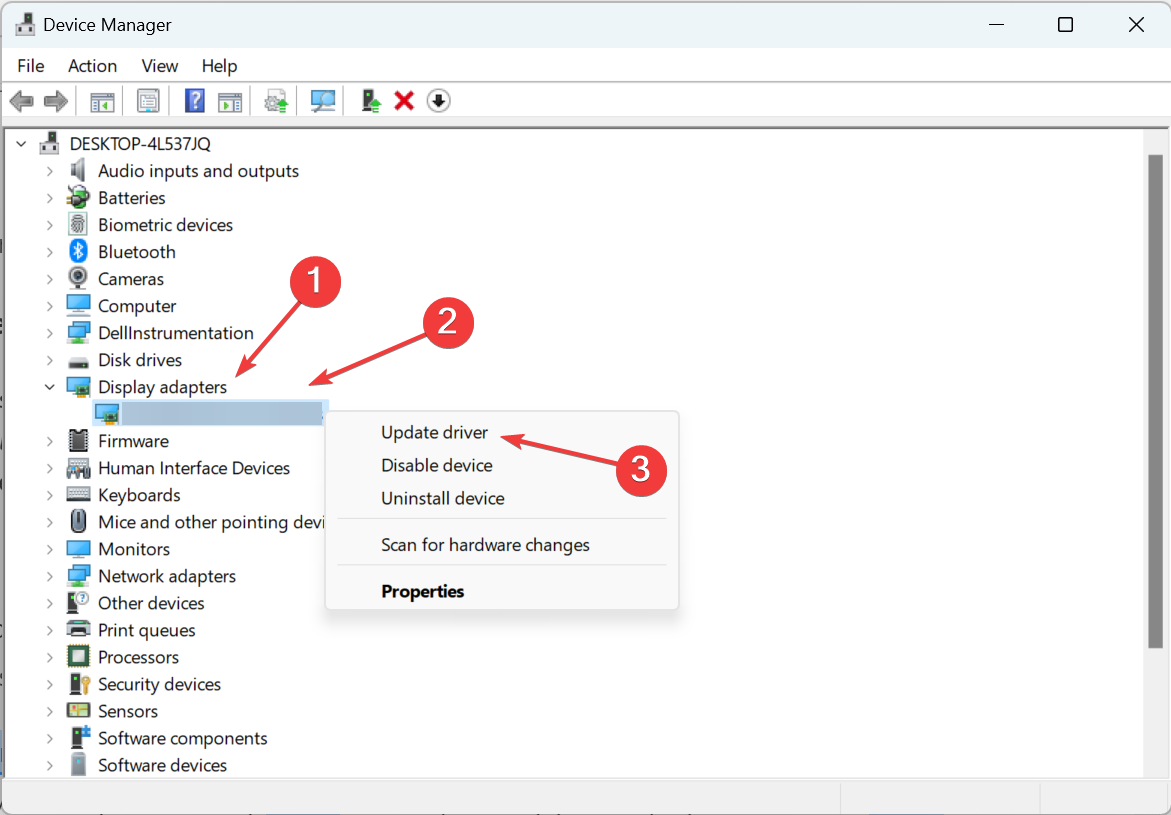
- Press Windows + X to open the Power User menu, and select Device Manager.

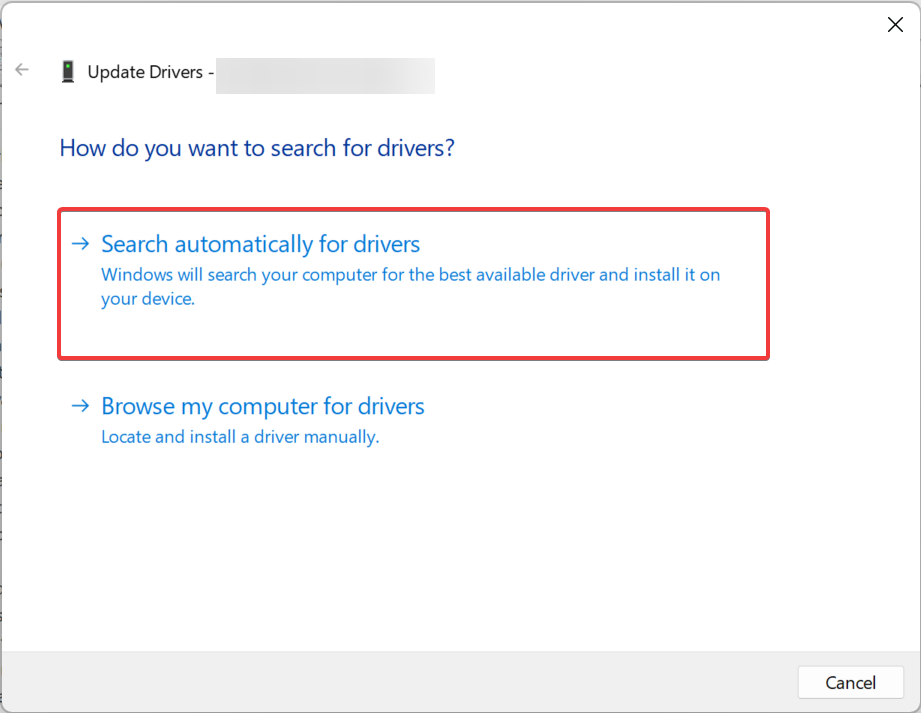
- Now, expand Display adapters, right-click on the NVIDIA or AMD graphics adapter, and select Update driver.

- Now, choose Search automatically for drivers and wait for the update to complete.

Some PC issues are hard to tackle, especially when it comes to missing or corrupted system files and repositories of your Windows.
Be sure to use a dedicated tool, such as Fortect, which will scan and replace your broken files with their fresh versions from its repository.
An outdated driver is just as likely to cause the error, and updating the graphics driver should get things running for most. Also, if Windows is unable to find an update, you can always manually install a newer driver version.
Update drivers automatically
Keep in mind that downloading and updating drivers manually from the manufacturer’s website can damage your system by choosing and installing the wrong driver version.
In order to prevent that, we strongly suggest doing it automatically by using DriverFix.
This tool is tested and approved by our team and will help you not damage your PC by downloading and installing the wrong driver versions.
After several tests, our team concluded that this is the best automatized solution.

DriverFix
Avoid installing the wrong drivers and get the right versions for your device by using DriverFix.
5. Change the graphics settings
5.1 NVIDIA graphics
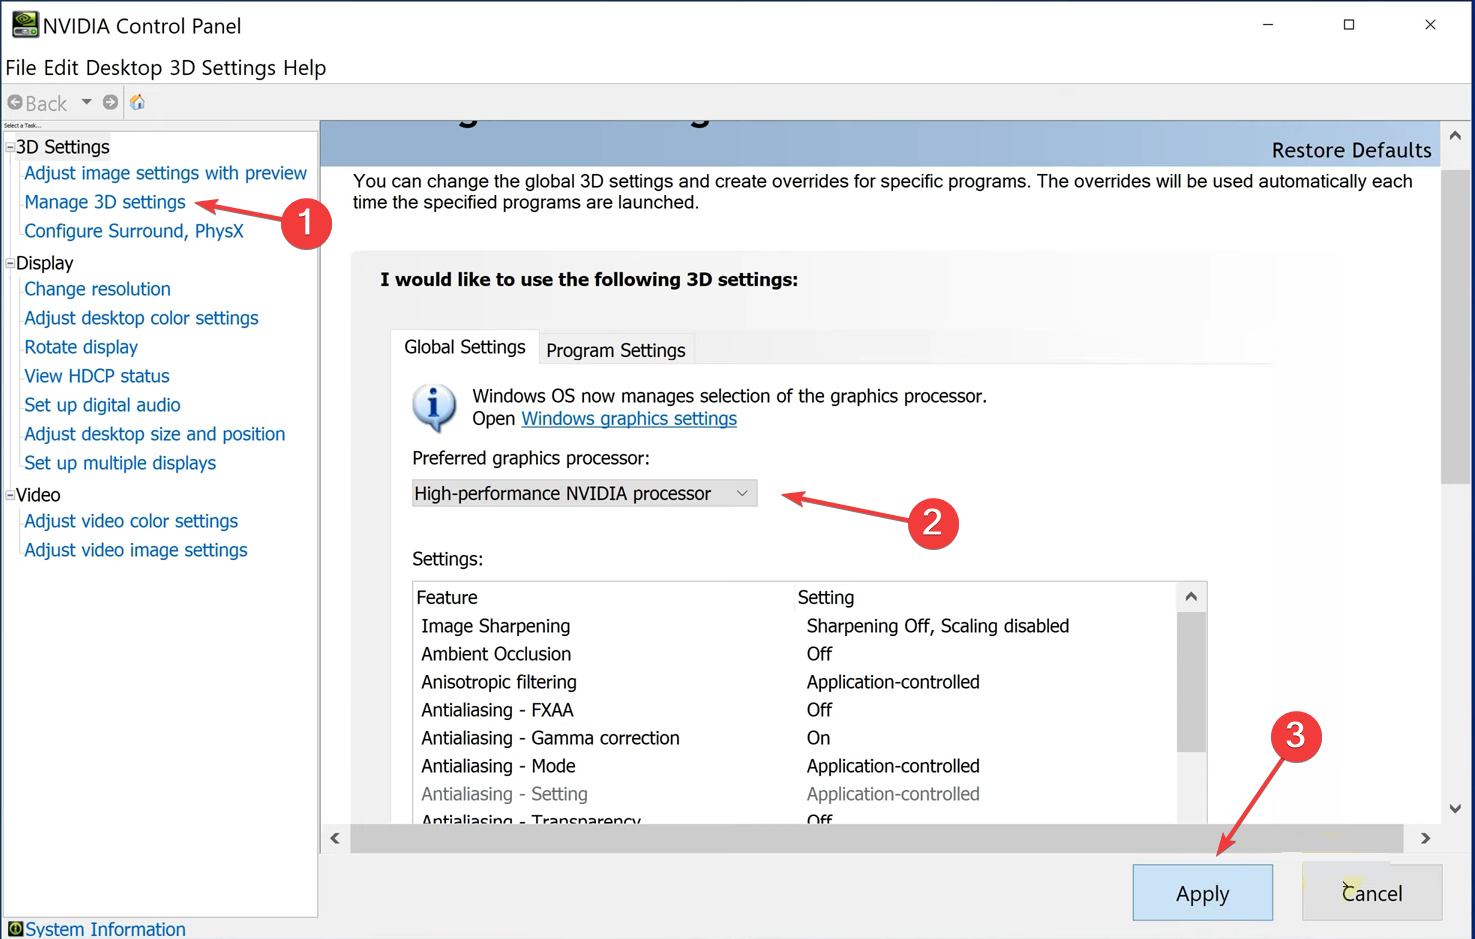
- Launch the NVIDIA Control Panel.
- Now, choose Manage 3D settings under 3D Settings, select High-performance NVIDIA processor under the Preferred graphics processor dropdown menu, and click on Apply for the changes to come into effect.

5.2 AMD graphics
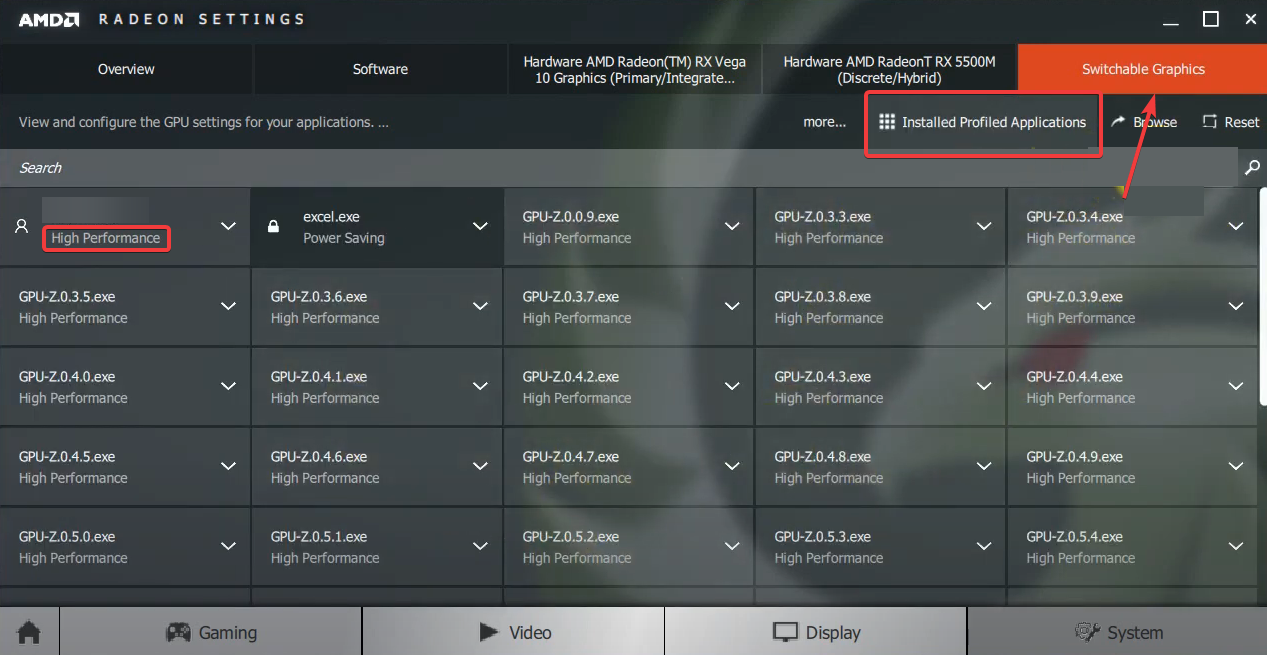
- Launch the AMD Radeon Settings.
- Now, navigate to Switchable graphics, select Installed Profiled Applications from the dropdown menu, and verify that the problematic app is set to High performance.

This should fix LoadLibrary failed with error 1114. A dynamic link library (dll) initialization in Windows. In case the error appears again, head to the last solution.
6. Reinstall the app that throws the error
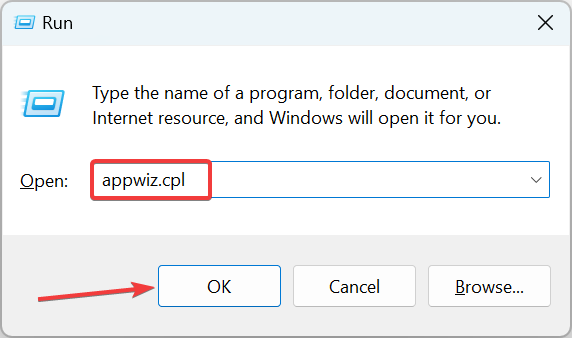
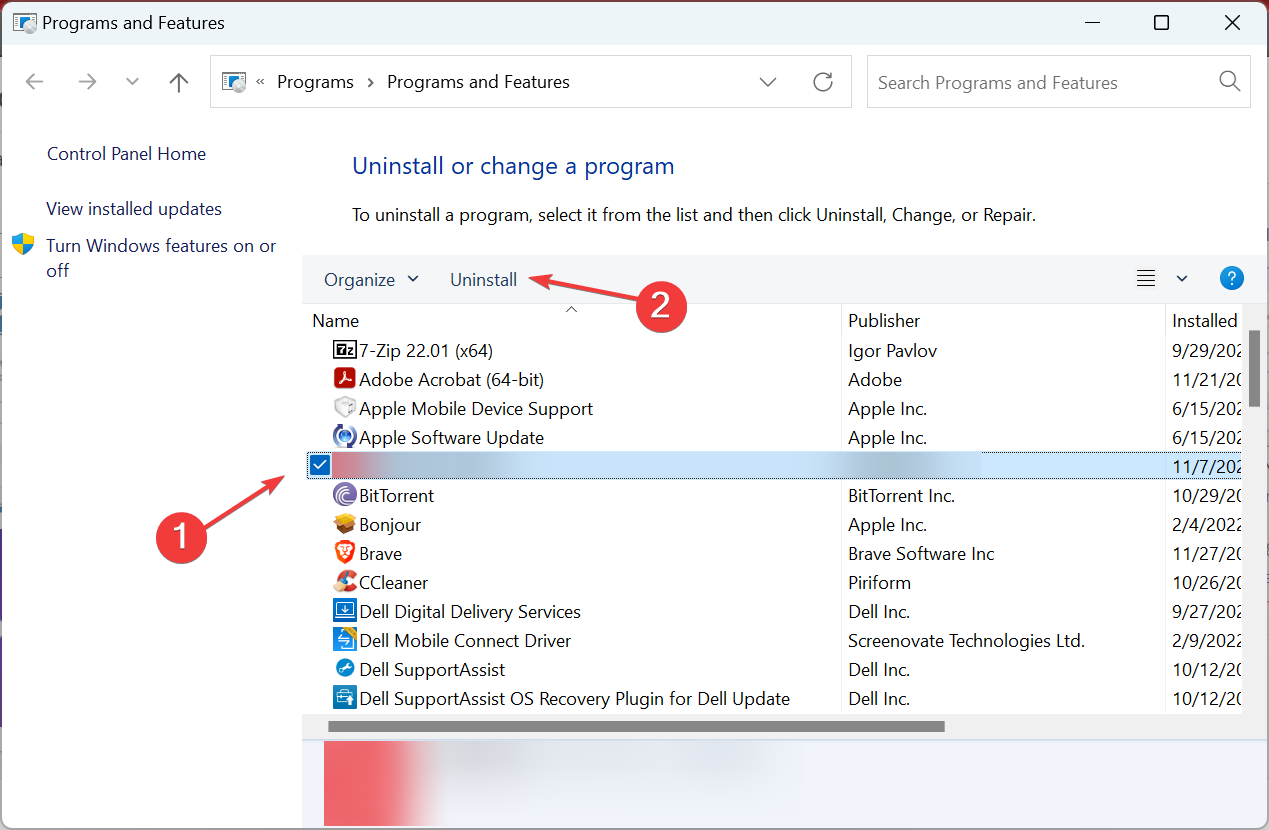
- Press Windows + R to open Run, type appwiz.cpl, and click OK.
- Now, locate the app that throws the error, select it, and click on Uninstall.
- Follow the on-screen instructions to complete the process.
- Once done, head to the official website or the Microsoft Store, and download the app again.
If nothing else worked, the last option is to reinstall the app that’s throwing the LoadLibrary failed with error 1114 dialog in Windows. And this should get things up and running.
Also, find out how to fix things when DLL files are missing in Windows, and prevent such errors from reappearing.
Tell us which fix worked for you in the comments section below.
Still experiencing issues?
SPONSORED
If the above suggestions have not solved your problem, your computer may experience more severe Windows troubles. We suggest choosing an all-in-one solution like Fortect to fix problems efficiently. After installation, just click the View&Fix button and then press Start Repair.
![]()
The LoadLibrary Error 1114 is an Error associated with the Dynamic link library (DLL) initialization routine. When the initialization routine fails, it will prevent you from opening certain game files, Adobe Lightroom/Photoshop, and Windows File Explorer. The major cause of this error is conflicting graphics drivers.
In this guide, we will be showing how the methods you must perform to fix the following error.
Prerequisites: Check the System Requirements
One of the reasons why this error has occurred is that your system doesn’t meet the requirements to run programs like Adobe Lightroom and Photoshop. Therefore, before using the programs, you must check your system specifications. Below is how you can check your system specifications:
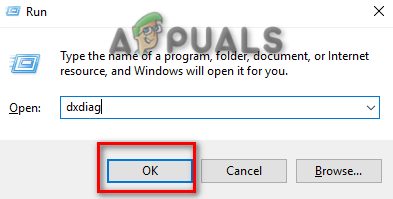
- Open the Run Command by pressing the Win + R keys together.
- Type “dxdiag” in the search box and click OK.

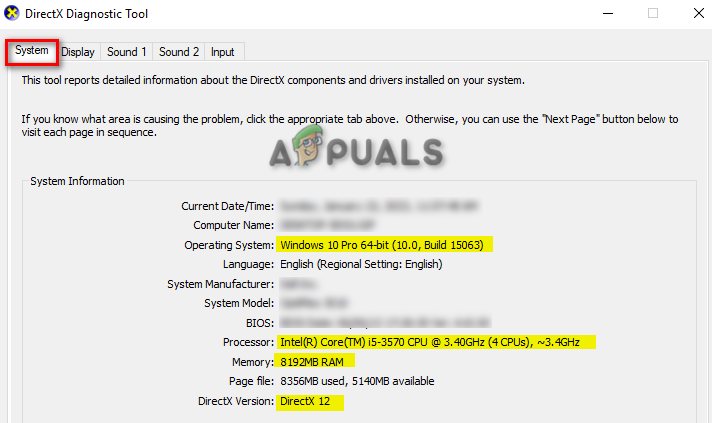
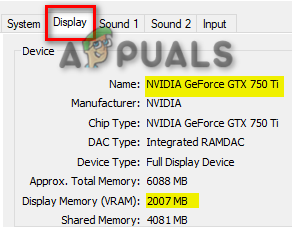
Opening the DirectX Diagnostics Tool - Click on the “System” tab to check your system specifications under “System Information.

Checking System Specifications on the Diagnostics Tool - Click on the “Display” tab to check your Display specifications.

Checking Display Specifications on the Diagnostics Tool
Minimum Display Requirement
- Windows 10 (1909 64-bit) or later
- DirectX 12-capable GPU.
- Intel GPUs: Skylake or later.
1. Set Global Settings to Maximize Performance
This error is most commonly caused by the use of the wrong Global Settings of the graphics card. The error occurs due to issues with the graphics. So, you must change the Global Settings to “Maximize-performance” to enhance the overall performance of the system. Below we have given the steps to set the Global Settings to a Maximize-performance:
- Open the Run Command by pressing the Win + R keys together.
- Type “control panel” in the search box and click OK.

Opening the Control Panel - Click on the drop menu of “view by” and select “Large icons.”

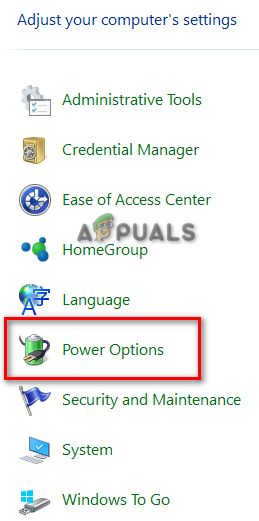
Settings Icons at Large Font Size - Open the Power Options settings.

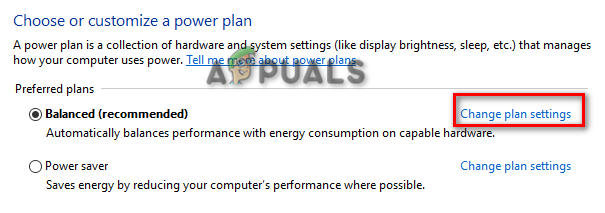
Opening Power Options - Click on the “Change plan settings” of the Preferred Plans.

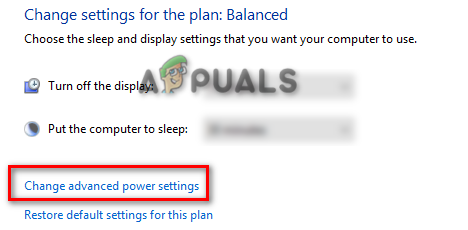
Changing Plan Settings of Preferred Plans - Open the advanced power settings by clicking on the “Change advanced power settings” option.

Changing Advanced Power Settings - On the Advanced Settings Box, scroll down and click on the ” Switchable Dynamic Graphics” option.
- Select the “Global Settings” and change both “On battery and “Plugged in” settings to “Maximize-performance”
- Make the changes by clicking Apply and OK.

Setting Global Settings to Maximize performance - Now, open the Windows Start Menu by pressing the Win key.
- Restart your computer by clicking on the Power option and selecting “Restart”

Restarting the Windows computer

2. Run the System Scans
Having corrupted system files will prevent you from accessing certain programs and files on the system. Therefore, you must make sure to perform System Scans that will detect and repair any corruption found in the system files. Perform the System Scans by following the steps listed below:
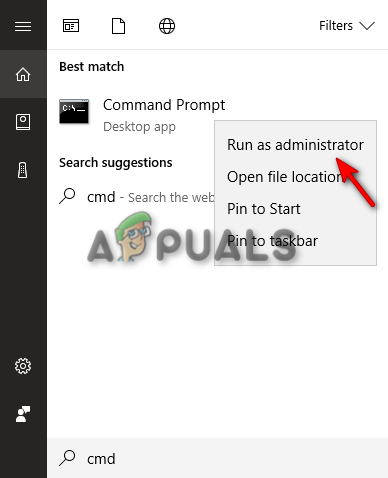
- Open the Windows Start Menu by pressing the Win key.
- Type “cmd” in the Windows Search bar.
- Right-click on it and select the “Run as an administrator” option.

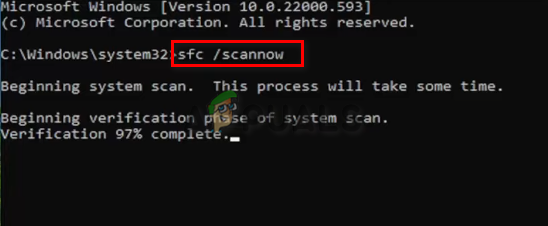
Running the Command Prompt as an administrator. - Ru the system file checker by typing the following command in the Command Prompt while giving a space between “sfc” and “/.”
sfc /scannow

Running system file checker on the command prompt. - After completing the scan, the file checker will automatically repair the defective files.
Note: After the System File Checker, you must run the DISM Command as well to Restore the Health of your system.
- Run the DISM command with the following commands while making sure to press the Enter key after each command:
Dism /Online /Cleanup-Image /CheckHealth
Dism /Online /Cleanup-Image /ScanHealth
Dism.exe /online /cleanup-image /restorehealth
- Restart your computer to make the necessary changes.
3. Set Diagnostic Policy Service Startup to Automatic
A disabled Diagnostic Policy Service Startup is also known to cause this error. This service helps to detect the problems and repairs programs at fault. Therefore, you must enable the Diagnostic Policy Service Startup by setting it to Automatic. You can enable the Diagnostic Policy Service Startup with the instructions below:
- Open the Run Command by pressing the Win + R keys together.
- Type “services.msc” in the search box and click OK.

Opening Windows Services - Find the “Diagnostics Policy” service by scrolling down the page.
- Right-click on the Service and select the “Properties” option.

Opening the Diagnostic Policy Service Properties - Set the Startup to Automatic by clicking on the “Startup type” drop-down menu and selecting the “Automatic” option.
- Make the necessary changes by clicking on Apply and OK.

Setting Diagnostic Policy Service to Automatic - Restart your computer to make the changes.
- Run the program at fault.

4. Download and Install the Display Driver Uninstaller
An outdated display driver interferes with the function of certain programs and prevents them from starting. So, you can uninstall your current Display driver and manually reinstall the latest version on your system. These are the steps to use the Display Driver Uninstaller:
- Open the Display Driver Uninstaller Website.
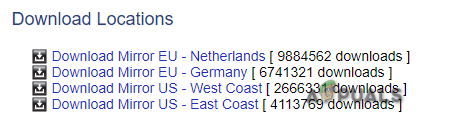
- Download the Zip file by scrolling down to the bottom and selecting the Download Location as per your choice.

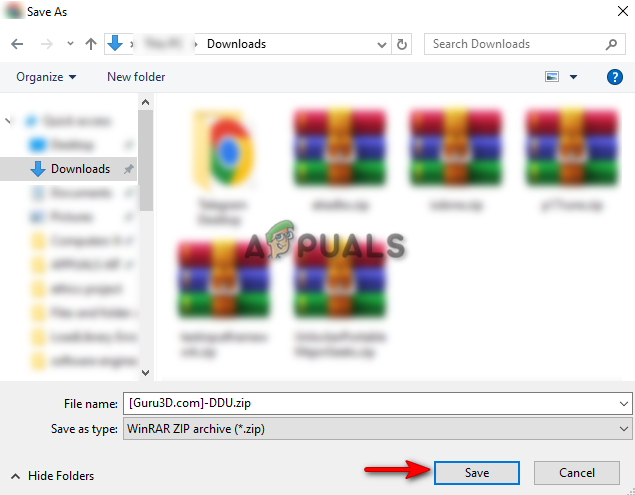
Downloading the latest Display Driver Uninstaller - Select the location where you want to download the file and click the Save option.

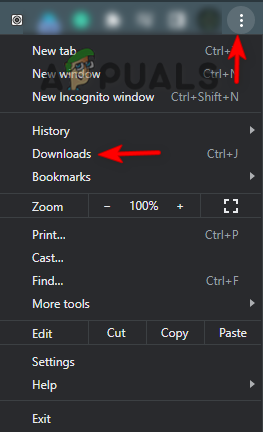
Selecting Download Location - Click on the three dots on the browser and open the “Downloads” page.

Opening the Downloads tab - Locate the file with the “Show in Folder” option.

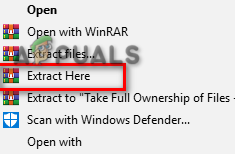
Showing zip file in the folder - Right-click on it and select the “Extract here” option.

Extracting the File

After Extracting the file, disable the automatic Windows Update and reboot the system in Safe Mode.
Disabling the automatic Windows Update
- Open the Run Command by pressing the Win + R keys together.
- Type “control panel” in the search box and click OK.
Opening the Control Panel - Click on the drop menu of “view by” and select “Large icons.”
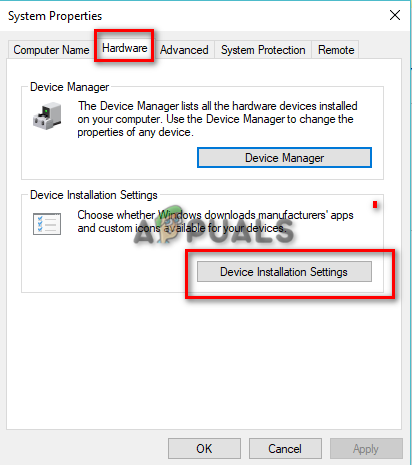
Settings Icons at Large Font Size - Navigate to System > Advanced system settings.
- On the System Properties page, click on the Hardware tab and open the Device Installation Settings.

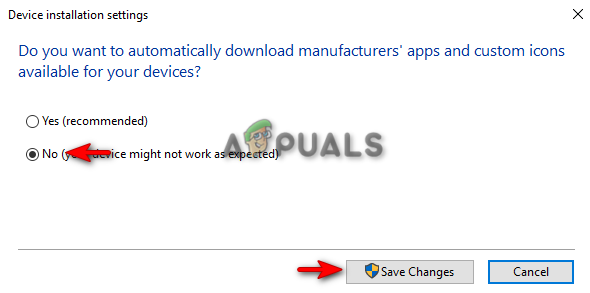
Opening Device Installation Settings - Disable Automatic Windows updates by selecting No and Save Changes.

Disabling Automatic Windows Updates
Rebooting in Safe Mode
- Now, you must Reboot the system on Safe Mode.
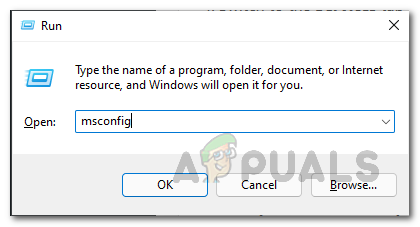
- Open the Run Command by pressing the Win + R keys together.
- Type “msconfig” in the search box and click OK.

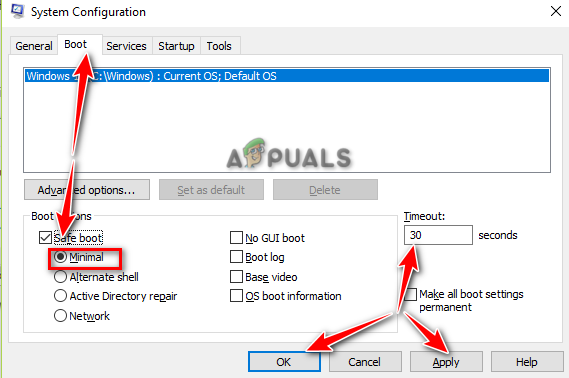
Opening System Configuration - Open the Boot tab and check the “Safe Mode” box.
- Click and select the “Minimal” option under Safe Mode.
- Set the “Timeout” as per your preference.
- Make the changes by clicking Apply and OK.

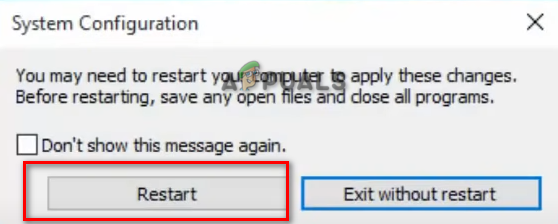
Booting System on Safe Mode - Restart your computer by selecting the “Restart” option on the System Configuration Prompt.

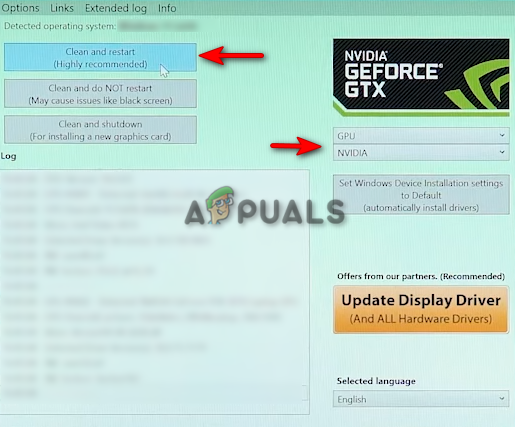
Restarting computer - On Safe Mode, open the Display Driver Uninstaller and select your GPU Type.
- Uninstall the driver by clicking on Clear and Restart.

Cleaning and Restarting
Note: After the system is rebooted, manually install the latest version of the Display Driver.
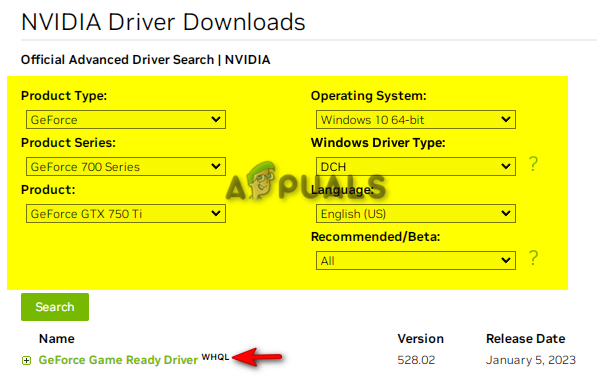
- Open the Official NVIDIA Drivers Website.
- Select the product type installed on your system.
- Search for the latest display driver by clicking on the Search Option.
- Download the Driver by clicking on the top search.

Manually searching the latest Display Driver - Start installing the Driver by double-clicking on the EXE file.
- After the Driver has been installed, restart your computer.
5. Perform a Clean Boot
If the error still occurs in the Normal State, then as a last resort, you must Perform a Clean Boot on your system. This is a built-in feature that boots the system on a minimal set of drivers and startup programs. However, do note that, in case your data gets deleted, you must have a backup copy of your files on the system.

Muhammad Zubyan
Muhammad Zubyan is a certified Google IT Support Professional with over 7 years of extensive experience. He has worked on more than 1500 computers, gaining valuable insights that enable him to detect and troubleshoot any complicated root cause of Windows-related issues and errors. In addition to managing Appuals as a Senior Editor, he is currently developing his own Game Optimization program that caters to both gamers and casual users alike.
If you are using a couple of graphics-intensive applications like video rendering software or some games, then something in the background of the system could get messed up and you might encounter the “LoadLibrary failed with error 1114, A dynamic link library (DLL) initialization routine failed” error message. This kind of error can usually get fixed by twerking some graphic settings, fixing and updating the drivers, and allowing your PC to work by leveraging the maximum use of the resources it’s got. Thus, in this post, you will be guided on some measures you can apply to resolve this kind of error message as soon as possible.
Before you go over the options given below, if you have made any changes to any software component in your computer or installed new software recently, then you might want to undo them and then check if it fixes the “LoadLibrary failed with error 1114 “ error. Once you have that covered but you’re still getting the error, use the options given below as a reference to fix the error.
Option 1 – Try to modify the Dynamic Graphics Settings
You might want to modify the Dynamic Graphics Settings in order to fix the error. To do so, follow the steps below.
- Open Control Panel and then Power Options.
- From there, click on the Change plan settings option for your chosen power plan.
- After that, click on Change advanced power settings.
- Then look for the Switchable Dynamic Graphics option and then click on it to expand it.
- Afterward, expand the Global Settings option and then select Maximize Performance for both the “On battery” and “Plugged in” options.
- Now click on the Apply button and then OK to save the changes made.
Note: If the Switchable Dynamic Graphics option is not available on your computer, you can try the next given option below.
Option 2 – Try switching the Graphics card to High-Performance mode
Note that this second option varies from computer to computer since most computers use the Graphics card made by NVIDIA, while some by AMD and others use Intel HD Graphics. Thus, depending on which graphics card your computer uses, pick one of the three fixes below.
NVIDIA Graphics Drivers:
If your computer uses a graphics card made by NVIDIA and has the drivers are properly installed and updated, then follow the steps below.
- Right-click on any empty space on your desktop and then click on the NVIDIA Control Panel.
- After that, expand the 3D Settings on the left-hand side tree-structured list and then click on Manage 3D Settings.
- Next, select your preferred GPU on the right-side panel and then set it to the High-Performance NVIDIA Card from the drop-down menu.
- As an alternative, you can also go to the Program Settings tab,
- From there, select the program that you are trying to run from the drop-down menu and click on Add.
- Now set the graphics processor to a High-performing processor and then restart your computer to apply the changes made.
AMD Graphics card:
If your computer uses a graphics card made by AMD and has the drivers are properly installed and updated, then follow the steps below.
- Right-click on any empty space on your desktop.
- Click on AMD Control or Configure Switchable Graphics.
- Next, click on Browse and select the program where you encounter the error.
- Finally, click on High Performance for the selected program and then restart your computer to successfully apply the changes made.
Intel HD graphics:
If your computer uses the Intel HD graphics and then its drivers are properly installed and updated, then follow these steps:
- Right-click on any empty space on your desktop and then click on the Intel Graphics Settings.
- Next, click on the Power menu.
- After that, select a Graphics Power Plan for both the “On battery” and “Plugged in” options to High-Performance Power Plan.
- Then click on the Apply button and restart your computer.
Do You Need Help with Your Device?
Our Team of Experts May Help

Troubleshoot.Tech Experts are There for You!
GET HELP
Troubleshoot.Tech experts work with all versions of Microsoft Windows including Windows 11, with Android, Mac, and more.
Share this article:
You might also like
What is Stop Error 7B?
Stop error 7B is a blue screen of death error code that occurs during Windows XP setup or after installation. The error message is displayed in either of the following formats:
- STOP: 0x0000007B (parameter1, parameter2, parameter3, parameter4)
- INACCESSIBLE_BOOT_DEVICE
- ‘A problem has been detected and Windows has been shut down to prevent damages’
- Setup has encountered a fatal error that prevents it from continuing.
- Setup cannot continue. Power down or reboot your computer now.
Solution

Muhammad Zubyan
Muhammad Zubyan is a certified Google IT Support Professional with over 7 years of extensive experience. He has worked on more than 1500 computers, gaining valuable insights that enable him to detect and troubleshoot any complicated root cause of Windows-related issues and errors. In addition to managing Appuals as a Senior Editor, he is currently developing his own Game Optimization program that caters to both gamers and casual users alike.
If you are using a couple of graphics-intensive applications like video rendering software or some games, then something in the background of the system could get messed up and you might encounter the “LoadLibrary failed with error 1114, A dynamic link library (DLL) initialization routine failed” error message. This kind of error can usually get fixed by twerking some graphic settings, fixing and updating the drivers, and allowing your PC to work by leveraging the maximum use of the resources it’s got. Thus, in this post, you will be guided on some measures you can apply to resolve this kind of error message as soon as possible.
Before you go over the options given below, if you have made any changes to any software component in your computer or installed new software recently, then you might want to undo them and then check if it fixes the “LoadLibrary failed with error 1114 “ error. Once you have that covered but you’re still getting the error, use the options given below as a reference to fix the error.
Option 1 – Try to modify the Dynamic Graphics Settings
You might want to modify the Dynamic Graphics Settings in order to fix the error. To do so, follow the steps below.
- Open Control Panel and then Power Options.
- From there, click on the Change plan settings option for your chosen power plan.
- After that, click on Change advanced power settings.
- Then look for the Switchable Dynamic Graphics option and then click on it to expand it.
- Afterward, expand the Global Settings option and then select Maximize Performance for both the “On battery” and “Plugged in” options.
- Now click on the Apply button and then OK to save the changes made.
Note: If the Switchable Dynamic Graphics option is not available on your computer, you can try the next given option below.
Option 2 – Try switching the Graphics card to High-Performance mode
Note that this second option varies from computer to computer since most computers use the Graphics card made by NVIDIA, while some by AMD and others use Intel HD Graphics. Thus, depending on which graphics card your computer uses, pick one of the three fixes below.
NVIDIA Graphics Drivers:
If your computer uses a graphics card made by NVIDIA and has the drivers are properly installed and updated, then follow the steps below.
- Right-click on any empty space on your desktop and then click on the NVIDIA Control Panel.
- After that, expand the 3D Settings on the left-hand side tree-structured list and then click on Manage 3D Settings.
- Next, select your preferred GPU on the right-side panel and then set it to the High-Performance NVIDIA Card from the drop-down menu.
- As an alternative, you can also go to the Program Settings tab,
- From there, select the program that you are trying to run from the drop-down menu and click on Add.
- Now set the graphics processor to a High-performing processor and then restart your computer to apply the changes made.
AMD Graphics card:
If your computer uses a graphics card made by AMD and has the drivers are properly installed and updated, then follow the steps below.
- Right-click on any empty space on your desktop.
- Click on AMD Control or Configure Switchable Graphics.
- Next, click on Browse and select the program where you encounter the error.
- Finally, click on High Performance for the selected program and then restart your computer to successfully apply the changes made.
Intel HD graphics:
If your computer uses the Intel HD graphics and then its drivers are properly installed and updated, then follow these steps:
- Right-click on any empty space on your desktop and then click on the Intel Graphics Settings.
- Next, click on the Power menu.
- After that, select a Graphics Power Plan for both the “On battery” and “Plugged in” options to High-Performance Power Plan.
- Then click on the Apply button and restart your computer.
Do You Need Help with Your Device?
Our Team of Experts May Help
Troubleshoot.Tech Experts are There for You!
GET HELP
Troubleshoot.Tech experts work with all versions of Microsoft Windows including Windows 11, with Android, Mac, and more.
Share this article:
You might also like
What is Stop Error 7B?
Stop error 7B is a blue screen of death error code that occurs during Windows XP setup or after installation. The error message is displayed in either of the following formats:
- STOP: 0x0000007B (parameter1, parameter2, parameter3, parameter4)
- INACCESSIBLE_BOOT_DEVICE
- ‘A problem has been detected and Windows has been shut down to prevent damages’
- Setup has encountered a fatal error that prevents it from continuing.
- Setup cannot continue. Power down or reboot your computer now.
Solution
 Error Causes
There is no one particular cause for this error. The Stop error 7B may be triggered due to multiple reasons. These include:
- Boot Sector Viruses
- Device Driver Issues
- Poor Windows XP installation
- Registry Corruption
If you come across this error code on your PC, it is advisable to fix it right away particularly because it is a blue screen of death error that can cause severe damages to your system. It can lead to system failure, crash, and valuable data loss.
Further Information and Manual Repair
Here we’ve listed for you the best PC repair solutions to resolve and fix stop error 7B.
Cause: Boot Sector Viruses
Solution: Stop error 7B can occur when infected with a boot sector virus. If this is the cause, then first download a powerful antivirus on your system. After downloading it, run it to scan your PC for viral infection. Immediately delete the viruses if found.
However, if the virus is too powerful, the antivirus may fail to remove it. In such an event, you will have to repartition and format your hard disk and then later reinstall Windows XP.
Cause: Device Driver Issues
Solution: If the boot controller is not properly configured or the driver is not updated, Stop error 7B can occur. When this happens, simply restart your system and press F8 to go to the advanced boot options.
Here choose the Last Known Good Configuration option. After that boot into Windows and then perform a system restore. Now go to the start menu and type Device Manager in the search box.
To access the Device Manager window it may prompt you to enter an administrator password, insert it to proceed. Now go to Device Manager and perform a driver rollback to reinstall the drivers generating this stop error.
By following these simple steps you can easily resolve device driver and configuration issues.
Cause: Poor Windows XP Installation
Solution: In this case, you will have to perform a Windows start-up repair. This can be done by booting Windows XP from CD. Simply press enter at setup Windows Screen when prompted. Then press R to repair Windows XP installation.
This procedure copies the original Windows files over the bad ones.
Cause: Registry Corruption
Solution: Sometimes the stop error 7B is also triggered by the registry corruption. When this happens, it is advisable to download and run Restoro software for PC scan and repair.
Restoro is a powerful, advanced, and highly functional registry cleaner. It is deployed with intuitive algorithms that detect registry issues and errors like Stop error 7B on your system in seconds. It wipes out clutter from your hard disk, repairs damaged files and the corrupted registry.
It is safe, efficient, and bug-free. It is also compatible with all Windows versions. In addition to this, it is also embedded with other utilities like an antivirus, a system optimizer, and Active X controls, and a class ID scanner.
Click here to download Restoro and resolve to stop error 7B on your PC immediately!
Read More
There are times when you suddenly encounter a Blue Screen error like DRIVER_POWER_STATE_FAILURE error when resuming from Sleep or right after you shut down or restart as well as switch from Hibernate mode. This kind of Blue Screen error is due to some issue with the driver state. Moreover, the bug check “0x0000009F” in the error also indicates that a driver is in an inconsistent or invalid power state.
The DRIVER POWER STATE FAILURE Blue Screen error usually occurs during events that involve power state transitions like shutting down, moving in or out of standby mode, or hibernate mode. To resolve this error, you can check out the suggestions given below.
Option 1 – Update the Device drivers
The device driver installed in your computer might be incompatible with your operating system which is the reason why the DRIVER POWER STATE FAILURE Blue Screen error occurs. To fix that, you have to update your device drivers.
- Reboot your computer into Safe Mode with networking support.
- Tap the Win + R keys on your keyboard to open the Run dialog box.
- After that, type “msc” in the field and hit Enter or click OK to open the Device Manager.
- After opening the Device Manager, update all the outdated Device drivers on your computer.
- Next, right-click on all the driver entries that are appropriately labeled, and then click the Update driver option.
- Now restart your PC and check if the BSOD error is fixed or not.
Option 2 – Uninstall any faulty device drivers
- Tap the Win + R keys on your keyboard to open the Run dialog box.
- After that, type “msc” in the field and hit Enter or click OK to open the Device Manager.
- From there, look for any device driver which has a yellow exclamation mark which indicates that something is wrong with them.
- And then right-click on each one of them and click on Uninstall.
- Once you’re done uninstalling the faulty drivers, restart your computer and allow your computer to reinstall the drivers you just uninstalled.
Option 3 – Run the Blue Screen Troubleshooter
The Blue Screen troubleshooter is a built-in tool in Windows 10 that helps users in fixing BSOD errors like rtwlane.sys Blue Screen error. It can be found on the Settings Troubleshooters page. To use it, refer to these steps:
- Tap the Win + I keys to open the Settings panel.
- Then go to Update & Security > Troubleshoot.
- From there, look for the option called “Blue Screen” on your right-hand side and then click the “Run the troubleshooter” button to run the Blue Screen Troubleshooter and then follow the next on-screen options. Note that you might have to boot your PC into Safe Mode.
Option 4 – Try to remove external hardware
If there is any external hardware plugged into your computer especially the new ones, you can try removing it and then check if the Blue Screen error persists. If the problem gets solved, you might want to update the driver of that particular hardware. On the other hand, if you’re still getting the error, then proceed to the next given options below.
Option 5 – Try resetting Windows 10
To fix this BSOD error, you can try resetting Windows 10. Doing so won’t get rid of any file in your system – instead of erasing all your media files and documents, this reset option resets all the system settings and files.
Option 6 – Try running the System File Checker Scan
The SFC or System File Checker scan could detect and automatically repair damaged system files that could be causing the DRIVER POWER STATE FAILURE Blue Screen error. SFC is a built-in command utility that helps in restoring corrupted files as well as missing files. It replaces bad and corrupted system files to good system files. To run the SFC command, follow the steps given below.
- Tap Win + R to launch Run.
- Type in cmd in the field and tap Enter.
- After opening Command Prompt, type in sfc /scannow
The command will start a system scan which will take a few whiles before it finishes. Once it’s done, you could get the following results:
- Windows Resource Protection did not find any integrity violations.
- Windows Resource Protection found corrupt files and successfully repaired them.
- Windows Resource Protection found corrupt files but was unable to fix some of them.
Read More
What is Error 1706?
Error 1706 is a Windows PC error. It occurs when you insert a Microsoft CD-ROM either to repair an Office or to install a feature set to Installed on First Use. The error message is displayed in the following format:
Error 1706. Setup cannot find the required files. Check your connection to the network, or CD-ROM drive. For other potential solutions to this problem, see C:Program FilesMicrosoft OfficeOffice101033Setup.hlp.
Solution
Error Causes
Error 1706 may occur due to several reasons. These include:
- You originally installed MS Office from a network administrative installation
- You are trying to use Office CD-ROM when the error is prompted by the Windows Installer for an Office source location
- Viral Infection
Further Information and Manual Repair
The good news is that this error code is not fatal. However, to avoid inconvenience, it is recommended to resolve the error right away. To fix the problem you don’t have to be a computer programmer or hire one. In fact, this error code can be resolved quite easily.
Here are some of the best and easiest do it yourself methods to resolve error 1706 on your PC:
Method 1
To resolve this issue find a different administrative installation for the Office source file location.
To do this, go to the start menu and then click run. In the open box, simply type this command line new network pathSetup.exe /fvm package name.msi and press OK to continue and update changes. Once the update is complete and finished press OK to save and proceed.
Please note after you follow these steps, the Windows Installer uses this new server location whenever it needs to reinstall, repair, or add a feature to your Office Installation.
Method 2
Another alternative method to resolve this method is to use CD-ROM for the Office Source Location. To do this you will have to remove Office and then re-install Office from the CD-ROM.
Here are the steps to remove the Office program. First, quit all Office programs.
- Go to the Control Panel then click on the Program and Features option.
- Now double click the Add/Remove programs and remove the entry for the Microsoft Office 2003 or Microsoft Office XP product installed on your PC.
- After that, click on the Maintenance Mode Options dialog box, select Uninstall Office, and then click Next to proceed.
- Click Yes to confirm changes.
- Now insert Office 2003 or Office XP CD-ROM and follow the setup dialog boxes to reinstall the program on your system from CD-ROM.
Download Restoro to Correct Registry Errors
However, to ensure the installation is successful this time around, it is advisable to clean the registry and ensure the uninstalled program is not located in the registry.
To do this, download Restoro and run it on your computer. This is a powerful PC Fixer integrated with a registry cleaner.
The registry cleaner wipes out all the unnecessary files and uninstalled program files saved in the registry. Once the registry is cleaned, try reinstalling MS Office again. This will resolve the error 1706.
Click here to download Restoro and repair error 1706.
Read More
If you have set a static IP address manually in your Windows 10 computer and you encounter an error saying, “This operation failed as no adapter is in the state permissible for this operation”, then you won’t be able to connect to any network.
Many users have reported that they were unable to connect to any network after they set their IP addresses manually and all they see is a red cross symbol on the network icon located at the left-hand side of the taskbar. And upon trying to release the IP configuration and renew the address using Command Prompt or Windows PowerShell, they are getting the error instead. Users also noted that their internet connection is fine since they were able to connect to their Wi-Fi connection on their mobile devices. However, they find it hard to connect to the internet using their PCs. To fix this issue, here are some possible fixes you can check out. Make sure to follow each one of the instructions carefully.
Option 1 – Try to run the Internet Connections troubleshooter
As you were not able to connect to your internet connection using your PC, you can try to run the Internet Connections troubleshooter as it might resolve the problem. Refer to the following steps to run this troubleshooter:
- Tap the Win + I keys to open Settings.
- After opening Settings, go to Update and Security.
- Next, navigate to the Troubleshoot pane and select the Internet Connections section and click the Run Troubleshooter button to get started.
- Wait until the troubleshooter is finished doing its job and then try connecting to your network again.
Option 2 – Try to perform Network Reset
As pointed out, the “This operation failed as no adapter is in the state permissible for this operation” error occurs due to the static IP you’ve set. Thus, to fix it, you can try to perform a Network Reset. This will reset the entire network configuration including your IP address. To perform Network Reset, follow these steps:
- Tap the Win + I keys to open Settings.
- From there, go to the Network and Internet section.
- Next, scroll down and look for “Network Reset” under the status pane.
- After that, click on Network Reset and then on Reset now to start resetting the network configuration. Once done, check if it is able to fix the error or not.
Option 3 – Try to update or rollback or uninstall the Network drivers
You might also want to update, roll back, or disable your Network drivers to fix the “This operation failed as no adapter is in the state permissible for this operation” error.
- Tap the Win + R keys to launch the Run window and then type in the “MSC” command and hit Enter to open the Device Manager window.
- Under the Device Manager, you will see a list of drivers. From there, look for the Network Adapters and expand it.
- Then right-click on each one of the Network drivers and depending on your preference, you can either select “Update driver”, “Disable device” or “Uninstall device”.
- After that, restart your PC and see if it helped in fixing the netio.sys Blue Screen error.
Option 4 – Try to reset Winsock, TCP/IP & Flush DNS
You might also want to try resetting Winsock, TCP/IP, and flushing DNS might help you resolve errors. To do so, follow these steps:
- Right-click on the Start button and click on Command Prompt (administrator) so you can pull up an elevated Command Prompt.
- After that, execute each one of the commands listed below. And after you typed in one after the other, you have to hit Enter.
- netsh winsock reset – type in this command to reset Winsock
- netsh int ip reset resettcpip.txt – type in this command to reset TCP/IP
- ipconfig /flushdns – type in this command to flush the DNS cache
- Next, restart your PC and check if the problem’s fixed.
Option 5 – Temporarily disable Firewall and third-party antivirus
Firewall and antivirus programs are known to block files the instant it detects a threat to the system. However, there are some cases when it can also block a file even when it’s a safe one. Thus, your antivirus or firewall programs might be the reason why you can’t download anything on your Windows 10 computer. To isolate the issue, you need to temporarily disable both the Firewall and antivirus programs and then check if you can now download anything from the internet. Do not forget to enable them again as disabling them can leave your computer vulnerable to cyber threats.
Read More
When performing a Windows Backup to the NAS device (backup to a network share) that is running Samba, fails with an error message The backup failed, The version does not support this version of the file format (0xC03A0005). The problem occurs because of a conflict with the VHD file that is created by Windows Backup and is mounted during the process. There are three types of VHD files:
- Fixed,
- Expandable
- Differencing
If the VHD file is a sparse file that is not supported by the native VHD driver, the mounting will fail, and you will get this error. An example VHD file is one that keeps expanding depending on the backup size. The problem occurs only in the case of File Level backup (file/folders in a volume) but not on the block level backup as the vhd file is never mounted. However, in the case of File Level Backup, the vhd is mounted, created by Windows Backup, which does not support the mounting of sparse files.
The solution is to use Strict Allocate: option in the smb.conf file
Login to SMB using SSH. Open the configuration file using the VI editor located at /etc/samba/smb.conf. If the option is not there, you can manually add strict allocate = yes which will make sure there are no sparse file that is created.
Read More
Error Code 0x80073afc — What is it?
Error code 0x80073afc deals with an antivirus program first built into Windows 8/8.1 This error occurs when Windows Defender, the built-in anti-virus software in Windows 8/8.1 and higher, does not start automatically and users attempt to manually start the program. During the initialization period of the program start-up, something goes wrong and users get a 0x80073afc Error message. The error message states there was a problem with the initialization of the program. Windows Defender provides protection of your computer and it is advised by the Microsoft Corporation that you ensure it starts up automatically on every start-up.
Solution
Further Information and Manual Repair
Users have found several manual repairs that have fixed the problem without needing to contact technicians for extra help. While the methods below should solve your problem easily, if this is the first time you have encountered the issue you may want to do a simple restart. This has fixed the problem for some users and is the easiest first troubleshooting move. If it doesn’t work move on to the methods listed below, which are easily completed without extra help.
Before trying any of these methods, please make sure that you are logged into a profile that is listed as the administrator of the computer of his administrative powers enabled. If this is not the case you will not be able to complete the following methods. Please log out and log back in on the administrator profile.
Method 1:
First, check to see if you have a third-party anti-virus program installed on your computer. Some users believe that the built-in Windows Defender program is not powerful enough to handle the safety of their computer so they usually download a third-party program. However, that program may have caused a conflict with Windows Defender and may not allow it to open. If you do have a third-party program installed, try uninstalling it then manually starting Windows Defender.
Method 2:
If method one does not work, you may be infected by malware or a virus that has tampered with the settings on your computer and will not allow Windows Defender to start automatically or manually.
First, open Run by holding the “Win” key and pressing the “R” key. Then type “Regedit”. The program will ask for permission to follow through with this action. Click on “Yes” and the Open Registry Editor will open.
Find the HKEY_LOCAL_MACHINESoftwareMicrosoftWindows NTCurrentVersionImage File Execution Option and check to see if there are any files similar to MSASCui.exe or MpCmdRun.exe. If there are any file entries that resemble that, you will want to right-click on them before selecting the “Delete” option. If you do not see any entries that match, this is not the issue with your Windows Defender and you will want to try another method.
The Registry on your computer is very important. It helps tell your computer what programs are safe to run, what programs should be run, and what programs should not be run. If it is tampered with by a virus or Malware, multiple system operations can be affected.
However, if you did find similar file names, and you deleted them, try to start Windows Defender manually. If it does not work again, move on to the next method.
Method 3:
If the first two methods do not work for your issue, and you are still receiving error code 0x80073afc when attempting to start Windows Defender, this step should solve the problem if you have Restore Point installed on your computer, which you most likely do.
For this method, we will be restoring your computer to a previous Restore Point. First, just like in method two, hold the “Win” key and press the “R” key. This will open run. Next type “Rstrui.exe” and click “ok”. After some time, you will see System Restore Windows. Click “Next” and select the restore point that you would like to go back to. After your computer has restored to the point you selected, check to ensure that Windows Defender has started correctly.
If the above methods aren’t able to rectify the issue, you might have to download and install a powerful automated tool to get the job done.
Read More
Call of Duty is a fun and good game, a great time killer with a squad of friends, however sometimes the game crashes, and fun is interrupted.
In this guide, we will address and solve this unpleasant issue.
-
Scan game files
inside launcher choose options and under them, choose scan and repair game files
This process can take 5-30 minutes, as the game is 60GB large. This will look through all your game files and make sure they’re all valid and that none are corrupted, which may cause crashes. When it’s complete, you’ll get a notification that the game is now playable. Try again and see if your crashes continue. -
Update drivers
Keeping drivers updated is crucial for the game to run smoothly, GPU drivers are possibly important. Go to your GPU manufacturer’s website and get the latest drivers.
-
Lower graphic settings
Intensive graphic requirements can overload GPU and cause crashes, try lowering details in-game and see if this will fix the issue.
-
Disable overlays
If you’re using a program like Discordthat has an overlay, you’ll want to disable it as it may be causing the graphic error
Read More
If you have a dual monitor setup on your Windows 10 computer and you mostly use the second screen when you are presenting something, this makes the Taskbar completely unnecessary and is not really required. So if you are using your computer generally and do not want the taskbar on your second screen, read on as this post will guide you in disabling Taskbar on your second display.
The good thing is, Windows comes with a built-in feature to disable Taskbar on your second screen or projector connected to your computer. In this post, you will be guided on how you can hide or disable the Taskbar from the second monitor in Windows 10. This post is coming in handy especially if you are using projectors or multiple displays.
Refer to the steps given below to disable Taskbar on the second display in Windows 10.
Step 1: Go to Settings and click on Taskbar from the left menu.
Step 2: After that, scroll down to lo look for Multiple Displays.
Step 3: Next, turn off the toggle labeled, “Show taskbar on all displays”.
Note: After completing the steps given above, it will disable the Taskbar on all the secondary displays. Bear in mind that these settings will work only if you are running a second screen in Extended mode. Contrariwise, if you are in the Duplicate mode, this setting will not work but you can always set your Taskbar to Autohide so that it won’t be displayed.
On the other hand, if you are facing some issues in finding which screen is primary and which one is secondary, refer to these steps:
Step 1: Go to Settings and select System.
Step 2: Next, from the left menu open Display.
Step 3: From there, select the desired display and make it the primary one as required by your setup.
Read More
The Gardening Enthusiast toolbar is another product that is advertised as a helpful addition to your browsing experience when it is really nothing more than the software you should remove as soon as possible. It is touted as a toolbar that will provide you with a lot of useful gardening tips. That is the hook to get you to install it. But, in truth, the only thing that it does is provide you with links to popular gardening websites that you can easily find on any search engine.
When installed the extension will change your default search engine and home page to MyWay.com
While browsing the internet with this extension you will see additional sponsored ads and links throughout your browsing session.
Anti-virus applications have marked this extension as a Browser Hijacker and are therefore marked for removal. While not considered malware, the fact that many users find it to hinder browser performance has led to its detection and flag for optional removal.
About Browser Hijackers
Browser hijacking means a malicious program code has control over and modified the settings of your browser, without your permission. Practically all browser hijackers are made for marketing or advertising purposes. Usually, hijackers will force hits to internet sites of their preference either to increase web traffic producing higher ad earnings, or to obtain a commission for every user visiting there. Nevertheless, it isn’t that harmless. Your internet safety is jeopardized and it is extremely annoying. Once the malware attacks your laptop or computer, it starts to mess things up a whole that slows your PC down to a crawl. In the worse case, you will be forced to tackle serious malware threats too.
Browser hijacking symptoms
The typical symptoms that suggest having this malware on your PC are: your home page has been reset to some unfamiliar website; you see new unwanted favorites or bookmarks added, usually directed to ad-filled or pornography sites; the default online search engine has been changed and the web browser security settings have been lowered without your knowledge; find new toolbars that you didn’t add; you notice lots of pop-up ads on your screen; your web browser gets sluggish, buggy, crashes quite often; Inability to navigate to certain sites, especially anti-malware and also other security software webpages.
Exactly how browser hijacker finds its way to your PC
A browser hijacker can be installed on your computer when you go to an infected site, click an e-mail attachment, or download something from a file-sharing website. They could be included with toolbars, BHO, add-ons, plug-ins, or browser extensions. Other times you might have accidentally accepted a browser hijacker as part of a software program package (generally freeware or shareware). Examples of popular browser hijackers are Fireball, Ask Toolbar, GoSave, CoolWebSearch, Babylon Toolbar, and RocketTab.
Browser hijackers can record user keystrokes to gather potentially invaluable information that leads to privacy issues, cause instability on computers, significantly disrupt user’s browsing experience, and ultimately slow down the PC to a point where it will become unusable.
Removing browser hijackers
Certain browser hijacking could be easily reversed by identifying and eliminating the corresponding malware application from your control panel. Unfortunately, many of the software products used to hijack an internet browser are deliberately designed to be hard to detect or get rid of. You should think of undertaking manual fixes only if you are a tech-savvy person, as risks are associated with tinkering with the computer registry and HOSTS file.
Browser hijackers can be effectively removed by installing anti-malware software on the affected PC. If you need to remove persistent hijackers effectively, install the award-winning anti-malware tool Safebytes Anti-Malware. And employ a system optimizer, like Total System Care, to eliminate all related files in the registry and fix browser issues.
How To Get Eliminate Malware That Is Preventing Anti-Malware Installation?
All malware is inherently harmful, but certain kinds of malicious software do more damage to your computer or laptop than others. Certain malware types alter internet browser settings by including a proxy server or change the computer’s DNS configuration settings. When this happens, you’ll be unable to visit certain or all of the sites, and thus unable to download or install the necessary security software to get rid of the computer virus. If you are reading this, chances are you’re stuck with a virus infection that is preventing you to download and/or install Safebytes Anti-Malware software on your computer. Even though this sort of problem can be harder to get around, there are some steps you can take.
Remove viruses in Safe Mode
Safe Mode is a special, basic version of Microsoft Windows where only the bare minimum services are loaded to prevent viruses as well as other problematic applications from loading. In the event, the malware is set to load immediately when PC boots, shifting to this particular mode can prevent it from doing so. To enter into Safe Mode or Safe Mode with Networking, press F8 while the PC is starting up or run MSCONFIG and locate the “Safe Boot” options under the “Boot” tab. Once you reboot into Safe Mode with Networking, you could download, install, as well as update anti-malware software from there. At this point, you can run the antivirus scan to eliminate viruses and malware without any interference from another application.
Switch over to an alternate internet browser
Malicious code might exploit vulnerabilities on a specific browser and block access to all antivirus software websites. In the event you suspect that your Internet Explorer happens to be hijacked by a virus or otherwise compromised by cybercriminals, the most effective thing to do would be to switch over to a different browser like Firefox, Chrome, or Safari to download your chosen computer security software – Safebytes Anti-Malware.
Install security software on a flash drive
To successfully get rid of the malware, you need to approach the problem of installing the anti-malware program on the affected computer system from a different perspective. To run antivirus from a USB drive, follow these simple measures:
1) Make use of another virus-free computer to download Safebytes Anti-Malware.
2) Plug the USB drive into the clean computer.
3) Double click on the downloaded file to open the installation wizard.
4) When asked, select the location of the pen drive as the place in which you want to store the software files. Follow the activation instructions.
5) Unplug the pen drive. You may now use this portable antivirus on the infected computer.
6) Double-click the anti-malware program EXE file on the pen drive.
7) Click on “Scan Now” to run a complete scan on the affected computer for viruses.
Benefits and Features of SafeBytes Security Suite
If you’re planning to purchase anti-malware for your desktop, there are numerous brands and utilities for you to consider. Some are well worth your money, but most aren’t. You must select a company that creates industry-best anti-malware and has earned a reputation as trustworthy. Among few good applications, SafeBytes Anti-Malware is the highly recommended software program for security-conscious people.
SafeBytes anti-malware is a very effective and easy-to-use protection tool that is designed for end-users of all levels of IT literacy. Using its cutting-edge technology, this application will help you get rid of several types of malware like viruses, worms, PUPs, trojans, adware, ransomware, and browser hijackers.
SafeBytes anti-malware takes PC protection to a totally new level with its enhanced features. Here are some of the features you will like in SafeBytes.
Anti-Malware Protection: Built upon a highly acclaimed anti-virus engine, this malware removal tool can detect and remove several stubborn malware threats such as browser hijackers, potentially unwanted programs, and ransomware that other typical antivirus programs will miss.
Real-time Threat Response: SafeBytes offers real-time active supervision and protection from all known viruses and malware. It will constantly monitor your computer for hacker activity and also gives end-users sophisticated firewall protection.
Safe Browsing: Safebytes allots all sites a unique safety ranking that helps you to have an idea of whether the website you’re about to visit is safe to browse or known to be a phishing site.
Lightweight: SafeBytes is renowned for its low impact on processing power and great detection rate of countless threats. It works silently and efficiently in the background so you are free to make use of your personal computer at full power all the time.
24/7 Premium Support: You will get 24/7 technical support to quickly resolve any issue with your security software.
SafeBytes will keep your personal computer safe from the latest malware threats automatically with hardly any input needed from you again. Malware problems will become a thing of the past once you put this software to use. You’ll get the best all-around protection for the money you spend on SafeBytes Anti-Malware subscription, there is no doubt about it.
Technical Details and Manual Removal (Advanced Users)
If you do not wish to use malware removal software and like to remove Gardening Enthusiast manually, you could do so by going to the Add/Remove Programs menu in the Control Panel and deleting the offending program; in cases of browser add-ons, you may uninstall it by visiting the browsers Add-on/Extension manager. You might also want to reset your home page and search engine providers, and also delete browsing history, temporary files, and internet cookies.
To make sure of complete removal, find the following Windows registry entries on your computer and remove them or reset the values appropriately. However, editing the Windows registry is really a difficult job that only experienced computer users and professionals should attempt to fix the problem. In addition, certain malware keeps replicating which makes it difficult to eliminate. Completing this task in Safe Mode is advised.
Folders:
C:Program FilesGardeningEnthusiast_7j
Files:
Search and Delete:
7jbar.dll
7jhighin.exe
7jmedint.exe
7jregfft.dll
7jregiet.dll
7jhkstub.dll
7jreghk.dll
7jSrcAs.dll
7jSrchMn.exe
NP7jStub.dll
7jPlugin.dll
7jauxstb.dll
7jbprtct.dll
7jdlghk.dll
7jradio.dll
7jieovr.dll
INSTALL.RDF
Read More
Gables is a browser extension developed by MindSpark Inc. This browser extension lets you create gifs and memes with a few simple clicks. This extension usually comes bundled up with the ASK toolbar.
While active this extension monitors your browser activity and records website visits, clicked links, and potentially personal data. This data is later forwarded to MindSparks ad servers where it is used to better target ads.
This extension hijacks your browser home screen, as well as your default search provider, and changes them to MyWay.com. This extension has been marked as a Browser Hijacker by several anti-virus scanners, and due to its behavior, it is not recommended to keep it on your computer for security reasons.
About Browser Hijackers
Browser hijacking means that a malicious program code has taken control over and altered the settings of your browser, without your approval. Browser hijacker malware is designed for a number of reasons. It redirects you to the sponsored websites and injects adverts on your internet browser that helps its creator generate earnings. Most people believe that these sites are legitimate and harmless but that is not true. Nearly every browser hijacker poses an existent threat to your online safety and it’s important to categorize them under privacy dangers. In a worst-case scenario, your internet browser could be hijacked to download malicious software that will do a lot of damage to your computer system.
Indications of browser hijack
There are numerous signs of web browser hijacking: your browser’s home page has been reset to some mysterious site; you find yourself regularly directed to some other web page than the one you actually meant; The default search page of web browser is modified; unwanted new toolbars are added to your browser; unstoppable flurries of popup advertisements appear on your computer screen; your browser has instability problems or displays frequent errors; You cannot access certain websites, in particular anti-virus sites.
Exactly how browser hijacker finds its way to your PC
Browser hijackers infect computers in numerous ways, including through a drive-by download, a file-share, or an infected email. They can be included with toolbars, add-ons, BHO, plugins, or browser extensions. Other times you may have mistakenly accepted a browser hijacker as part of an application bundle (generally freeware or shareware). A good example of a popular browser hijacker is the most recent Chinese malicious software called “Fireball”, which has infected 250 million computers globally. It works as a hijacker but can be turned into a full-functioning malware downloader later on.
Browser hijackers could affect the user’s browsing experience significantly, record the websites frequented by users and steal personal information, cause difficulty in connecting to the internet, and ultimately create stability issues, making software programs and computers crash.
Learn how to get rid of browser hijackers
Some browser hijacking could be easily stopped by identifying and removing the corresponding malware program from your control panel. Often, it could be a challenging job to discover and delete the malicious program because the associated file will be running as part of the operating system process. Also, browser hijackers could modify the Computer registry so that it can be extremely difficult to restore all of the values manually, particularly if you are not a tech-savvy individual.
What To Do If You Cannot Install Any Antivirus?
Malware can cause a great deal of damage to your computer. Some malware is designed to hinder or block things that you wish to do on your computer system. It may well not allow you to download anything from the web or it will prevent you from accessing some or all of the sites, in particular the antivirus sites. If you’re reading this article, odds are you’re stuck with a malware infection that is preventing you to download and install Safebytes Anti-Malware software on your computer system. Refer to the instructions below to remove malware by alternate methods.
Use Safe Mode to resolve the problem
Safe Mode is a special, basic version of Microsoft Windows in which only essential services are loaded to prevent viruses and other problematic applications from loading. In the event, the virus is set to load immediately when PC boots, shifting to this particular mode may prevent it from doing so. To enter into Safe Mode or Safe Mode with Networking, press the F8 key while the PC is starting up or run MSCONFIG and locate the “Safe Boot” options under the “Boot” tab. Once you are in safe mode, you can attempt to install your antivirus software program without the hindrance of the malware. At this point, you could run the anti-malware scan to get rid of computer viruses and malware without hindrance from another malicious application.
Download the security software using an alternate browser
Some malware mainly targets specific internet browsers. If this sounds like your case, make use of another web browser as it might circumvent the malware. The best way to avoid this problem is to opt for a web browser that is known for its security features. Firefox has built-in Phishing and Malware Protection to help keep you secure online.
Create a bootable USB antivirus drive
Here’s another solution which is creating a portable USB antivirus software package that can check your system for viruses without needing installation. Adopt these measures to run the anti-virus on the affected computer.
1) Make use of another virus-free computer to download Safebytes Anti-Malware.
2) Plug the Flash drive into the clean computer.
3) Run the setup program by double-clicking the executable file of the downloaded application, which has a .exe file format.
4) Select the drive letter of the pen drive as the location when the wizard asks you exactly where you want to install the anti-malware. Follow the on-screen instructions to complete the installation.
5) Now, transfer the pen drive to the infected computer.
6) Double click the Safebytes Anti-malware icon on the USB drive to run the application.
7) Run Full System Scan to detect and clean-up up all kinds of malware.
How SafeBytes Anti-Malware Keep your Computer Virus Free
Do you wish to install the best anti-malware program for your system? There are many applications on the market that come in paid and free versions for Windows computers. Some are worth your money, but most aren’t. You really should select a company that creates industry-best anti-malware and has earned a reputation as reliable. While thinking about reliable applications, Safebytes AntiMalware is undoubtedly the highly recommended one.
SafeBytes antimalware is a highly effective and user-friendly protection tool that is designed for end-users of all levels of IT literacy. This tool can easily identify, remove, and protect your computer from the latest malware intrusions including adware, spyware, trojan horses, ransomware, parasites, worms, PUPs, as well as other possibly damaging software programs.
SafeBytes anti-malware takes computer protection to a whole new level with its enhanced features. Below are some of the good ones:
World-class AntiMalware Protection: Using its advanced and sophisticated algorithm, this malware removal tool can detect and get rid of the malware threats hiding in your computer system effectively.
Real-time Active Protection: SafeBytes gives round-the-clock protection for your computer limiting malware attacks instantly. It will continuously monitor your pc for hacker activity and also provides users with advanced firewall protection.
Safe Browsing: Through its unique safety ranking, SafeBytes informs you whether a site is safe or not to visit it. This will ensure that you’re always certain of your online safety when browsing the online world.
“Fast Scan” Features: This program has got one of the fastest and most powerful virus scanning engines in the industry. The scans are very accurate and take a little time to complete.
Minimal CPU Usage: SafeBytes is renowned for its minimal influence on processing power and great detection rate of numerous threats. It runs quietly and efficiently in the background so you are free to use your PC at full power all of the time.
Fantastic Technical Support: Support service is accessible 24 x 7 x 365 days through chat and email to answer your questions.
Technical Details and Manual Removal (Advanced Users)
If you wish to manually remove GIFables without the use of an automated tool, it may be possible to do so by removing the program from the Windows Add/Remove Programs menu, or in cases of browser extensions, going to the browsers AddOn/Extension manager and removing it. You will likely also want to reset your browser.
To ensure the complete removal, manually check your hard drive and registry for all of the following and remove or reset the values accordingly. Please note that this is for advanced users only and may be difficult, with incorrect file removal causing additional PC errors. In addition, some malware is capable of replicating or preventing deletion. Doing this in Safe Mode is advised.
The following files, folders, and registry entries are created or modified by GIFables
Files:
%UserProfile%Local SettingsApplication DataGoogleChromeUser DataDefaultSync Extension Settingsjahgjnedbefhiimghmiemdmgiegiddjg
%LOCALAPPDATA%GoogleChromeUser DataDefaultLocal Extension Settingsjahgjnedbefhiimghmiemdmgiegiddjg
%UserProfile%Local SettingsApplication DataGoogleChromeUser DataDefaultLocal Extension Settingsjahgjnedbefhiimghmiemdmgiegiddjg
Search and Delete: chrome-extension_jahgjnedbefhiimghmiemdmgiegiddjg_0.localstorage-journal
Search and Delete: chrome-extension_jahgjnedbefhiimghmiemdmgiegiddjg_0.localstorage
Read More
![]()
Copyright © 2023, ErrorTools. All Rights Reserved
Trademark: Microsoft Windows logos are registered trademarks of Microsoft. Disclaimer: ErrorTools.com is not affiliated with Microsoft, nor claims direct affiliation.
The information on this page is provided for information purposes only.
![]()