
I am very new in Android Studio. I have a problem with gradle.
it says,
Error:Invalid Gradle JDK configuration found.
Platform SDK does not point to valid `JDK` `(C:/Program Files/Java/jdk1.8.0_20)`.
Consult IDE log for more details (Help | Show Log)
then what should I do to solve that?
![]()
Lucky
16.7k19 gold badges117 silver badges151 bronze badges
asked May 19, 2015 at 14:49
![]()
0
I got this issue in Android studio 4.2 canary, and I had to delete those generated files:
.idea/gradle.xml
.idea/workspace.xml
then clicking try again to sync the project.
answered May 10, 2021 at 7:07
![]()
5
Under Android Studio, select File > Project Structure > JDK location.
Specify the JDK to the folder of your currently installed JDK. And specify the SDK location as well.
![]()
Lucky
16.7k19 gold badges117 silver badges151 bronze badges
answered May 29, 2015 at 4:36
![]()
ctc chenctc chen
1,3361 gold badge7 silver badges7 bronze badges
3
Simple solution:
- Go to build.gradle and at the top there will be a message JDK missing
- Click on it and use JDK from the list (or download one if you don’t have)
- Sync project
![]()
answered Dec 14, 2020 at 12:18
![]()
Stack FoxStack Fox
1,2019 silver badges14 bronze badges
0
I got this issue in Android Studio 4.2.2, and the solution is very simple, just delete
.idea/gradle.xml
.idea/workspace.xml
and click on
File -> Invalidate Caches/ Restart
answered Jul 12, 2021 at 9:36
![]()
RishabhRishabh
3533 silver badges8 bronze badges
1
If you want / need to, update your JDK installation to the version that you want to use.
Next, find the version for your current JDK installation by running javac -version or java -version. Check that it is what you expect.
Next, find the JDK installation directory:
- It should be on your %PATH%.
- By default it will be a subdirectory of «C:Program FilesJava»‘ for example: «C:Program FilesJavajdk1.8.0_45»
Next, start Android Studio, and go to the «File->Project Structure->JDK Location» preference page.
The file path given by the preference should be the path to the JDK installation director that you identified above. If it isn’t then update it.
Notes:
- Use the full pathname of the installation directory; e.g. «C:Program FilesJavajdk1.8.0_45».
- Use a pathname, not a URL.
answered Aug 13, 2015 at 19:26
![]()
Just delete .idea and .gradle folders from your project path on your computer and sync again.
answered May 17, 2021 at 15:47
![]()
Sana EbadiSana Ebadi
6,5422 gold badges43 silver badges43 bronze badges
This Problem occurs when you open your Android Project in Another Computer.
To Solve this,
- DELETE your
.gradleand.ideafolder from your project. Invalidate Cache and RestartAndroid studio- After Restart, SYNC Again to automatically create new
.gradleand.ideafolders
answered Sep 30, 2021 at 5:15
![]()
This issue happens if you change the workspace or manually copy files to the new repo workspace. i fixed it by deleting below files,
.idea/gradle.xml
.idea/workspace.xml
Finally click on File-> invalidate cache and restart
answered Aug 26, 2021 at 8:05
![]()
Prashant.JPrashant.J
7397 silver badges12 bronze badges
For Android studio Canary Build Arctic Fox 2020.3.1 this seems like a bug or hard dependency with Jdk 11.
I already had jdk defined, but I was still getting this error. Got resolved after installing jdk 11 and providing path to it in the jdk location here
File > Project Structure > JDK location
answered Dec 31, 2020 at 2:15
![]()
Anuj GargAnuj Garg
95910 silver badges12 bronze badges
I have solve this problem my App name «Addvoicetomusic2»;
go to app dir-
C:UsersamramAndroidStudioProjectsAddvoicetomusic2
- then remove .gradle and .idea file
*then connect to internet - restart android studio project
successfully solve
answered Jan 28, 2021 at 6:29
![]()
amra ramamra ram
811 silver badge2 bronze badges
For macOS:
-
install JDK from Oracle site
-
Go to the folder:
cd /Library/Java/JavaVirtualMachines
Here you will see JDK installed.
Set folder in the Android Studio, something like this:
/Library/Java/JavaVirtualMachines/jdk-16.0.1.jdk
I don’t why it’s not possible to automate such tasks after all this years.
answered Jul 10, 2021 at 10:42
![]()
amra ram’s solution worked for me, more or less. I had an old .idea directory with a weird configuration. Deleting it, closing Android Studio, and opening the project again forced it to reinstall and sync Gradle.
answered May 7, 2021 at 0:27
![]()
When I encountered this same problem, I solved it by specifying the path to the portable (non installed) JDK8.
![]()
ryanyuyu
6,31710 gold badges48 silver badges52 bronze badges
answered Aug 12, 2015 at 10:50
![]()
0
Same error i got when I install android studio on my pc . at the time of installation I have installed android sdk and android studio in different path so In project structure I have set my new sdk path .
Still I got message of invalid jdk …then I knew location of jdk ,again in project structure I have set my jdk path.It works.
answered Aug 17, 2016 at 7:01
![]()
For me the problem appeared after updating IntelliJ to version 2020.2.1.
Just solved it by going to Project Structure -> SDK. There I only had the Java jdk. I’ve added IntelliJ IDEA Platform Plugin SDK and that seems to have solved the problem. gradle loads just fine.
answered Sep 11, 2020 at 9:59
![]()
- First you have to delete the folders —
.ideaand.gradlefrom the source directory. - Select
File > Project Structure > JDK location. Specify the JDK to the folder of your currently installed JDK. Ensure that you have installed the JDK version greater than 1.8. Also specify the SDK location. - Select
File -> Invalidate Caches/Restartclick Invalidate and Restart
answered Jun 15, 2021 at 17:26
![]()
if other answers not work try this
For Android Studio Arctic Fox | 2020.3.1 Canary 15
File -> Invalidate Caches/Restart
click Invalidate and Restart
it works for me
answered Jun 15, 2021 at 15:57
![]()
Just clean and rebuild project worked for me.
answered Aug 17, 2021 at 15:19
![]()
Dave LeeDave Lee
1541 silver badge9 bronze badges
I had to update to the latest Android build, Android Studio Arctic Fox | 2020.3.1. to be specified to make the project compile.
answered Nov 19, 2021 at 8:44
![]()
touhid udoytouhid udoy
3,9552 gold badges17 silver badges31 bronze badges
Go to Android studio settings or preferences and select jdk as shown in image and try syncing project

answered Mar 29, 2022 at 6:38
![]()
Tarun ATarun A
2,01215 silver badges14 bronze badges
Just deleted the entire .idea folder from your project and it will work.
answered Apr 13, 2022 at 4:39
![]()
If you’re working with Android Studio 4.2.2, and you got a zip of somebody’s source code, it may often contain the .idea folder. Unfortunately, the .idea folder may contain gradle SDK configuration, etc., that are only valid for the computer of the person who sent you the source code.
Solution:
- Ideally, the sender should have deleted the .idea folder before sending to you, but you can still fix it by ..
- Delete
.idea/gradle.xmland.idea/workspace.xml.
Then do the gradle sync again and the error will go away, and it should be fine.
answered Jun 20, 2022 at 18:04
![]()
auspicious99auspicious99
3,8321 gold badge43 silver badges58 bronze badges
For me I just did File -> Invalidate Caches… -> Invalidate And Restart(leave the checkboxes above as default)
It will take some time but it worked fine .
answered Dec 7, 2022 at 18:23
![]()
Try to put the JRE path inside the IDE folder.
Another way is to put JAVA_HOME, configuring in the global variables of windows.
answered May 18 at 3:25
![]()
The invalid Gradle JDK configuration found IntelliJ IDEA error affects your project when the script includes a few invalid Gradle JDK files generated by the system. As a result, this inconsistency affects the open Gradle settings change JDK and obliterates your programming experience by launching a JDK location exception.
So, writing this detailed invalid Gradle JDK configuration found 2020 debugging guide was the best step because it provides advanced debugging approaches. However, we will also teach you how to recreate the invalid JDK configuration found IntelliJ bug using actual examples and code exceptions.
Contents
- What Causes the Invalid Gradle JDK Configuration Found Error?
- – Using Gradle in Android Studio
- Repair the Invalid Gradle JDK Configuration: 3 Straightforward Fixes
- – Downloading the Correct JDK Configuration
- – Updating the Pathname for the Project Structure
- Conclusion
What Causes the Invalid Gradle JDK Configuration Found Error?
Several invalid files and commands generated by the program cause the invalid Gradle JDK configuration found in Android Studio error. Unfortunately, you can experience an exact code exception when the JDK download file is not in sync with the current project and its properties, confusing the output.
As you can tell, the invalid Gradle JDK configuration found Mac error affects most operating systems and programs, although it has different messages. For instance, your Gradle project will launch various code exceptions depending on your application’s elements, tags, and commands.
As a result, your system will likely display the IntelliJ platform SDK does not point to valid JDK issue when your document needs more adequate packages and functions.
You can try to change JDK location, but this will only sometimes debug the program unless you input the correct paths and JDK configurations.
In addition, your project structure must include the right SDK location to avoid the invalid gradle jdk configuration found. project-jdk-name is not defined. Still, please note that recreating this invalid Gradle error using standard elements and commands is impossible because it has nothing in common with the script.
So instead, we will show you the entire code exception that indicates why the error happens and which is the corrupted location of the Gradle JDK file. We will also provide the debugging approaches that should help you remove the open Gradle error without affecting other functions or commands in your document.
– Using Gradle in Android Studio
Using Gradle in Android Studio with incorrect locations and settings change is the most common action that causes this configuration mistake in your application. Although your document can only have a few functions and commands, the system can launch the error unless all inputs are functional and serve the proper purpose.
On the flip side, this error also occurs in advanced Android projects and files with many processes, confirming the error’s dynamic trait. But again, we must verify that the error is not affected by the script, which can confuse beginners.
As a result, your system displays the unique code exception for all documents due to the elements and locations. You can learn more about the error in the following Intellij IDEA example:
Platform SDK does not indicate valid `JDK` `(C:/ Program Files/ Java/ jdk1.9.0_22)`.
Consult the IDE log for more details (Help | Show Log)
As you can tell, the mistake indicates the failed property that is critical when compiling your Gradle application or project. Unfortunately, programmers usually need help recognizing the exact broken file because the location includes many files.
Therefore, you must be careful because deleting a functional property can cause further complications and errors.
Moreover, this bug affects nearly all Android Studio versions, making debugging even more challenging. Luckily, the debugging methods this guide explains will apply to most interpretations, so it would help if you remain calm.
In addition, we will share a few alternative solutions that should clarify any remaining inconsistencies or obstacles your document will have.
Repair the Invalid Gradle JDK Configuration: 3 Straightforward Fixes
You can repair the invalid Gradle JDK configuration by deleting the invalid files generated by the program. In addition, you must sync the project to complete the debugging process, which is easily done by opening the file. Finally, restarting the application ensures the files no longer affect the system.
Although you usually need clarification and do not know how to react, invalid Gradle configurations are typically affected by two files. As a result, we will show you a short code snippet that includes the broken elements and removes the mistake without affecting other commands, which is critical when completing your project.
In addition, we should confirm the system generated the files on Android Studio 4.2 Canary, although it appears with other versions, as explained before. You can quickly locate the files inside the main document, confirmed by the location indicated in the code exception listed in the former chapter.
The following example shows the files you must delete to reenable the processes:
.idea/ workspace.xml
Although both XML processes appear harmless to your project, they are responsible for the annoying code exception. In addition, it would help if you clicked try again to sync the main document and functions, which should clear your application and remove the error.
As you can tell, the Gradle and Workspace files include incorrect properties that confuse your system and prevent you from completing the program.
However, this debugging approach needs to provide the missing JDK. So instead, we will show you a method to remove the bug by downloading the suitable JDK configuration.
– Downloading the Correct JDK Configuration
In the beginning, we explained that this error affects your program due to broken JDK configurations. Although deleting a few files from the main folder should debug this exception in most cases, you must learn about an alternative approach that can help you and your project.
For instance, you can download the fair JDK configuration and save it to the Gradle project to remove the message. Then, after running the commands, you can initiate this debugging approach by navigating to the broken exception your system displays.
As a result, this should save some time because you will have the right location where you must paste the recently downloaded JDK configuration. The complete operation consists of a few steps shown in the following list:
- Navigate the build Gradle document and open it. You will see a message that confirms the JDK configuration is missing at the top of the dialog box.
- Click on the invalid exception and use the JDK configuration the program suggests.
- Alternatively, download the configuration suitable for your Android Studio version. It would help if you did some research to find the versions and structures that match.
- Sync the project and the newly-introduced JDK configurations to allow your system to render the command correctly.
- Close and restart the program.
This list confirms downloading the JDK configuration file is sometimes critical unless your program provides the correct package. Still, this should encourage you because the standard JDK configuration supports most Android Studio versions and operating systems.
– Updating the Pathname for the Project Structure
Another excellent debugging approach asks you to update the pathname for the project structure, helping your system to recognize the correct commands. However, this operation includes a few sections where you must make specific changes to the project and its files.
For instance, you must first download or update the JDK installation to the version your program needs. Then, locate the version for the JDK installation package using the javac -version or java -version properties, and ensure this is what your system expects.
The following step requires you to find the correct JDK installation directory, as explained in this list:
- The directory should be on your %PATH%
- In addition, it acts as a subdirectory for the Java application, as shown here: C: Program Files Java jdk1.8.0_45
You can launch the Android Studio program on your computer using the project structure folder and navigate to the JDK location reference page. In addition, the file location specified by the preference should be the path to the JDK installation directory you have identified before.
The file path can be unavailable but worry not, as an easy fix exists. Namely, you must update to the latest pathname and match it to the project structure, which should only take a minute.
In addition, we urge you not to use URLs and only introduce proper pathnames to avoid inconsistencies and future errors. It would help if you also used the installation directory’s full pathname, as exemplified before. The Gradle JDK configuration mistake should no longer affect your program or application.
Conclusion
The Gradle JDK configuration error affects your project when the script includes a few invalid files generated by the system. Luckily, this guide explained the most sophisticated debugging approaches and clarified the following critical points:
- The null code exception provides the exact file that breaks your project
- You may experience the invalid Gradle JDK error when the current task and the properties are async
- Deleting the files that provoke the bug is the most accessible debugging approach for invalid Gradle JDK configuration.
- Always update to the latest pathname and match it to the structure of the project.
Although facing bugs and mistakes can ruin your programming experience, the JDK configuration error will no longer be one of them. Instead, you can use this article’s debugging approaches to fix your document and reenable all processes.
- Author
- Recent Posts

Your Go-To Resource for Learn & Build: CSS,JavaScript,HTML,PHP,C++ and MYSQL. Meet The Team
Если при создании проекта по разработке приложений на Android Studio, либо импорте готового проекта у вас появляется ошибка “Invalid Gradle JDK configuration found. Open Gradle Settings Change JDK location”, то необходимо обновить полностью настройки, конфигурацию и версию системы автоматической сборки Gradle. Обычно данная ошибка появляется при импорте готового и старого проекта в Android Studio.
Чтобы исправить это и решить проблему, нужно:
1. Закрыть проект в Android Studio: File – Close Project.
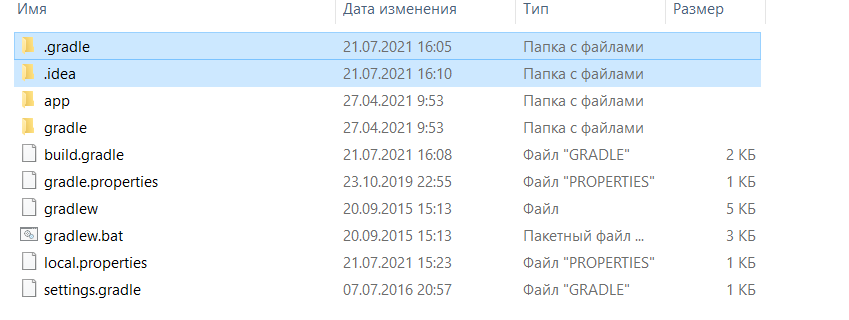
2. Удалить папки .gradle и .idea
Your Go-To Resource for Learn & Build: CSS,JavaScript,HTML,PHP,C++ and MYSQL. Meet The Team

