Note: This article is based on Hyper-V 2.0, and might not apply to Hyper-V 3.0 (Server
2012)
This article builds upon the
topic in the TechNet Library at:
http://technet.microsoft.com/en-us/library/dd581879(WS.10).aspx
Applies To: Windows Server 2008
Table of Contents
- How to Resolve
- Check Hyper-V status
- AMD «Bulldozer» Processor Special Case
- How to Verify
- Event Details
- Related Information
How to Resolve
Check Hyper-V status
The virtual machine could not be started because the hypervisor is not running. Check your BIOS settings and BCD store, then restart the physical computer.
NOTE: You might also have seen the following error message when attempting to start the virtual machine.

Hyper-V requires hardware support, including: an x64 CPU; VT (Intel) or AMD-V (AMD) hardware extensions; No eXecute (NX)/eXecute Disable (XD) and full BIOS support for hardware virtualization. Check your physical
computer’s BIOS settings to ensure that virtualization features are enabled, and
then turn off the power to your physical computer. Restart the physical machine. NOTE: Restarting the physical computer is not sufficient.
To check if the computer meets the hardware requirements, use the appropriate utility for your CPU manufacturer:
If the computer meets the requirements for Microsoft virtualization software, see the video titled
Hypervisor is not running error: How to fix, which demonstrates how to change the system BIOS on a computer to enable support for virtualization (http://go.microsoft.com/fwlink/?LinkId=163578).
Also, check that Boot Configuration Data (BCD) store is set to start the hypervisor, and then restart your physical computer.
The BCD store contains boot configuration parameters and controls how the operating system is started in Windows Vista and Windows Server 2008 operating systems. These parameters were previously in the Boot.ini file (in BIOS-based operating systems) or in
the nonvolatile RAM (NVRAM) entries (in Extensible Firmware Interface-based operating systems).
You can use the Bcdedit.exe command-line tool to update BCD store with the correct launch options as referenced in the error, and then restart the server. Bcdedit.exe is located in the WindowsSystem32 directory by default.
NOTE: Administrator privileges are required to use bcdedit to modify the BCD store. Unless otherwise specified, bcdedit operates on the system store by default.
On PC/AT BIOS systems, the BCD store resides in the active partition’s boot folder. On EFI systems, the file is located on the EFI system partition (ESP) under EFIMicrosoftBoot.
Caution: The BCD data store is a registry hive, but that hive should not be accessed with the registry API. Interaction with the underlying firmware occurs in the supported BCD interfaces. For this reason, BCD stores should
be accessed only through the associated tools or WMI API. Incorrectly editing the registry might severely damage your system. Before making changes to the registry, you should back up any valued data.
For more information about the BCD Store, see How the Boot Configuration Data Store Works at http://technet.microsoft.com/en-us/library/cc770770(WS.10).aspx
AMD «Bulldozer» Processor Special Case
If your server contains an AMD «Bulldozer» based CPU, you may also need to apply the
Advanced Vector Extensions (AVX) hotfix supplied by Microsoft in addition to performing the steps above. If your configuration matches the scenarios listed in the «Symptoms» section of the
page, request that the hotfix be sent to you by clicking the «View and request hotfix downloads» link underneath the title of the article.
How to Verify
Start the virtual machine again.
Event Details
| Product: | Windows Operating System |
| ID: | 3112 |
| Source: | Microsoft-Windows-Hyper-V-Worker |
| Version: | 6.0 |
| Symbolic Name: | MSVML_WP_INIT_HYPERVISOR_NOT_RUNNING_ERROR |
| Message: | The virtual machine could not be started because the hypervisor is not running. The following actions may help you resolve the problem:%r
1) Verify that the processor of the physical computer has a supported version of hardware-assisted virtualization. 2) Verify that hardware-assisted virtualization and hardware-assisted data execution protection are enabled in the BIOS of the physical computer. (If you edit the BIOS to enable either setting, you must |
The
Dell Latitude E6400 and some Dell Optiplex machines appear to be a special case. Users of this computer have had good results with the information at:
http://reidablog.blogspot.com/2008/06/with-correct-bios-settings-enabled-on.html
Related Information
- Hypervisor Operation
- Hyper-V
- Hyper-V Health Model
- Hyper-V Forum FAQ
There have been users reports that state that users are not able to launch VirtualBox as they are presented with a message box saying hypervisor is not running. This error is often due to your Hyper-V services not running automatically or disabled Hyper-V feature. Basically, Hypervisor is a software that is used to run or create virtual machines. When users try to open VirtualBox, instead of the user interface, they are prompted with the ‘Virtual Machine could not be started because the hypervisor is not running’ error.
We all know about virtual machines and many of us have used it at least once throughout the years, albeit most of us aren’t aware of the responsible tech at play. Nonetheless, the error can be easily resolved by applying a few simple solutions that we have mentioned down below.
What causes the ‘Virtual Machine could not be started because the Hypervisor is not running’ Error on Windows 10?
Well, after looking at the user reports, the error is due to the following factors —
- Hyper-V services: In some cases, the error is popping up because the Hyper-V services on your Windows 10 aren’t starting automatically after abootupp.
- Hyper-V feature: Another thing that can cause the error to appear is the Hyper-V feature. If this feature, located in your Windows features list, is disabled, it will cause the error message to emerge.
To fix your issue, you can follow the few solutions down below. If you want a quick workaround, we recommend following the solutions in the same order as provided.
Solution 1: Using the Command Prompt
You can fix your issue by setting the hypervisor to start automatically in your boot configuration data file. This will require an elevated command prompt so make sure you are using an administrator account. Here’s how to do it:
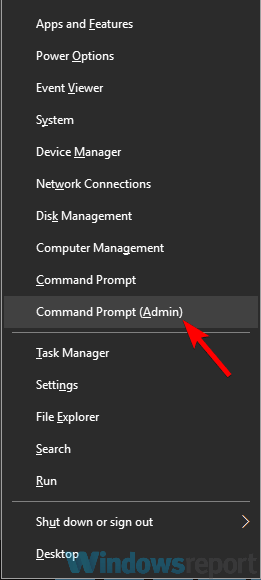
- Press Windows Key + X and select Command Prompt (Admin) from the list to open an elevated command prompt.
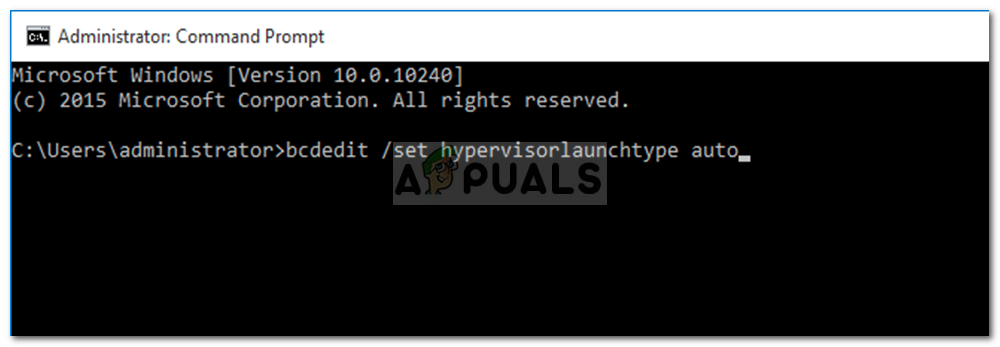
- Once the command prompt loads, type in the following command and press enter:
- bcdedit /set HypervisorLaunchType auto

Setting Hypervisor to Start Automatically in BCD - Restart your system and check if it fixes your issue.
Solution 2: Starting the Hyper-V Service
Another fix that you can implement to circumvent the issue would be changing the properties of a Hyper-V service. Sometimes, the service doesn’t start automatically due to which the error is popping up. Therefore, to fix it, you will have to set the service to start automatically. Here’s how to do it:
- Press Windows Key + R to open Run.
- Type in ‘services.msc‘ and press Enter.
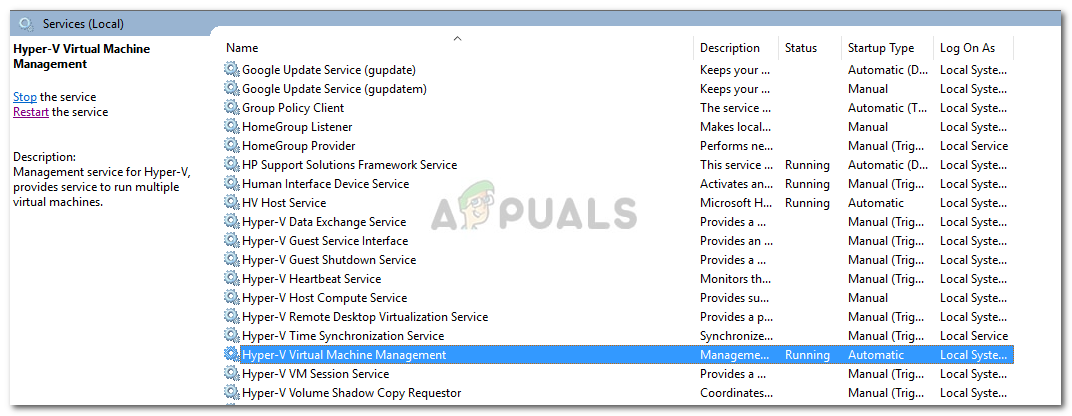
- In the Windows Services list, locate the Hyper-V Virtual Machine Management service.

Hyper-V Virtual Machine Management Service - Double-click it to open Properties.
- Set the Startup type to Automatic and make sure the service is running.
- Restart your system.
Solution 3: Enabling Hyper-V Feature
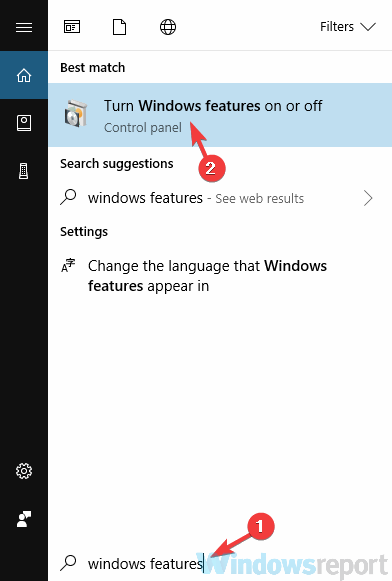
Finally, the last thing that can potentially fix your issue would be enabling the disabled Hyper-V feature. This feature is located in the Windows features list which can be found in the Control Panel. To do this, you will have to do the following:
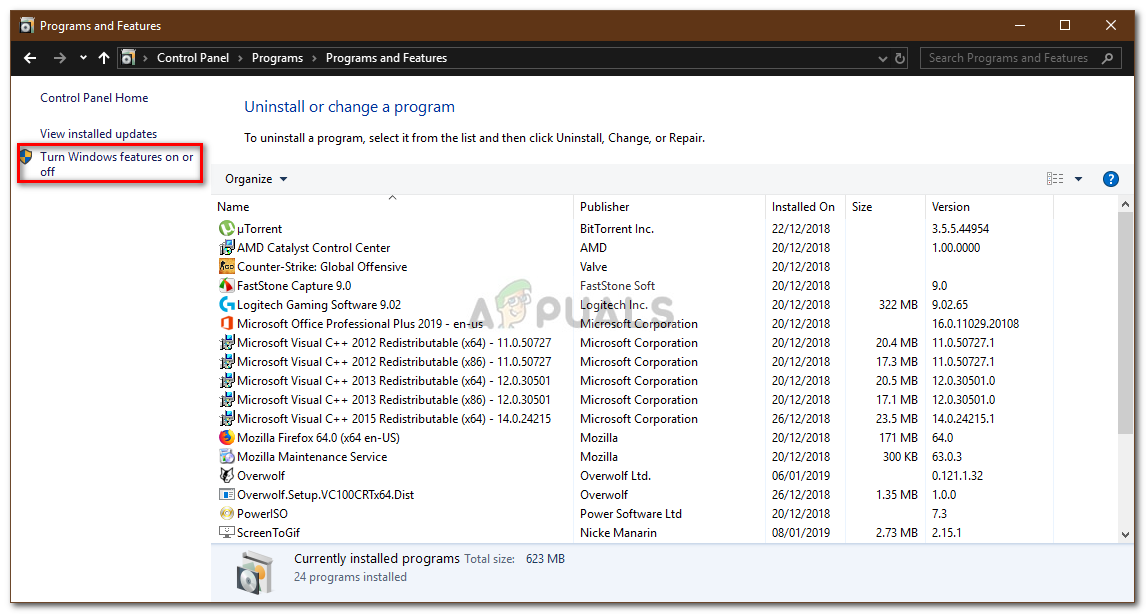
- Go to the Start Menu and open up the Control Panel.
- Go to Programs and Features.
- On the left-hand side, click ‘Turn Windows Features on or off’.

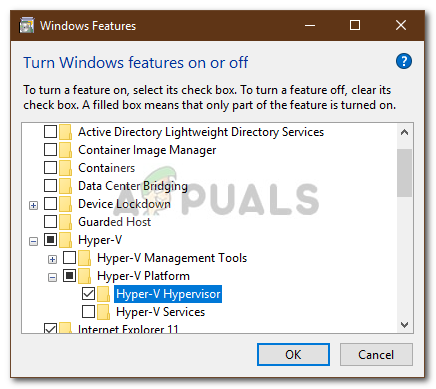
Programs and Features – Control Panel - Scroll down and expand the Hyper-V entry.
- Afterward, expand the Hyper-V Platform list.
- Tick the ‘Hyper-V Hypervisor’ box and then click OK.

Enabling Hyper-V Hypervisor Feature - If it is greyed out, you will have to tweak your BIOS settings a teensy bit. In your BIOS settings, make sure Virtualization setting is enabled.

Kevin Arrows
Kevin Arrows is a highly experienced and knowledgeable technology specialist with over a decade of industry experience. He holds a Microsoft Certified Technology Specialist (MCTS) certification and has a deep passion for staying up-to-date on the latest tech developments. Kevin has written extensively on a wide range of tech-related topics, showcasing his expertise and knowledge in areas such as software development, cybersecurity, and cloud computing. His contributions to the tech field have been widely recognized and respected by his peers, and he is highly regarded for his ability to explain complex technical concepts in a clear and concise manner.
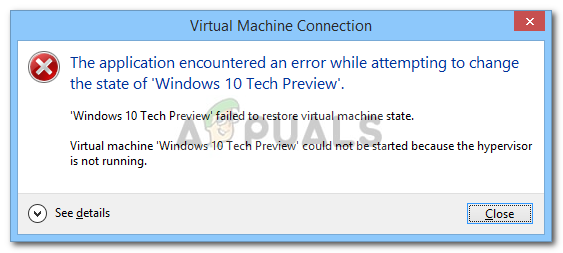
In this article, we will take a look at how to fix the error when starting virtual machines on a Windows host with the Hyper-V role: Virtual machine could not be started because the hypervisor is not running.
Below is the full text of the error:
Hyper-V Manager
An error occurred while attempting to start the selected virtual machine(s).
VMname failed to start.
Virtual machine VMName could not be started because the hypervisor is not running.

Kevin Arrows
Kevin Arrows is a highly experienced and knowledgeable technology specialist with over a decade of industry experience. He holds a Microsoft Certified Technology Specialist (MCTS) certification and has a deep passion for staying up-to-date on the latest tech developments. Kevin has written extensively on a wide range of tech-related topics, showcasing his expertise and knowledge in areas such as software development, cybersecurity, and cloud computing. His contributions to the tech field have been widely recognized and respected by his peers, and he is highly regarded for his ability to explain complex technical concepts in a clear and concise manner.