
Посетители сайта видят 404 ошибку, если страница, на которую они пытаются перейти, не существует или по какой-то причине сервер не может её найти. В статье рассмотрим, что это за ошибка и какое влияние она оказывает на поведенческие факторы пользователей и SEO. А также разберем, как настроить редирект 404 ошибки через .htaccess.
Что такое ошибка 404
Ошибка 404 (File not found) возникает, когда сервер не может найти запрашиваемую пользователем страницу. От ее появления не застрахован ни один сайт. Достаточно ввести в адресной строке после домена рандомный набор символов. Например:
http://site.ru/asdfjkl;
Сервер не сможет найти страницу, и отобразится ошибка:
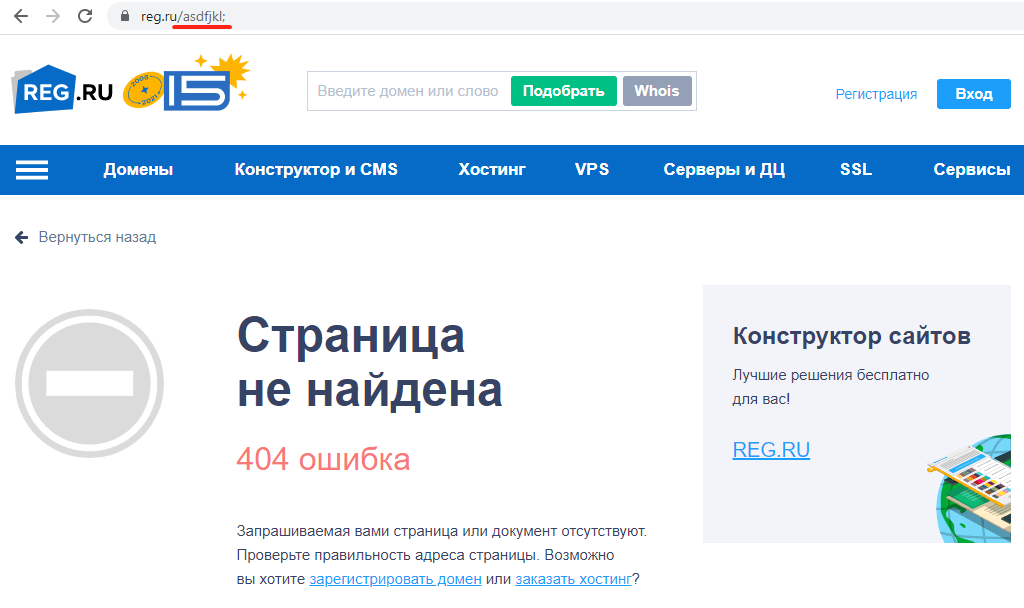
Ошибка 404 на сайте reg.ru
Также с ошибкой 404 можно столкнуться в следующих случаях:
- Администратор сайта удалил или переместил страницу, но не сделал редирект на актуальный материал.
- Изменилась структура сайта, а у страниц остались старые URL.
- Посетитель опечатался в адресе, когда вводил его вручную.
- Посетитель перешел по «битой» ссылке, которая ведет на несуществующую (удаленную или перемещенную) страницу.
Технически ошибка 404 связана с тем, что при открытии страницы браузер пользователя отправляет серверу запрос на контент, а сервер не находит запрашиваемой страницы и возвращает соответствующий ответ: не найдено.
Код 404 не стоит путать с другими похожими ошибками. Например, 403-й, которая означает, что доступ к ресурсу ограничен или запрещен. Подробнее о том, как ее исправить в статье.
Иногда при загрузке несуществующей страницы браузер получает ответ 200 вместо 404. Такой случай называют Ложной ошибкой (Soft 404). Он означает, что со страницей всё в порядке, хотя пользователь видит ошибку. Также проблема заключается в том, что Яндекс и Google показывают эту страницу в результатах поиска. Чтобы проверить код ошибки, воспользуйтесь проверкой URL от Google.
Наличие ложных ошибок негативно сказывается на SEO-продвижении и затрудняет видимость основного контента сайта. Чтобы это исправить, нужно вручную настроить редирект на страницу с ошибкой 404 для всех несуществующих страниц.
Возможные последствия для сайта
В самом наличии ошибок 404 на сайте нет ничего страшного. Как уже говорилось выше, посетитель может просто опечататься в адресе. Однако разработчику сайта стоит уделить внимание созданию и отладке страницы ошибки 404. О том, как это сделать, мы расскажем ниже.
Также важно следить за тем, чтобы на сайте было как можно меньше несуществующих страниц, битых ссылок и т. п. Чтобы отыскать их, можно воспользоваться веб-инструментами Яндекс и Google или другими сервисами. Найдите все, что нужно поправить, настройте 301-й редирект на актуальные материалы и замените некорректные ссылки.
Если на сайте регулярно встречается ошибка 404, это может повлиять на поведение посетителей. Пользователи, которые многократно видят сообщение о том, что страница не существует/не найдена, с большой вероятностью покинут сайт и уйдут к конкурентам.
Рекомендации по созданию страницы 404
Если сайт создавался в CMS WordPress, Joomla, Drupal и т. п., в нем, скорее всего, предусмотрена страница ошибки 404. Но она может быть неинформативной или отличаться от дизайна остальных страниц вашего веб-ресурса.
Лучше всего — создать свою страницу для ошибки 404. Если вы владеете навыками верстки и дизайна, можно сделать эту страницу красивой, шуточной и необычной. Это хорошо воспринимается пользователями и снижает негативный эффект.
Важно, чтобы страница была информативной и полезной:
- Объясните, что случилось и почему пользователю попалась ошибка;
- Посоветуйте, что пользователю стоит сделать, чтобы найти интересующий его контент;
- Оставьте каналы для связи и возможность связаться с поддержкой сайта.
Яндекс рекомендует оформлять страницу ошибки 404 так, чтобы она отличалась от остальных страниц сайта и содержала ссылку на главную страницу, поисковую строку и инструкцию с дальнейшими действиями.
Примеры страниц с ошибкой 404

СберМаркет предлагает познать мудрость котов и цены на сайте
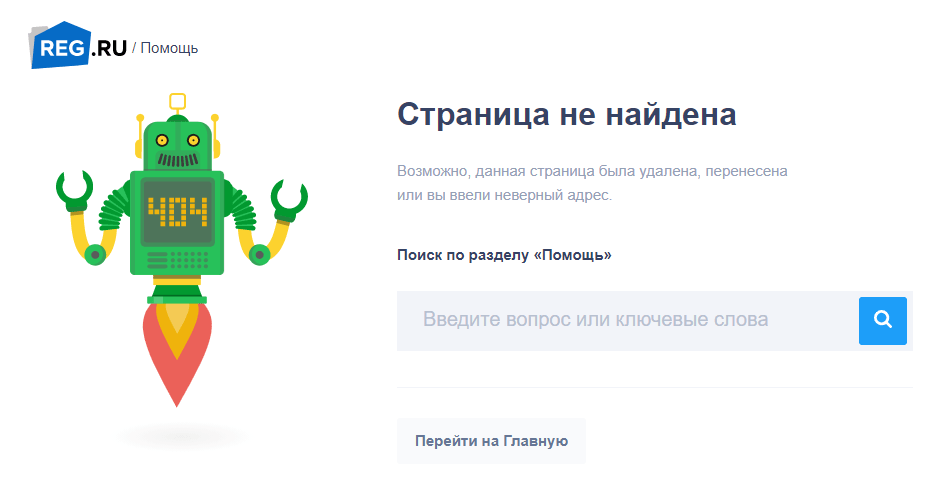
404 ошибка в разделе «Помощь» на сайте REG.RU
Как создать страницу ошибки 404 и настроить редирект на нее в .htaccess
-
1.
Создайте страницу одним из следующих способов:
-
Если вы знаете HTML и CSS, напишите код страницы самостоятельно и загрузите файл с названием 404.html в корневую папку сайта.
-
Если навыков верстки нет, в интернете можно найти бесплатные шаблоны со страницами ошибки. Скачайте файл и добавьте его в корневую папку.
-
Если вы используете WordPress, воспользуйтесь плагином 404page — your smart custom 404 error page по инструкции ниже. Обратите внимание! Если вы воспользовались плагином, вам не нужно прописывать путь к файлу в .htaccess.
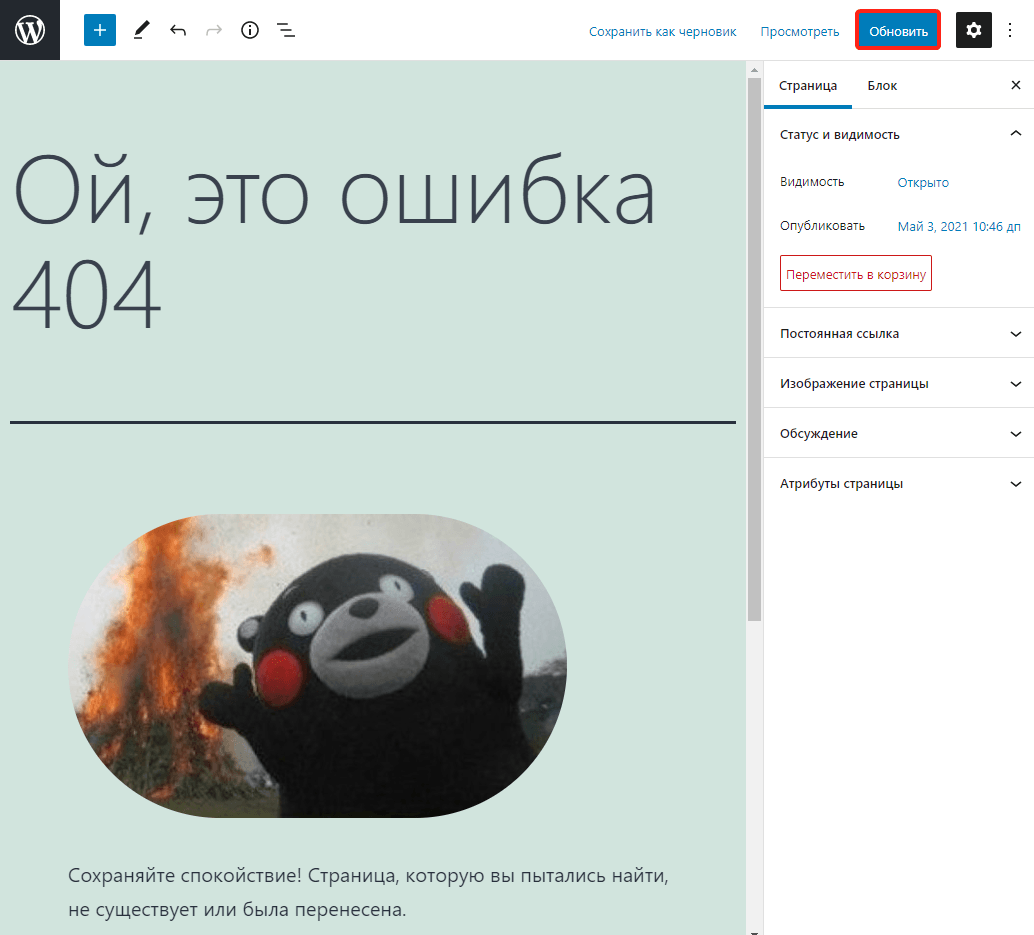
Как настроить страницу в плагине WordPress1) Откройте админку вашего сайта в WordPress.
2) Перейдите в раздел «Плагины» и нажмите Добавить новый.
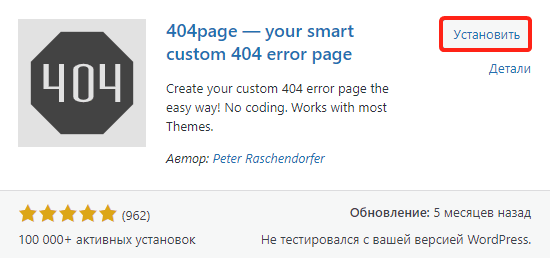
3) В строке поиска введите название 404page — your smart custom 404 error page.
4) Нажмите Установить → Активировать:

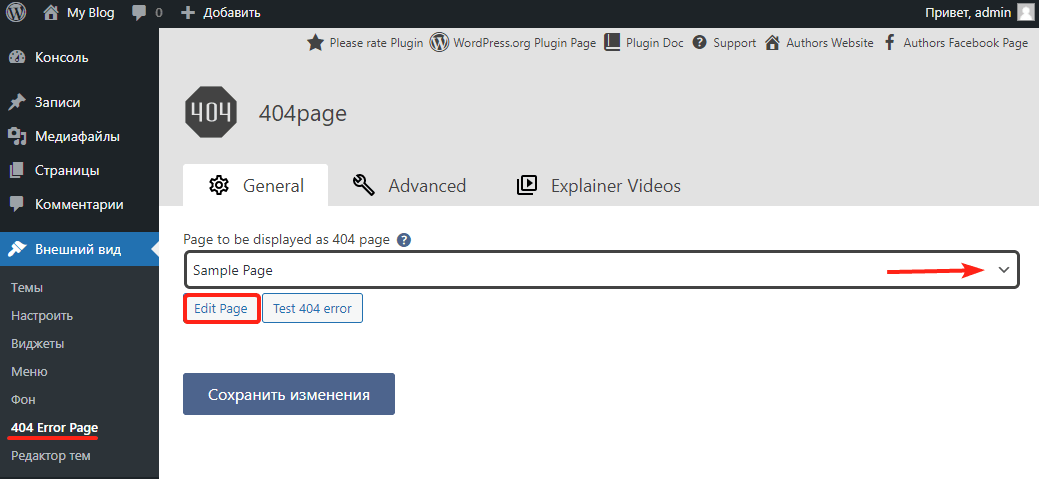
5) Перейдите в раздел Внешний вид → 404 Error Page.
6) Выберите в списке Sample Page, чтобы сменить стандартную страницу ошибки, и нажмите Edit Page:
7) Создайте страницу в открывшемся визуальном редакторе и нажмите Обновить:
Готово! После обновления страница будет использоваться автоматически.
-
-
2.
Откройте конфигурационный файл .htaccess в корневой папке вашего сайта и добавьте в него строку:
ErrorDocument 404 https://site.ru/404.htmlГде вместо site.ru — домен вашего сайта.
-
3.
Сохраните изменения.
Готово! Теперь при возникновении 404 ошибки, в браузере пользователей будет открываться созданная вами кастомная страница.
Также рекомендуется закрыть служебную страницу 404 от индексации, чтобы она не возникала в поисковой выдаче вместе с остальными страницами сайта. Для этого откройте файл robots.txt в корневой папке сайта, добавьте соответствующую команду и сохраните изменения:
Редирект с 404 на главную (не рекомендуется)
Чтобы не создавать отдельную страницу ошибки 404, некоторые веб-разработчики прописывают в .htaccess редирект на главную страницу сайта. Это нежелательно делать с точки зрения SEO-оптимизации.
Также редирект на главную страницу может ввести пользователей в заблуждение. Представьте, что вместо искомой страницы у посетителя открывается главный экран сайта. Будет непонятно, почему это произошло, ведь пользователь искал какой-то конкретный контент и не узнает, что не сможет найти его.
Рекомендуется использовать специальные страницы для ошибки 404.
Проверка редиректа 404
Проверить, корректно ли все настроено можно в Яндекс.Вебмастер и Google Search Console.
Яндекс.Вебмастер
Если вы используете его впервые, укажите домен вашего сайта и пройдите проверку валидации, добавив файл в корневую папку сайта. Это займет несколько минут.
- 1.
-
2.
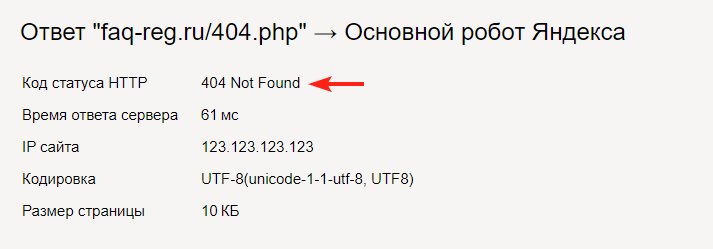
Перейдите в раздел Инструменты → Проверка ответа сервера.
-
3.
Введите название страницы ошибки и нажмите Проверить.
-
4.
В коде статуса HTTP должно отображаться 404 Not Found:
Google Search Console
Если вы используете этот инструмент впервые, укажите свой домен и пройдите валидацию, добавив TXT-запись/загрузив файл в корневую папку сайта или с помощью других способов.
- 1.
-
2.
Перейдите в раздел «Покрытие» в меню справа. Здесь будет отображаться информация о страницах ошибок.
На сайте небольшого объема можно самостоятельно следить за наличием ошибок и постараться не допускать того, чтобы на нём было много страниц, утративших актуальность. Своевременно настраивайте 301 редиректы, когда статья в справке, страница или товар теряют актуальность.
Если сайт многораздельный и многостраничный, вручную мониторить его будет сложно. Рекомендуется использовать для поиска страниц ошибки 404 онлайн-сервисы (Serpstat, BadLincs.ru и другие). Также можно воспользоваться плагинами в CMS. Замените ссылки и настройте редиректы. А также создайте понятную красочную страницу ошибки с объяснением причины, ссылками на основные разделы и строкой поиска.
I’d like to cut off access to a subdirectory on my site but I want any access in the subdirectory to be a 404 error, not a 403 forbidden. How can this be accomplished?
asked Sep 11, 2013 at 0:05
![]()
1
Try:
RewriteRule ^directory/ - [L,R=404]
This redirects all requests for the folder «/directory/«, they get a 404 response.
answered Sep 11, 2013 at 0:10
![]()
Jon LinJon Lin
142k29 gold badges217 silver badges218 bronze badges
6
I think, 410 error better
RewriteRule ^directory/ - [L,R=410]
or my search:
RewriteCond %{HTTP_USER_AGENT} (googlebot|bingbot|Baiduspider) [NC]
RewriteRule .* - [R=410,L]
on russian wiki
404 Not Found [19] — the most common mistake when using the Internet, the main reason — an error in writing the address of a Web page. The server understood the request, but did not find the corresponding resource at the specified URL. If the server knows that there was a document at this address, then it is desirable for it to use code 410. Answer 404 can be used instead of 403 if you need to carefully hide certain resources from prying eyes. Appeared in HTTP/1.0.
answered Apr 16, 2019 at 11:01
![]()
MrSwedMrSwed
5397 silver badges15 bronze badges
Redirect 404
Put this into the .htaccess file in the directory that you want off the record. The Redirect directive is part of mod_alias and can be used to send any status code, not just redirects.
answered Aug 11, 2022 at 17:05
![]()
a cata cat
6341 gold badge9 silver badges17 bronze badges
You could also for the time being change which page a user will see when confronted with a 403 error, but I wouldn’t recommend doing this long-term.
.htaccess:
ErrorDocument 403 /your404pagehere.php
answered Sep 11, 2013 at 0:09
![]()
JasonJason
1851 silver badge9 bronze badges
0
Htaccess переадресация 404 ошибка примеры
ErrorDocument 404 Редирект 404 htaccess или редирект на страницу 404, errordocument в файле htaccess сегодня полностью разберемся во всех возможных ситуациях, которые возникают с с использованием htaccess редирект 404
Всё о htaccess редирект 404 errordocument
- Что такое редирект htaccess 404
- Как настроить 404 ошибку в htaccess
- Как настроить 404 ошибку в htaccess -> единая точка входа
Еще смотри: tema=404
Что такое редирект htaccess 404
Редирект в файле htaccess создается для того, чтобы при возникновении ошибки 404 на вашем сайте происходила переадресация… туда, куда вы захотите!
Обычно делают переадресацию на собственный файл -> 404.html
Зачем нужен редирект на файл 404.html
Нам нужно, чтобы наш посетитель не ушел с нашего сайта! Поэтому после того, как он увидит страницу 404.html, ему можно сделать редирект на главную!
Конечно же… никаких таких правил в web-e не существует, что именно по такому алгоритму должна обрабатываться ошибка 404.
У вас есть выбор… оставить пользователя смотреть на не найденную страницу и предоставить выбор ему…
Либо переадресовать на существующую страницу!
Как настроить 404 ошибку в htaccess
Настраивать ничего не нужно! Просто нужно прописать правило редиректа и всё! Для того, чтобы прописать редирект при появлении ошибки 404Ю в файле htaccess прописываем редирект страницы на 404:
ErrorDocument 404 /404.html
Если вам требуется показывать какую-то другую страницу 404, которая находится в другом месте, то конструкцию нужно изменить таким образом:
ErrorDocument 404 /путь_до_файла/название_файла_.html

Как сделать редирект с 404 на главную htaccess
В файле htaccess, внутри правила ErrorDocument прописываем файл не 404.html? а адрес главной! И когда произойдет 404 ошибка то редирект произойдет на главную, если по домену открывается файл index.html:
ErrorDocument 404 /index.html
Как сделать редирект уже в файле 404.html
После того, как ваш редирект вна 404 сработает, то пользователя переместят на страницу 404.html. далее вы можете сделать простую переадресацию html уже на любую страницу!
Как настроить 404 ошибку в htaccess -> единая точка входа
Когда у вас единая точка входа, то те выше приведенные правила редиректов работать просто не будут, потому, что при любом случае, все запросы будут отправляться на какую-то страницу!
Как настроить 404 ошибку в htaccess если у вас единая точка входа!?
Когда я делал свой редирект на 404 единой точки входа, ничего внятного в интернетах по этому вопросу не было написано! Поэтому, я сам до этого дошел!
Если url из адресной строки пролетел мимо всех проверок, то создается переменная $no_page. В этом подпункте мы как раз касались немного, темы структуры единой точки входа — тема проверок, и в том числе там фигурирует эта переменная:
$no_page = 1;
В самом низу перед html тегами, делаем условие, существует ли переменная $no_page, если да то:
Отправляем заголовок 404 — поскольку поисковая система никак не сможет узнать, что данная страница не существует!
Далее просто инклудим 404.html страницу
Останавливаем скрипт!
if($no_page)
{
header(«HTTP/1.0 404 Not Found»);
include(‘404.html’);
exit;
}

Не благодарите, но ссылкой можете поделиться!
COMMENTS+
BBcode
4,397 просмотров всего, 1 просмотров сегодня
Оглавление
- Как правильно настроить .htaccess и зачем это нужно
- Прописываем htaccess правильно
- Настройка ЧПУ
- Настройка свойств PHP
- Кэширование данных
- Настройка редирект в htaccess
- Как правильно сделать 301 редирект в htaccess
- Настройка 404 ошибки в htaccess
- Настройка редиректа на https в htaccess
- Управление доступом
- Вместо заключения
Файл .htaccess дает пользователю возможность свободно управлять web-сервером Apache и применять настройки по отношению к директориям и папкам, которые расположены на сервере.
Успешность развития и продвижения интернет-проекта во многом зависит от правильной адекватной работы сервера, на котором расположен сайт. Сейчас большинство использует Apache – в основном, из-за простоты настройки и большого количества предоставляемых возможностей. Настраивать его работу можно как в главном конфигурационном файле, так и с помощью .htaccess. Расположенные на сервере в отдельных папках, они указывают ему, как именно действовать в данном подкаталоге.
Правильная настройка htaccess дает возможность отдельно настроить редиректы на сайте, прописать внутренние изменения url, добавить авторизацию по паролю и др. О том, как это можно сделать, поговорим далее.
Владельцы сайтов, которые пользуются услугами виртуального хостинга, доступа к httpd.conf чаще всего не имеют. Поэтому единственным способом управления сервером для них будет настройка файла htaccess.
По сути и по структуре, он напоминает httpd.conf. С одним отличием: прописанные в htaccess директивы будут действовать только на тот каталог, в котором расположен этот файл. А также на подчиненные папки и файлы. Но действовать они будут точно так же, как директивы глобального файла конфигурации. То есть, для каждого каталога можно указать отдельный файл .htaccess с нужными настройками, не меняя при этом глобальных настроек сервера и не обращаясь за помощью к хостеру.
Правило: прежде, чем начинать настройку htaccess, в обязательном порядке сделайте копию рабочего файла. Это поможет восстановить данные, если что-то пойдет не так. Неправильные изменения сделают сайт недоступным для пользователей и поисковых роботов. Поэтому очень важно иметь актуальную резервную копию файла конфигурации.
С помощью директив, прописанных в конфигурационном файле, пользователь или владелец сайта получает возможность настройки:
- ЧПУ.
- Опций PHP.
- Кэширования.
- Редиректов.
- Обработки ошибок 404.
- Перенаправления на https
- Управления доступом и пр.
Правильный файл htaccess значительно упрощает и оптимизирует работу с сайтом, дает возможность влиять на выдачу, сформированную сервером.
Прописываем htaccess правильно
Синтаксис директив файла конфигурации достаточно прост.
При написании пары команд и их опций обязательно разделяются пробелом:
Команда параметр1 параметр2 флаги
Помимо команд можно использовать вложенные структуры, необходимые для активации либо проверки доступности отдельных модулей.
Обратите внимание, что несоблюдение синтаксиса может привести к появлению ошибок сервера. Правильный htaccess должен быть написан с соблюдением следующих требований:
- Путь к файлу или директории указывается от корня сервера:
/home/mdhscyhq/public_html/ - Домен прописывается с указанием протокола:
Redirect / https://yoursupersite.ru - Название файла должно содержать «точку»:
.htaccess - Файл должен записываться в формате UNIX.
Путь от корня можно спросить у администратора сервера или посмотреть самостоятельно. Для этого достаточно запустить на сайте функцию PHP–phpinfo и посмотреть значение doc_root.
1.Настройка ЧПУ
ЧПУ, или человеко-понятный урл, положительно (хоть и незначительно) влияет на релевантность страницы сайта запросу пользователя с точки зрения поискового робота. А значит – повышает позицию выдачи в поиске. А еще более удобен для пользователя при навигации.
Сравните:
http://yoursupersite.ru/index.html?id=4
и
http://yoursupersite.ru/razrabotka-sayta/
В последнем случае сразу становится понятно, на какой странице мы находимся и какую информацию можно на ней получить.
В ЧПУ можно прописать ключевые слова или фразы: кириллицей или транслитом.
Вот так, к примеру, из стандартного url:
tovar.html?id=101
с помощью изменений настроек ЧПУ в htaccess можно сделать вполне понятный url:
tovar-101.html.
RewriteRule ^tovar-([0-9]+).html$ tovar.html?id=$10
Или создать древовидную структуру url: category/tovar-123.html
RewriteRule ^category/([a-zA-Z0-9_-]+)/([0-9]+).html$ tovar.html?id=$20
2.Настройка свойств PHP
Даже если хостер закрыл доступ к php.ini, но вам обязательно необходимо изменить некоторые свойства PHP, это можно сделать с помощью файла htaccess.
Пример:
<ifModule mod_php.c>
php_value post_max_size 10M
php_value upload_max_filesize 32M
php_value max_execution_time 200
php_value default_charset utf-8
</ifModule>
Директивы:
upload_max_filesize позволяет выполнить загрузку файлов размером до 32Мб (по умолчанию – до 16Мб).
post_max_size увеличивает размер постинга до 10Мб (стандарт – 2Мб).
max_execution_time позволяет использовать сложные скрипты, на выполнение которых необходимо более чем 30 стандартных секунд.
3.Кэширование данных
В файле htaccess можно выполнить настройку кэширования, если по каким-либо причинам это невозможно организовать с помощью синтаксиса PHP. В таком случае для ускорения загрузки данных с сервера можно применить следующие модули:
- mod_headers — дает возможность устанавливать в заголовке ответа сервера разные правила кэширования для файлов различных типов.
- mod_expires — отвечает за срок «устаревания» файлов, время, по истечении которого, файл будет помещен в кэш браузера.
При схожем смысле модули имеют разный синтаксис. Допускается использование любого из них (выбор зависит от того, какой установлен на сервере).
4.Настройка редирект в htaccess
Настройка файла htaccess позволяет выполнить простую и сложную переадресацию url. То есть, вы можете перенаправить пользователя на другой адрес глобально:
Redirect / http://www.yoursupersite.ru
или при запросе отдельных страниц на сайте:
Redirect / blog http://yoursupersite.ru/blog
Правильный редирект в htaccess имеет следующий синтаксис:
Redirect [status] url_local url_redirect
Существует несколько несложных правил, которые стоит соблюдать при настройке переадресации через htaccess:
- Редиректы страниц в файле нужно располагать от более частных (вверху страницы) к глобальным. То есть сверху вниз.
- Необходимо избегать двух и более последовательных редиректов, т.к. это увеличивает время ответа и негативно оценивается поисковыми роботами.
Как правильно сделать 301 редирект в htaccess
В случае переноса сайта на новый домен или смены CMS возникает необходимость перенаправления пользователя со старых url на новые адреса. Редирект с номером ошибки 301 (Permament Redirect) сообщает роботу о том, что документы и страницы были перемещены на постоянной основе. Это позволяет сохранить позиции сайта в поисковых системах, сохранить ссылочную массу и PageRank.
Настройка 301 редиректа в htaccess может быть выполнена различными способами, в зависимости от предустановленного ПО и поставленных целей.
Самый простой вариант:
Redirect 301 /new-1/ http://yoursupersite.ru/new-2/
Недостаток этого метода состоит в том, что необходимо по отдельности перечислить все адреса, с которых и на которые будет осуществляться перенаправление. Поэтому для более сложных редиректов лучше использовать модуль mod_rewrite, который позволяет выполнить любой тип преобразования url и при этом настроить зависимость преобразования от ряда условий и факторов.
Вот так, к примеру, можно выполнить перенаправление со страниц, url которых заканчивается слешем, на страницы без слеша:
RewriteCond %{REQUEST_URI} !?
RewriteCond %{REQUEST_URI} !&
RewriteCond %{REQUEST_URI} !=
RewriteCond %{REQUEST_URI} !.
RewriteCond %{REQUEST_URI} ![^/]$
RewriteRule ^(.*)/$ /$1 [R=301,L]
А так каждая страница старого домена перенаправляется на страницу с аналогичным url на новом домене:
RewriteCond %{REQUEST_URI} (.*)
RewriteRule ^(.*)$ http://site.ru/$1 [L,R=301]
5.Настройка 404 ошибки в htaccess
Удалили или перенесли страницу с сайта? Пользователь, перейдя по ссылке в поисковой системе или вводя неправильный url, увидит сообщение об ошибке 404. И, скорее всего, закроет вкладку.
Чтобы этого не произошло, более правильным будет отдельно настроить редирект 404 в htaccess и перенаправить посетителя на главную страницу сайта:
ErrorDocument 404 http://www.yoursupersite.ru/
Однако это не всегда такое решение оправдано. Маркетологи рекомендуют создавать отдельную страницу «Not Found», которая будет работать на увеличение конверсии. Подробнее о дизайне страницы «Ошибка 404» можно почитать здесь. А перенаправить пользователя на нее можно с помощью следующих настроек в htaccess:
ErrorDocument 404http://www.yoursupersite.ru/404.html
Аналогичным образом можно настроить вывод сообщений об ошибках:
ErrorDocument 401 http://www.yoursupersite.ru/401.html
ErrorDocument 403 http://www.yoursupersite.ru/403.html
ErrorDocument 500 http://www.yoursupersite.ru/500.html
6. Настройка редиректа на https в htaccess
Использование сертификата безопасности SSL и протокола https обеспечивает более безопасное соединение и достаточно высоко ценится поисковыми системами при ранжировании. Чтобы перенаправить всех пользователей сайта на этот протокол и тем самым обеспечить надежность передачи данных, достаточно внести в файл htaccess следующие настройки:
RewriteEngine On
RewriteCond %{HTTPS} !on
RewriteRule (.*) https://%{HTTP_HOST}%{REQUEST_URI}
7.Управление доступом
В файле htaccess с помощью специальных директив можно ограничить доступ расположенным в текущей директории файлам и папкам:
deny from all
Владелец или администратор сайта может разрешить доступ пользователям с конкретного IP-адреса. Это выполняется следующим образом
order deny,allow
deny from all
allow from 192.168.ХХ.Х
При необходимости, можно ограничить или даже запретить доступ к файлам и папкам каталога по IP. Выполняется это с помощью следующей директивы:
deny from 192.168.ХХ.Х
Вместо заключения
Правильная настройка htaccess обеспечит правильную работу сайта. Однако не стоит забывать о том, что он является только дополнительным конфигурационным файлом, поэтому по возможностям значительно уступает httpd.conf. Но позволяет применять более тонкие настройки к отдельным папкам, расположенным на сервере.
In this article we’ll show you how to set a custom 404 page via a .htaccess file. This will allow you to set the error message that visitors to your site receive when they request a page that doesn’t exist on the server.
If you read our previous article about 404 error not found pages it was discussed that handling 404 errors dynamically can be problematic if done very frequently. If you’re running WordPress on your website, you might want to think about installing the W3 Total Cache plugin which has the ability to serve static 404 errors for WordPress.
It’s typically recommended to handle 404 errors with a custom static HTML 404 error page instead of handling them dynamically. If you don’t already have one you can learn about creating a custom 404 error page, and if you’re looking to add advanced functionality to your 404 error page you can even learn about using Google’s custom 404 page widget.
The easiest way to modify your .htaccess file would be using cPanel’s file manager with the instructions below, although you can also upload a .htaccess file via FTP as well.
Create or Modify a Custom 404 Page via .htaccess
- Login to your cPanel.
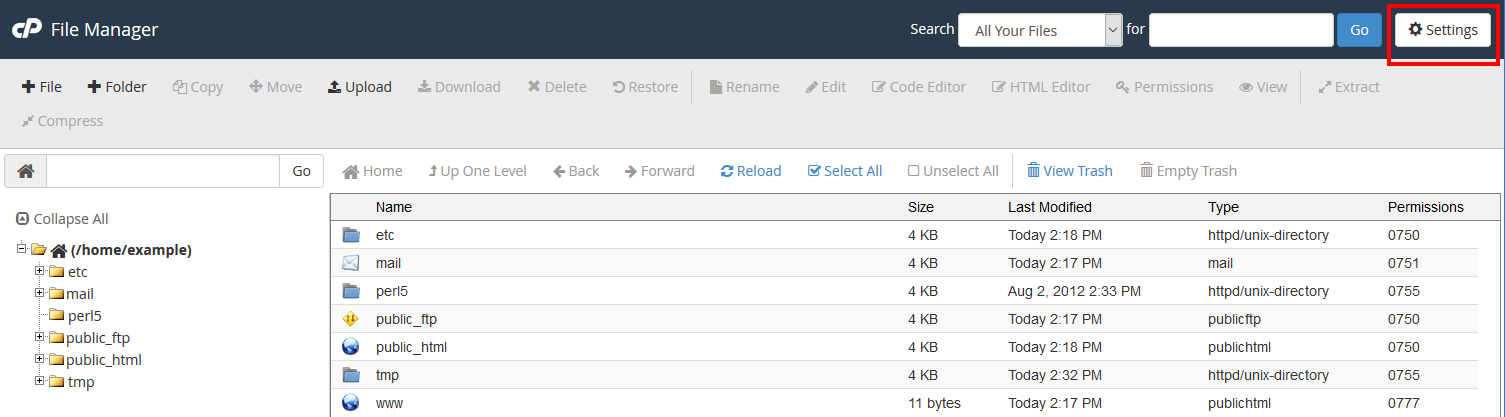
- Under the Files section click on File Manager.

- Navigate to the document root folder for the site.
- Click on Settings.

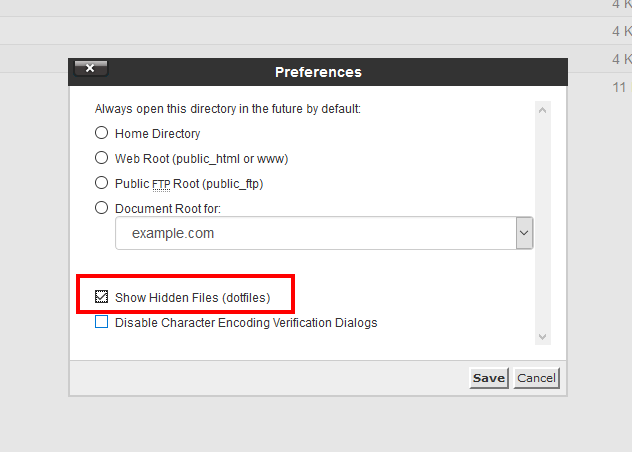
- Ensure Show Hidden Files is selected.

- Then click Save.
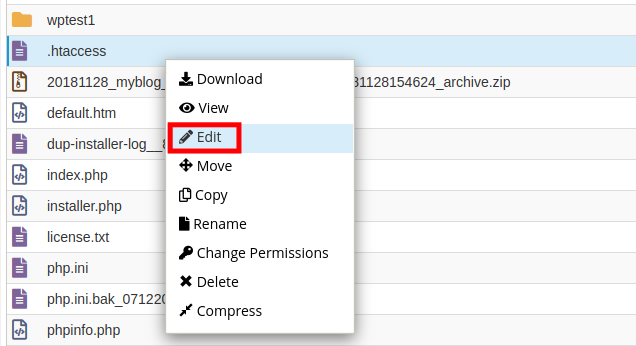
- Right-click on the .htaccess file and select Edit.

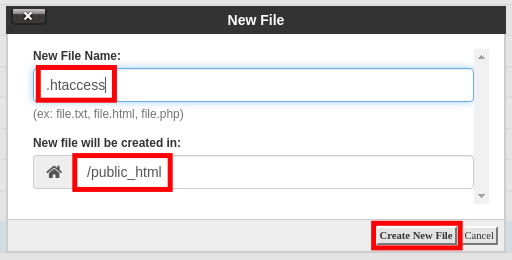
- If the .htaccess file didn’t exist in the previous step, click on the +File link on the top left, name the file .htaccess, and set the directory for creation to /public_html/ or the document root of your site.

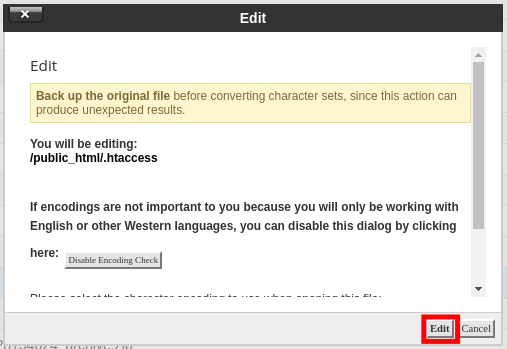
- You might have a text editor encoding dialog box pop-up, go ahead and just click Edit.

- Now that you are ready to edit the .htaccess file, the simplest way to set a 404 error page is by directly setting a 404 error message in the .htaccess file itself:
ErrorDocument 404 "<H1>Page not found</H1>"
If you already have a static HTML page that you’d like to use for 404 errors you can also directly point to that file with the .htaccess file as well. In this example, we have a 404.html page we want to serve up. Be sure to replace “404.html” with your actual page name:
ErrorDocument 404 /404.html
- After you’ve made your edits to the .htaccess file, click on Save Changes.

You should see a green Success pop-up
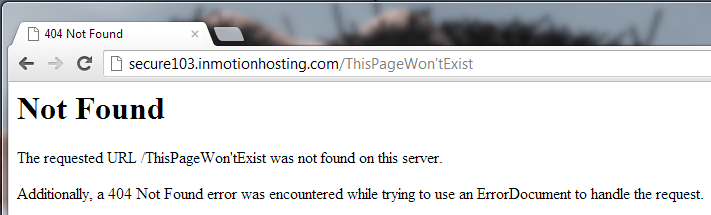
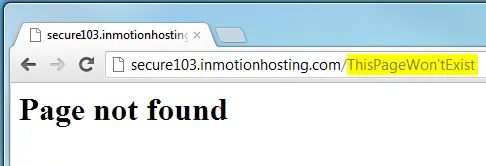
- Now if you try to pull up a page that won’t exist on the server such as /ThisPageWon’tExist you should see the custom 404 error message that we’ve configured. This first image below is the default 404 error page when a custom one is not set:

The second one is the custom 404 page that we just created:


You should now understand how to control how 404 errors are handled for your website, by either setting the error directly or pointing to a custom 404 error page. If you need help on actually creating your custom 404 error page you would want to review our article on creating a custom 404 error page. Check out our Website section for more helpful tutorials to lead you toward success.
Want more performance and power from your website? InMotion Hosting’s VPS Hosting plans provide hyperfast site speeds on high-performance NVMe servers.
![]() Dedicated Resources
Dedicated Resources ![]() NVMe SSD Storage
NVMe SSD Storage ![]() High-Availability
High-Availability ![]() Ironclad Security
Ironclad Security ![]() Premium Support
Premium Support
View VPS Hosting Plans
John-Paul Briones Content Writer II
John-Paul is an Electronics Engineer that spent most of his career in IT. He has been a Technical Writer for InMotion since 2013.
More Articles by John-Paul
What is 404?
So, how would you define a 404?
Why 404 errors should get you concerned
The impact of 404s on SEO
- Loss in PageRank
- Bad user experience
What should you do about 404s?
- Redirects
- HTML redirects
- 301 redirects
- 302 redirects
- Caveat
How to fix 404 on WordPress
- How to use the Redirection plugin
Using .htaccess for 404 redirect
404 redirect using PHP
Redirecting your 404s in Shopify
- Side Note
Create great 404 pages, for the necessary situations
- Creating 404 page on WordPress
- Setting up a 404 page using htaccess
- Setting up 404 page using PHP
- Creating a 404 page with Shopify
In conclusion
Should 404 errors be every webmaster’s nightmare? Is this a truth or a myth that needs to be debunked? What are 404 errors? What impact do they have on SEO? Is there a correct way to implement 404 errors? These are the issues that we explore in this article.


What is 404?
Before we look at 404 errors, it is good to have a general understanding of the basics of web HTTP protocols. Basically, the internet is made up of clients and servers. Clients, in this case, refer to the browsers that you use to access the Internet – Google Chrome, Safari, Opera, Firefox, and Internet Explorer. When a user requests a website, the request is actually sent to web servers, which then responds. The user makes their request using the HTTP protocol.
What is an HTTP? These are standards that all internet users have agreed to. When users make requests, it is status codes that will reveal whether the request was successful or not. These status codes are what is referred to as HTTP status codes.
There are different HTTP status code blocks:
- 100 – generally made of informational requests
- 200 – successful requests
- 300 – used for redirects
- 400 – block shows client errors
- and 500 – shows server errors
Let’s further look at the 400 block since it is where the focus of this article – 404 errors are categorized. The 400 block means that a page was not found or the client sent a request with a certain problem. The issue is coming from the client’s side. The 404 error is as a result of the requested page not being found.
So, how would you define a 404?
Now that you understand what HTTP status codes are and their source, how would we define a 404 error?
It is an HTTP response code that shows that the page that a user has requested has not been found. It is usually accompanied by a message like “page not found” or “The page you are trying to access does not exist”.
Why 404 errors should get you concerned
404s are extremely common. But, should you be concerned if you have them on your site as a webmaster?
Well, not all 404s are bad. Remember, they are a result of errors on the client’s side. Sometimes, if a user mistypes your URL, it means that they are in essence requesting for a webpage that does not exist. In this case, serving 404 is actually a good idea. Note that Google will not penalize you if you served a 404 as a result of a ‘bad URL’.


John Mueller, from Google said in his 404 error video:
“In your server logs, or analytics, check for traffic to those URLs. If there’s no traffic, that’s great. In Search Console check for links to those URLs. Are there no relevant links? That’s great too. If you see nothing special in either the links, or the traffic, having those pages return 404 is perfectly fine.”
If however, you have an authoritative web page with awesome ‘link juice’ (lots of backlinks) and when the users make requests they are seeing 404s, you need to be quite concerned. Sometimes this may result when a page is deleted from your site and even the server, but there are still links to that deleted page and bookmarks that still exist or from URL restructures (for instance, after renaming directories).
Other issues that may result in 404 include outdated references or link mentions with typos.
The impact of 404s on SEO
As we have seen, 404 errors need to be a source of concern, depending on their cause and the resource that they affect. Let’s look at its effect on SEO.
Loss in PageRank
When you have 404s, search engine bots are trying to access a resource which does not exist. Every time, the bots send negative signals about that particular resource. If this happens several times, the resource will be removed from the index. If this was your page’s homepage or a landing page with important link juice or information, then this means that that page will not rank at all. What happens to your users? If this was the product page on an e-commerce site, it means that your sales will be affected too.
Bad user experience
The whole point of having a site in the first place is to create a point of contact between users and your brand. If the point of contact results in a bad experience, then there is no point of having it. If the users keep trying to access a resource and all they get is 404s, then they will stop trying. Guess where they are headed? To your competitor’s site, store or business. Sooner or later, search engine bots will begin to note the high bounce rates, and this will see them rank your site or webpage lower and lower.


What should you do about 404s?
What do we do about 404s? A great way to deal with the 404 is to learn how to do redirects. Redirects come in handy if there us an URL change for example when you have an old URL with evergreen content that brings significant traffic to your site and you decide to change the URL to a new one. You can also create awesome 404 pages where it is necessary to serve them. Let’s explore these options next:
Redirects
There are several redirect types, for instance, 301 redirects, HTTP redirects, 302 redirects, and HTML redirects. Which one should you use when? Let’s explore further:
HTML redirects
This type automatically sends users to a new site after a specific period of time. It is accompanied by a message to show that the site has moved and that they are being redirected shortly.
While this may be a seemingly good idea, HTML redirects can be bad when it comes to user experience. This is because the user might not be prepared for the big change from the resource that cannot be found to an entirely new site. Worse still, it could affect navigation when the user wants to go back to a previous page. They might end up going back to the 404 error, and then get confused trying to look for a specific resource.
301 redirects
What are the situations that may require the use of this redirect?
- If you move your site entirely to a new domain
- If you tend to have frequent misspellings of your URL
- If you want to make a clear distinction between www and non-www versions of your site as in www.abc.com and abc.com. In this case, you need to determine what the default version will be and then redirect the non-default version to the default one.
301s are a great option for old pages with impressive link juice. These can be redirected to newer versions that are quite similar to the old pages. Better still, you can create a new URL to host the old page that had started to show 404 errors.
302 redirects
This redirect is ideal if you are dealing with a temporary situation. For instance, let’s say that you are rebuilding the main sections on your website. You can use a 302 to inform your users that the page is temporarily unavailable due to the ongoing edits or upgrades.
Caveat
At this point, what happens when you had used a 302 redirect but you have actually decided to not remove it, for example, so that once you are done building the main section of your site you can keep both the new and old versions? In this case, search engines may overlook the new site and keep indexing the old one, with the older content. It is only safer to ensure that you use the correct redirect types.

How to fix 404 on WordPress
Are there ways to manage 404s if you are using a CMS like WordPress? There are plugins like the Redirection.me plugin that can do a clean job.
How to use the Redirection plugin
- You need to download, install and activate the plugin.
- Then go to ‘settings’
- Go to the 404 tab and click it to review any issues detected


- You then need to fill the Redirect section with the URLs from which you want to redirect
- Fill the new URLs, the ones that you want to redirect to in the destination tab


- Save changes
Other plugins that you can use include:
- Simple 301 Redirects
- WP 404 Auto Redirect to Similar Post
- Yoast SEO Premium
- Safe Redirect Manager
Using .htaccess for 404 redirect
You need a server powered by Apache and the mod_rewrite needs to be installed too. You need to access your .htaccess file.
Here is how to go about it:
- Access your cPanel and login
- Go to ‘Files’ then ‘File Manager’


- Access your site’s document root folder
- Click ‘settings’
- Select ‘show hidden files’
- Save

- Right click on your .htaccess file
- Choose ‘edit’

- If you do not have a .htaccess file, you need to create one. To do this, click ‘new file’ on the top left
- Ensure that you name this new file ‘.htaccess’
- Ensure that the directory in which the .htaccess file is created to /public_html/
- If a dialog box pops up, click ‘edit’


.htaccess using FTP (FileZilla)
If you do not have access to cPanel, you can access your .htaccess using FTP.
- Open FileZilla and log in to your web space using FTP
- Double-click public_html to list your website files
- Select .htaccess, right-click and select View/Edit
- Enter your new code. Save the file once you have finished editing
- Click Yes in FileZilla to upload your new .htaccess file
Here is the code to use in your .htaccess file. The ‘problem-domain’ here refers to the domain that is serving 404s. ‘redirected- domain’ is the source to which you are redirecting the URL that has been serving 404s. You need to comment out the second last line and uncomment the last line to avoid creating more errors – this time, a 403.
# REDIRECT BROKEN LINKS FROM SPECIFIC DOMAIN
<IfModule mod_rewrite.c>
RewriteCond %{REQUEST_FILENAME} .*
RewriteCond %{HTTP_REFERER} ^https?://([^.]+.)?problem-domain. [NC]
RewriteRule (.*) http://redirected-domain.tld/target.html [R=301,L]
# RewriteRule (.*) - [F,L]
</IfModule>
You then need to upload the updated code to your server. You can then check whether the problematic domains are still serving 404s.
404 redirect using PHP
You need to place the redirection code in the redirect.php file. This keeps the code functionality separate from the 404 error message which should show on the site (look out for it in the next section).
This is the code you need to add to your 404.php file after <?php declaration:
include(‘redirect.php’);
Create a file named redirect.php in your site’s root directory.
You then need to add the following code to it:
<?php// current address$oldurl = strtolower($_SERVER[‘REQUEST_URI’]);// new
Redirect address$newurl=’ ‘;
‘oldurl’ here is the URL from which you are redirected and ‘newurl’ is the URL to which you are redirecting.
The code that you add here depends on the extent of the need for redirection. If the reason for the 404 was a simple change in the name of the URL, for instance, singular and plural versions, you may want to use this simple code:
$newurl = str_replace(‘book’, ‘books’, $oldurl);
This is the code that you can use for simple redirects:
$redir = array(‘book’ => ‘/books/’, ‘video’ => ‘/videos/’, ‘demo’ =>
‘/demonstrations/main/’);while ((list($old, $new) = each($redir)) && !$newurl({
If (strpos($oldurl, $old) !==false) $newurl = $new;}
The array above ($redir) defines value pairs that can be configured. If the first string is found in the URL that you are redirecting from, and the address to which you are redirecting is set to the second string.
If the word ‘book’ in the above code is found in the URL that you are redirecting from, the user will be redirected to the URL with ‘books’.
If the URL that you are redirecting from contains at least two of the words defined in the code, the first word will take precedence. If the first word is ‘book’, this is what will be redirected to ‘books’.
Redirecting your 404s in Shopify
To redirect your 404s in Shopify, you need to access the Google Search Console, so you can review your 404 errors.
- Once you are done, login and go navigate to the dashboard.
- Click ‘Coverage’ on the left hand sidebar
- Click ‘error Submitted URLs not found (404)’


- Under each device type, you will also see two types of 404 errors – soft 404 and not found
- You need not to worry about the former. Let’s deal with the latter.
- You need to click the ‘not found’ tab in order to see the list of URLs.


- You then begin your analysis by filtering the URLs with 404s
- Next step? Redirecting
- You need to access your Shopify dashboard to do redirects (Here’s our guide on how to redirect URLs with Shopify)
- On your dashboard, click ‘navigation’ on the left
- You will see a link called ‘URL redirects’ at the top center part of the dashboard
- Click on it
- It opens a page that allows you to see a button called ‘URL redirect’
- Click on it
- A pop up opens
- On the Old URL field, paste the link from which you want to redirect. Don’t include your domain’s URL
- Paste the link to which you want to redirect in the Redirect in the new page field. This time, include your domain name in the link
- If you have a number of links, the Shopify SEO app will come in handy.
Side Note
Not all 404s need to be redirected. Remember the URLs that are non-existent? Those do need 404s. Something else to note here is that redirecting 404s to the homepage is not a good idea in terms of user experience. The user is trying to access specific information, and redirecting them to the homepage may not be the best way to go about this. It may be confusing and annoying, increasing your bounce rates. You do not want search engine bots to catch you on this one.


Create great 404 pages, for the necessary situations
Since not all 404s need redirection, there is a need to ensure that the pages that serve the necessary 404 messages are presentable. For example, it is good to give the user options. You can let them know that there are similar pages on your site that have the same content that they are looking for, and provide the links.
The 404 page also needs to have an appealing design to hold the client’s attention longer as they decide whether to take your options and navigate where you are requesting them to. This way, it’s a win-win. Your SEO does not get hurt, and the user has a better experience when using your site. One of my all-time favorite is Steve Lambert’s 404 page.


Most importantly, the 404 page design needs to be consistent with the design of the rest of the website and webpages in terms of font size and style, color and themes.
You can also include a search tab, to encourage the user to specifically search for what they want for.
Creating 404 page on WordPress
If you use WordPress, you can use the w3 Total Cache plugin to serve 404 pages and messages. Other plugins include:
- WordPress Ultimate 404 Plugin
- Redirection
- 404 page
- and 5sec Proper 404
Setting up a 404 page using .htaccess
You can set up a 404 error page using .htaccess. You can look at how to access your .htaccess file in the previous .htaccess section. After you have accessed or created it, let’s go ahead and create our 404 error message.
- We need to add the error message to the .htaccess file.
- Here is a message you can use:
ErrorDocument 404 "<H1>Page not found</H1>"
- You can also point to a static HTML page that you have set aside to use with 404s. Here is how to do this:
ErrorDocument 404 /404.html
- Replace ‘404.html’ with your URL.
- Click save changes
- A success message should show
Setting up 404 page using PHP
Here is the code you need to add to your site’s root file:
<?php// basic 404 error pageheader(‘HTTP/1/1 404 Not
Found’); header(‘Status: 404 Not Found’);?><!DOCTYPE html><html
lang=”en”><head><meta charset=”UTF-8”><title>Page not
found</title>< /head><body><h1>Page not found</h1><p>Sorry,we cannot
find that page.</p><p><a href=”/”>Please return to the home
page…</a></p></body></html>
Creating a 404 page with Shopify
With Shopify, any URL that you does not exist will be redirected to a 404 page. You can create a custom 404 page to help the visitors navigate to the desired locations on your site.
You can make changes by going to Themes>>Customize and select 404 page:


Or customize by going to the actual code and select 404.liquid to make any changes there:


Remember, you need to make this page appealing!
In conclusion
We have looked at 404 errors in-depth, defined them, and looked at their impact on SEO. We have also looked at how to deal with 404s via redirects and creating appealing 404 pages using .htaccess, and PHP, as well as how to handle redirects in WordPress and Shopify. It is important to know which method suits your site. Remember, not all 404s are bad, you need to know when to use them.
Everything I find seems to be about created a custom 404 page.
That is not what I am trying to do.
If I want to block access to a page I can do this in htaccess:
RewriteRule pattern — [F]
However, «Forbidden» hints that the page does exists. I want the page to appear to not even exist. So I would like to give a 404 error instead of a 403. Then have it render whatever 404 page would render if the resource really wasn’t there.
How can I do that?
asked May 19, 2011 at 20:02
![]()
1
The documentation and AskApache suggest that you can simply use Redirect 404.
![]()
a cat
1031 silver badge6 bronze badges
answered May 19, 2011 at 20:28
![]()
Gerald CombsGerald Combs
6,41123 silver badges35 bronze badges
1
Redirect 404 will work but will execute across all domains pointing to your vhost. Since you’re using multiple domains, you’ll want to use RewriteRule:
RewriteEngine On
RewriteCond %{HTTP_HOST} ^(www.)?example.com$ [OR]
RewriteCond %{HTTP_HOST} ^microsite.someotherexample.net$
RewriteRule ^path/to/page/?$ - [R=404,NC,L]
answered Sep 19, 2012 at 21:20
![]()
Simple:
RewriteEngine On
Redirect 404
And check you have on the Apache configuration the AllowOverride sentence with FileInfo or All to allow this type of .htaccess.
answered Mar 12, 2021 at 8:18
![]()
NetViciousNetVicious
4625 silver badges17 bronze badges
1
…what about actually removing it (or renaming it, or moving it away…)?
What’s the point anyway of having it there if you want to make it not accessible at all?
answered May 19, 2011 at 20:08
![]()
MassimoMassimo
69.8k57 gold badges199 silver badges321 bronze badges
1
Have you ever felt a need to change the configuration of your website running on an Apache webserver without having root access to server configuration files (httpd.conf)? This is what the .htaccess file is for.
The .htaccess file provides a way to make configuration changes to your website on a per-directory basis. The file is created in a specific directory that contains one or more configuration directives that are applied to that directory and its subdirectories. In shared hosting, you will need to use a .htaccess file to make configuration changes to your server.
[ You might also enjoy: 6 sysadmin skills web developers need ]
Common uses of .htaccess file
The .htaccess file has several use cases. The most common examples include:
- Redirections for certain URLs
- Load custom error pages, like 404 pages
- Force your website to HTTPS instead of HTTP
- Allow or deny specific IP addresses access to your website
- Password-protect certain directories on your server
When not to use .htaccess?
The .htaccess file is commonly used when you don’t have access to the main server configuration file httpd.conf or virtual host configuration, which only happens if you have purchased shared hosting. You can achieve all of the above-mentioned use cases by editing the main server configuration file(s) (e.g., httpd.conf) or virtual host configuration files, so you should not use .htaccess when you have access to those files. Any configuration that you need to put in a .htaccess file can just as effectively be added in a <Directory> section in your main server or virtual host configuration files.
Reasons to avoid using .htaccess
There are two reasons to avoid the use of .htaccess files. Let’s take a closer look at them.
First: Performance — When AllowOverride is set to allow the use of .htaccess files, httpd will look for .htaccess files in every directory starting from the parent directory. This will cause a performance impact, whether you’re using it or not. The .htaccess file is loaded every time a document is requested from a directory.
To have a full view of the directives that it must apply, httpd will always look for .htaccess files starting with the parent directory until it reaches the target sub-directory. If a file is requested from directory /public_html/test_web/content, httpd must look for the following files:
/.htaccess/public_html/.htaccess/public_html/test_web/.htaccess/public_html/test_web/content/.htaccess
So, four file-system accesses were performed for each file access from a sub-directory content even if the file is not present.
Second: Security — granting users permission to make changes in .htaccess files gives them full control over the server configuration of that particular website or virtual host. Any directive in the .htaccess file has the same effect as any placed in the httpd configuration file itself, and changes made to this file are live instantly without a need to restart the server. This can become risky in terms of the security of a webserver and a website.
Enable the .htaccess file
To enable the .htaccess file, you need to have sudo/root privileges on the server.
Open the httpd configuration file of your website:
/etc/httpd/conf/test.conf
You should add the following configuration directive in the server’s virtual host file to allow the .htaccess file in the DocumentRoot directory. If the following lines are not added, the .htaccess file will not work:
</VirtualHost>
<Directory /var/www/test.com/public_html>
    Options Indexes FollowSymLinks
    AllowOverride All
    Require all granted
</Directory>
In the case of shared hosting, this is already allowed by the hosting service providers. All you need to do is to create a .htaccess file in the public_html directory to which the service provider has given you access and to which you will upload your website files.
Redirect URLs
If your goal is to simply redirect one URL to another, the Redirect directive is the best option you can use. Whenever a request comes from a client on an old URL, it forwards it to a new URL at a new location.
If you want to do a complete redirect to a different domain, you can set the following:
# Redirect to a different domain
Redirect 301 "/service" "https://newdomain.com/service"
If you just want to redirect an old URL to a new URL on the same host:
# Redirect to a URL on the same domain or host
Redirect 301 "/old_url.html" "/new_url.html"
Load a custom 404 Error page
For a better user experience, load a custom error page when any of the links on your website point to the wrong location or the document has been deleted.
To create a custom 404 page, simply create a web page that will work as a 404 page and then add the following code to your .htaccess file:
ErrorDocument 404 /error/pagenotfound.htmlYou should change /error/pagenotfound.html to the location of your 404 page.
Force the use of HTTPS instead of HTTP for your website
If you want to force your website to use HTTPS, you need to use the RewriteEngine module in the .htaccess file. First of all, you need to turn on the RewriteEngine module in the .htaccess file and then specify the conditions you want to check. If those conditions are satisfied, then you apply rules to those conditions.
The following code snippet rewrites all the requests to HTTPS:
# Turn on the rewrite engine
RewriteEngine On

# Force HTTPS and WWW
RewriteCond %{HTTP_HOST} !^www.(.*)$ [OR,NC]
RewriteCond %{https} off
RewriteRule ^(.*)$ https://www.test-website.com/$1 [R=301,L]
Let’s go through each line.
RewriteEngine on turns on the RewriteEngine module. This is required; otherwise, conditions and rules won’t work.
The first condition checks if www is entered. [OR, NC] stands for no case, which means even if the entered URL has a mix of upper or lowercase case letters.
Next, it checks if the HTTPS protocol was already entered by the user. %{https} off means that HTTPS protocol was not used.
When the RewriteCond is satisfied, we use RewriteRule to redirect the URL to HTTPS. Note that in this case, all URLs will be redirected to HTTPS whenever any request is made.
[ A free guide from Red Hat: 5 steps to automate your business. ]
Wrap up
Website owners often use the .htaccess file to control the behavior of their website. In this article, we have covered the basics of the .htaccess file and some common use cases in place on most of the websites.
Страница 404 призвана сообщать пользователю, что заданный им url (адрес страницы) не существует.
Такие неправильные урлы еще можно назвать «битыми ссылками».
Многие сайты делают свои страницы 404 для удобства своих пользователей. Часто это красивые и интересные страницы, которые вызывают у пользователя улыбку вместо разочарования от того, что адрес страницы неправильный.
При создании страницы 404 есть важная техническая составляющая, которая сильно влияет на ранжирование сайтов в поисковых системах, если все не настроено правильно.
Если вы озадачились созданием страницы 404, то вам нужно учитывать три момента:
1) Переадресация со всех неправильно введенных url на страницу 404 в .htaccess.
2) Правильный ответ сервера после переадресации (http-код страницы должен быть 404, а не 200).
3) Закрытие страницы 404 от индексации в robots.txt
Сразу отмечу, что все вышеизложенное написано для самописных сайтов, преимущественно на php. Для wordpress существуют плагины по настройке того же самого. Но в этой статье мы рассмотрим, как все выглядит в реальности. %)
ЕСЛИ КРАТКО, то нужно сделать следующее:
I. В файле .htaccess добавить строку:
—————
ErrorDocument 404 http://mysite.com/404.php
—————
Это перенаправит все неправильные (битые) ссылки на страницу — 404.php. Детали ниже в статье.
II. В файле 404.php в самом начале php-кода пишите:
—————
—————
Это даст правильный ответ о статусе страницы. Не 200, не 302, а 404 — потому что страницы, на которую якобы хотел перейти пользователь — не существует. Как это проверить — читайте ниже.
III. В файле rodots.txt делаете следующую запись:
—————
User-agent: *
Disallow:
Disallow: /404.php
—————-
Это закрывает страницу 404.php от индексации поисковыми системами. В этом пункте будьте аккуратны. Детали читайте ниже.
Дальше каждый пункт расписан в деталях! Если вам достаточно короткого описания… то благодарности принимаются в виде комментариев и лайков.

Переадресация (редирект) неправильных url на страницу 404
Первое, что вы делаете – создаете саму страницу 404, чтобы было куда людей посылать %).
Перенаправление url настраивается в файле .htaccess
Просто вписываете строчку:
ErrorDocument 404 http://mysite.com/404.php
Где «mysite.com» – ваш домен, а http://mysite.com/404.php — путь к реальной странице. Если ваш сайт на html, то строка будет выглядеть как:
ErrorDocument 404 http://mysite.com/404.html
Проверка очень проста. После заливки на хостинг файла .htaccess с вышеуказанной строкой, делаете проверку, вводя заведомо не существующий урл (битая ссылка), например: http://mysite.com/$%$%
Если переадресация на созданную вами страницу произошла, значит все работает.
Итак, полностью файл .htaccess, где настроена ТОЛЬКО переадресация на 404 будет выглядеть так:
____________________________
RewriteEngine on
ErrorDocument 404 http://mysite.com/404.html
____________________________
Правильный ответ сервера (http-код страницы)
Очень важно, чтобы при перенаправлении был правильный ответ сервера, а именно – 404 Not Found.
Тут следует объяснить отдельно.
Любому url при запросе назначается статус (http-код страницы).
• Для всех существующих страниц, это: HTTP/1.1 200 OK
• Для страниц перенаправленных: HTTP/1.1 302 Found
• Если страницы не существует, это должен быть HTTP/1.1 404 Not Found
То есть, какой бы урл не был введен, ему присваивается статус, определенный код ответа сервера.
Проверить ответ сервера можно:
1. Консоль браузера, закладка Network. Нажмите F12 для Chrome. Или Ctrl + Shift + I — подходит и для Chrome и для Opera.
2. На такой ресурсе как bertal.ru
3. SEARCH CONCOLE GOOGLE – Сканирование/Посмотреть как GOOGLE бот.
Когда у вас не было перенаправления через .htaccess на страницу 404, то на любой несуществующий url, введенный пользователем, а также на битые ссылки был ответ «HTTP/1.1 404 Not Found»
Итак, после краткой теоретической части, вернемся к нашим
баранам
настройкам.
После того, как вы настроили перенаправление на свою авторскую страницу 404 через .htaccess, как описано выше, то вводя битую ссылку (неверный url, который заведомо не существует), типа http://mysite.com/$%$%, ответ сервера будет:
— сначала HTTP/1.1 302 Found (перенаправление),
— а затем HTTP/1.1 200 OK (страница существует).
Проверьте через bertal.ru.
Чем это грозит? Это будет означать, что гугл в свою базу данных (индекс) может внести все битые ссылки, как существующие страницы с содержанием страницы 404. По сути — дубли страниц. А это невероятно вредно для поисковой оптимизации (SEO).
В этом случае нужно сделать две вещи:
1) Настроить правильный ответ сервера на странице 404.
2) Закрыть от индексирования страницу 404. Это делается через файл robots.txt
Настраиваем ответ сервера HTTP/1.1 404 Not Found для несуществующих страниц
Ответ сервера настраивается благодаря функции php в самом начале страницы 404.php:
Пишите ее вначале файла 404.php.
В результате мы должны получить ответ на битую ссылку:
Пример страницы 404.php. Вот как это выглядит +/-:
Естественно, что у вас скорее всего сайт полностью на php и динамический, то просто вставляете строку с ответом сервера в начало — перед всеми переменными и подключенными шаблонами.
Закрыть страницу 404 от индексирования
Закрыть страницу от индексирования можно в файле rodots.txt. Будьте внимательны с этим инструментом, ведь через этот файл ваш сайт, по сути, общается с поисковыми роботами!
Полный текст файла rodots.txt, где ТОЛЬКО закрыта индексация 404 страницы, выглядит так:
____________________________
User-agent: *
Disallow:
Disallow: /404.php
____________________________
Первая строка User-agent: * сообщает, что правило для всех поисковых систем.
Вторая строка Disallow: сообщает что весь сайт открыт для индексации.
Третья строка Disallow: /404.php закрывает индексацию для страницы /404.php, которая находится в корневой папке.
Замечания по коду: «/404.php» означает путь к странице. Если на вашем сайте страница 404.php (или 404.html соответственно) находится в какой-то папке, то путь будет выглядеть:
/holder/404.php
где «holder» — название папки.
Вот, собственно и все по странице 404. Проверьте работу страницы, перенаправления битых ссылок, и ответы серверов.
Повторюсь: Все вышеизложенное для самописных сайтов. Если вы используете wordpress, то можете поискать приличный плагин для настройки ошибки 404.
Благодарности принимаются в виде комментариев 
Читать также:
Быстро создать свой сайт на WordPress
Сколько стоит создать сайт
Как залить сайт на хостинг
Зарегистрировать торговую марку самостоятельно
Самое ценное на сайте
Сайт бесплатно – это миф!
Продвижение сайта
Резервная копия сайта (бэкап)