
Completing the CAPTCHA proves you are a human and gives you temporary access to the web property.
What can I do to prevent this in the future?
If you are on a personal connection, like at home, you can run an anti-virus scan on your device to make sure it is not infected with malware.
If you are at an office or shared network, you can ask the network administrator to run a scan across the network looking for misconfigured or infected devices.
Another way to prevent getting this page in the future is to use Privacy Pass. You may need to download version 2.0 now from the Chrome Web Store.
Cloudflare Ray ID: 71ab311b0a239104 • Your IP : 82.102.23.104 • Performance & security by Cloudflare
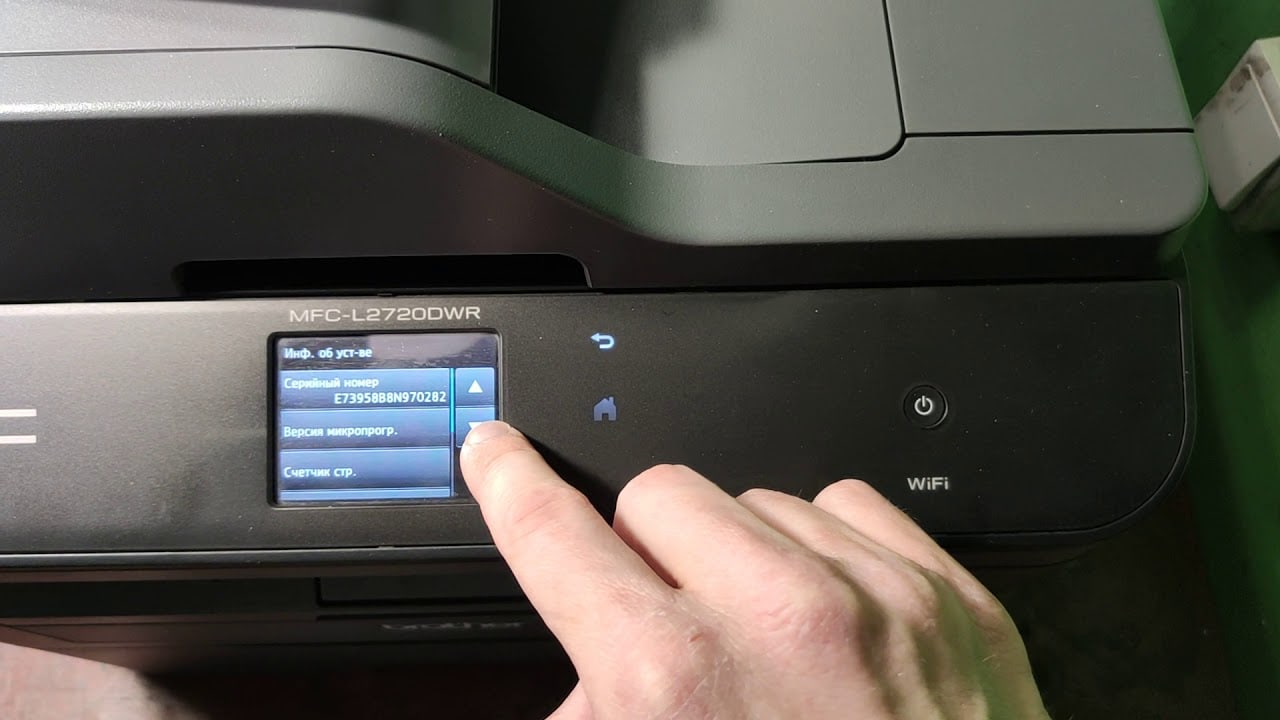
Нр м436 как сбросить ролик переноса счетчик
КОНФЕРЕНЦИЯ СТАРТКОПИ
Принтеры, копировальные аппараты, МФУ, факсы и другая офисная техника:
вопросы ремонта, обслуживания, заправки, выбора
0. kochnev.1994 29.06.19 14:04
Добрый День! подскажите пароль для входа в режим сброса расходных материалов , получается я захожу в сервисный режим Maintenance Counts Clear Counts Enter Passcode, а код не знаю.Спасибо
1. Scuzzy 29.06.19 14:51
Сервис-мануал (гуглится), стр. 227.
2. kochnev.1994 29.06.19 14:58
<code>Scuzzy</code>Документация у меня есть, пин нету.
3. Владимир А. 29.06.19 14:59
(2) Пробуйте циферки набрать тока, как при входе в сервис.
(Press Menu, + #, 1,0,0,4,3,6,1,6, Menu in sequence, так наберите тока 1,0,0,4,3,6,1,6).
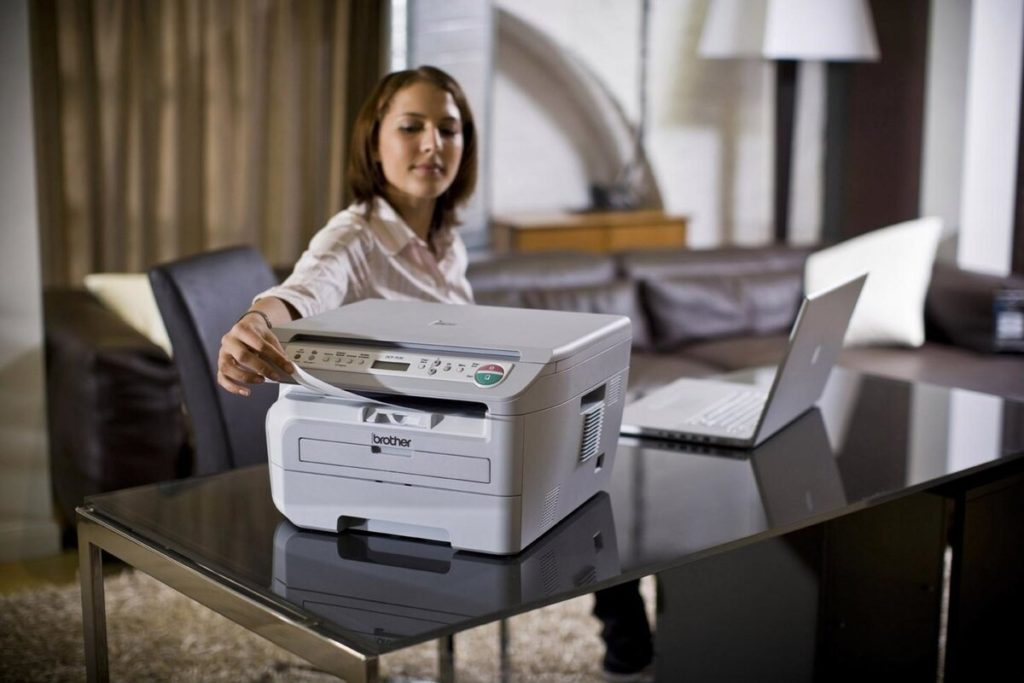
Как сбросить до заводских настроек принтер HP
Компания Hewlett-Packard –лидер в сфере производства оргтехники для дома и офиса. Принтеры HP подтвердили надежность, высокое качество. Большой выбор струйных и лазерных моделей, отличающихся производительностью, форматом, ценой позволяет выбрать оптимальный вариант.
Сброс настроек принтера HP
Специальная программа оценивает информацию о расходе чернил или тонера, зная усредненное количество расходного материала на печать одной страницы. Эта информация записывается на чип в картридже. После заправки картриджа тонером или после технического обслуживания необходимо обнулить эти данные. Когда расходные материалы заканчиваются, блокируется печать и без сброса настроек невозможно использовать устройство. Процедура позволяет избавиться от внутренних ошибок.
Результат сброса принтера HP до заводских настроек:
- остановка печати, запущенной в момент сброса настроек, удаление информации о ней из памяти;
- удаление настроек пользователя, возврат к исходным установкам;
- удаление программных ошибок.
Программный сброс
Некоторые принтеры HP имеют возможность программного сброса:
- подключить устройство к компьютеру;
- выбрать «Файл», далее «Перезапуск».
Программа осуществит сброс настроек.
Аппаратный сброс
При возникновении проблем попробуйте осуществить аппаратный сброс:
- отключите принтер;
- нажмите и удерживайте «Отмена» и «Стрелка вправо», включите оргтехнику;
- дождитесь надписи «Permanent storage init»;
- отпустите клавиши.
Примерно через минуту настройки будут сброшены до заводских значений. Оригинальные картриджи имеют высокую стоимость, пользователи стремятся их заправить. Это снижает стоимость эксплуатации. В большинстве моделей лазерных принтеров HP невозможно обнулить картридж, производителю не выгодно использование неоригинальных расходных материалов.
Как удалить данные с картриджа
Этапы удаления данных:
- изолируйте скотчем или изолентой контакт чипа, отмеченный на схеме зелёным;
- не удаляя скотч, закройте поочередно голубой, малиновый и красный контакты;
- после каждой процедуры распечатывайте текстовую страницу.
Удалите скотч полностью, очистите контакты спиртом. Отправьте на печать документ. В струйных моделях принтеров чернила, предназначенные для прочистки, переходят в отсек для использованного материала. После удаления чернил необходимо сбросить счётчик. В ряде моделей после замены емкости происходит автоматический сброс.
Если этого не произошло, для снятия блокировок предпримите действия:
- достаньте отсек для чернил, очистите, верните на место;
- включите устройство;
- нажмите и подержите кнопки «Cancel» и «Resume» 8 секунд.
Загоревшиеся светодиоды подтвердят разблокировку оргтехники.
Необходимость в техническом обслуживании
Основной узел струйного принтера – печатающая головка. Застывшие чернила в сопле, загрязнение пылью, длительные простои – основные причины выхода устройства hp из строя. Техническое обслуживание струйного принтера заключается в прочистке печатающей головки, сопел подачи чернил, внутренних узлов от пыли и чернил, проверке устройства передвижения бумаги. Регулярное ТО принтера продлевает срок эксплуатации устройства. Этапы работы зависят от типа принтера.
Техническое обслуживание лазерных моделей заключается в следующем:
- диагностика;
- чистка печи для удаления остатков тонера с резинового вала и термопленки;
- проверка вращения барабана;
- чистка роликов;
- проверка контактов;
- сброс принтера на начальные установки.
Если возникли проблемы со сбросом настроек принтера HP, инженеры центра Mister-print помогут. Мастер приедет в течение часа после поступления заявки, по территории Санкт-Петербурга вызов бесплатный, за пределы города – от 500 руб., точную сумму назовёт оператор. Осуществляем ремонт всех видов оргтехники, заправку и перечипирование картриджей, сброс настроек. Со стоимостью услуг ознакомьтесь на сайте, компания работает без выходных.

Hi @SHREYAS123,
Welcome to HP Support Community.
Thank you for posting your query, I will be glad to help you.
Supply Motor Failure: #A1-5513. Turn off then on.
The motor-related to toner supply has experienced a problem.
Follow these troubleshooting steps in the order presented.
- Turn the printer off, and then on.
- If the error persists, contact your HP-authorized service or support provider, or contact customer support at www.hp.com/go/contactHP.
I hope this helps.
Take care and have a good day.
Please click “Accepted Solution” if you feel my post solved your issue, it will help others find the solution. Click the “Kudos/Thumbs Up» on the bottom right to say “Thanks” for helping!
Alden4
HP Support
I am an HP Employee.
hp-concentra-wrapper-portlet
![]()
Actions
This document provides error-code troubleshooting information

Legal information
Copyright and License
© Copyright 2022 HP Development Company, L.P.
Reproduction, adaptation, or translation without prior written permission is prohibited, except as allowed under the copyright
laws.
The information contained herein is subject to change without notice.
The only warranties for HP products and services are set forth in the express warranty statements accompanying such products
and services. Nothing herein should be construed as constituting an additional warranty. HP shall not be liable for technical
or editorial errors or omissions contained herein.
Edition 1.3, 11/2022
Trademark Credits
Adobe®, Adobe Photoshop®, Acrobat®, and PostScript® are trademarks of Adobe Systems Incorporated.
Apple and the Apple logo are trademarks of Apple Inc., registered in the U.S. and other countries.
macOS is a trademark of Apple Inc., registered in the U.S. and other countries.
AirPrint is a trademark of Apple Inc., registered in the U.S. and other countries.
Google™ is a trademark of Google Inc.
Microsoft®, Windows®, and Windows Server® are U.S. registered trademarks of Microsoft Corporation.
UNIX® is a registered trademark of The Open Group.
Document last updated
The following is the last time this document was updated:
Last update: November 11, 2022
About this document
This document provides error-code troubleshooting information. Procedures and part numbers change. For current information,
use the browser-based format.
Choose the format that best meets your needs.
|
Format |
Document title example |
Recommended use |
|---|---|---|
|
Browser-based |
[Product] — Control Panel Message Document (CPMD) |
|
|
|
[Product] — Control Panel Message Document (CPMD) PDF |
Note: Refer to the printer service manual for removal and replacement procedures. Note: For current information, use the browser-based format. |
Control-panel message types
The control-panel messages and error code entries indicate the current product status or situations that might require action.
Note:
The Error Information Report provides more detailed information on the error and does not appear on the control-panel display.
To print and view the Error Information Report perform the following:
-
Enter Tech Mode.
-
Select Information T
-
Select Report
-
Select Error Information
-
Select Print?
-
Then touchYes
A control-panel message displays temporarily and might require the user to acknowledge the message by touching the OK button to resume printing or by touching the Stop button to cancel the job. With certain messages, the job might not finish printing or the print quality might be affected.
If the message is related to printing and the auto-continue feature is on, the product will attempt to resume printing after
the message has appeared for 10 seconds without acknowledgment.
For some messages, restarting the product might fix the problem. If a critical error persists, the product might require service.
Error -code and control-panel-message troubleshooting overview
Learn how to troubleshoot error messages.
Error codes
Error codes and control-panel messages display on the printer control panel to indicate the current printer status or situations
that might require action. Error codes are numerical, or alphanumerical, and have a set structure with six characters (example:
A1-xxxx).
-
The first two characters are numeric and represent the system component that is causing the error. For example, in error code
A1-1211, A1 = Motor for these printers. -
The remaining four digits further define the error.
The CPMD is a comprehensive list of error codes, diagnostic and troubleshooting steps to clear or resolve the error, and other
helpful information such as service mode pins and part numbers.
The CPMD is continually updated and republished with the latest information for the following error codes.
|
Error code |
System Component |
System Error Description |
|---|---|---|
|
11-2Txx |
Tray- Paper |
Tray X paper mismatch |
|
A1-xxxx |
Motors |
Motor failure |
|
A2-xxxx |
Fans |
Fan rotation error |
|
A3-xxxx |
Sensors (non-paper path) |
Temp or humidity sensor error |
|
C1-xxxx |
Toner cartridge |
Toner cartridge relate error |
|
C3-xxxx |
Drum unit |
Drum unit related error |
|
C5-xxxx |
ITB Unit (Color printer) or Transfer roller (Mono printers) |
ITB Unit or Transfer roller life message |
|
C6-xxxx |
Fuser unit |
Fuser unit either not installed, wrong fuser or has been replaced |
|
C7-xxxx |
Waste toner |
Waste toner container error |
|
C8-xxxx |
Developer |
Developer unit error |
|
C9-xxxx |
Transfer roller |
Transfer roller error |
|
H1-xxxx |
Optional tray |
Optional paper tray error |
|
H2-xxxx |
Inner finisher |
Miscellaneous error including general and misprint or mismatch errors typically involving (but not limited to) the fuser, |
|
Mx-xxxx |
Paper Path/Paper Tray |
Paper path or paper tray sensor error (This includes tray empty, tray not installed and bin full |
|
Sx-xxxx |
System |
System error, Clock, Video, HDD MSOK, Supply checking |
|
U1-xxxx |
Fuser error |
Fuser error (Temp, voltage, or pressure control) |
|
U2-xxxx |
Laser/Scanner |
Laser/scanner error |
|
U3-xxxx |
Document feeder |
Document feeder error (Jams, loading or open) |
How to search for printer documentation
The CPMD, error codes, and other support documentation for each printer is found on the internal HP portals.
These portals are on WISE for Channel (please see Accessing WISE for HP channel partners (HP Partner Portal) below for instructions on how to navigate to the site) and WISE. WISE for Channel is available to HP channel partners and WISE is available to call agents, service technicians, and other
HP internal users. The level of detail available will depend on your access credentials. To learn how to find support content
in WISE, watch the video here.
WISE — How to access and use
Learn how to access and use Web-based Interactive Search Engines (WISE) to locate available support information. WISE is a
repository of technical support documentation including service manuals, user guides, videos, and general support information.
Accessing WISE
Learn how to access Web-based Interactive Search Engines (WISE) if you are an HP channel partner or an internal HP user.
Accessing WISE for HP channel partners (HP Partner Portal)
Learn how to access WISE by accessing the HP Partner Portal if you are an HP Channel Partner.
Note:
If this is your first visit to the HP Partner Portal, you will be asked to create an account. Follow the setup directions
using your HP Partner credentials.
-
-
Select the Services & Support tab, and then select Technical Support.
-
Select Technical Documentation.
-
You will be taken to the WISE portal.
Play the video:

Accessing WISE for internal HP users
Using WISE to search for error codes
Learn how to use WISE to look up error codes.
Note:
The model used in the instructional videos is an example. The same steps apply to all printer models.
You will need the printer type (e.g. HP LaserJet), model number (e.g. M607), and bundle option (e.g. dn, dh, z).
Search for error codes using the lookup widget
Learn how to search for a specific error code using the WISE Error Code Lookup widget.
-
Select Products in the navigation bar of the WISE portal home page.
-
Using the type, model number and bundle option of the printer to be repaired, select HP Printers
> Type of Printer >
Model Group > Model Number >
Bundle Option >
Product Number, and then select Launch Product Detail Page. The PDP page will open.
-
Enter the error code in the widget in the Error Code Lookup area at the bottom-right of the screen and click the search icon or press the Enter button.
-
Select the desired topic from the search results.
Search for error codes from the WISE home page
Learn how to search for a specific error code from the WISE home page.
-
Enter the model number in the search field on the WISE home page. The search is predictive, and a drop-down menu will appear
with available selections.Note:
Selecting the series item from the drop-down list is recommended for the most accurate search return.
-
Enter the error code in the search field.
-
Select the desired topic from the search results.
Using WISE to access repair and replace videos for FRUs
Learn how to use WISE to access repair and replace videos for FRUs.
Note:
The model used in the instructional videos is an example. The same steps apply to all printer models.
You will need the printer type (e.g. HP LaserJet), model number (e.g. M607), and bundle option (e.g. dn, dh, z).
Search for a printer’s Product Detail Page (PDP)
Learn how to search WISE for product specific information. Quickly review the steps and then play the video.
-
Select Products in the navigation bar of the WISE portal home page.
-
Using the type, model number and bundle option of the printer to be repaired, select HP Printers > Type of Printer > Model Group > Model Number > Bundle Option > Product Number, and then select Launch Product Detail Page. The PDP page will open.
-
Select the link to Videos in the Other Content menu at the bottom-right of the screen.
-
Select the desired video from the list of videos.
Play the video:
Perform a model number search using the search function
Learn how to search WISE using the model number. Quickly review the steps and then play the video.
-
Enter the model number in the search field on the WISE home page. The search is predictive, and a drop-down menu will appear
with available selections.Note:
Selecting the series item from the drop-down list is recommended for the most accurate search return.
-
Click the search icon to the right.
-
To refine the search results, select the radio button labeled video in the upper-right portion of the screen.
Tip:
To refine video search results, append a part name to the model detail shown in the search bar. For example, adding the word
fuser to the detail in the search bar will return videos related to repair and replacement of the fuser.
Play the video:
Printer service information
Last update: November 11, 2022
Service mode PIN numbers:
-
M433, M436
: 10043616 -
M437, M438, M439, M440, M442, M443, M42523, M42623
: 10043616
To enter tech mode:
-
Touch the following in sequence:
-
When Tech Menu is displayed, touch OK.
Numerical control panel messages
Use the following numerical error message troubleshooting to resolve your issue.
11-XXXX error messages
A1-XXXX error messages
A2-XXXX error messages
A3-XXXX error messages
C1-XXXX error messages
C3-XXXX error messages
C9-XXXX error messages
H1-XXXX error messages
M1-XXXX error messages
M2-XXXX error messages
M3-XXXX error messages
S2-XXXX error messages
S3-XXXX error messages
S6-XXXX error messages
U1-XXXX error messages
U2-XXXX error messages
U3-XXXX error messages
11-2Txx Paper mismatch Tray X
Mismatch paper size in tray X.
Paper in tray is not matched to the printer paper setting.
-
11-2T11 — Tray 2 paper mismatch
-
11-2T21 — Tray 3 paper mismatch
Recommended action for customers
-
If you want to print on the current paper, press «OK«. If not, select «X» and change the paper.
-
Ensure that the tray width guides are set to the correct paper size being installed into the tray. The arrow on the guide
should line up exactly with the line connected to the paper size designation. Ensure that the tray is not filled above the
fill mark on the tray.
-
If the error persists, contact your HP-authorized service or support provider, or contact customer support at www.hp.com/go/contactHP.
11-2T61 Paper mismatch Tray 1 Load [A4] [Plain] Continue ⊙ Cancel X or Load tray 1 with [Letter], [Plain] paper
Paper mismatch error in the MP Tray 1.
Paper in tray is not matched to the machine paper setting.
Recommended action for customers
-
If you want to print on the current paper, press «OK«. If not, select «X» and change the paper.
-
Ensure that the tray guides on the MP Tray are set correctly.
-
Ensure the paper type and size is set correctly for the multipurpose tray 1.
To change the menu options, press the Menu
button. On the display screen, select .
-
If the error persists, contact your HP-authorized service or support provider, or contact customer support at www.hp.com/go/contactHP.
A1-1110 Motor Failure
Main Motor Failure: #A1-1110. Turn off and then on. Call for service if the problem persists.
Harness or main BLDC motor or main board is defective.
Recommended action for customers
Follow these troubleshooting steps in the order presented.
-
Turn the printer off, and then on.
-
If the error persists, contact your HP-authorized service or support provider, or contact customer support at www.hp.com/go/contactHP.
A1-5513 Motor Failure
Supply Motor Failure: #A1-5513. Turn off then on.
The motor related to toner supply has experienced a problem.
Recommended action for customers
Follow these troubleshooting steps in the order presented.
-
Turn the printer off, and then on.
-
If the error persists, contact your HP-authorized service or support provider, or contact customer support at www.hp.com/go/contactHP.
A2-1210 Error: #A2-1210 / Fan Failure
Fan Failure: #A2-1210. Turn off then on. Call for service if the problem persists.
Switching mode power supply (SMPS) fan error.
The fan does not operate or the fan signal is abnormal.
Recommended action for customers
Follow these troubleshooting steps in the order presented.
-
Turn the printer off, and then on.
-
If the error persists, contact your HP-authorized service or support provider, or contact customer support at www.hp.com/go/contactHP.
A2-2110 Error: #A2-2110 / Fan Failure
Fuser Fan Failure: Error: #A2-2110 / Fan Failure: #A2-2110. Turn off then on. Call for service if the problem persists
Fuser fan does not operate.
Recommended action for customers
Follow these troubleshooting steps in the order presented.
-
Turn the printer off, and then on.
-
If the error persists, contact your HP-authorized service or support provider, or contact customer support at www.hp.com/go/contactHP.
A3-3311, A3-3312, A3-3320, A3-3411, A3-3412 Sensor error
Temperature/Humidity sensor is defective.
-
A3-3311, Error: #A3-3311 / Sensor Failure: #A3-3311. Turn off then on. Call for service if the problem persists
-
A3-3312, Error: #A3-3312 / Sensor Failure: #A3-3312. Turn off then on. Call for service if the problem persists
-
A3-3320, Not proper Room Temp / The room temperature is not suitable for this set use. Please adjust room temperature
-
A3-3411, Error: #A3-3411 / Sensor Failure: #A3-3411. Turn off then on. Call for service if the problem persists
-
A3-3412, Error: #A3-3412 / Sensor Failure: #A3-3412. Turn off then on. Call for service if the problem persists
Recommended action for customers
Follow these troubleshooting steps in the order presented.
-
Turn the printer off, and then on.
-
If the error persists, contact your HP-authorized service or support provider, or contact customer support at www.hp.com/go/contactHP.
C1-1110 / C1-111A
Toner remaining is 5 ~ 30% of its life.
The printer indicates when the toner supply level is low. Actual cartridge life might vary. You do not need to replace the
cartridge at this time unless print quality is no longer acceptable. The toner is expected to run short soon because the remaining
toner is reaching 0%.This error occurs every time that you try to use the printer.
-
C1-1110, Prepare new toner / Prepare new toner cartridge
-
C1-111A, Shake toner cart. / Shake toner cartridge and then install. Replace toner cartridge if the problem persists
Recommended action for customers
-
Check the life remaining of the toner cartridge.
-
Select on the control panel.
-
Select the option you want and press OK.
-
Press the Stop button to return to ready mode.
-
-
To shake the toner cartridge and redistribute the toner.
-
Open front door
-
Remove toner cartridge
-
Shake the toner cartridge horizontally to distribute the toner evenly inside the cartridge.
-
Reinstall the toner cartridge.
-
Close the front door.
-
If the toner cartridge yield is expired, replace the toner cartridge.
Note:
After an HP supply has reached the very low threshold, the HP Premium Protection Warranty ends and the customer is responsible
for replacing the supply.Part numbers
Item Description
Cartridge number
Part Number
Black Original LaserJet Toner Cartridge
China (IT Channel)
HP 333A
W1333A
High Yield Black Original LaserJet Toner Cartridge
China (IT Channel)
HP 333X
W1333X
Black Original LaserJet Toner Cartridge
China (OA Channel)
HP 334A
W1334A
High Yield Black Original LaserJet Toner Cartridge
China (OA Channel)
HP 334X
W1334X
Black Original LaserJet Toner Cartridge
Rest of AP and EMEA (IT Channel)
HP 335A
W1335A
High Yield Black Original LaserJet Toner Cartridge
Rest of AP and EMEA (IT Channel)
HP 335X
W1335X
Black Original LaserJet Toner Cartridge
Rest of APJ (OA Channel)
HP 336A
W1336A
High Yield Black Original LaserJet Toner Cartridge
Rest of APJ (OA Channel)
HP 336X
W1336X
C1-1140 / C1-1160 / C1-1160 Toner error
The toner cartridge is at the end of its life.
The black toner cartridge is empty. The printer cannot draw toner from the toner cartridge.
The remaining volume is 0% (cartridge lifespan surpassed). This error occurs every time that you try to use the printer.
-
C1-1140, Replace new toner / End of life, Replace with new toner cartridge
-
C1-1160, Replace new toner / Replace with new toner cartridge
-
C1-1170, Replace new toner / End of life, Replace with new toner cartridge
Recommended action for customers
-
Replace the toner cartridge.
-
Open the front cover.
-
Remove the toner cartridge.
-
Install the new toner cartridge.
-
Close the front cover.
Note:
After an HP supply has reached the very low threshold, the HP Premium Protection Warranty ends and the customer is responsible
for replacing the supply.Part numbers
Item Description
Cartridge number
Part Number
Black Original LaserJet Toner Cartridge
China (IT Channel)
HP 333A
W1333A
High Yield Black Original LaserJet Toner Cartridge
China (IT Channel)
HP 333X
W1333X
Black Original LaserJet Toner Cartridge
China (OA Channel)
HP 334A
W1334A
High Yield Black Original LaserJet Toner Cartridge
China (OA Channel)
HP 334X
W1334X
Black Original LaserJet Toner Cartridge
Rest of AP and EMEA (IT Channel)
HP 335A
W1335A
High Yield Black Original LaserJet Toner Cartridge
Rest of AP and EMEA (IT Channel)
HP 335X
W1335X
Black Original LaserJet Toner Cartridge
Rest of APJ (OA Channel)
HP 336A
W1336A
High Yield Black Original LaserJet Toner Cartridge
Rest of APJ (OA Channel)
HP 336X
W1336X
-
-
If the error persists, please contact customer support.
C1-1313 / C1-1314 Toner error
Shake toner cartridge and then install.
Toner supply is inefficient or abnormal.
The toner supply in the toner cartridge is malfunctioning. The toner sensor indicates that the toner in the development unit
is insufficient.
The toner sensor indicates that the toner in the development unit is insufficient. There is no toner in the toner cartridge
or the toner supply line is blocked. A circuit fault such as a fault in the toner supply motor or the toner sensor occurs.
-
C1-1313, Shake toner cart. / Shake toner cartridge and then install. Call for service if the problem persists
-
C1-1314, Remove seal tape / Did not supply enough toner. Remove seal tape of toner cartridge or shake it. Call for service if the
problem persists
Recommended action for customers
-
To shake the toner cartridge and redistribute the toner.
-
Open front door
-
Remove toner cartridge
-
Shake the toner cartridge horizontally to distribute the toner evenly inside the cartridge.
-
Check if the seal tape is removed. If not, remove it.
-
Reinstall the toner cartridge.
-
Close the front door.
-
If the error persists, contact your HP-authorized service or support provider, or contact customer support at www.hp.com/go/contactHP.
C1–1411 Toner Not Installed / Toner cartridge is not installed. Install it
The toner cartridge is not installed or is installed incorrectly.
The toner cartridge is not installed. / The CRUM data is not detected.
Recommended action for customers
-
Open the front cover. Check if the toner cartridge is installed.
-
Remove and reinstall the toner cartridge.
-
If the error persists, check if the toner cartridge modular jack is contaminated or deformed.
-
Remove the toner cartridge.
-
Check the module jack on the toner cartridge.
-
If it is damaged or deformed, replace the toner cartridge.
Part numbers
Item Description
Cartridge number
Part Number
Black Original LaserJet Toner Cartridge
China (IT Channel)
HP 333A
W1333A
High Yield Black Original LaserJet Toner Cartridge
China (IT Channel)
HP 333X
W1333X
Black Original LaserJet Toner Cartridge
China (OA Channel)
HP 334A
W1334A
High Yield Black Original LaserJet Toner Cartridge
China (OA Channel)
HP 334X
W1334X
Black Original LaserJet Toner Cartridge
Rest of AP and EMEA (IT Channel)
HP 335A
W1335A
High Yield Black Original LaserJet Toner Cartridge
Rest of AP and EMEA (IT Channel)
HP 335X
W1335X
Black Original LaserJet Toner Cartridge
Rest of APJ (OA Channel)
HP 336A
W1336A
High Yield Black Original LaserJet Toner Cartridge
Rest of APJ (OA Channel)
HP 336X
W1336X
-
-
If the error persists, contact your HP-authorized service or support provider, or contact customer support at www.hp.com/go/contactHP.
C1–1512 Toner Not Compatible / Toner cartridge is not compatible. Check guide
The toner cartridge is not compatible with the printer.
Recommended action for customers
-
Open the front cover. Remove the toner cartridge.
-
Replace the toner cartridge with the correct toner cartridge for the printer.
-
If a genuine HP supply is not installed, replace it with a new HP supply.
Part numbers
Item Description
Cartridge number
Part Number
Black Original LaserJet Toner Cartridge
China (IT Channel)
HP 333A
W1333A
High Yield Black Original LaserJet Toner Cartridge
China (IT Channel)
HP 333X
W1333X
Black Original LaserJet Toner Cartridge
China (OA Channel)
HP 334A
W1334A
High Yield Black Original LaserJet Toner Cartridge
China (OA Channel)
HP 334X
W1334X
Black Original LaserJet Toner Cartridge
Rest of AP and EMEA (IT Channel)
HP 335A
W1335A
High Yield Black Original LaserJet Toner Cartridge
Rest of AP and EMEA (IT Channel)
HP 335X
W1335X
Black Original LaserJet Toner Cartridge
Rest of APJ (OA Channel)
HP 336A
W1336A
High Yield Black Original LaserJet Toner Cartridge
Rest of APJ (OA Channel)
HP 336X
W1336X
-
If the toner cartridge is a genuine HP supply and the error persists, contact your HP-authorized service or support provider,
or contact customer support at www.hp.com/go/contactHP. support.
C1-1711 or C1-1712 Error
The toner cartridge is not installed. / The CRUM data is not detected.
-
C1-1711, Error: #C1-1711 / Toner Cart Failure: #C1-1711. Call for service
-
C1-1712, Error: #C1-1712 / Toner Cart Failure: #C1-1712. Call for service
Recommended action for customers
-
Open the front cover. Check if the toner cartridge is installed.
-
Remove and reinstall the toner cartridge.
-
If the error persists, check if the toner cartridge modular jack is contaminated or deformed.
-
Remove the toner cartridge.
-
Check the module jack on the toner cartridge.
-
If it is damaged or deformed, replace the toner cartridge.
Part numbers
Item Description
Cartridge number
Part Number
Black Original LaserJet Toner Cartridge
China (IT Channel)
HP 333A
W1333A
High Yield Black Original LaserJet Toner Cartridge
China (IT Channel)
HP 333X
W1333X
Black Original LaserJet Toner Cartridge
China (OA Channel)
HP 334A
W1334A
High Yield Black Original LaserJet Toner Cartridge
China (OA Channel)
HP 334X
W1334X
Black Original LaserJet Toner Cartridge
Rest of AP and EMEA (IT Channel)
HP 335A
W1335A
High Yield Black Original LaserJet Toner Cartridge
Rest of AP and EMEA (IT Channel)
HP 335X
W1335X
Black Original LaserJet Toner Cartridge
Rest of APJ (OA Channel)
HP 336A
W1336A
High Yield Black Original LaserJet Toner Cartridge
Rest of APJ (OA Channel)
HP 336X
W1336X
-
-
If the error persists, contact your HP-authorized service or support provider, or contact customer support at www.hp.com/go/contactHP.
C3-1110 Prepare IMG. Unit / Prepare new imaging unit
The drum unit is approaching the end of its lifespan.
Imaging unit remained is 5 ~ 30% of its life.
Recommended action for call-center agents and onsite technicians
-
The life of the drum unit will be or is expired. prepare a new drum unit.
Note:
The life of the Imaging Unit is approximately 80k pages.
-
If the print quality is no longer acceptable replace the imaging drum unit.
Part number: CF257A
-
Remove imaging drum unit from shipping bag and place it on a clean flat surface.
-
Loosen shipping tape from the bottom and both sides.
-
Remove orange shipping locks from imaging drum unit.
Note:
There shipping locks on each side of the imaging drum unit.
-
Remove remaining shipping tape and pull protective sheet from imaging drum unit.
CAUTION:
Do not touch exposed drum roller surface.
Note:
Do not expose the imaging unit to light for more than a few minutes.
-
Remove orange plug on back of imaging drum unit.
CAUTION:
Once the plug is removed, the imaging drum unit must remain level. Contents may spill out if the imaging drum unit is tipped.
-
Open the front and right doors.
CAUTION:
Leave front and right door open until all installation steps are complete.
-
With right and front doors fully open, carefully lift imaging unit into position, so the bottom of imaging drum unit aligns
with the raised alignment rails inside printer cabinet as shown
CAUTION:
Do not touch exposed drum roller surface.
-
Install imaging drum unit and ensure it is fully seated.
Note:
If imaging unit binds or does not slide easily into cabinet, verify the right door is fully open, realign imaging drum unit,
and install. -
Route the electrical cable into holder as shown and plug in the connector.
CAUTION:
Make sure the connector is fully seated in the socket.
-
Install two screws as shown.
-
Ensure electrical connector is plugged in and fully seated. Ensure the two screws are securely installed.
-
Close the front and right doors.
C3-1140 or C3-1170 Imaging unit error
The imaging unit has almost reached the end of life.
The drum/imaging unit is past its usable life and needs to be replaced. Replace with new imaging unit
-
C3-1140, Replace IMG. Unit / End of life, Replace with new imaging unit
-
C3-1170, Replace IMG. Unit / End of life, Replace with new imaging unit
Recommended action for call-center agents and onsite technicians
-
Check the life remaining of the imaging drum unit.
Note:
The life of the Imaging Unit is approximately 80k pages.
-
If its life is at the end, have the customer purchase a new imaging drum unit
Part number: CF257A, CF257-67902
-
Remove imaging drum unit from shipping bag and place it on a clean flat surface.
-
Loosen shipping tape from the bottom and both sides.
-
Remove orange shipping locks from imaging drum unit.
Note:
There shipping locks on each side of the imaging drum unit.
-
Remove remaining shipping tape and pull protective sheet from imaging drum unit.
CAUTION:
Do not touch exposed drum roller surface.
Note:
Do not expose the imaging unit to light for more than a few minutes.
-
Remove orange plug on back of imaging drum unit.
CAUTION:
Once the plug is removed, the imaging drum unit must remain level. Contents may spill out if the imaging drum unit is tipped.
-
Open the front and right doors.
CAUTION:
Leave front and right door open until all installation steps are complete.
-
With right and front doors fully open, carefully lift imaging unit into position, so the bottom of imaging drum unit aligns
with the raised alignment rails inside printer cabinet as shown
CAUTION:
Do not touch exposed drum roller surface.
-
Install imaging drum unit and ensure it is fully seated.
Note:
If imaging unit binds or does not slide easily into cabinet, verify the right door is fully open, realign imaging drum unit,
and install. -
Route the electrical cable into holder as shown and plug in the connector.
CAUTION:
Make sure the connector is fully seated in the socket.
-
Install two screws as shown.
-
Ensure electrical connector is plugged in and fully seated. Ensure the two screws are securely installed.
-
Close the front and right doors.
C3-1312, C3-1411, C3-1414
The imaging unit is not installed. / The CRUM data is not detected.
-
C3-1312, Error: #C3-1312 / Imaging Unit Failure: #C3-1312. Install IMG. Unit
-
C3-1411, IMG. Not Installed / Imaging unit is not installed. Install the unit
-
C3-1414, Error: #C3-1414 / Imaging Unit Failure: #C3-1414. Install imaging unit again
C3-1512 IMG. Not compatible / Imaging unit is not compatible. Check guide
Imaging unit is not installed. Install the unit.
The imaging unit has an invalid CRUM.
Recommended action
-
Open the front cover. Remove the toner cartridge.
-
Remove the imaging drum unit.
-
Check the part number of the installed imaging drum unit. (HP part numbers are and
Part numbers: CF257A, CF257-67902
For instructions:
-
If the imaging drum unit is not an HP genuine supply, the customer must purchase a new imaging drum unit.
Part number: CF257A
For instructions:
C3-1711, C3-1712 Imaging unit errors
Imaging unit is not installed. Install the unit.
The imaging/drum unit is not installed. / The data of CRUM is not detected.
-
C3-1711, Error: #C3-1711 / Imaging Unit Failure: #C3-1711. Call for service
-
C3-1712, Error: #C3-1712 / Imaging Unit Failure: #C3-1712. Call for service
C9-2210, C9-2120 Prepare TR. Roller / Prepare with new transfer roller
Transfer roller is at the end of its life.
Replace with new transfer roller
Recommended action for customers
-
Replace the transfer roller.
-
Open the side cover.
-
Replace the transfer roller with a new one.
Part number: W7U01-67901
Note:
After an HP supply has reached the very low threshold, the HP Premium Protection Warranty ends and the customer is responsible
for replacing the supply. -
Close the side cover.
-
C9-2220 Error: #C9-2220 / TR Failure: #C9-2220. Install TR roller again
Transfer roller is at the end of its life.
Recommended action for customers
-
Replace the transfer roller.
-
Open the side cover.
-
Replace the transfer roller with a new one.
Part number: W7U01-67901
Note:
After an HP supply has reached the very low threshold, the HP Premium Protection Warranty ends and the customer is responsible
for replacing the supply. -
Close the side cover.
-
H1-1210 Jam in Tray 3
A paper jam occurred in tray 3.
Paper jam has occurred in tray 3. (Pickup roller is worn out.)
Recommended action for customers
-
Open the lower-right jam cover.
-
Gently pull out any jammed paper.
-
Close the lower-right jam cover.
-
Pull the tray completely out of the printer by pulling and lifting it up slightly.
-
Remove any jammed or damaged sheets of paper. Verify that the tray is not overfilled and that the paper guides are adjusted
correctly.
-
With the tray out, check if the paper pickup roller is worn or contaminated. Clean the roller the a water dampened lint free
cloth.
-
Open the right door.
-
Gently pull out any jammed paper.
-
Close the right door.
-
If the error persists, contact your HP-authorized service or support provider, or contact customer support at www.hp.com/go/contactHP.
H1-1220
Tray 3 cassette is pulled out.
Tray 3 is open. Close it
Recommended action for customers
-
Remove and insert tray 3 correctly.
-
Turn the printer off, and then on.
-
If the error persists, contact your HP-authorized service or support provider, or contact customer support at www.hp.com/go/contactHP.
H1-1230 Input System Failure: #H1-1230. Check tray 3 connection
Communication error has occurred between the copier and SCF.
Recommended action for customers
Follow these troubleshooting steps in the order presented.
-
Turn the printer off, and then on.
-
If the error persists, contact your HP-authorized service or support provider, or contact customer support at www.hp.com/go/contactHP.
H1-1352 / H1-1354 Paper empty in tray 3 / Paper is empty in tray 3. Load paper
Paper is low in Tray 3. Load paper.
Paper in the tray is less than 10% of specification. / The photo sensor is not functioning correctly.
Recommended action for customers
-
Load the correct size paper in the tray.
-
Ensure that the tray is loaded and installed correctly.
-
If the error persists, contact your HP-authorized service or support provider, or contact customer support at www.hp.com/go/contactHP.
M1-1110 Paper jam in tray 2
Paper jam in Tray 2. Please remove the paper
A paper jam has occurred in Tray 2.
Recommended action for customers
-
Pull the tray completely out of the printer by pulling and lifting it up slightly.
-
Remove any jammed or damaged sheets of paper. Verify that the tray is not overfilled and that the paper guides are adjusted
correctly.
-
Gently remove any paper from the feed rollers inside the printer. First pull the paper to the left to release it, and then
pull it forward to remove it.
-
With the tray out, check and clean the paper rollers in the tray with a damp lint free cloth.
-
Install and close the tray.
-
Open the right door.
-
Gently pull out any jammed paper.
-
Close the right door.
-
If the error persists, contact your HP-authorized service or support provider, or contact customer support at www.hp.com/go/contactHP.
M1–1610 Paper jam in MP tray 1
Paper jam in MP tray 1. Please remove the paper
A paper jam has occurred in tray 1.
Recommended action for customers
-
If jammed paper is visible in Tray 1, clear the jam by gently pulling the paper straight out.
-
Open the right door.
-
Gently pull out any jammed paper.
-
Close the right door.
-
If the error persists, contact your HP-authorized service or support provider, or contact customer support at www.hp.com/go/contactHP.
M1-5112, M1-5113 Paper empty in tray 2 / Paper is empty in tray 2. Load paper
Paper is low in Tray 2. Load paper. Paper is empty in Tray 2. Load paper.
Paper in the tray 2 is less than 10%. / The photo sensor is defective.
Recommended action for customers
-
Load the correct size paper in the tray.
-
Ensure that the tray is loaded and installed correctly.
-
If the error persists, contact your HP-authorized service or support provider, or contact customer support at www.hp.com/go/contactHP.
M1–5120 All Trays Empty / Paper is empty in all trays. Load paper
Paper in the all tray is less than 10% of specification. / The photo sensor is defective.
Recommended action for customers
-
Load the correct size paper in the tray.
-
Ensure that the tray is loaded and installed correctly.
-
If the error persists, contact your HP-authorized service or support provider, or contact customer support at www.hp.com/go/contactHP.
M1-5610, Paper Normal in tray 1
Paper on MP tray 1 is normal.
M1-5612 Paper empty in tray 1 / Paper is empty in tray 1. Load paper
Paper is empty in tray 1. Load paper.
Paper in the MP tray is empty. The photo sensor is defective.
Recommended action for customers
-
Load the correct size paper in the tray.
-
Ensure that the tray is loaded and installed correctly.
-
If the error persists, contact your HP-authorized service or support provider, or contact customer support at www.hp.com/go/contactHP.
M2-1110, M2-2210 Paper jam inside of machine.
Paper jam inside of machine. Please remove the paper
-
M2-1110, Jam inside machine
-
M2-2210, Jam inside of duplex
Recommended action for customers
-
Open the right side cover.
-
Open the jam guide and remove the jammed paper.
-
Open the fuser jam cover and remove the jammed paper.
CAUTION:
The fuser area is hot. Take care when removing paper from the printer.
-
Close the right door.
-
If the error persists, contact your HP-authorized service or support provider, or contact customer support at www.hp.com/go/contactHP.
M3–1110 Jam in exit area
Paper jam in exit area. Please remove the paper; Paper jam inside of machine. Please remove the paper
Recommended action for customers
-
Open the right side cover.
-
Open the jam guide and remove the jammed paper.
-
Open the fuser jam cover and remove the jammed paper.
CAUTION:
The fuser area is hot. Take care when removing paper from the printer.
-
Close the right door.
-
If the error persists, contact your HP-authorized service or support provider, or contact customer support at www.hp.com/go/contactHP.
S2-3110 Waiting for low temp / Waiting delay time for lower fixing temperature…
The printer is stopped because the temperature of the fuser unit is in abnormal status.
Recommended action
-
Please wait. This error will disappear.
S2-3321 Supplying Toner / Supplying and mixing toner to developer unit. Please wait…
Toner is being supplied to the developer unit.
Recommended action
-
No action needed. Wait until error disappears.
S2-3421 Calibrating density / Calibrating image density. Please wait…
The printer is calibrating.
Recommended action
-
No action needed. Wait until error disappears.
S2–4210 Front door is open. Close it
Front door is open. Close it.
Front cover is open or the cover open sensor is defective.
Recommended action for customers
-
Close the cover.
-
If the error persists, open and close the cover and ensure it is correctly closed.
-
If the error persists, contact your HP-authorized service or support provider, or contact customer support at www.hp.com/go/contactHP.
S2–4410 Right door is open. Close it
Right door is open. Close it.
Side cover is open or the cover open sensor is defective.
Recommended action for customers
-
Close the cover.
-
If the error persists, open and close the cover and ensure it is correctly closed.
-
If the error persists, contact your HP-authorized service or support provider, or contact customer support at www.hp.com/go/contactHP.
S3-3211
Automatic document feeder communication error.
Communication error occurred between the automatic document feeder and the PBA.
Recommended action for customers
Follow these troubleshooting steps in the order presented.
-
Turn the printer off, and then on.
-
If the error persists, contact your HP-authorized service or support provider, or contact customer support at www.hp.com/go/contactHP.
S3-3122 Scanner Locked / Scanner is locked. Press Stop button
Scanner lock error has occurred. scanner image bar does not move.
Recommended action for customers
Follow these troubleshooting steps in the order presented.
-
Turn the printer off, and then on.
-
If the error persists, contact your HP-authorized service or support provider, or contact customer support at www.hp.com/go/contactHP.
S6-3123 IP Conflict / This IP address conflicts with that of other system
IP address conflicts with that of other system. / There is no response when checking the ping test.
Recommended action
-
Change the printer’s IP address.
-
Set-up the IP address in this order, Network -> TCP/IP (IPv4) -> STATIC.
-
In case of DHCP or Bootp, reboot the printer to receive a new IP address.
-
-
Check the setting-up for 802.1x confirmation server.
U1-2132, U1-2315, U1-2320, U1-2330, U1-2334, U1-2340, U1-234H Fuser unit failure errors
Fuser Unit Failure: #U1-2xxx Turn off then on.
The thermistor can’t measure temperature. The hear-roller will not heat-up. / Temperature of the fuser increases abnormally.
-
U1-2132, Error: #U1-2132 / Fuser Unit Failure: #U1-2132. Turn off then on. Call for service if the problem persists
-
U1-2315, Error: #U1-2315 / Fuser Unit Failure: #U1-2315. Turn off then on. Call for service if the problem persists
-
U1-2320, Error: #U1-2320 / Fuser Unit Failure: #U1-2320. Turn off then on. Call for service if the problem persists
-
U1-2330, Error: #U1-2330 / Fuser Unit Failure: #U1-2330. Turn off then on. Call for service if the problem persists
-
U1-2334, Error: #U1-2334 / Fuser Unit Failure: #U1-2334. Turn off then on. Call for service if the problem persists
-
U1-2340, Error: #U1-2340 / Fuser Unit Failure: #U1-2340. Turn off then on. Call for service if the problem persists
-
U1-234H, Error: #U1-234H / Fuser Unit Failure: #U1-234H. Turn off then on. Call for service if the problem persists
Recommended action for customers
Follow these troubleshooting steps in the order presented.
-
Turn the printer off, and then on.
-
If the error persists, contact your HP-authorized service or support provider, or contact customer support at www.hp.com/go/contactHP.
U2-1111, U2-1112, U2-1113, U2-1114 LSU failure errors
LSU Failure: #U2-111x Turn off then on. Call for service if the problem persists
Hsync signal of the LSU is abnormal.
-
U2-1111, Error: #U2-1111 / LSU Failure: #U2-1111.Turn off then on. Call for service if the problem persists
-
U2-1112, Error: #U2-1112 / LSU Failure: #U2-1112.Turn off then on. Call for service if the problem persists
-
U2-1113, Error: #U2-1113 / LSU Failure: #U2-1113.Turn off then on. Call for service if the problem persists
-
U2-1114, Error: #U2-1114 / LSU Failure: #U2-1114.Turn off then on. Call for service if the problem persists
Recommended action for customers
Follow these troubleshooting steps in the order presented.
-
Turn the printer off, and then on.
-
If the error persists, contact your HP-authorized service or support provider, or contact customer support at www.hp.com/go/contactHP.
U3-3211, U3-3213, U3-3214, U3-3311, U3-3313, U3-3314 Original paper jam / Original paper jam inside of scanner. Remove jam
Original paper jam inside of automatic document feeder.
Jam has occurred inside the automatic document feeder unit.
Recommended action for customers
-
Open the document-feeder cover.
-
Gently remove any jammed paper.
-
Open the duplex/exit access cover and remove any paper present.
-
Lift the input tray and remove any paper found in the exit area.
-
Use a moist, lint-free cloth to wipe both pickup rollers and the separation pad to remove dirt.
CAUTION:
Do not use abrasives, acetone, benzene, ammonia, ethyl alcohol, or carbon tetrachloride on any part of the printer; these
can damage the printer. Do not place liquids directly on the glass or platen. They might seep and damage the printer. -
Close the document-feeder cover.
-
If the error persists, contact your HP-authorized service or support provider, or contact customer support at www.hp.com/go/contactHP.
U3-3411, U3-3413, U3-3414 Original paper jam / Original paper jam inside of scanner. Remove jam
Original paper jam inside of automatic document feeder.
Jam has occurred inside the automatic document feeder unit.
Recommended action for customers
-
Open the document-feeder cover.
-
Gently remove any jammed paper.
-
Open the duplex/exit access cover and remove any paper present.
-
Lift the input tray and remove any paper found in the exit area.
-
Use a moist, lint-free cloth to wipe both pickup rollers and the separation pad to remove dirt.
CAUTION:
Do not use abrasives, acetone, benzene, ammonia, ethyl alcohol, or carbon tetrachloride on any part of the printer; these
can damage the printer. Do not place liquids directly on the glass or platen. They might seep and damage the printer. -
Close the document-feeder cover.
-
If the error persists, contact your HP-authorized service or support provider, or contact customer support at www.hp.com/go/contactHP.
U3-3511, U3-3513, U3-3514 Original paper jam / Original paper jam inside of scanner. Remove jam
Original paper jam inside of scanner.
Jam has occurred inside the automatic document feeder unit.
Recommended action for customers
-
Open the document-feeder cover.
-
Gently remove any jammed paper.
-
Open the duplex/exit access cover and remove any paper present.
-
Lift the input tray and remove any paper found in the exit area.
-
Use a moist, lint-free cloth to wipe both pickup rollers and the separation pad to remove dirt.
CAUTION:
Do not use abrasives, acetone, benzene, ammonia, ethyl alcohol, or carbon tetrachloride on any part of the printer; these
can damage the printer. Do not place liquids directly on the glass or platen. They might seep and damage the printer. -
Close the document-feeder cover.
-
If the error persists, contact your HP-authorized service or support provider, or contact customer support at www.hp.com/go/contactHP.
U3-3711, U3-3713, U3-3714 Original paper jam / Original paper jam inside of scanner. Remove jam
Original paper jam / Original paper jam inside of automatic document feeder. Remove jam
Jam has occurred inside the automatic document feeder unit.
Recommended action for customers
-
Open the document-feeder cover.
-
Gently remove any jammed paper.
-
Open the duplex/exit access cover and remove any paper present.
-
Lift the input tray and remove any paper found in the exit area.
-
Use a moist, lint-free cloth to wipe both pickup rollers and the separation pad to remove dirt.
CAUTION:
Do not use abrasives, acetone, benzene, ammonia, ethyl alcohol, or carbon tetrachloride on any part of the printer; these
can damage the printer. Do not place liquids directly on the glass or platen. They might seep and damage the printer. -
Close the document-feeder cover.
-
If the error persists, contact your HP-authorized service or support provider, or contact customer support at www.hp.com/go/contactHP.
U3–4210 Scanner door open / Top door of scanner is open. Close the door
Automatic document feeder cover is open.
Recommended action for customers
-
Ensure the document-feeder cover is closed correctly.
-
If the error persists, contact your HP-authorized service or support provider, or contact customer support at www.hp.com/go/contactHP.
 Thanks: 0
 Likes: 0
 Dislikes: 0
-
05-10-2016
#1
CLC9251 — A1-5513 Error
Hi guys,
I don’t see many samsung but came across this error today, manual says black toner supply issue. I removed & checked both the drum & dev units, all seem ok to the eye. Error is intermittent once or twice a day, print quality is perfect.
Before I order parts has anyone seen this error pls? do I go down toner supply motor, dev unit etc?
Thanks.
-
05-10-2016
#2
Re: CLC9251 — A1-5513 Error
Originally Posted by copier tech
Hi guys,
I don’t see many samsung but came across this error today, manual says black toner supply issue. I removed & checked both the drum & dev units, all seem ok to the eye. Error is intermittent once or twice a day, print quality is perfect.
Before I order parts has anyone seen this error pls? do I go down toner supply motor, dev unit etc?
Thanks.
I think the other tech here had to replace black toner motor on a Samsung (not sure which model). I had a CLX-8640 telling me to replace black developer. Message went away and second call I noticed the bracket that held the developer in was bent not holding in in all the way. Noticed newer models have screw at top and bottom now for that bracket. I just bent the bracket back and it has been over 6 months. I only have a couple of these machines but I will be interested in hearing what you find.
-
05-10-2016
#3
Re: CLC9251 — A1-5513 Error
Thanks for the info, bracket holding K dev had 2 screws & was tight.
I have ordered a black dev unit, will post back if this was the fix.
-
05-10-2016
#4
Re: CLC9251 — A1-5513 Error
Originally Posted by copier tech
Thanks for the info, bracket holding K dev had 2 screws & was tight.
I have ordered a black dev unit, will post back if this was the fix.
With that error code I wonder if it could be the toner motor or some gear or something related to it?
-
05-10-2016
#5
Re: CLC9251 — A1-5513 Error
Yes maybe, a collegue told me all four toner motors are the same so I may swap the black motor with say the yellow as a test.
-
06-16-2016
#6
Technician
- Rep Power
- 15
Re: CLC9251 — A1-5513 Error
Common problem on this range. There is a new firmware coming out which will resolve this issue. This is still in testing. If you contact Samsung they may be able to get it to you sooner otherwise just keep an eye out on GSPN.
-
06-17-2016
#7
Re: CLC9251 — A1-5513 Error
Thanks for the info. I fitted a new black dev unit & not heard back.
However if you could supply me with this firmware I would be gratefull as im not a Sumsung dealer.
-
10-19-2016
#8
Re: CLC9251 — A1-5513 Error
Hi again, I have this intermittent fault on 3 machines now, rebooting them clears the error but it will return again a few days later.
I’d appreciate if someone could supply me this modified firmware as mentioned above.
Thanks


Bookmarks
Bookmarks
Posting Permissions

- You may not post new threads
- You may not post replies
- You may not post attachments
- You may not edit your posts
- BB code is On
- Smilies are On
- [IMG] code is On
- [VIDEO] code is On
- HTML code is Off
Forum Rules