
Типы сообщений панели управления
Состояние устройства или возникшие с ним проблемы можно определить по четырем типам сообщений панели управления.
|
Тип сообщения |
Описание |
|
Сообщения о состоянии |
Сообщения о состоянии отражают текущее состояние устройства. Они информируют о нормальном функционировании устройства, и для их очистки вмешательство не требуется. Сообщения изменяются при изменении состояния устройства. Если устройство готово к работе, не занято и не ожидает разрешения предупреждающих сообщений, отображается сообщение Готов. |
|
Предупреждающие сообщения |
Предупреждающие сообщения информируют об ошибках передачи данных или ошибках принтера. Обычно эти сообщения чередуются с сообщением Готов или сообщениями о состоянии и остаются на экране, пока не будет нажата клавиша OK. Отображение некоторых предупреждающих сообщений прекращается автоматически. Если для параметра Удаляемые предупреждения в меню Параметры экрана задано значение Задание, эти сообщения исчезнут при выполнении следующего задания печати. |
|
Сообщения об ошибках |
Сообщения об ошибках информируют о необходимости выполнения определенных действий, например добавить бумагу или устранить ее замятие. После появления некоторых сообщений об ошибках предусматривается автоматическое продолжение печати. Если для параметра События автопродолж. в меню Параметры экрана задано значение Автоматическое продолжение, устройство продолжит работу через 10 секунд после появления сообщения об ошибке, предусматривающего автоматическое продолжение печати.
|
|
Сообщения о критических ошибках |
Сообщения о критических ошибках уведомляют о сбое устройства. Некоторые из этих сообщений можно удалить, выключив и снова включив устройство. Параметр Автоматическое продолжение не влияет на эти сообщения. Если критическая ошибка не будет устранена, необходимо вызвать обслуживающий персонал. |
 , печать остановится, после чего будет предложено отменить задание печати.
Сообщения панели управления
Устройство предоставляет различные сообщения панели управления. После отображения сообщения на панели управления следуйте указаниям на экране, чтобы устранить неполадку. Если на панели управления отображается сообщение «Ошибка» или «Внимание» и не указано шагов для устранения неполадки, выключите и включите устройство. Если ошибки устройства продолжают возникать, обратитесь в службу поддержки HP.
Чтобы просмотреть дополнительную справочную информацию, нажмите кнопку «Справка»  .
.
Interpret control-panel messages, status-alert messages and event code errors
The control-panel messages and event code errors indicate the current product status or situations that might require action.
NOTE: Event log errors do not appear on the control-panel display. Access the event log to view or print the event log errors.
Control-panel messages appear temporarily and might require that you acknowledge the message by pressing the OK button to resume printing or by pressing the Stop button to cancel the job. With certain messages, the job might not finish printing or the print quality might be affected. If the message is related to printing and the auto-continue feature is on, the product will attempt to resume printing after the message has appeared for 10 seconds without acknowledgement.
For some messages, restarting the product might fix the problem. If a critical error persists, the product might require service.
___________________________________________________________________________
10.00.33
Description A used supply is in use (end of life).
Recommended action No action necessary.
10.00.35
Description An incompatible supply is in use.
Recommended action Install the correct HP print cartridge for this product (CE390A or CE390X).
NOTE: The CE390X cartridge is not compatible with the HP LaserJet Enterprise 600 M601.
10.00.60
Description The black cartridge is low.
Recommended action If print quality is no longer acceptable, replace the print cartridge.
TIP: Advise the customer that HP recommends that they have replacement supplies available to install when the print quality is no longer acceptable.
10.00.69
Description The black cartridge is very low.
Recommended action If print quality is no longer acceptable, replace the print cartridge.
TIP: Advise the customer that HP recommends that they have replacement supplies available to install when the print quality is no longer acceptable.
10.00.91
Description Cartridge motor stall.
Recommended action Replace the print cartridge.
10.0X.Y0 Supply memory error
Description The product cannot read or write to at least one print cartridge memory tag or a memory tag is missing from the print cartridge.
Memory error (Y = 0)
10.00.00 (event code) Black print cartridge
Memory tag missing (Y = 1)
10.00.10 (event code) Black print cartridge
Recommended action
Remove, and then reinstall the indicated print cartridge.
- If the error reappears, turn the power off, and then on.
- Check the cartridge memory tag. If it is damaged, replace the cartridge.
- If the error persists, replace the indicated print cartridge.
10.23.35
Description An incompatible fuser is in use.
Recommended action Replace the fuser.
TIP: Advise the customer that HP recommends that they have replacement supplies available to install when the print quality is no longer acceptable.
10.23.50
Description The fuser kit life was reset above the order threshold.
Recommended action No action necessary.
10.23.51
Description The fuser kit life was reset above the replace threshold.
Recommended action No action necessary.
10.23.52
Description The fuser kit life was reset above the reset threshold.
Recommended action No action necessary.
10.23.60
Description The product indicates when fuser kit is very low. The actual remaining fuse kit life might vary. You do not need to replace the fuser kit at this time unless print quality is no longer acceptable.
NOTE: After an HP supply has reached the very low threshold, the HP premium protection warranty ends.
Recommended action If print quality is no longer acceptable, replace the fuser kit. See the parts chapter in the service manual for the fuser kit part number.
TIP: Advise the customer that HP recommends that they have replacement supplies available to install when the print quality is no longer acceptable.
10.23.70 Printing Past Very Low
Description The product indicates when the fuser kit is very low. The actual remaining fuse kit life might vary. You do not need to replace the fuser kit at this time unless print quality is no longer acceptable.
NOTE: After an HP supply has reached the very low threshold, the HP premium protection warranty ends.
Recommended action If print quality is no longer acceptable, replace the fuser kit. See the parts chapter in the service manual for the fuser kit part number.
TIP: Advise the customer that HP recommends that they have replacement supplies available to install when the print quality is no longer acceptable.
10.26.15
Description The product indicates when the maintenance might need to be replaced.
Recommended action If print quality is no longer acceptable, replace the maintenance kit. See the parts chapter in the service manual for the maintenance kit part number.
TIP: Advise the customer that HP recommends that they have replacement supplies available to install when the print quality is no longer acceptable.
10.26.50
Description The maintenance kit was reset.
Recommended action No action required.
10.26.60
Description The product indicates when the maintenance kit is very low. The actual remaining maintenance kit life might vary. You do not need to replace the maintenance kit at this time unless print quality is no longer acceptable.
NOTE: After an HP supply has reached the very low threshold, the HP premium protection warranty ends.
Recommended action
If print quality is no longer acceptable, replace the maintenance kit. See the parts chapter in the service manual for the maintenance kit part number.
TIP: Advise the customer that HP recommends that they have replacement supplies available to install when the print quality is no longer acceptable.
10.XX.34 Used Supply In Use
Description The print cartridge is used.
10.00.34 (event code) Black print cartridge
Recommended action If you believe this is a genuine HP supply, go to http://www.hp.com/go/anticounterfeit.
NOTE: Removing a cartridge from one product and then installing it in a different product (for testing functionality) will cause this event code.
10.XX.40 Genuine HP Supplies Installed
Description A genuine HP print cartridge has been installed.
10.00.40 (event code) Black print cartridge
Recommended action No action necessary.
10.XX.41 Unsupported Supply In Use
Description The installed print cartridge is for a different product.
10.00.41 (event code) Black print cartridge
Recommended action Remove the print cartridge, and then install the correct cartridge for this product.
TIP: See the parts chapter in the service manual for the correct cartridge part number.
10.XX.70 Printing past very low
Description The product indicates when a supply level is very low. The actual remaining print cartridge life might vary. You do not need to replace the print cartridge at this time unless print quality is no longer acceptable.
NOTE: After an HP supply has reached the very low threshold, the HP premium protection warranty ends.
10.00.70 (event code) Black print cartridge
Recommended action If print quality is no longer acceptable, replace the print cartridge. See the parts chapter in the service manual for the correct cartridge part number.
TIP: Advise the customer that HP recommends that they have replacement supplies available to install when the print quality is no longer acceptable.
10.YY.15 Install <supply>
Description The indicated supply has been removed or installed incorrectly.
10.00.15 (event code) Black print cartridge
10.23.15 Fuser kit
Recommended action Replace or install the indicated supply. See the parts chapter in the service manual for the correct supply or kit part number.
10.YY.35 Incompatible <supply>
Description The indicated supply is not compatible with this product.
10.00.35 (event code) Black print cartridge
10.23.35 (event code) Fuser
Recommended action CAUTION: The fuser might be hot. Be careful when removing the fuser. Install a supply that is designed for this product. See the parts chapter in the service manual for the correct supply part number.
11.00.YY Internal clock error
Description The product real time clock has experienced an error.
◦ 01=dead clock
◦ 02=dead real time clock
Recommended action Whenever the product is turned off and then turned on again, set the time and date at the control panel. If the error persists, you might need to replace the formatter.
13.00.00
Description Generic jam event code.
Recommended action Check the product for a jam. See the clear jams section in the service manual.
13.00.EE
Description Unknown door open
Recommended action make sure that all of the doors and covers are closed.
13.A3.FF
Description Power on jam at the Tray 3 feed sensor.
Recommended action Check the product for a jam. See the clear jams section in the service manual.
13.D3.DZ
Description Late to duplex re-feed jam
◦ 13.D3.D1 (event code)
◦ 13.D3.D2 (event code)
◦ 13.D3.D3 (event code)
◦ 13.D3.D4 (event code)
◦ 13.D3.D5 (event code)
◦ 13.D3.D6 (event code)
◦ 13.D3.DD (event code)
◦ 13.D3.DE (event code)
Recommended action Check the product for a jam. See the clear jams section in the service manual.
13.E5.FF
Description A power on jam has occurred.
Recommended action Check the product for a jam. See the clear jams section in the service manual.
13.EA.EE
Description A door jam has occurred.
Recommended action Check the product for a jam. See the clear jams section in the service manual. Use the component test to isolate a faulty door switch or sensor.
13.EE.FF
Description A power on jam has occurred.
Recommended action Check the product for a jam. See the clear jams section in the service manual.
13.FF.EE
Description A door jam has occurred.
Recommended action Check the product for a jam. See the clear jams section in the service manual. Use the Manual sensors test or Tray/Bin manual sensors test to isolate a faulty door switch or sensor.
13.FF.FF
Description A power on residual paper jam has occurred (sensor).
Recommended action Check the product for a jam. See the clear jams section in the service manual. Use the Manual sensors test or Tray/Bin manual sensors test to isolate a faulty door switch or sensor.
13.WX.EE
Description This jam occurs when a door is opened during printing.
Recommended action Make sure that the doors are fully closed.
13.WX.FF
Description Power on residual paper jam This jam occurs when the paper exists at any of the paper path jam sensors at power on or door close. Due to the current FW timing requirements, the displayed jam code is always 13.FF.FF, only the event log will have 13.WX.FF
Recommended action Clear the jam. See the clear jams section in the service manual.
13.WX.YZ Fuser Area Jam
Description A jam in the fuser area has occurred.
Recommended action Clear the jam. See the clear jams section in the service manual. Make sure media is within specifications, check for obstructions in the fuser, check that the T2 roller is installed properly.
13.WX.YZ Fuser wrap jam
Description Recommended action Clear the jam. See the clear jams section in the service manual.
13.WX.YZ Jam below control panel
Description
13.B2.9Z (event code)
Page at duplex switchback jam.
Z = the source tray number
Recommended action Check the product for a jam. See the clear jams section in the service manual.
13.WX.YZ Jam in Tray 1
Description
13.B2.D1 (event code)
Late to registration jam, from Tray 1
This jam occurs when the paper does not reach the TOP sensor in designated amount of time from the start of paper pickup at printing from Tray 1 and duplex printing.
Recommended action Clear the jam. See the clear jams section in the service manual.
13.B2.D2 Late to registration jam, Tray 2
13.B2.D3 Late to registration jam, Tray 3
Note: Same as above.
13.WX.YZ Jam in Tray <X>
Description A misfeed jam has occurred.
Recommended action Clear the jam. See the clear jams section in the service manual.
13.WX.YZ Jam inside envelope feeder
Description A jam exists inside the envelope feeder.
Recommended action Clear the jam. See the clear jams section in the service manual.
13.WX.YZ Jam inside top cover
Description A jam exists inside the top cover.
Recommended action Clear the jam. See the clear jams section in the service manual.
14.00.XX
Description A feed roller error has occurred.
◦ 14.00.01 (event code)
◦ 14.00.02 (event code)
◦ 14.00.03 (event code)
◦ 14.00.04 (event code)
◦ 14.00.05 (event code)
◦ 14.00.06 (event code)
Recommended action Check the product and accessories feed rollers for dirt or damage. Clean or replace the rollers as necessary.
20.00.00 Insufficient memory: <Device> To continue, touch “OK”
Description The product has experienced a memory error. You might have tried to transfer too many fonts or macros.
Recommended action Touch the OK button to print the transferred data (some data might be lost), and then simplify the print job or install additional memory.
21.00.00 Page Too Complex
Description The page decompression process was too slow for the printer.
Recommended action Touch the OK button to continue printing (some data might be lost).
32.08.AX
Description
◦ 32.08.A1 (event code)
Shutdown event
◦ 32.08.A2 (event code)
Boot from normal shutdown event
◦ 32.08.A3 (event code)
Boot from abnormal shutdown event
Recommended action No action necessary.
32.1C.XX
Description
◦ 32.1C.01 (event code)
NVRAM backup/restore service backup started
◦ 32.1C.02 (event code)
NVRAM backup/restore service restore started
◦ 32.1C.03 (event code)
NVRAM backup/restore administrator backup started
◦ 32.1C.04 (event code)
NVRAM backup/restore administrator restore started
◦ 32.1C.05 (event code)
Backup/restore complete
◦ 32.1C.06 (event code)
Data model failed to clone job ticket
◦ 32.1C.07 (event code)
Backup restore permissions error
◦ 32.1C.08 (event code)
Not enough disk space to perform backup/restore or network share issue
◦ 32.1C.09 (event code)
Tried to restore a backup file that was not valid for this product
◦ 32.1C.0A (event code)
Backup file is invalid
◦ 32.1C.0B (event code)
Backup is from newer version of FW than what is currently on the product
◦ 32.1C.0C (event code)
Backup cancelled from the HP Embedded Web Server
◦ 32.1C.0D (event code)
Backup/restore failed, auto-reboot failed, or the product might be busy
◦ 32.1C.0E (event code)
Backup/restore timeout while communicating with the formatter
◦ 32.1C.0F (event code)
Backup/restore timeout while communicating with the finisher firmware
◦ 32.1C.10 (event code)
Backup/restore timeout while communicating with the scanner firmware
◦ 32.1C.11 (event code)
Backup/restore timeout while communicating with the engine
◦ 32.1C.12 (event code)
Backup/restore timeout while communicating with the disk
◦ 32.1C.13 (event code)
Scheduled backup failure
◦ 32.1C.14 (event code)
NVRAM restore timeout while communicating with the formatter
◦ 32.1C.15 (event code)
NVRAM restore timeout while communicating with the finisher firmware
◦ 32.1C.16 (event code)
NVRAM restore timeout while communicating with the scanner firmware
◦ 32.1C.17 (event code)
NVRAM restore timeout while communicating with the engine
◦ 32.1C.18 (event code)
Backup of copy subsystem failed
◦ 32.1C.19 (event code)
Backup of fax subsystem failed
◦ 32.1C.1A (event code)
Backup of digital send subsystem failed
◦ 32.1C.1B (event code)
Backup of print subsystem failed
◦ 32.1C.1C (event code)
Backup of networking subsystem failed
◦ 32.1C.1D (event code)
Backup of finishing subsystem failed
◦ 32.1C.1E (event code)
Restore of copy subsystem failed
◦ 32.1C.1F (event code)
Restore of fax subsystem failed
◦ 32.1C.20 (event code)
Restore of digital send subsystem failed
◦ 32.1C.21 (event code)
Restore of print subsystem failed
◦ 32.1C.22 (event code)
Restore of networking subsystem failed
◦ 32.1C.24 (event code)
NVRAM backup/restore successful
◦ 32.1C.25 (event code)
Reset of copy subsystem failed
◦ 32.1C.26 (event code)
Reset of fax subsystem failed
◦ 32.1C.27 (event code)
Reset of digital send subsystem failed
◦ 32.1C.28 (event code)
Reset of print subsystem failed
◦ 32.1C.29 (event code)
Reset of networking subsystem failed
◦ 32.1C.2A (event code)
Reset of finishing subsystem failed
◦ 32.1C.2B (event code)
Reset formatter timeout
◦ 32.1C.2C (event code)
Reset finisher timeout
◦ 32.1C.2D (event code)
Reset scanner timeout
◦ 32.1C.2E (event code)
Reset engine timeout
◦ 32.1C.2F (event code)
Reset failure
Recommended action
◦ 32.1C.01 (event code)
No action necessary
◦ 32.1C.02 (event code)
No action necessary
◦ 32.1C.03 (event code)
No action necessary
◦ 32.1C.04 (event code)
No action necessary
◦ 32.1C.05 (event code)
No action necessary
◦ 32.1C.06 (event code)
Retry
◦ 32.1C.07 (event code)
Retry
◦ 32.1C.08 (event code)
Remove stored jobs and retry
Use larger capacity storage device
Check network share
◦ 32.1C.09 (event code)
Use a valid backup file
◦ 32.1C.0A (event code)
Use a valid backup file
Reboot and observe state of product
Do a partition clean using the Preboot menu.
◦ 32.1C.0B (event code)
Use a valid backup file or put correct firmware version on the product.
◦ 32.1C.0C (event code)
No action necessary
◦ 32.1C.0D (event code)
Reboot and then retry the backup/restore
◦ 32.1C.0E (event code)
Turn the product off then on and retry
◦ 32.1C.0F (event code)
Turn the product off then on and retry
◦ 32.1C.10 (event code)
Turn the product off then on and retry
◦ 32.1C.11 (event code)
Turn the product off then on and retry
◦ 32.1C.12 (event code)
Turn the product off then on and retry
◦ 32.1C.13 (event code)
Turn the product off then on and retry
◦ 32.1C.14 (event code)
Turn the product off then on and retry
◦ 32.1C.15 (event code)
Turn the product off then on and retry
◦ 32.1C.16 (event code)
Turn the product off then on and retry
◦ 32.1C.17 (event code)
Turn the product off then on and retry
◦ 32.1C.18 (event code)
Turn the product off then on and retry
◦ 32.1C.19 (event code)
Turn the product off then on and retry
◦ 32.1C.1A (event code)
Turn the product off then on and retry
◦ 32.1C.1B (event code)
Turn the product off then on and retry
◦ 32.1C.1C (event code)
Turn the product off then on and retry
◦ 32.1C.1D (event code)
Turn the product off then on and retry
◦ 32.1C.1E (event code)
Turn the product off then on and retry
If the error persists, clear the firmware image from the active partition by using the Partial Clean item in the Preboot menu.
◦ 32.1C.1F (event code)
Turn the product off then on and retry
If the error persists, clear the firmware image from the active partition by using the Partial Clean item in the Preboot menu.
◦ 32.1C.20 (event code)
Turn the product off then on and retry
If the error persists, clear the firmware image from the active partition by using the Partial Clean item in the Preboot menu.
◦ 32.1C.21 (event code)
Turn the product off then on and retry
If the error persists, clear the firmware image from the active partition by using the Partial Clean item in the Preboot menu.
◦ 32.1C.22 (event code)
Turn the product off then on and retry
If the error persists, clear the firmware image from the active partition by using the Partial Clean item in the Preboot menu.
◦ 32.1C.24 (event code)
Turn the product off then on and retry.
◦ 32.1C.25 (event code)
Turn the product off then on and retry.
◦ 32.1C.26 (event code)
Turn the product off then on and retry.
◦ 32.1C.27 (event code)
Turn the product off then on and retry.
◦ 32.1C.28 (event code)
Turn the product off then on and retry.
◦ 32.1C.29 (event code)
Turn the product off then on and retry.
◦ 32.1C.2A (event code)
Turn the product off then on and retry.
◦ 32.1C.2B (event code)
Turn the product off then on and retry.
◦ 32.1C.2C (event code)
Turn the product off then on and retry.
◦ 32.1C.2D (event code)
Turn the product off then on and retry.
◦ 32.1C.2E (event code)
Turn the product off then on and retry.
◦ 32.1C.2f (event code)
Turn the product off then on and retry.
32.21.00
Description Corrupt firmware in external accessory
Recommended action Turn the product off, then on, and retry.
If the error persists, clear the firmware image from the active partition by using the Partial Clean item in the Preboot menu
33.01.XX
Description
◦ 33.01.01 (event code)
A restore process has occurred.
◦ 33.01.02 (event code)
A save process has occurred.
Recommended action No action necessary.
33.XX.YY Used board/disk
Description An encrypted board or disk with existing data previously locked to a different product has replaced the original. If you continue, data is permanently lost.
Recommended action To save the data on the board or disk, turn the product off. Replace the board or disk with another board or disk.
To delete the data on the board or disk and continue, touch the OK button.
40.00.01 USB I/O buffer overflow To continue, touch “OK”
Description The USB buffer has overflowed.
Recommended action Touch the OK button to print the transferred data (some data might be lost). Check the host configuration.
40.00.02 Embedded I/O buffer overflow To continue, touch “OK”
Description The product has experienced a JetDirect buffer overflow.
Recommended action Touch the OK button to print the transferred data (some data might be lost). Check the host configuration.
40.00.05 Embedded I/O bad transmission To continue, touch “OK”
Description The USB device has been removed.
Recommended action Touch the OK button to clear the error message. (Data will be lost.) Install the USB device.
41.02.00 Error
Description A beam detected misprint error.
Recommended action Turn the product off, and then on. If the error persists, replace the laser/scanner assembly.
41.03.YZ Unexpected size in envelope feeder To use another tray, touch “Options”
Description The product detected a different paper size than expected.
◦ Y = 0
Size mismatch. Detected media is longer or shorter than expected.
◦ Y = A
Size mismatch. Detected media too long.
◦ Y = B
Size mismatch. Detected media too short.
◦ Y = C
Size mismatch. Inter-page gap error.
◦ Z = D
Source is duplexer
◦ Z = E
Source is envelope feeder
◦ Z = 2
◦ Z = 3
Source is Tray 3
◦ Z = 4
Source is Tray 4
◦ Z = 5
Source is Tray 5
Recommended action Make sure that the feeder is loaded with the correct paper size and that the sliding paper guides are correctly adjusted. Use the Tray/Bin manual sensor test to verify that the envelope feeder paper sensor (PS1802) is correctly functioning.
If the error persists, replace the envelope feeder.
41.03.YZ Unexpected size in tray <X>
Description The product detected a different paper size than expected.
◦ Y = 0
Size mismatch. Detected media is longer or shorter than expected.
◦ Y = A
Size mismatch. Detected media too long.
◦ Y = B
Size mismatch. Detected media too short.
◦ Y = C
Size mismatch. Inter-page gap error.
◦ Z = D
Source is duplexer
◦ Z = E
Source is envelope feeder
◦ Z = 1
Source is Tray 1
Z = 2
Source is Tray 2
◦ Z = 3
Source is Tray 3
◦ Z = 4
Source is Tray 4
◦ Z = 5
Source is Tray 5
Recommended action Make sure that the tray is loaded with the correct paper size and that the sliding paper guides are correctly adjusted. Use the Tray/Bin manual sensor test to verify that the cassette media switch is correctly functioning. If the error persists, replace the lifter assembly.
41.05.YZ Unexpected type in tray <X>
Description The product detected a different paper type than expected.
◦ Y = 0 (expected type)
Unknown
◦ Y = 1 (expected type)
Normal media
◦ Y = 3 (expected type)
LBP OHT
◦ Y = 6 (expected type)
Non-assured OHT
◦ Y = 7 (expected type)
Heavy media
◦ Y = 8 (expected type)
Light media
◦ Y = 9 (expected type)
Rough media
◦ Y = C (expected type)
Heavy media 3
◦ Y = D (expected type)
Heavy media 2
◦ Z = 1 (detected type)
Normal media
◦ Z = 3 (detected type)
LBP OHT
◦ Z = 6 (detected type)
Non-assured OHT
◦ Z = 7 (detected type)
Heavy media
◦ Z = 8 (detected type)
Light media
◦ Z = 9 (detected type)
Rough media
◦ Z = B (detected type)
Heavy glossy media (glossy media 2)
◦ Z = C (detected type)
Heavy media 3
◦ Z = D (detected type)
Heavy media 2
Recommended action Load the tray with the size and type of paper indicated, or use another tray if available. If this message appears and the tray is loaded with the correct paper type, check the print driver settings to make sure they match the tray type settings.
Clean the Media Sensor. If the error persists, replace the paper pickup assembly.
41.XX.YZ Error To continue, touch “OK”
Description A product error has occurred.
◦ XX = error type
◦ Y = fuser mode
◦ Z = input tray
◦ XX = 02
Beam detect misprint
◦ XX = 09
Sub thermistor abnormally high
◦ XX = 18
Scan line inclination adjustment
◦ XX = 20
Image drum HV
◦ Y = 2
Normal typed (not AutoSense)
◦ Y = 3)
Light media 1, 2, 3: typed or AutoSense
◦ Y = 4
Heavy media 1: typed or AutoSense
◦ Z = 0
Envelope feeder
◦ Z = 1
Tray 1
◦ Z = 2
Tray 2
◦ Z = 3
Tray 3
◦ Z = 4
Tray 4
◦ Z = 5
Tray 5
◦ Z = 6
Tray 6
◦ Z = D
Duplexer
Recommended action Turn the product off, and then on.
If the error persists, replace the DC controller PCA.
42.XX.YY
Description Internal system failure
Recommended action Turn the product of,f then on, and retry.
If the error persists, clear the firmware image from the active partition by using the Partial Clean item in the Preboot menu.
47.00.XX
Description Back channel internal error
Recommended action Turn the product off, and then on again. Resend the print job. If the error persists, execute the Partial Clean item in the Preboot menu.
47.01.XX
Description Image transformer internal error
Recommended action Turn the product off, and then on again. Resend the print job. If the error persists, execute the Partial Clean item in the Preboot menu.
47.02.XX
Description Job parser internal error
Recommended action Turn the product off, and then on again. Resend the print job. If the error persists, execute the Partial Clean item in the Preboot menu.
47.03.XX
Description Print job internal error
Recommended action Turn the product off, and then on again. Resend the print job. If the error persists, execute the Partial Clean item in the Preboot menu.
47.04.XX
Description Print spooler 9100 internal error
Recommended action Turn the product off, and then on again. Resend the print job. If the error persists, execute the Partial Clean item in the Preboot menu.
47.05.00
Description Print spooler framework internal error
Recommended action Turn the product off, and then on again. Resend the print job. If the error persists, execute the Partial Clean item in the Preboot menu.
47.06.XX
Description Print App internal error
Recommended action Turn the product off, and then on again. Resend the print job. If the error persists, execute the Partial Clean item in the Preboot menu.
47.WX.YZ Printer Calibration Failed To continue, touch “OK”
Description The device is unable to access or implement one of the image patterns files.
Y = calibration type, Z = event
◦ 47.FC.20 (event code)
Error Diffusion Image not found at system initialization
◦ 47.FC.21 (event code)
Error Diffusion Store image failure
◦ 47.FC.22 (event code)
Error Diffusion Image not found
◦ 47.FC.23
Error Diffusion Print engine execution failure
◦ 47.FC.300 (event code)
Drum Speed Adjustment Image not found at system initialization
◦ 47.FC.31 (event code)Drum Speed Adjustment Store image failure
◦ 47.FC.32 (event code)
Drum Speed Adjustment Image not found
◦ 47.FC.33 (event code)
Drum Speed Adjustment Print engine execution failure
◦ 47.FC.40 (event code)
Pulse Width Modulation Image not found at system initializatione
◦ 47.FC.41 (event code)
Pulse Width Modulation Store image failure
◦ 47.FC.42 (event code)
Pulse Width Modulation Image not found
◦ 47.FC.43 (event code)
Pulse Width Modulation Print engine execution failure
Recommended action Turn the product off, and then on. If the error persists, reload the firmware.
49.XX.YY To continue turn off then on
Description A firmware error has occurred.
Recommended action
- Turn the product off, and then on.
- If the error returns, check the following:
- The error might be caused by a network connectivity problem.
- Damaged interface cable
- Damaged USB port
- Invalid network configuration setting
- The error might be caused by the print job.
- Invalid printer driver
- Problem with the software application
- Problem with the file
- If the error persists, perform a firmware upgrade.
50.WX.YZ Fuser error To continue turn off then on
Description
The fuser has experienced an error.
W = fuser error code, X = fuser mode, Y = previous printer sleep state, Z = next printer sleep state
Recommended action
W = 2
Fuser warm up failure
- Reconnect the connector (J128) between the fuser and the DC controller PCA.
- Turn the product off. Remove the fuser and then reinstall it. If the error persist, replace the fuser.
- If the error persists, replace the low-voltage power supply.
W = 3
Low temperature thermistor 1
- Reinstall the fuser. Check the connector (J128) between the fuser and the product. If it is damaged, replace the fuser.
- Reconnect the connector (J82) on the DC controller PCA.
- Replace the fuser.
- W = 2: Reconnect the connector (J62) on the low-voltage power supply PCA.
- If the error persists, replace the low-voltage power supply.
W = 4
High temperature thermistor 1
- Reinstall the fuser. Check the connector (J128) between the fuser and the product. If it is damaged,
replace the fuser.
- Reconnect the connector (J82) on the DC controller PCA.
- Replace the fuser.
- If the error persists, replace the low-voltage power supply.
W = 6
Drive circuit fault
- Check the power source. Make sure the power source meets product requirements.
NOTE: If the power source does not meet the power frequency requirement of 40 to 70Hz, the
fuser temperature control does not work properly and causes this error.
- Reconnect connectors J51, J52, J53, and J162 and DC controller PCA connectors J85, J95, and J96.
- If the error persists, replace the low-voltage power supply.
W = 10
Low temperature thermistor 2
- Reinstall the fuser. Check the connector (J128) between the fuser and the product. If it is damaged,
replace the fuser.
- Reconnect the connector (J62) on the low-voltage power supply PCA.
- If the error persists, replace the low-voltage power supply.
W = 11
High temperature thermistor 2
- Reinstall the fuser. Check the connector (J128) between the fuser and the product. If it is damaged,
replace the fuser.
- Reconnect the connector (J62) on the low-voltage power supply PCA.
- If the error persists, replace the low-voltage power supply.
W = 12
Fuser pressure release mechanism failure
- Reconnect the fuser connector (J128) and the DC controller PCA connector (J62).
- Check the fuser pressure release sensor flag. If the flag is damaged or not properly working, replace the fuser.
- Reconnect the fuser motor connector (J221) and the DC controller PCA connector (J89).
- Use the Component Test item in the Troubleshooting menu to test the fuser motor. If the motor fails the test, replace the fuser motor.
- If the error persists replace the fuser.
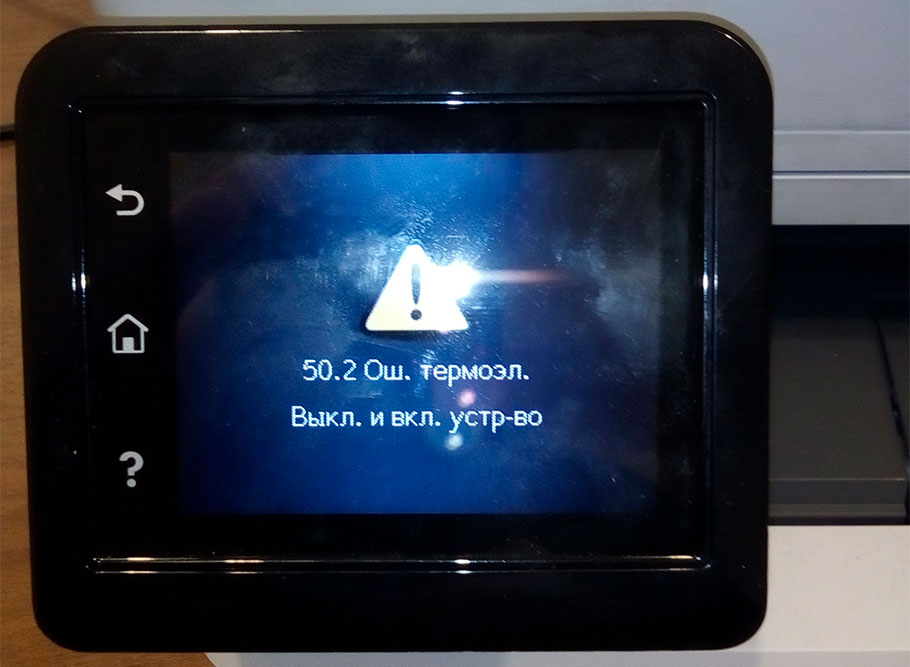
50.22.xx See This article for troubleshooting steps
51.00.YY Error
Description Laser/scanner error
◦ YY = 20
Black laser/scanner error
Recommended action
- Reconnect connector (J145) on the laser/scanner.
- Reconnect connectors (J86 and J93) on the DC controller.
- If the error persists, replace the laser/scanner.
52.XX.00 Error To continue turn off then on
Description Laser/scanner error
◦ XX = 00
laser/scanner motor startup error
◦ XX = 20
Laser/scanner rotation error
Recommended action
- Reconnect connector (J145) on the laser/scanner.
- Reconnect connectors (J86 and J93) on the DC controller.
- Use the scanner motor (M108) drive test in the component test to verify that the scanner motor is properly functioning. If it is not, replace the laser/scanner.
NOTE: Listen for a high pitched whine from the motor.
- If the error persists, replace the laser/scanner.
54.XX.YY Error
Description
A sensor error has occurred.
Recommended action
54.00.03
Environmental sensor (TH3) failure
- Turn the product off, and then reconnect the connector (J63) on the DC controller PCA. Turn the
product on.
- If the environment sensor has been removed or replaced, check the connector (J199) on the
environment sensor and the connector (J63) on the DC controller PCA.
- If the error persists, replace the environment sensor assembly.
54.06.21
Primary laser/scanner beam detect abnormality
- Turn the product off, and then on.
- If the product has had parts removed or replace, check the connector (J93) on the DC controller PCA.
- If the error persists, replace the laser/scanner assembly.
55.00.YY DC controller error To continue turn off then on
Description DC controller PCA error
◦ 55.00.01 (event code)
DC controller memory error
◦ 55.00.03 (event code
DC controller no engine response
◦ 55.00.04 (event code
DC controller communications timeout
Recommended action Turn the product off, and then on. If the error persists, replace the DC controller PCA.
55.0X.YY DC controller error To continue turn off then on
Description DC controller PCA error
◦ 55.01.06 (event code)
NVRAM memory data error warning
◦ 55.02.06 (event code)
NVRAM memory access error warning
Recommended action Turn the product off, and then on.
If the error persists, replace the DC controller PCA.
56.00.YY Error To continue turn off then on
Description Optional paper trays communication error
Recommended action Turn the product off, and then on. If the error persists, reseat the optional paper trays (1 x 500-sheet feeder and/or 3 x 500-sheet feeder). Check the input connectors for damage. If a connector is damaged, replace the connector.
57.00.0Y Error To continue turn off then on
Description Fan error
Recommended action
57.00.03
Main fan (FN101) failure
- Turn the product off, and then on. Listen for fan noise at the back corner of the product. If no noise is heard, replace the power supply fan (FN101).
- If the fan has been removed or replaced, check the connector (J64) on the DC controller PCA.
- If the error persists, replace the main fan (FN101).
57.00.04
Laser/scanner fan (FN102) failure
- If this part has been removed or replace, check the connector (J75) on the DC controller PCA.
- If the error persists, replace the laser/scanner fan (FN102).
57.00.06
Cartridge fan (FN301) failure
- If this part has been removed or replace, check the connector (J95) on the DC controller PCA.
- If the fan has been removed or replaced, check the connector (J66) on the DC controller PCA.
- If the error persists, replace the cartridge fan (FN301).
57.00.05
Cartridge front-side fan (FN103) failure
- Turn the product off, and then on. Listen for fan noise at the middle back of the product. If no noise
is heard, replace the cartridge front-side fan (FN103).
- If the fan has been removed or replaced, check the connector (J79) on the DC controller PCA.
- If the error persists, replace the cartridge front-side fan (FN103).
57.00.07
Duplex fan (FN107) failure
- Turn the product off, and then on. Listen for fan noise at the left side of the product. If no noise is
heard, replace the duplex fan (FN107).
- If the fan has been removed or replaced, check the connector (J64) on the DC controller PCA.
- If the error persists, replace the duplexer.
58.00.0Y Error To continue turn off then on
Description A sensor error has occurred.
Recommended action
58.00.05
Environmental sensor (TH3) failure
- Turn the product off.
- If this part has been removed or replace, check the connector (J63) on the DC controller PCA.
- If the error persists, replace the environmental sensor (TH3).
58.00.03
DC controller CPU failure
- Turn the product off.
- Check all of the connectors on the DC controller PCA.
- If the error persists, replace the DC controller PCA.
58.00.04
LVPS failure
- Turn the product off.
- If this part has been removed or replace, check the connector (J50) on the LVPS, and then check
the connector (J85 and J95) on the DC controller PCA.
- If the error persists, replace the LVPS.
59.00.YY error To continue turn off then on
Description A motor error has occurred.
◦ YY = 00
Paper path malfunction
Recommended action
59.00.20 or 59.00.30
Feed motor (M101) failure (start-up or rotational)
- Reconnect the connector (J191) on the feed motor and the connector (J91) on the DC controller PCA.
- Use the feed motor (M101) drive test in the Component test to verify that the motor is properly functioning. If is not, replace the feed motor (M101).
59.00.40 or 59.00.50
Fuser motor (M299) failure (start-up or rotational)
- Reconnect the connector (J221) on the feed motor and the connector (J89) on the DC controller PCA.
- Use the fuser motor (M299) drive test in the Component test to verify that the motor is properly functioning. If it is not, replace the fuser motor (M299).
59.00.60 or 59.00.70
Drum motor (M102) failure (start-up or rotational)
- Reconnect the connector (J187) on the drum motor and the connector (J87) on the DC controller PCA.
- Use the drum motor (M102) drive test in the Component test to verify that the motor is properly functioning. If it is not, replace the drum motor (M102).
59.A2.0x Error
Description A product error has occurred.
Recommended action
59.A2.02 or 59.A2.11
Lifter driver assembly Tray 2 failure
- Use the Tray/Bin manual sensor test to verify that the Tray 2 paper (PS107 and PS907) surface sensors are properly functioning.
- If this part has been removed or replace, check the connector (J73 and J94) on the on the DC controller PCA.
- Check the media stack surface sensor lever and place it in the correct position to move smoothly. Replace the media stack surface sensor lever if it is damaged.
- If the error persists, replace the lifter drive assembly (Tray 2).
59.A2.12 to 59.A2.15
Lifter driver assembly Tray 3 to 6 motor failure
- Reconnect the connectors (J1605 and J1608) on the paper feeder drive PCA.
- Reconnect the connectors (J1703 and J1707) on the paper cassette drive PCA.
- Replace the sheet feeder media stack surface sensor.
- If the error persists, replace the lifter motor for the specific sheet feeder.
60.00.0Y Tray <Y> lifting error
Description A tray lift motor error has occurred.
Recommended action
60.00.02
Lifter driver assembly Tray 2 failure
- Use the Tray/Bin manual sensor test to verify that the Tray 2 paper (PS107 and PS907) surface sensors are properly functioning.
- If this part has been removed or replace, check the connector (J73 and J94) on the on the DC controller PCA.
- Check the media stack surface sensor level and place it in the correct position to move smoothly.
Replace the sensor lever if it is damaged.
- Replace the media stack surface sensor.
- If the error persists, replace the lifter drive assembly (Tray 2).
60.00.12 to 60.00.15
Lifter driver assembly Tray 3 failure
- Use the Tray/Bin manual sensor test to verify that the Tray 3 paper (SR1 and SR2) surface sensors
are properly functioning.
- If this part has been removed or replace, check the connector (1605 and 1608) on the on the
paper feeder controller PCA.
- Reconnect the connectors (J1703 and J1707) on the sheet feeder PCA.
- Replace the sheet feeder media stack surface sensor.
- If the error persists, replace the lifter drive assembly (Tray 3-6).
62.00.00 No system To continue turn off then on
Description Internal system failure
Recommended action Turn the product off, and then on.
If the error persists, reload the firmware. If the error still persists, perform a firmware upgrade.
If the firmware upgrade does not resolve the problem, replace the hard disk.
65.X0.A1 Output accessory disconnected
Description
An external paper handling accessory connection has been interrupted.
Recommended action
- Turn the product off.
- Make sure that all packing materials have been removed from the paper handling accessory.
- Check the paper path for obstructions, or jammed paper.
- Check the accessory cable connection.
- Turn the product on. If the error persists, replace the accessory.
66.80.YY Stapler/Stacker failure
Description An external paper handling accessory error has occurred.
◦ 66.80.01 (event code)
Y-align malfunction
◦ 66.80.02 (event code)
Jogger malfunction
◦ 66.80.03 (event code)
Stapler malfunction
◦ 66.80.21 (event code)
Lift up malfunction
◦ 66.80.22 (event code)
Lift down malfunction
◦ 66.80.23 (event code)
Lift sensor malfunction
◦ 66.80.33 (event code)
Output roller malfunction
◦ 66.80.35 (event code)
Self priming malfunction
◦ 66.80.51 (event code)
System error (FW error)
◦ 66.80.55 (event code)
System error 5 (FW error)
◦ 66.80.56 (event code)
System error 6 (FW error)
◦ 66.80.57 (event code)
System error 7 (FW error)
◦ 66.80.58 (event code)
System error 8 (FW error)
◦ 66.80.59 (event code)
System error 9 (FW error)
◦ 66.80.60 (event code)
System error 10 (inter-page delay mismatch)
◦ 66.80.61 (event code)
System error 11 (lifter task trouble)
◦ 66.80.62 (event code)
System error 12 (inter-page delay mismatch)
◦ 66.80.63 (event code)
System error 13 (FW error)
◦ 66.80.64 (event code)
System error 14 (FW error)
◦ 66.80.65 (event code)
System error 15 (FW error)
◦ 66.80.70 (event code)
Page-info in flush
◦ 66.80.71 (event code)
Flush request in PDLV
◦ 66.80.72 (event code)
Delivery notice error
◦ 66.80.73 (event code)
Flush request in checking paper path
◦ 66.80.74 (event code)
Checking paper path start in PDLV
◦ 66.80.75 (event code)
Flush request in flush
◦ 66.80.76 (event code)
Non-flush complete
Recommended action
Turn the product off, and then on.
If the error persists, replace the paper handling device.
69.11.YY Error To continue turn off then on
Description Duplexer error
Recommended action
Turn the product off, and then on.
If the error persists, replace the duplexer.
70.00.00 Error To continue turn off then on
Description DC controller failure
Recommended action Turn the product off, and then on. If the error persists, replace the DC controller.
79.XX.YY Error To continue turn off then on
Description
This error can be caused by corrupted print jobs, software application issues, non-product specific
printer drivers, poor-quality USB or network cables, bad network connections or incorrect network
configurations, invalid firmware operations, or unsupported accessories.
Recommended action
- Turn the product off, and then on.
- If the error persists, check the following:
- The error might be caused by a network connectivity problem, such as a bad interface cable,
a bad USB port, or an invalid network configuration setting.
- The error might be caused by the print job, an invalid print driver, a problem with the
software application, or a problem with the file you are printing.
Make sure you are using the correct printer driver. Try printing using a different software
application. Try printing a different file or print job.
- Upgrading the product firmware might resolve the problem.
80.0X.YY Embedded JetDirect error
Description Embedded HP JetDirect print server critical error
◦ 80.01.80 (event code)
No heartbeat
◦ 80.01.81 (event code)
Reclaim timeout
◦ 80.01.82 (event code)
Invalid data length
◦ 80.01.8B (event code)
Invalid max outstanding packet header field
◦ 80.01.8C (event code)
Invalid channel mapping response
◦ 80.03.01 (event code)
No PGP buffers
◦ 80.03.02 (event code)
Channel table full
◦ 80.03.03 (event code)
Producer index not reset
◦ 80.03.04 (event code)
Consumer index not reset
◦ 80.03.05 (event code)
Queue position size too small
◦ 80.03.06 (event code)
Transport overflow
◦ 80.03.07 (event code)
No overflow packets
◦ 80.03.08 (event code)
Invalid identify response
◦ 80.03.09 (event code)
Invalid channel map return status
◦ 80.03.1080.03.10 (event code)
Invalid reclaim return status
◦ 80.03.12 (event code)
Datagram invalid buffer
◦ 80.03.13 (event code)
Max stream channels
◦ 80.03.14 (event code)
Max datagram channels
◦ 80.03.15 (event code)
Card reset failed
◦ 80.03.16 (event code)
Self test failure
◦ 80.03.17 (event code)
Unknown PGP packet
◦ 80.03.18 (event code)
Duplicate I/O channel.
Recommended action
Turn the product off, and then on.
If the error persists, replace the formatter.
81.YY.ZZ EIO-1 Card Failure
Description An EIO error has occurred.
◦ 81.01.80 (event code)
No heartbeat
◦ 81.01.81 (event code)
Reclaim timeout
◦ 81.01.82 (event code)
Invalid data length
◦ 81.01.8B (event code)
Invalid max outstanding
◦ 81.01.8C (event code)
Invalid channel mapping
◦ 81.03.01 (event code)
No PGP buffers
◦ 81.03.02 (event code)
Channel table full
◦ 81.03.03 (event code)
Producer index not reset
◦ 81.03.04 (event code)
Consumer index not reset
◦ 81.03.05 (event code)
Queue position size
◦ 81.03.06 (event code)
Transport overflow
◦ 81.03.07 (event code)
No overflow packets
◦ 81.03.08 (event code)
Invalid identify response
◦ 81.03.09 (event code)
Invalid channel map return
◦ 81.03.10 (event code)
Invalid reclaim return status
◦ 81.03.12 (event code)
Datagram invalid buffer
◦ 81.03.13 (event code)
Max stream channels
◦ 81.03.14 (event code)
Max datagram channels
◦ 81.03.15 (event code)
Card reset failed
◦ 81.03.16 (event code)
Self test failure
◦ 81.03.17 (event code)
Unknown PGP packet
◦ 81.03.18 (event code)
Duplicate I/O channel
Recommended action
Turn the product off, and then on.
If the error persists, replace the EIO device..
82.73.46 OR 82.73.47
Description A hard disk or compact flash disk cleaning failed. Usually caused by a failure of the disk hardware.
Recommended action
- Turn the product off, and then on.
- Use the Clean Disk item in the Preboot menu.
- Reload the firmware.
98.00.01 Corrupt data in firmware volume
Description
Data corruption has occurred in the firmware volume
Recommended action
Turn the product off, and then on.
Use the Clean Disk item in the Preboot menu.
Reload the firmware.
98.00.02 Corrupt data in solutions volume
Description Data corruption has occurred in the solutions volume
Recommended action Turn the product off, and then on. Use the Clean Disk item in the Preboot menu. Reload the firmware.
98.00.03 Corrupt data in configuration volume
Description
Data corruption has occurred in the configuration volume
Recommended action Turn the product off, and then on.
Use the Clean Disk item in the Preboot menu.
Reload the firmware.
98.00.04 Corrupt data in job data volume
Description Data corruption has occurred in the job data volume
Recommended action Turn the product off, and then on. Rerun the file erase function.
99.00.01 Upgrade not performed file is corrupt
Description A remote firmware upgrade (RFU) was not performed. CRC error in the firmware image (bad image).
Recommended action Download the RFU file and attempt the upgrade again.
99.00.02 Upgrade not performed timeout during receive
Description A remote firmware upgrade (RFU) was not performed. I/O timeout when reading header number and size. Indicates a problem with the network environment, not the device.
Recommended action The most common cause is an issue with the network environment. Make sure that there is a good connection to the device and attempt the upgrade again, or upgrade using the USB walk-up port.
99.00.03 Upgrade not performed error writing to disk
Description A remote firmware upgrade (RFU) was not performed.
Disk error. May indicate a problem or a hard disk failure. It might be necessary to check the connection to the hard disk or replace the hard disk.
Recommended action
- Download the RFU file and attempt the upgrade again.
- If the error persists, perform the Clean Disk process. You will then need to download firmware
from the Preboot menu.
- If the error persists, replace the hard disk.
99.00.04 Upgrade not performed timeout during receive
Description A remote firmware upgrade (RFU) was not performed. I/O timeout when reading rest of header.
Recommended action The most common cause is an issue with the network environment. Make sure that there is a good connection to the device and attempt the upgrade again, or upgrade using the USB walk-up port.
99.00.05 Upgrade not performed timeout during receive
Description A remote firmware upgrade (RFU) was not performed.
I/O timeout when reading image data.
Recommended action The most common cause is an issue with the network environment. Make sure that there is a good connection to the device and attempt the upgrade again, or upgrade using the USB walk-up port.
99.00.06 Upgrade not performed error reading upgrade
Description A remote firmware upgrade (RFU) was not performed.
Unexpected read error when reading header number and size.
Recommended action Download the RFU file and attempt the upgrade again.
- If the error persists, replace the hard disk.
99.00.07 Upgrade not performed error reading upgrade
Description A remote firmware upgrade (RFU) was not performed. Unexpected read error when reading rest of header.
Recommended action
- Download the RFU file and attempt the upgrade again.
- If the error persists, replace the hard disk.
99.00.08 Upgrade not performed error reading upgrade
Description A remote firmware upgrade (RFU) was not performed. Unexpected read error when reading image data.
Recommended action
- Download the RFU file and attempt the upgrade again.
- If the error persists, replace the hard disk.
99.00.09 Upgrade canceled by user
Description A remote firmware upgrade (RFU) was not performed. The RFU was canceled by the user.
Recommended action Resend the RFU.
99.00.10 Upgrade canceled by user
Description A remote firmware upgrade (RFU) was not performed. Job canceled when reading header number and size.
Recommended action Resend the RFU.
99.00.11 Upgrade canceled by user
Description A remote firmware upgrade (RFU) was not performed. Job canceled when reading rest of header.
Recommended action Resend the RFU.
99.00.12 Upgrade not performed the file is invalid
Description A remote firmware upgrade (RFU) was not performed. Header number is 1 but header size doesn’t match version 1 size.
Recommended action Download the RFU file again. Make sure that you download the file for the correct product model. Resend the RFU.
99.00.13 Upgrade not performed the file is invalid
Description A remote firmware upgrade (RFU) was not performed.
Header number is 2 but header size doesn’t match version 2 size.
Recommended action Download the RFU file again. Make sure that you download the file for the correct product model. Resend the RFU.
99.00.14 Upgrade not performed the file is invalid
Description A remote firmware upgrade (RFU) was not performed. The file is invalid.
Recommended action Download the RFU file again. Make sure that you download the file for the correct product model. Resend the RFU.
99.00.2X
Description
◦ 99.00.20 (event log)
The bundle is not for this product
◦ 99.00.21 (event log)
The bundle is not signed with the correct signature, or the signature is invalid
◦ 99.00.22 (event log)
The bundle header version is not supported by this firmware
◦ 99.00.23 (event log)
The package header version is not supported by this firmware
◦ 99.00.24 (event log)
◦ The format of the bundle is invalid
◦ 99.00.25 (event log)
The format of the package is invalid
◦ 99.00.26 (event log)
A CRC32 check did not pass
◦ 99.00.27 (event log)
An I/O error occurred while downloading the bundle
Recommended action Download the correct firmware file from http://www.hp.com/go/lj600Series_firmware, and then resend the firmware upgrade.
99.00.27 only: Turn the product off, and then on again. Resend the firware upgrade. If the error persists, try the sending the upgrade by another method (USB or Embedded Web Server).
99.09.60 Unsupported disk
Description Preboot menu error.
The hard disk currently installed is not recognized or supported by the product.
Recommended action Install the correct hard disk for this product.
99.09.61 Unsupported disk
Description Preboot menu error.
The installed disk is installed in a product configured for a encrypted hard disk.
Recommended action Access the Preboot menu and then select Lock Disk to lock the disk.
99.09.62 Unknown disk
Description Preboot menu error. The installed disk was previously locked in another product.
Recommended action Install a new disk or use the Preboot menu to unlock this disk. If the disk is to be reused in a different product, execute the Clean Disk procedure from the Preboot menu, then reload firmware and lock the disk.
99.09.63 Incorrect disk
Description A new or blank disk has been installed in a device which previously had an encrypted disk.
Recommended action Follow the procedure to load firmware on a new hard disk and then lock it to this product.
99.09.64 Disk malfunction
Description A fatal hard disk failure has occurred.
Recommended action Replace the hard disk drive.
99.09.65 Disk data error
Description Disk data corruption has occurred.
Recommended action Execute the Clean Disk procedure from the Preboot menu, and then resend the RFU.
99.09.66 No disk installed
Description A disk drive is not installed in the product.
Recommended action Install a compatible hard disk drive.
99.09.67 Disk is not bootable please download firmware
Description The product has a non-secure disk (solid state disk) installed as the boot disk, and it has been replaced with a new service part. A new firmware image needs to be downloaded to the device.
Recommended action
- Press any key to continue to the main Preboot menu.
- Press the Help button to see the help text for the error.
- Select the Administrator menu.
NOTE: If there is a password assigned to the Administrator, a prompt to enter the password displays.
- Select the Download item.
- The user can now download a new firmware bundle to the product.
99.XX.YY
Description Firmware installation error
Recommended action Reload the firmware.
<binname> full Remove all paper from bin
Description The specified output bin is full.
Recommended action Empty the bin to continue printing.
Hi @Josiah_F,
I would suggest doing the following:
1) With the Paper Feed Motor (M101) connected to the DC controller but NOT screwed into place (just hold it outwards so that you can see its gear), boot the printer and see if the error comes up again and the motor spins. You can verify if it is working by doing a Component Test.
2) If the printer boots without any error and the motor spins then the problem is any of the driving parts:
a) Tray-1 pickup rollers
b) Tray-2 pickup rollers
c) Feed rollers
You have to check all of these drive assemblies if the have any damage and thus they do not let the motor to spin.
3) If the motor does not spin and the printer still boots to the same error 59.00.30, then you have to check the connector (J191) on the motor and the connector (J91) on the DC controller if they properly seated. Check of any damage on the wire itself. Next step would be to replace the M101 motor. Finally, replace the DC controller.
Let me know if anything of the above helps. Update me of any progress done. Good luck.
Cheers!

ALEX-TATS
Printer Engineer for a HP Platinum Partner
I am not a HP employee
If you found this post helpful, you can let others know by clicking the “Accept as Solution” button. You can also show your appreciation, with a kudos, by clicking the “Thumbs up» button!
Спустя какое-то время любая оргтехника начинает сбоить во время работы. Это также касается лазерных принтеров и МФУ Hawlett-Packard (HP). К счастью, данные устройства оснащены средством самодиагностики, которое информирует потребителя о возникшей проблеме. Вывод информации может осуществляться различными способами: специфическим миганием светодиодных индикаторов, появлением специальных кодов на сегментном дисплее, отображением информационных сообщений с кодом и описанием ошибки, а также вывод кода ошибки на персональный компьютер. В этой статье мы представим самые популярные коды ошибок лазерных принтеров HP с их расшифровкой и рекомендациями по устранению.
Коды ошибок лазерных принтеров и МФУ HP
Первое, что нужно знать, так это то, что ошибки работы оргтехники делятся на несколько видов. Есть коды ошибок обычного информационного характера, которые просто показывают потребителю, что в данный момент делает печатающее устройство. Например, 00 READY ON LINE с кодом 10001 указывает лишь на то, что печатающее устройство готово к работе. В свою очередь, предупреждающие или сервисные коды ошибок HP, как правило, информируют о скором окончании онера, либо о том, что пора заменить какой-либо расходник. Страшнее всего, когда на дисплее принтера HP, появляется код критической ошибки. Возникновение подобного сообщения, обычно указывает на серьезную проблему с печатающим устройством (к примеру, поломка механизма протяжки бумаги, привода или блока лазера).
Быстрее всего узнать о возникшей проблеме можно по светодиодным индикаторам. В зависимости от их состояния можно приблизительно определить, что произошло с печатающим аппаратом. В частности, речь идет о следующем (пример взят из официального мануала HP LaserJet Pro M1132, M12a, M12w, P1102, P1102s, P1102w, P1106, P1108, P1109 и P1109w):
- Постоянно мигает индикатор Wi-Fi (беспроводной связи или локальной сети). Указывает на то, что принтер не может подключиться к сети. Нужно перенастроить параметры подключения, либо заменить модуль Wi-Fi.
- Постоянно мигает светодиод индикатора ошибки. Таким образом, устройство предупреждает о проблеме с тонер-картриджем. Также может указывать на то, что открыта верхняя крышка или на образования замятия бумаги/постороннего предмета.
- Постоянно горят два индикатора (обычно, это светодиод готовности и ошибки). Указывает на возникновение критической ошибки. Лучше всего не искать причину, а сразу обратиться в сервисный центр.
Кроме того, если после нажатия кнопки включения, ни один светодиод не загорается и принтер также не осуществляет пуск, то, скорее всего, возникли проблемы с блоком питания печатающего устройства. Далее представим таблицы с самыми популярными кодами ошибок принтеров HP.
Основные группы кодов ошибок лазерных принтеров HP
|
Код ошибки принтера HP |
Расшифровка |
Описание |
|
HP 10XXX |
Обычные сообщения информационного характера. |
Такие коды сообщают о готовности работы принтера, об отсутствии подключения (HP 10002) и т.д. |
|
HP 102XX |
Информационные сообщения о том, что устройство нуждается в обслуживании. |
Например, информирует об окончании тонера в картридже, а также о том, что пора заменить расходный материал. |
|
HP 11XXX |
Предупреждающие сообщения, касающиеся загрузки бумаги. |
Выводятся, когда в одном или нескольких лотках отсутствует бумажный носитель. Также может указывать на некорректность выставленного размера бумаги. |
|
HP 12XYY |
Серия кодов для лотков подачи бумаги. |
Указывают на наличие/отсутствие бумаги, а также на различные сбои в работе. |
|
HP 15XXY |
Серия кодов для лотков приема бумаги. |
Указывают на наличие/отсутствие бумаги, а также на различные сбои в работе. |
|
HP 20XXX |
Ошибки синтаксических команд. |
Появляются тогда, когда система обнаруживает нелогические команды, посылаемые печатающему устройству. |
|
HP 25XXX |
Ошибки, вызванные нарушением синтаксиса команд. |
Появляются тогда, когда система обнаруживает нелогические команды, посылаемые печатающему устройству. |
|
HP 27XXX |
Ошибки семантических команд. |
Появляются тогда, когда система обнаруживает нелогические команды, посылаемые печатающему устройству. |
|
HP 30XXX |
Ошибки, которые автоматически могут быть устранены. |
Тип информационных кодов, которые указывают на временные сбои в работе устройства, по типу, память принтера заполнена и т.д. |
|
HP 32XXX |
Ошибки файловой системы PJL. |
Появляются тогда, когда система обнаруживает сбои в работе системы. |
|
HP 35XXX |
Ошибки, которые можно сразу же решить выполнением определенных команд и продолжить работу. |
Такие коды приходят на дисплей принтера вместе с рекомендациями по их устранению. Например, когда нужно увеличить объем памяти. |
|
HP 40XXX |
Ошибки, которые можно решить выполнением определенных команд, но работа устройства прерывается. |
Такие коды приходят на дисплей принтера вместе с рекомендациями по их устранению. Например, когда необходимо перезагрузить печатающий аппарат, по той или иной причине. |
|
HP 41XYY |
Сервисные сообщения, касающиеся загрузки бумаги. |
Выводятся, когда во всех лотках отсутствует бумажный носитель. Указывает на некорректность выставленного размера бумаги, а также проблемы в работе данных частей принтера. |
|
HP 42XYY |
Сообщают о наличии замятия бумаги или постороннего предмета (актуально для HP LaserJet 5Si/ 5SiMx). |
В зависимости от кода можно максимально точно определить причину замятия бумаги. |
|
HP 43XYY |
Предупреждающие сообщения о проблемах с подключенными модулями. |
Многие офисные МФУ способны расширять свой функционал, за счет дополнительно подключенных моделей (лотков, податчиков, ADF и т.д.). Если в них обнаружатся сбои, то именно данные коды об этом проинформируют. |
|
HP 44XYY |
Сообщают о наличии замятия бумаги или постороннего предмета (актуально для HP LaserJet 4000/ 5000). |
В зависимости от кода можно максимально точно определить причину замятия бумаги. |
|
HP 50XXX |
Группа ошибок, указывающих на механические проблемы принтера. |
Если у принтера начал сбоить какой-то узел (печка, система охлаждения, блок лазера и т.д.), то принтер выдаст сообщение с кодом ошибки данной серии. |
|
HP 55XXX |
Ошибки, касающиеся персональных настроек печатающего устройства. |
Обычно можно исправить сбросом и перенастройкой принтера. |
На практике, вместо [X] и [Y] в коде будет указанно уникальное цифровое значение, соответствующее той или иной ошибке.
Коды ошибок принтеров и МФУ HP, выводимые на штатный дисплей устройства
|
Код ошибки принтера HP |
Содержание |
Расшифровка |
|
HP 10001 |
Принтер готов к работе (00). |
Принтер находится в режиме готовности, либо ему требуется незначительное сервисное обслуживание. Можно перезагрузить или очистить память принтера. Еще может помочь сброс настроек до заводских. |
|
Принтеру требуется сервисное обслуживание (68). |
||
|
Память принтера заполнена. Настройки не могут быть сохранены (68). |
||
|
HP 10002 |
Принтер не готов к работе (00). |
Принтер не готов к работе. Включить/разбудить/перезагрузить. |
|
Устройство нуждается в обслуживании (68). |
||
|
HP 10003 |
Осуществляется прогрев принтера (02). |
Печатающее устройство находится в режиме прогрева. Немного подождать, либо перезагрузить МФУ. |
|
HP 10004 |
Проводится самодиагностика печатающего устройства (05). |
Принтер создает тестовый отпечаток. Дождаться окончания процесса печати, либо перезагрузить устройство. |
|
Осуществляется печать страницы диагностики (05). |
||
|
HP 10005 |
Перезагрузка памяти (07). |
Параметры или память принтера были сброшены. Перенастроить печатающее устройство. |
|
Очистка памяти (07). |
||
|
HP 10006 |
Низкий уровень тонера в картридже (16). |
В тонер-картридже заканчивается красящее вещество. Заправить или купить новый картридж. |
|
HP 10007 |
Задание отменено. |
Очистите память принтера и очередь печати. Перезагрузите или перенастройте устройство. |
|
HP 10010 |
Буфер памяти принтера переполнен. |
Очистите память принтера и очередь печати. Перезагрузите или перенастройте устройство. |
|
HP 10011 |
Осуществляется подключение или отсутствует связь с дополнительными модулями принтера (18). |
Переподключить дополнительные лотки и прочие модули. Перезагрузить МФУ. |
|
HP 10013 |
Осуществляется печать тестовой страницы (04). |
Принтер создает тестовый отпечаток. Дождаться окончания процесса печати, либо перезагрузить устройство. |
|
HP 10014 |
Осуществляется печать тестовой страницы или листа конфигурации (06). |
Дождаться окончания процесса печати, либо перезагрузить устройство. |
|
HP 10015 |
Осуществляется печать шрифтов, поддерживаемых принтером (06). |
Дождаться окончания процесса печати, либо перезагрузить устройство. |
|
HP 10016 |
Осуществляется печать теста работы узлов печатающего устройства (15). |
Дождаться окончания процесса печати, либо перезагрузить устройство. |
|
HP 10017 |
Осуществляется демо-печать (06). |
Дождаться окончания процесса печати, либо перезагрузить устройство. |
|
HP 10018 |
Включение режима сброса настроек (09). |
Выйти из режима, перезагрузить принтер, либо выполнить сброс параметров (если устройство нуждается в этом). |
|
HP 10019 |
Включение режима сброса параметров активных портов (09). |
Выйти из режима, перезагрузить принтер, либо выполнить сброс параметров (если устройство нуждается в этом). |
|
HP 10020 |
Включение режима сброса параметров всех портов (09). |
Выйти из режима, перезагрузить принтер, либо выполнить сброс параметров (если устройство нуждается в этом). |
|
HP 10021 |
Осуществление сброса параметров принтера, в том числе очистка NVRAM (08). |
Дождаться окончания процесса, либо перезагрузить устройство. |
|
HP 10022 |
Осуществляется печать листа конфигурации (06). |
Дождаться окончания процесса печати, либо перезагрузить устройство. |
|
HP 10023 |
Осуществляется обработка задания. |
Дождаться окончания процесса, либо перезагрузить устройство. |
|
HP 10024 |
Осуществляется передача данных. |
Нужно принять/отменить задание, дождаться окончания процесса или перезагрузить принтер. |
|
HP 10025 |
Отказ в доступе к той или иной функции МФУ. |
Перезагрузить принтер, обратиться в СЦ за помощью. |
|
HP 10026 |
Невозможно отменить задание. |
Перезагрузить принтер, обратиться в СЦ за помощью. |
|
HP 10027 |
Забился тракт подачи бумаги. |
Следует очистить тракт от посторонних предметов, устранить замятие. |
|
HP 10028 |
Осуществляется печать журнала событий. |
Дождаться окончания процесса печати, либо перезагрузить устройство. |
|
HP 10029 |
Осуществляется подача бумаги. |
Дождаться окончания процесса, перезагрузить принтер, устранить проблему. |
|
HP 10030 |
Ошибки, связанные с системой команд PJL. |
Перезагрузить ноутбук, сбросить настройки принтера. |
|
HP 10031 |
Осуществляется самоочистка устройства. |
Дождаться окончания процесса, перезагрузить принтер, почистить устройство самостоятельно. |
|
HP 10032 |
Принтер не может распознать совместимый картридж. |
Установить оригинальный картридж, прошить принтер, заменить чип картриджа, сменить главную плату. |
|
HP 10033 |
Введен неверный PIN-код. |
Заново ввести код, сбросить настройки принтера. |
|
HP 10034 |
Прерывание задания. |
Очистить очередь печати, перезагрузить принтер, проверить подключение. Если все хорошо, продолжить работу. |
|
HP 10035 |
Можно продолжить выполнение прерванного задания. |
Подтвердить или отменить действие. |
|
HP 10036 |
Осуществление повторного прогрева печатающего устройства. |
Дождаться окончания процесса, перезагрузить принтер. |
|
HP 10200 |
Заканчивается черный тонер, но принтер еще может печатать. |
Временно продолжить работу. После придется перезаправить картридж или купить новый. |
|
HP 10201 |
Заканчивается голубой тонер, но принтер еще может печатать. |
Временно продолжить работу. После придется перезаправить картридж или купить новый. |
|
HP 10202 |
Заканчивается пурпурный тонер, но принтер еще может печатать. |
Временно продолжить работу. После придется перезаправить картридж или купить новый. |
|
HP 10203 |
Заканчивается желтый тонер, но принтер еще может печатать. |
Временно продолжить работу. После придется перезаправить картридж или купить новый. |
|
HP 10204 |
Требуется замена фотобарабана. |
Следует осуществить замену указанного расходника. |
|
HP 10205 |
Требуется замена черного фотобарабана. |
Следует осуществить замену указанного расходника. |
|
HP 10206 |
Требуется замена голубого фотобарабана. |
Следует осуществить замену указанного расходника. |
|
HP 10207 |
Требуется замена пурпурного фотобарабана. |
Следует осуществить замену указанного расходника. |
|
HP 10208 |
Требуется замена желтого фотобарабана. |
Следует осуществить замену указанного расходника. |
|
HP 10209 |
Требуется замена черного картриджа. |
Следует осуществить замену указанного расходника. |
|
HP 10210 |
Требуется замена голубого картриджа. |
Следует осуществить замену указанного расходника. |
|
HP 10211 |
Требуется замена пурпурного картриджа. |
Следует осуществить замену указанного расходника. |
|
HP 10212 |
Требуется замена желтого картриджа. |
Следует осуществить замену указанного расходника. |
|
HP 10213-10403 |
Различные коды сервисного обслуживания принтера, связанные с использованием расходных материалов. |
Заправить/заменить картридж, восстановить/заменить блок фотобарабана и т.д. Все зависит от информации, указанной в описании ошибки. |
Внимание: Не пытайтесь самостоятельно починить печатающий аппарат, если не имеете опыта сервисного обслуживания оргтехники. Лучше доверьте дело специалисту.
Коды ошибок E-серии для лазерных принтеров и МФУ HP
|
Код ошибки принтера HP |
Расшифровка |
Варианты решения |
|
HP E0 |
Указывает на замятие бумаги или наличие постороннего предмета. |
Извлечь замявшийся лист или иной предмет. Почистить или заменить ролик захвата бумаги. Проверить датчик и механизм протяжки бумаги. |
|
HP E1 |
Информирует об отсутствии бумаги в лотке подачи или установленный размер не соответствует. |
Загрузить или поправить бумагу. Проверить ролик захвата. Сменить задание на печать. |
|
HP E2 |
Предупреждает о том, что открыта дверца или датчик вышел из строя. |
Открыть/закрыть все крышки, проверить защелку и датчик. |
|
HP E3 |
Принтер не видит или не может распознать картридж. |
Поправить картридж, снять защитную чеку/пленку, прочистить чип картриджа и принтера и т.д. Подробнее, читайте в статье «Что делать, если принтер не распознает картридж». Почистить контакты и осуществить сервисное обслуживание принтера и картриджа. |
|
HP E4 |
Память печатающего устройства заполнена или ее не хватает. |
Очистить память принтера, сбросить настройки, прошить или сменить главную плату. |
|
HP E5 |
Проблема в работе механизма захвата или протяжки бумаги. |
Проверить наличие бумаги в лотке, поправить листы, пододвинуть флажок, почистить/заменить ролик захвата, проверить механизм протяжки, энкодер и датчик. Заменить или прошить главную плату. |
|
HP E6 |
Неизвестная ошибка работы принтера. |
Провести диагностику и сервисное обслуживание печатающего устройства. |
|
HP E7 |
Неизвестная аппаратная ошибка работы принтера. |
Провести диагностику и сервисное обслуживание печатающего устройства. |
|
HP E8 |
Критическая ошибка в работе сканера. |
Лучше всего отнести МФУ в сервисный центр. Однако можно разобрать и поправить линейку, либо осмотреть шестеренки привода (заменить, отремонтировать). |
|
HP E9 |
Неизвестная критическая ошибка работы принтера. |
Провести диагностику и сервисное обслуживание печатающего устройства. |
|
HP E10 |
Проблема в подключении дополнительных модулей. |
Перезапустить печатающий аппарат, выполнить переподключение проблемного модуля, проверить/заменить шлейф. |
|
HP E20 |
Не хватает памяти принтера для печати материала. |
Перезапустить устройство, очистить память и очередь печати, сменить задачу на печать. |
|
HP E21 |
Заполнена память печатающего устройства. |
Перезапустить устройство, очистить память и очередь печати, сменить задачу на печать, добавить оперативной памяти. |
|
HP E22 |
Сбой LPT-подключения или несоответствия драйвера принтера. |
Переподключить устройство к ПК, заменить кабель, переустановить драйвер. |
Также сюда стоит отнести ошибку HP 13.А, которая указывает на проблему с деталями механизма подачи бумаги (соленоидом, датчиком и т.д.).
Коды ошибок HP LaserJet, указывающие на проблемы аппаратной части устройства
|
Код ошибки принтера HP |
Расшифровка |
|
HP 50000 |
Данный код появляется в случае возникновения неизвестной ошибки, в работе аппаратной части печатающего устройства. |
|
HP 50001 |
Ошибка одного или нескольких модулей памяти, размещенных на плате форматера. |
|
HP 50002 |
Ошибка модуля оперативной памяти главной платы принтера. |
|
HP 50003 |
Код указывает на проблему двигателя печки лазерного принтера. |
|
HP 50004 |
Сработал датчик лазера, указывающий на проблему данной детали. |
|
HP 50005 |
Проблема с приводом сканера (скорее всего связанная с зеркалом). |
|
HP 50006 |
Проблема в приводе кулера. |
|
HP 50007 |
Потеря связи между контроллером и главной платой принтера. |
|
HP 50008 |
Код указывает на низкую температуру термоэлемента печки принтера. |
|
HP 50009 |
Код указывает на долгий период прогрева печки принтера до нужной температуры. |
|
HP 50010 |
Код указывает на высокую температуру прогрева печки принтера (перегрев). |
|
HP 50011 |
Неизвестная проблема, связанная с печкой лазерного МФУ. |
|
HP 50012 |
Проблема в работе датчика луча лазера. |
|
HP 50013 |
Проблема, связанная с блоком лазера принтера. |
|
HP 50014 |
Ошибка старта работы сканера. |
|
HP 50015 |
Ошибка движения линейки сканера. |
|
HP 50016-50019; HP 50030-50036 |
Проблема в слабом вращении или поломке одного из вентиляторов. |
|
HP 50020 |
Проблемы с механизмом подачи бумаги верхнего лотка. |
|
HP 50021 |
Проблемы с механизмом подачи бумаги нижнего лотка. |
|
HP 50022 |
Проблемы с механизмом подачи бумаги универсального лотка. |
|
HP 50023 |
Ошибка пуска основного электромотора принтера. |
|
HP 50024 |
Ошибка работы основного электромотора принтера. |
|
HP 50025 |
Ошибка подключения дополнительных модулей (актуально для больших офисных МФУ). |
|
HP 50026 |
Ошибка работы дополнительных модулей (актуально для больших офисных МФУ). |
|
HP 50027 |
Проблема в работе дуплекса принтера или МФУ (модуля двусторонней печати). |
|
HP 50028 |
Нарушение контакта между форматером и другими частями печатающего аппарата. |
|
HP 50029 |
Проблема в обработке или получении данных платой форматера. |
|
HP 50048-50063 |
Неизвестные ошибки принтера, связанные с распределением питания. |
|
HP 50064 |
Ошибка датчика совмещения желтого цвета. |
|
HP 50065 |
Ошибка датчика совмещения пурпурного цвета. |
|
HP 50066 |
Ошибка датчика совмещения голубого цвета. |
|
HP 50067 |
Ошибка датчика совмещения черного цвета. |
|
HP 50068 |
Несоответствие диапазона плотности желтого цвета. |
|
HP 50069 |
Несоответствие диапазона плотности пурпурного цвета. |
|
HP 50070 |
Несоответствие диапазона плотности голубого цвета. |
|
HP 50071 |
Несоответствие диапазона плотности черного цвета. |
|
HP 50072 |
Ошибка, возникающая из-за несоответствия данных датчика фазовой калибровки фотобарабана для желтого цвета. |
|
HP 50073 |
Ошибка, возникающая из-за несоответствия данных датчика фазовой калибровки фотобарабана для пурпурного цвета. |
|
HP 50074 |
Ошибка, возникающая из-за несоответствия данных датчика фазовой калибровки фотобарабана для голубого цвета. |
|
HP 50075 |
Ошибка, возникающая из-за несоответствия данных датчика фазовой калибровки фотобарабана для черного цвета. |
|
HP 505XX |
Сбой в работе прошивки лазерного принтера HP. |
|
HP 50599 |
Проблема с питанием платы форматера. |
Важно: В данном случае представлена только расшифровка кодов ошибок HP, так как в большинстве случаев устранить проблему очень сложно, даже для квалифицированного специалиста. Поэтому чаще всего приходится просто заменять испорченную деталь принтера.
Прочие коды ошибок лазерной оргтехники HP
|
Код ошибки принтера HP |
Расшифровка |
Варианты решения |
|
HP 10.XX.YY |
Проблема считывания данных с чипа картриджа (часто сопровождается сообщением «SUPPLY MEMORY ERROR»). |
Переустановить картридж, установить оригинальный картридж HP или сбросить ошибку (подробнее, читайте в статье «Как исправить ошибку памяти картриджа HP»). |
|
HP 10.32.XX |
Принтер определил, что установлен неоригинальный картридж. |
Проигнорировать и пользоваться принтером дальше (может перестать отображаться ресурс картриджа, а также будет часто выскакивать информационное окно о необходимости использования оригинальной продукции). Если нет такой возможности, проблему нужно решать уже исходя из особенностей оргтехники (замена чипа картриджа, прошивка принтера и т.д.). |
|
HP 11.01 и HP 11.02 |
Принтер постоянно запрашивает установку дату и времени, либо они отображаются некорректно. |
Необходимо заменить батарею или форматер принтера. |
|
HP 13.XX.YY (13.A, 13.02.00, 13.03.XX, 13.05.XX, 13.06.XX, 13.12.00, 13.20.00, 13.21.00) |
Произошло замятие бумаги. |
Извлеките замятую бумагу или посторонний предмет. Перезагрузите принтер, проверьте датчики бумаги, а также механизм протяжки бумаги. |
|
HP 20 INSUFFICIENT MEMORY |
Перегрузка оперативной памяти принтера. |
Нажмите продолжить печать, но при этом часть данных может быть утеряна. Лучше переделать файл и отправить его заново на печать. Также можно попробовать очистить память принтера или расширить, за счет установки дополнительного модуля. |
|
HP 21 PAGE TOO COMPLEX |
Принтер не может сжать изображение из-за его сложности. |
Нажмите продолжить печать, но при этом часть данных может быть утеряна. Упростите задание для печати. |
|
HP 22 EIO BUFFER OVERFLOW (EMBEDDED, PARALLEL, USB) |
Переполнен буфер памяти принтера или передаются по определенному каналу слишком объемный материал. |
Нажать продолжить, но данные будут утеряны. Проверить соединения, переключить порты или заменить кабели. |
|
HP 40 EMBEDDED I/O BAD TRANSMISSION |
Ошибка передачи данных. |
Нажать продолжить, на данные будут утеряны. Перезагрузить принтер и отправить повторное задание. Переустановить/заменить серверную карту или плату форматера. |
|
HP 41.3 UNEXPECTED PAPER SIZE IN TRAY X |
Формат бумаги не соответствует заданным параметрам. |
Установить бумагу соответствующего формата или сменить настройки печати. Сменить лоток (если их несколько). Проверить работу механизма протяжки и всех датчиков бумаги. Избавить МФУ от наличия посторонних предметов. |
|
HP 41.5 UNEXPECTED TYPE IN TRAY X |
Тип бумаги не соответствует заданным параметрам. |
Установить бумагу соответствующего типа или сменить настройки печати. Сменить лоток (если их несколько). Проверить работу механизма протяжки и всех датчиков бумаги. Избавить МФУ от наличия посторонних предметов. |
|
HP 41.X ERROR |
Неизвестная ошибка, связанная с протягиванием бумаги. |
Можно попробовать перезагрузить МФУ, почистить ролики захвата бумаги, либо разбирать и искать проблему по пути следования бумаги. |
|
HP 49.XXXXX ERROR |
Критическая ошибка, связанная с микропрограммой (прошивкой, firmware) принтера. |
Перезагрузите принтер, после чего отмените все задания печати, очистите очередь, проверьте обновления для принтера (обновите) и снова попытайтесь печатать при помощи фирменного ПО. Не помогло, пробуйте наоборот понизить версию прошивки, либо перепрошить принтер, установив на него дамп с нового устройства. Замените плату форматера. |
|
HP 50.X FUSER ERROR |
Проблема в работе печки лазерного принтера. |
Выключить принтер и дать ему отдохнуть около 30 минут. Проверить блок печки, почистить и заменить термоэлемент (если он в этом нуждается). Заменить весь блок, БП или плату микроконтроллера. |
|
HP 51.1X ERROR |
Проблема в работе датчика синхронизации луча лазера. |
Перезагрузить МФУ, проверить контакты, шлейфы и различные подключения. Заменить блок лазера или плату микроконтроллера. |
|
HP 52.XX.0 PRINTER ERROR |
Проблема в работе драйвера двигателя лазерного блока. |
Перезагрузить МФУ, проверить контакты, шлейфы и различные подключения. Заменить блок лазера или плату микроконтроллера. |
|
HP 53.10.01 PRINTER ERROR |
Принтер не поддерживает модуль памяти DIMM. |
Перезагрузить принтер. Переустановить или заменить модуль памяти. Заменить форматер. |
|
HP 55.XX.YY DC CONTROLLER ERROR |
Ошибка контроллера DC. |
Перезагрузить принтер. Проверить соединения на плате контроллера, либо заменить плату. |
|
HP 56.XX ERROR |
Неизвестная ошибка, возникшая во время печати. |
Перезапустить принтер. Проверить все контакты. Провести диагностику. |
|
HP 57.XX PRINTER ERROR |
Проблема в работе вентилятора лазерного принтера. |
Проверить кулер на работоспособность, почистить, смазать или заменить. |
|
HP 58.XX ERROR |
Неизвестная ошибка, связанная с работой процессора принтера. |
Проверить все контакты платы контроллера или заменить ее. |
|
HP 59.XX ERROR Main Motor |
Проблема в работе главного электромотора принтера. |
Выключить принтер и дать ему немного отдохнуть. Разобрать и проверить подключения и сам электромотор. Заменить в случае неисправности. |
|
HP 62 NO SYSTEM |
Принтер не может обнаружить систему управления. |
Перезапустить печатающее устройство, обновить прошивку, сменить главную плату. |
|
HP 64 ERROR |
Неизвестная ошибка, связанная с буфером хранения данных для лазера. |
Перезапустить печатающее устройство, обновить прошивку, сменить главную плату. |
|
HP 68.X PERMANENT STORAGE FULL |
Ошибка, связанная с переполнением памяти NVRAM. |
Продолжить печать, перезапустить принтер, очистить буфер памяти. |
|
HP 79.XXXX ERROR |
Критическая ошибка, связанная с аппаратной частью принтера или МФУ. |
Здесь может быть все что угодно. Нужно перезагружать принтер, разбирать и искать проблему. Чаще всего, дело заключается в неисправности материнской платы устройства. |
|
HP 8X. XXXX EIO ERROR |
Критическая ошибка подключения дополнительного модуля. |
Перезапустить принтер, переподключить модуль, обновить прошивку. Заменить плату форматера. |
Внимание: Не пытайтесь самостоятельно починить печатающий аппарат, если не имеете опыта сервисного обслуживания оргтехники. Лучше доверьте дело специалисту.
Типы сообщений панели управления
Устранение неполадок |
Состояние устройства или возникшие с ним проблемы можно определить по четырем типам сообщений панели управления.
|
Тип сообщения |
Описание |
|||
|---|---|---|---|---|
|
Сообщения о состоянии |
Сообщения о состоянии отражают текущее состояние устройства. Они информируют о нормальном функционировании устройства, и для их очистки вмешательство не требуется. Сообщения изменяются при изменении состояния устройства. Если устройство готово к работе, не занято и не ожидает разрешения предупреждающих сообщений, отображается сообщение Готов. |
|||
|
Предупреждающие сообщения |
Предупреждающие сообщения информируют об ошибках передачи данных или ошибках принтера. Обычно эти сообщения чередуются с сообщением Готов или сообщениями о состоянии и остаются на экране, пока не будет нажата клавиша OK. Отображение некоторых предупреждающих сообщений прекращается автоматически. Если для параметра Удаляемые предупреждения в меню Параметры экрана задано значение Задание, эти сообщения исчезнут при выполнении следующего задания печати. |
|||
|
Сообщения об ошибках |
Сообщения об ошибках информируют о необходимости выполнения определенных действий, например добавить бумагу или устранить ее замятие. После появления некоторых сообщений об ошибках предусматривается автоматическое продолжение печати. Если для параметра События автопродолж. в меню Параметры экрана задано значение Автоматическое продолжение, устройство продолжит работу через 10 секунд после появления сообщения об ошибке, предусматривающего автоматическое продолжение печати.
|
|||
|
Сообщения о критических ошибках |
Сообщения о критических ошибках уведомляют о сбое устройства. Некоторые из этих сообщений можно удалить, выключив и снова включив устройство. Параметр Автоматическое продолжение не влияет на эти сообщения. Если критическая ошибка не будет устранена, необходимо вызвать обслуживающий персонал. |

 , печать остановится, после чего будет предложено отменить задание печати.
HP LaserJet 600 M601 M602 M603 Типы сообщений панели управления