
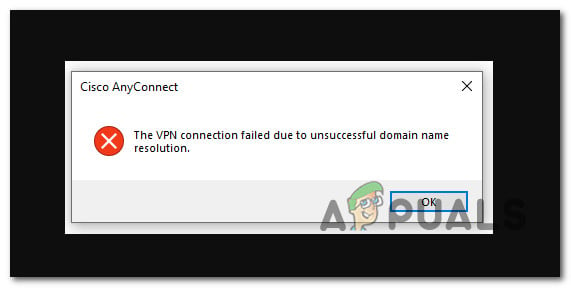
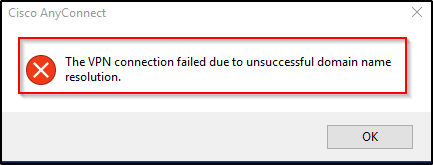
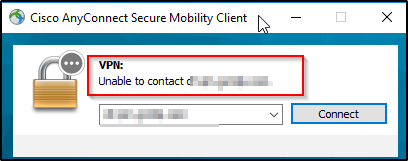
The VPN connection failed due to unsuccessful domain name resolution is a common error that may occur when using the Cisco AnyConnect Secure Mobility Client to remotely connect to the workplace.
The description is self-explanatory: you can’t establish a successful VPN connection using Cisco due to DNS issues.
BEST VPN RECOMMENDATIONS — VETTED BY OUR EXPERTS
Normally, if you stumble upon problems with your company’s VPN, such as AnyConnect installation failure, you should contact your system admin and request assistance.
However, since this error is usually caused by improper settings on the client side, you can try the following solutions to fix it.
What does it mean when it says the VPN connection failed due to unsuccessful domain name resolution?
The VPN connection failed due to unsuccessful domain name resolution error usually means the VPN service is unable to establish a connection to the server through the DNS.
If you wonder why is VPN connection unsuccessful, you should know that this type of error generally hints to underlying problems in your network or applications, most notably:
➡️ Faulty DNS configuration: it’s possible that your native DNS setup is not compatible with your VPN client
➡️ Bad Internet connection: if your connection is fluctuating or down, you will have problems with your VPN too
➡️ Corrupt/outdated VPN app: if you don’t run the best version, some functionalities may not work as desired
➡️ Problems with the operating system: it’s possible that certain parts of your OS are corrupt which interferes with establishing a secure VPN connection
How can I fix the VPN connection failed due to DNS error?
- Change your DNS settings
- Try another VPN service
- Repair the anyconnect.xml file
- Reinstall your operating system
1. Change your DNS settings
Time needed: 2 minutes.
If you want to get rid of this Cisco VPN connection error and repair any DNS malfunctions, the logical solution is to change your settings as exemplified below.
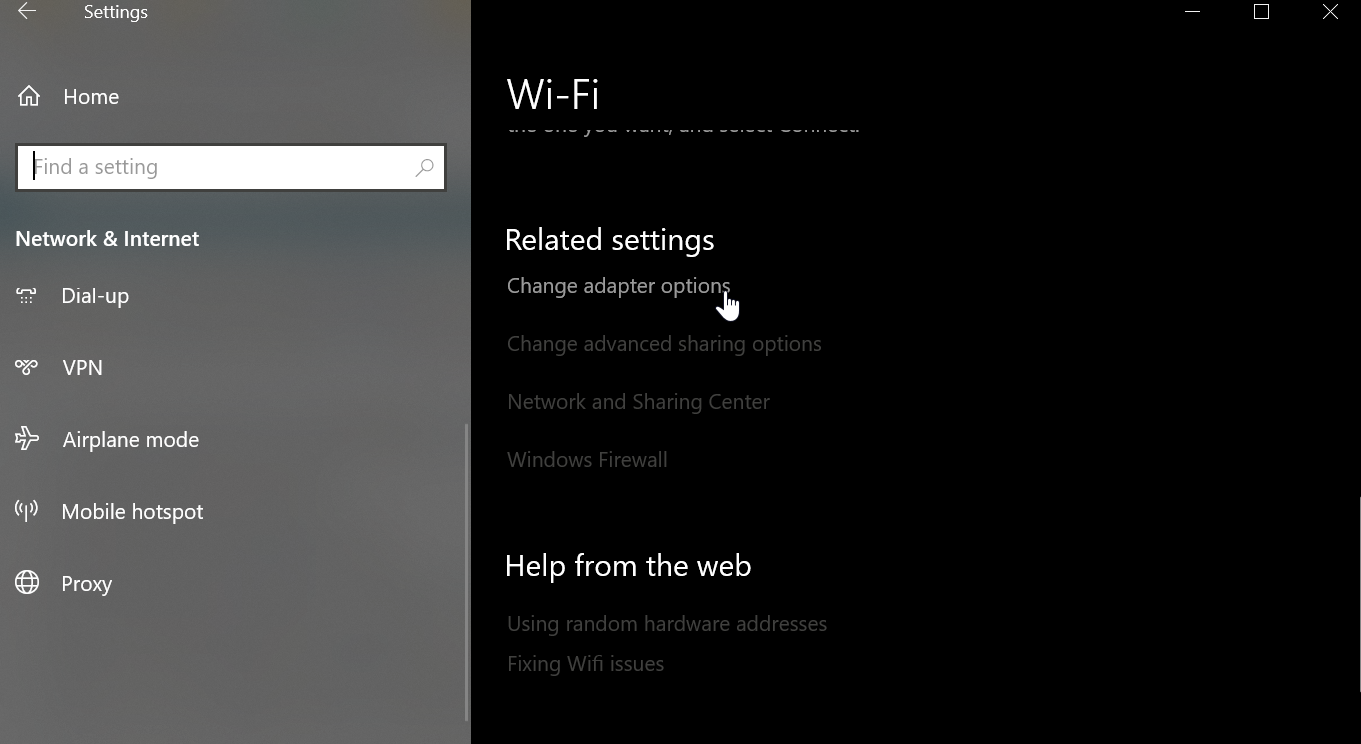
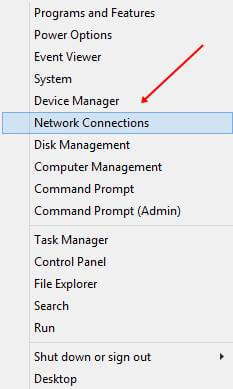
- On Windows 10, right-click the Start button.
- Go to Network Connections > Change adapter options.

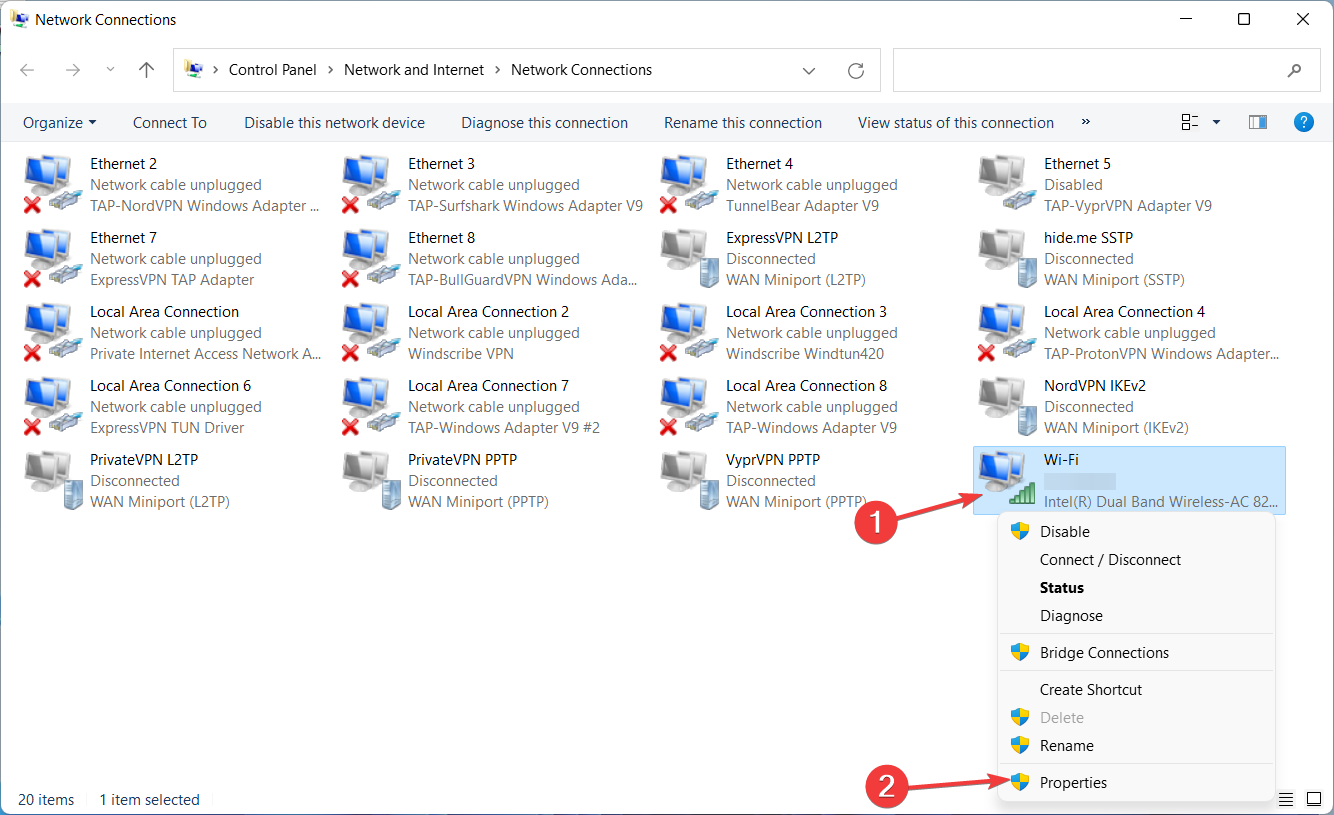
- Right-click your network adapter and select Properties.

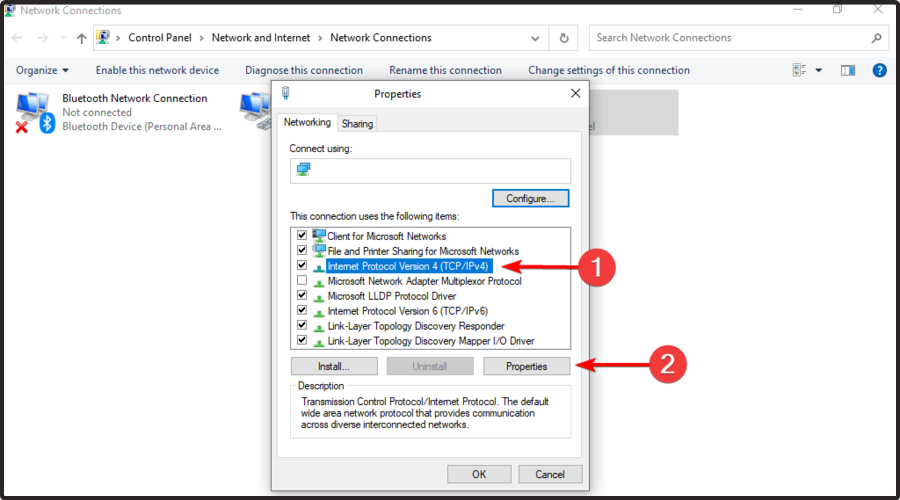
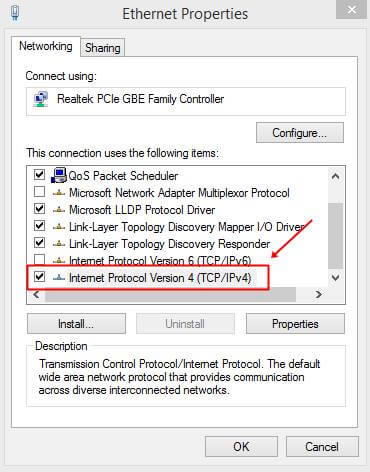
- Double-click Internet Protocol Version 4 (TCP/IPv4).

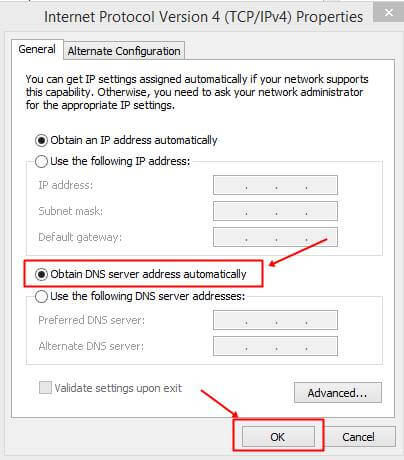
- Select Obtain DNS server address automatically and Click OK.

The DNS error might occur when using custom DNS settings, such as Google Public DNS, OpenDNS, or Cloudflare. In certain cases, static DNS servers are not compatible with VPN clients like Cisco VPN.
However, you can easily fix this issue by resetting your computer’s DNS settings to default, which means using the DNS servers provided by your ISP. If the problem persists, you should contact your ISP.
But if your ISP’s DNS servers are slow by default and that’s actually the reason why you used custom DNS in the first place, then you should try using other static DNS servers.
2. Try another VPN service
If you get DNS-related issues on a regular basis, we suggest you try a different VPN. Look for a trusted provider that’s secure and up-to-date.
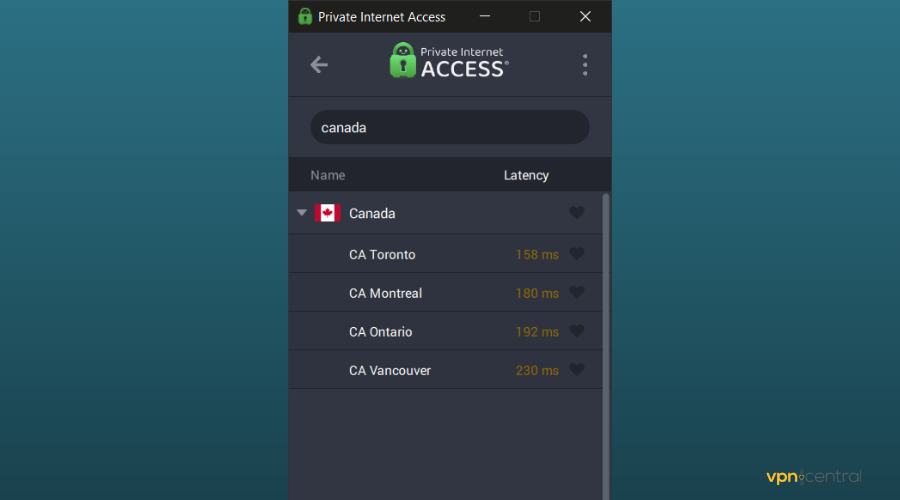
In this regard, we recommend Private Internet Access (PIA) because it is acknowledged to have great DNS security.
This tool has very secure DNS configurations and also lets you make your own custom DNS setup, configure port forwarding, and more.
Along with that, you should also know that PIA has a global server coverage of over 35,000 servers. This ensures private and high-speed connections regardless of location.
Private Internet Access is a full-package VPN service with unlimited bandwidth, powerful encryption, a dedicated ad and malware blocker, and more. Plus, it is open source which makes it more stable and secure than other types of apps.
With this VPN you should be able to bypass issues like unsuccessful domain name resolution errors.

Private Internet Access
Get access to secure VPN and DNS servers for a private and error-free experience.
3. Repair the anyconnect.xml file

In some cases, AnyConnect’s XML profiles become corrupt, which causes the VPN connection failed due to an unsuccessful domain name resolution error. But you should be able to fix this problem by reinstalling AnyConnect.
You can also try connecting to another region, specifying an alternative VPN gateway, or checking the DNS name and port address in the XML file to see if it’s correct.
4. Reinstall your operating system
If you can’t fix the VPN connection failed due to an unsuccessful domain name resolution error using the solutions above, back up all your important data and applications in order to reinstall Windows 10.
This way, all system settings will be restored to default. Alternatively, you can use the Refresh Tool for a clean install.
In conclusion, the solutions we provided above should be enough to fix the VPN failed due to unsuccessful domain name resolution error with Cisco AnyConnect on your Windows PC.
However, if the error is recurring, you should consider dropping Cisco VPN and replacing it with other corporate VPN solutions.
The error ‘VPN connection failed due to unsuccessful domain name resolution‘ occurs when using the Cisco AnyConnect Secure Mobility Client to connect remotely to a different machine.
A DNS issue is a potential cause of this issue, an issue with the anyconnect.xml file, or some system file corruption.
Here’s a list of troubleshooting steps that you can try to fix the issue.
1. Change DNS Settings
This error occurs more frequently when a custom public DNS is in use (such as Cloudflare, Google Public DNS, or Open DNS). The built-in VPN component used by Cisco AnyConnect is very specific and is known to trigger incompatibility errors with the majority of public DNS addresses.
To ensure that a DNS-based conflict is not causing the following error. For step-by-step instructions on how to do this, follow the instructions below:
- Press the Win + R keys together to open up a Run dialog box.
- Type ‘ncpa.cpl’ and press Ctrl + Shift + Enter to open Network Connections window.

Open the Network Connection menu - At the User Account Control (UAC), click Yes to grant admin access.
- Once you’re inside the Network Connections menu, right-click on your active network, then click on Properties from the context menu that just appeared.

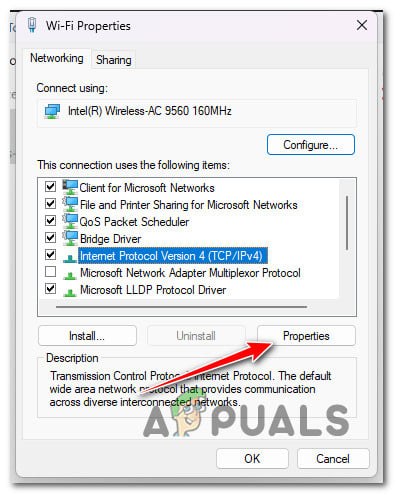
Access the Properties screen of your Network connection - Inside the Properties menu of your active network, click on the Networking tab, then scroll down to the ‘This connection uses the following items:’, select Internet Protocol Version 4 (TCP/IPv4) and click on Properties.

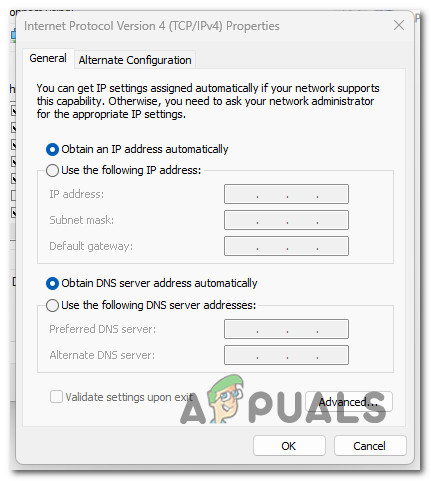
Access the Properties screen of IPV4 - From the Internet Protocol Version 4 (TCP/IPv4) Properties screen, access the General tab and make sure the Obtain DNS server address automatically toggle is enabled and click on Ok to save the changes.

Reconfigure IPV4 to obtain DNS server automatically - Reboot your PC to allow the changes to take effect.


2. Repair the anyconnect.xml file
The following error will also occur if the AnyConnect XML profiles have become corrupted.
You can access the XML file and look for inconsistencies in the showcased paths if you know networking.
You can effectively reset AnyConnect’s XML profiles by reinstalling the AnyConnect application.
Follow the steps to repair anyconnect.xml:
- Press Windows key + R to open up a Run dialog box.
- Now type ‘appwiz.cpl’ inside the text box, then press Ctrl + Shift + Enter to open up a Run dialog box.
Open up the Programs and features menu - At the User Account Control (UAC), click Yes to grant admin access.
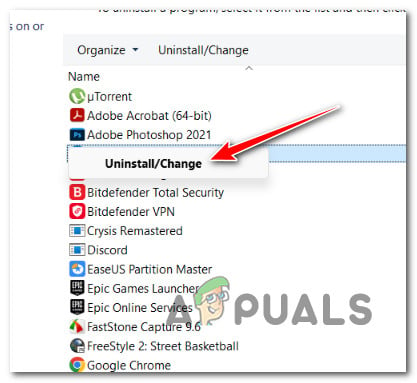
- Once you’re inside the Programs and Features menu, scroll down through the list of programs and locate the AnyConnect installation.
- Right-click the AnyConnect installation and click on Uninstall from the context menu that just appeared.

Uninstall the AnyConnect application - Once you see the uninstallation screen, follow the on-screen prompts to complete the uninstallation, then reboot your PC to remove any remnant files left behind by the installation.
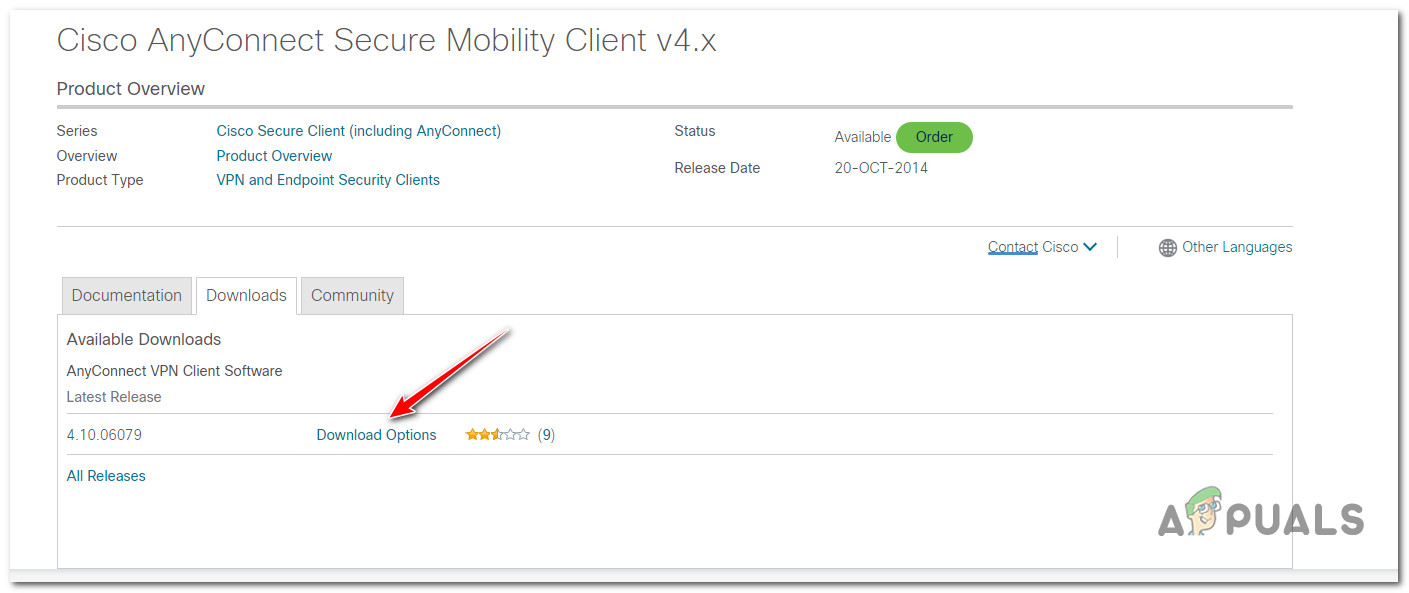
- At the next startup, navigate to the official download page of AnyConnect Security Mobility Client and download the latest executable from Downloads > Download Options.

Downloading the latest version of AnyConnect Note: To download the software, you need to be logged in with your Cisco account.
- From the next link, make sure you download the file package compatible with your OS.
- Once the download is complete, open the executable with admin access and follow the on-screen instructions until AnyConnect Secure Mobility Client is reinstalled.
- Attempt to connect to a machine remotely using the recently installed software and see if the problem is now fixed.

If the same problem is still occurring, move to the next method below.
3. Connect to another region (with different VPN HEs)
If you’ve come this far without a viable resolution, another thing that you can do to avoid the following error is to connect to another region with a different set of VPN HEs.
Note: This method will fix the issue if the anyconnect.xml file becomes corrupted and the method above doesn’t work in your case.
This action will cause a new file to be downloaded, allowing you to connect to the original HEs.
If you are an AnyConnect admin and you can connect with a different set of HEs, do so the new file is generated.
Next, connect to the original HEs and see if the problem is now fixed. If you still see the ‘VPN connection failed due to unsuccessful domain name resolution’ or you don’t have the necessary permissions to complete the operation, try the next method below.
4. Disable or Uninstall 3rd party firewall
If you’ve gotten this far without a solution and you’re using a third-party antivirus, you should look into it to see if it’s the cause of the Cisco AnyConnect software cutting off the connection.
The “VPN connection failed due to unsuccessful domain name resolution” error could be caused by a series of overprotective suites that cut off the connection to the VPN server because they thought it was a threat.
Note: Norton and Comodo Antivirus, both AV suites often cause this problem.
Start by trying to turn off the 3rd party suite to see if that is the problem. Most 3rd party security suites will let you do this right from the tray bar icon.
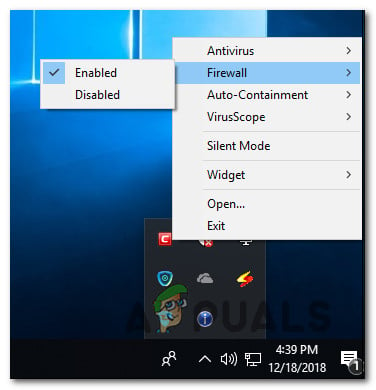
After turning off the firewall, restart your computer and open Cisco AnyConnect again to see if the problem is fixed.
Important: Even if you turn off real-time protection on some firewalls, rules that are specific to a network will still be in place. So, if you set up your firewall to stop certain kinds of communication with external servers in the past, this role is likely to stay the same after you turn off the firewall protection.
If this is the case, follow the steps below to remove the third-party firewall and see if the error goes away.
What you have to do is:
- Press the Windows key + R to open the Run box, type “appwiz.cpl,” and then press Enter. This will bring up the menu for Programs and Files.
Open up the Programs and features menu - Use the Programs and Files menu to look through the list of installed programs until you find the third-party firewall tool you want to get rid of.
- To finish uninstalling, right-click on the third-party antivirus program you found and choose “Uninstall” from the new menu that pops up.

4. Now, you need to finish following the instructions for removing the program and restarting your computer to see if the problem is still there.
If you’re still getting the error “VPN connection failed because the domain name could not be resolved,” move on to the last solution below.
5. Disable Proxy server or 3rd party VPN
Another third-party component that might prevent communication between your Windows end-user version and Cisco AnyConnect’s VPN server is a proxy or VPN client. Most of the time, this issue was brought on by a VPN client or proxy server configured on Windows.
Try uninstalling your VPN client or disabling your proxy server if your circumstance is similar to the one described above.
Select the guide that best fits your needs from the two we created to address these scenarios.
5.1. Disable VPN client
Whether a VPN service was set up by Windows itself or by an external program determines how to disable it on a Windows computer.
You must go to the VPN interface if you are using a standalone app to disconnect from a VPN.
However, you can disable it by carrying out the following steps if you configured your VPN using the built-in feature:
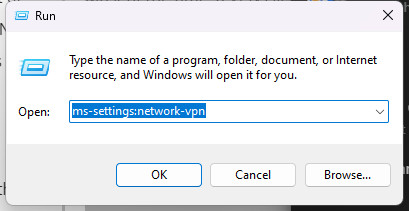
- Press the Windows key + R to bring up the Run box.
- Then, press Enter after typing “ms-settings:network-vpn” to open the VPN tab in the Windows Settings app.

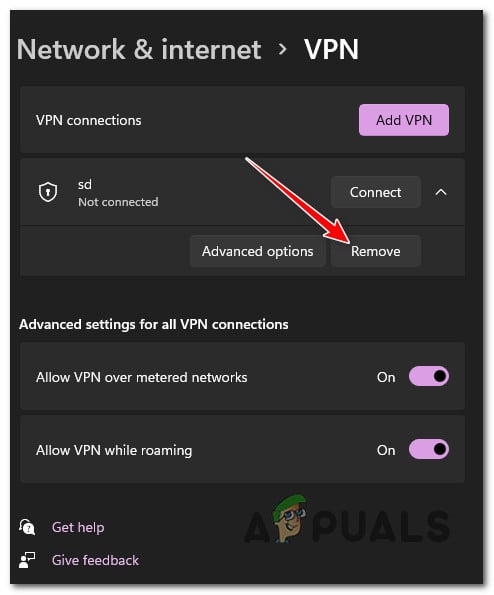
- Click on your VPN connection on the right side.
- Click Remove on the new context menu to stop it from messing up connections to the outside world.

- Open Cisco AnyConnect again and connect to the same machine that was giving you the “VPN connection failed because domain name resolution failed” error before.
5.2 Turn off the proxy server
If you’ve already configured a local proxy server, you may quickly disable it by selecting the Proxy tab from the Settings menu.
Here’s how:
- Press the Windows key + R to bring up the Run box.
- In the next menu, type “ms-settings:network-proxy” and press Enter to open the Proxy tab in the Settings app.
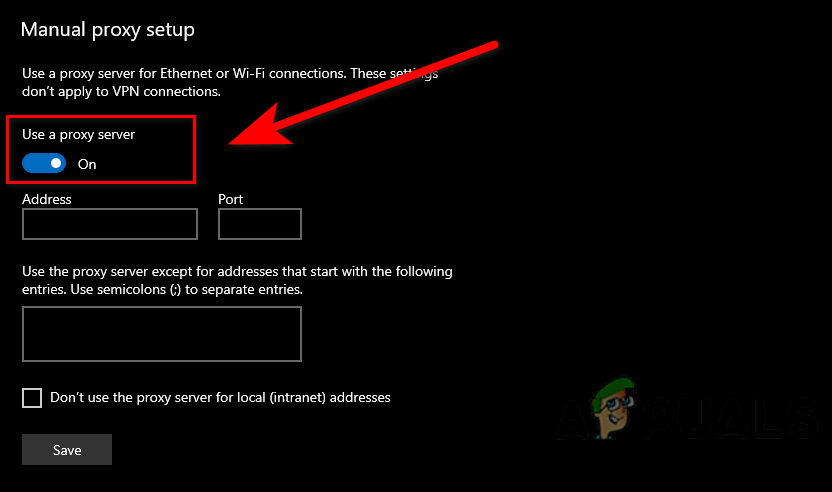
Open the Proxy server - Go to the Proxy tab in the Settings menu and click on Manual Proxy Setup.
- On the right side of the screen, uncheck the box that says “Use a proxy server.”

Disable Proxy Server - After turning off the proxy server, restart your computer and try to connect remotely with Cisco AnyConnect again to see if the problem has been fixed.

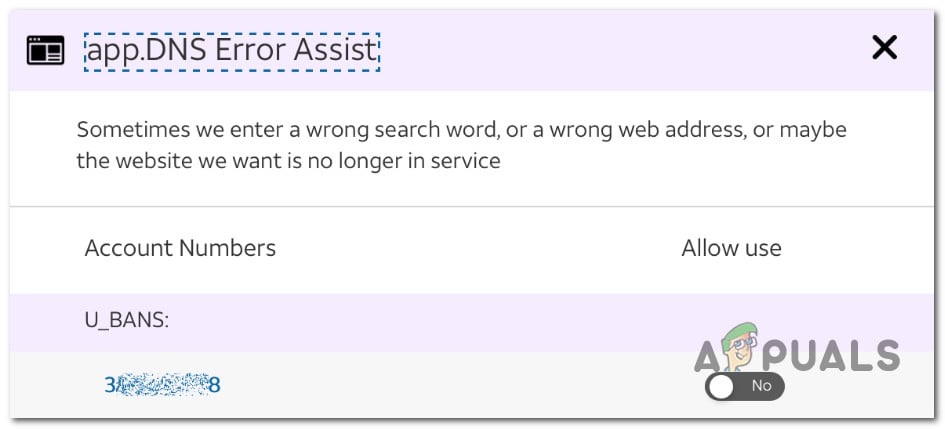
6. Disable DNS Error Assist (if applicable)
The DNS Error Assist function may be the cause of your issue if you encounter this error when attempting to connect from an AT&T network.
If you can enter your AT&T account and change the Privacy Settings to keep the DNS Error Assist feature disabled, you should be able to resolve the problem.
Note: If you try to use AnyConnect to connect outside from an AT&T network, this is probably where the issue is coming from.
To opt out of the DNS Error assistance, adhere to the directions below:
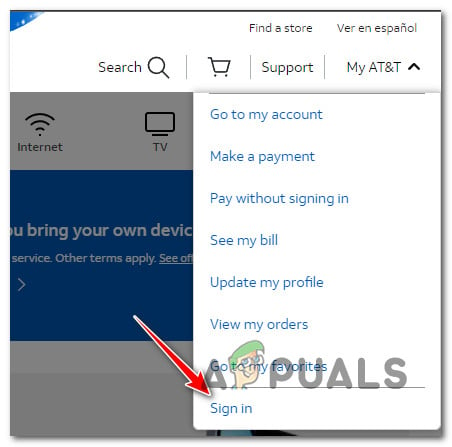
- Open any browser and visit the home page of AT&T.
- Click on My AT&T (From the right-hand top corner), then click on Sign In.

Sign in with your Account - Use your account credentials to sign in with your account.
- Once you have successfully signed in with your account, click on View Profile.
- Go to Communication Preferences, then click on Privacy Settings.
- Select DNS Error Assist and use the opt out option to disable it.

Disable the DNS error assist - Reboot your PC, then attempt to connect with AnyConnect once again and see if the problem is now fixed.
7. Clean install or repair install
If none of the above solutions worked, it’s likely that the problem is caused by corrupted system files that affect the local network and prevent AnyConnect from connecting to the VPN server.
In this case, the only way to fix the problem is to follow a set of steps that will reset every part of the OS.
You have two options for how to do this: a repair install or a clean install.
- A clean install is a simple process that takes only a few clicks and doesn’t need any installation media. But the biggest problem is that if you don’t back up your apps, games, user settings, and other personal data first, you might lose most of it.
- A repair install will require Windows 11 installation media that is compatible, but you will be able to keep all of your personal apps, games, user preferences, and media. The operation will only change the parts of the OS. Everything else will stay the same.
Fix Vpn Failed Due Unsuccessful Domain Name Resolution
- Если вы получилиVPN-соединение не удалось из-за неудачного разрешения доменного имениошибка, это означает, что Cisco VPN не работает должным образом из-за проблем с DNS, что не позволяет вам удаленно подключиться к вашему рабочему месту.
- Откройте для себя 3 надежных решения для исправления этой ошибки VPN в Cisco AnyConnect Secure Mobility Client на стороне клиента без необходимости связываться с системным администратором вашей компании.
- Посетите наш Раздел Cisco для получения дополнительных полезных статей и руководств.
- Присоединяйтесь к нашему Центр устранения неполадок VPN если у вас возникли другие ошибки, связанные с VPN.

VPN-соединение не удалось из-за неудачного разрешения доменного имениэто распространенная ошибка, которая может возникнуть при использовании Клиент безопасной мобильности Cisco AnyConnect для удаленного подключения к рабочему месту. Описание говорит само за себя: вы не можете установить успешное VPN-соединение с помощью Cisco из-за Проблемы с DNS .
Обычно, если вы сталкиваетесь с проблемами с VPN вашей компании, например Ошибка установки AnyConnect , вам следует обратиться к системному администратору и запросить помощь. Однако, поскольку эта ошибка обычно вызвана неправильными настройками на стороне клиента, вы можете попробовать следующие решения, чтобы исправить ее.
Как исправить «сбой подключения к VPN из-за неудачного разрешения доменного имени»?
Наша команда тестирует различные бренды VPN, и мы рекомендуем их нашим пользователям:
- Серверный парк: более 20000 серверов по всему миру, высокие скорости и ключевые местоположения
- Забота о конфиденциальности: многие VPN хранят много пользовательских журналов, поэтому мы ищем те, которые не
- Справедливые цены: мы выбираем лучшие доступные предложения и регулярно меняем их за вас.
ТОП РЕКОМЕНДУЕМЫЕ VPN

ЛУЧШИЙ ТРАХ ДЛЯ БАКА

Раскрытие: WindowsReport.com поддерживается читателем.
Прочтите наше партнерское раскрытие.
Измените настройки DNS

- В Windows 10 щелкните правой кнопкой мыши значок Начало кнопка.
- Идти к Сетевые соединения > Изменить параметры адаптера .
- Щелкните правой кнопкой мыши сетевой адаптер и выберите Свойства .
- Двойной щелчок Интернет-протокол версии 4 (TCP / IPv4) .
- Выбрать Получить адрес DNS-сервера автоматически .
- Нажмите Хорошо .
Ошибка DNS может возникнуть при использовании пользовательских настроек DNS, таких как Google Public DNS , OpenDNS или же Cloudflare . В некоторых случаях статические DNS-серверы несовместимы с VPN-клиентами, такими как Cisco VPN.
ИБП доставлены, но нет пакета
Однако вы можете легко решить эту проблему, сбросив настройки DNS вашего компьютера на значения по умолчанию, что означает использование DNS-серверов, предоставленных вашим интернет-провайдером. Если проблема не исчезнет, обратитесь к своему интернет-провайдеру.
Но если DNS-серверы вашего интернет-провайдера по умолчанию работают медленно и именно поэтому вы изначально использовали собственный DNS, то вам следует попробовать использовать другие статические DNS-серверы.
Восстановите файл anyconnect.xml

В некоторых случаях профили XML AnyConnect становятся поврежденными, что приводит кVPN-соединение не удалось из-за неудачного разрешения доменного имениошибка. Но вы сможете решить эту проблему, переустановка AnyConnect .
Вы также можете попробовать подключиться к другому региону, указав альтернативный шлюз VPN или проверив DNS-имя и адрес порта в XML-файле, чтобы убедиться, что они верны.
Переустановите вашу операционную систему

Если вы не можете исправитьVPN-соединение не удалось из-за неудачного разрешения доменного имениошибка, используя приведенные выше решения, сделайте резервную копию всех ваших важных данных и приложений, чтобы переустановить Windows 10 .
Таким образом, все системные настройки будут восстановлены по умолчанию. В качестве альтернативы вы можете используйте Refresh Tool для чистой установки .
Cisco AnyConnect VPN не работает на вашем ПК? В нашей статье показано, как это исправить.
В заключение, приведенных выше решений должно быть достаточно, чтобы исправитьОшибка VPN из-за неудачного разрешения доменного имениошибка с Cisco AnyConnect на вашем ПК с Windows.
Однако, если ошибка повторяется, вам следует рассмотреть возможность отказа от Cisco VPN и замены его другим корпоративные решения VPN .
We are having trouble when test the VPN remote-access with the above error. It returned domain name successfully when we run nslookup «router_IP» in window CMD but it keeps prompting the error window when we connected via Cisco Any Connect 3.1. We have Router cisco 3925, iOS Version 15.1(1)T1. Please help.
Updated1: Router’s config
aaa new-model
aaa authentication login AuthenList local
aaa authorization network vpn-group local
username vpn1 secret 5 xxxx

crypto isakmp policy 10
 encr 3des
 hash md5
 authentication pre-share
 group 2

ip local pool remote-pool 10.223.131.35 10.223.131.50

crypto isakmp client configuration group cisco
 key xxxx
 pool remote-pool

crypto ipsec transform-set set1 esp-3des esp-md5-hmac
crypto dynamic-map map1 10
 set transform-set set1
 reverse-route

crypto map map1 client authentication list AuthenList
crypto map map1 isakmp authorization list vpn-group
crypto map map1 client configuration address respond
crypto map map1 10 ipsec-isakmp dynamic map1


interface GigabitEthernet0/1
 ip address A.B.C.D xxxx
 ip nat outside
 ip virtual-reassembly
 duplex auto
 speed auto
 crypto map map1
The error:
The VPN connection failed due to unsuccessful domain name resolution
when I entered the domain name of router’s interface g0/1 from nslookup (server 8.8.8.8)**
Updated2:
I could do forward nslookup but reverse lookup (domain name -> IP) returns failed. Is it a problem?
Update3:
In router’s config:
ip name-server 8.8.8.8
It happened with many users who are using the Cisco AnyConnect Secure Mobility Client. If you are facing a “VPN failed due to unsuccessful domain name resolution” issue, then it means your Cisco clients do not establish a successful VPN connection. There is also an issue with your DNS Settings.
It is often resolved with minor DNS tweaking and establishes a VPN connection using the Cisco AnyConnect Client. Once verify from the client side that AnyConnect is properly installed and ready to use with your computer. By this, you can ensure that there is no fault from the AnyConnect Client.
Also Read- How to Fix Broken Registry Items in Windows 10
List of Best Ways to fix the VPN connection failed due to DNS Error
Many windows 11/10 users are facing this problem right now because of some VPN establishment. So we listed various methods to fix the VPN connection that failed due to DNS Issue.
Method 1: Change DNS Settings
It can change your DNS server’s IP to resolve any misconfiguration on the internet connection. There are various DNS available on the internet, such as Google DNS, Open DNS & Comodo Secure DNS.
Sometimes the problem is resolved after removing these and resetting DNS settings to default in windows.
- On Windows 10, right-click on the start menu and click on Network Connections.

- Now you can see the network you are connected to, now right-click on it and go to properties.
- Now double click on Internet Protocol Version 4 (TCP/IPv4).

- A new dialog box will pop up where you need to select Obtain DNS server address automatically.

- Click Ok to save settings.
One of the primary reasons that cause VPN connection failed error because third-party VPN clients like Cisco VPN do not support static IP connections. So if You are using Google Public DNS, Open DNS, etc., you need to change it to a dynamic setting.
Method 2: Repair anyconnect.xml File
The best way to repair anyconnect.xml file is to remove this Cisco AnyConnect Client properly from your computer and reboot the PC. Then install a fresh copy of the software step by step. Finally, make ensure that it is properly installed.
 Because the main problem of the “VPN connection failed due to unsuccessful domain name resolution” error is that sometimes anyconnect.xml File is corrupted and unable to make a VPN connection. You can also try to connect to another region. Maybe it can make a successful connection and repair the file.
Method 3: Reinstall Your Operating System
In the last, if the problem is not fixed by doing all the above methods, then the last possible way is to install a fresh copy of the operating system. Then, it can resolve all of your custom DNS settings, and you can install the Cisco client.
Before reinstalling Windows OS, first, take a backup of all of your important files and folders. Then you can reset or install a fresh copy of Windows OS. By doing this, you can get all the settings by default. After that, you just need to properly install the cisco client and see how it can successfully make a VPN connection.
VIDEO – Fix VPN failed due to unsuccessful domain name resolution
From Editor’s Desk
At last, we have to say these are the best ways to resolve the VPN issue. Many users who face this either have Cisco AnyConnect Secure Mobility Client installed on their computer or any misconfigured VPN. You can try the above method one by one and see which one works for you.
Проверяем, что клиент может успешно разрешить доменное имя VPN-сервера:
nslookup vpn.vpnservername.com.
Проверяем, что VPN-сервер доступен с клиента:
ping vpn.vpnservername.com.
Проверяем, что папка клиента:
C:ProgramDataCiscoCisco AnyConnect Secure Mobility ClientProfile
Содержит профиль VPN-сервера:
C:ProgramDataCiscoCisco AnyConnect Secure Mobility ClientProfilevpnservername.xml
-
Partition Wizard
-
Partition Manager
- VPN Connection Failed Due to Unsuccessful Domain Name Resolution
By Vicky | Follow |
Last Updated November 18, 2021
Are you stuck in the error message saying “The VPN connection failed due to unsuccessful domain name resolution” when trying to connect to a VPN? Follow the post from MiniTool Partition Wizard to fix the issue “VPN says unsuccessful domain name”.
VPN Says Unsuccessful Domain Name
“The VPN connection failed due to unsuccessful domain name” error message sometimes appears when Windows 10 users use Cisco AnyConnect Secure Mobility Client.

And a netizen reported the issue on community.cisco.com:
I have a customer who is trying to connect to their SSL VPN via AnyConnect client. They have a Cisco ASA 5515x running ASA 8.6(1)2, using AnyConnect for windows 3.1.03103. They are on a laptop that is running Windows 7. When they attempt to connect they get the following error message: The VPN connection failed due to unsuccessful domain name resolution. They never get to a login prompt. They have attempted to connect using the IP address of the Cisco ASA, as well as the Domain name pointing to the ASA. They have other devices coming from the same location running win7 that have no problems connecting. I believe this is a client side, or client PC issue. Any advice would be appreciated.https://community.cisco.com/t5/vpn/the-vpn-connection-failed-due-to-unsuccessful-domain-name/td-p/2461599
Why VPN says unsuccessful domain name? Something likely goes wrong with your DNS (Domain Name System) settings. So, to get rid of the “The VPN connection failed due to unsuccessful domain name resolution”, please try modifying your DNS settings.
How to modify DNS settings? You need to enable the Obtain DNS server address automatically via Control Panel. For that, here is the tutorial:
Step 1: Open Control Panel via Run dialog window.
Press Windows + R at the same time to launch the Run dialog box. Then, type control into the blank bar. Finally, hit the Enter key.

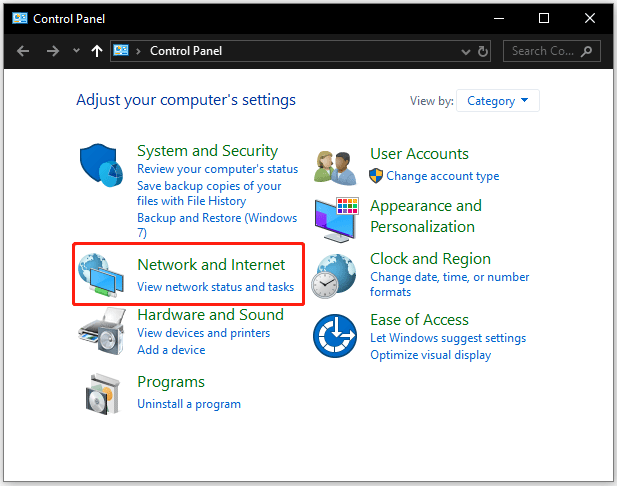
Step 2: Choose the Network and Internet option. To find it quickly, you can set the view mode to Category.
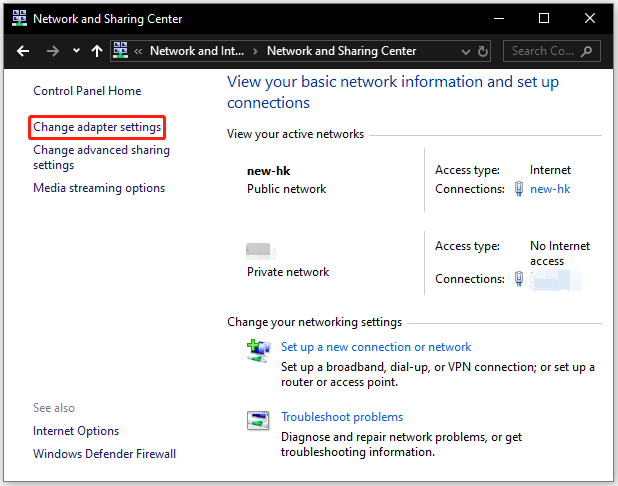
Step 3: Choose the Network and Sharing Center option and the Change adapter settings option.
Step 4: Right-click your network adapter and then choose the Properties option.
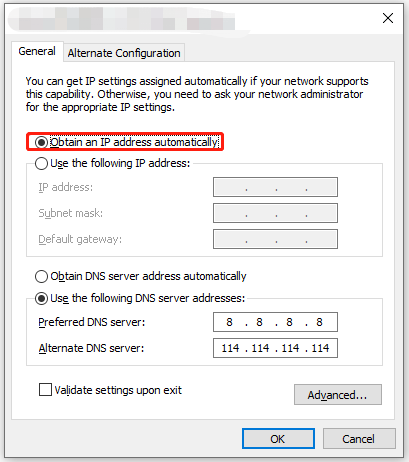
Step 5: Double-click the Internet Protocol Version (TCP/IPv4) option in the list. Then, select the Obtain DNS server address automatically option and click the OK button to save this change.
Now try using Cisco AnyConnect Secure Mobility Client to connect to the workplace again and see if your VPN says unsuccessful domain name again.
If you still receive the error message saying “The VPN connection failed due to unsuccessful domain name resolution”, there might be some unknown causes. In this case, you might need to try reinstalling your operating system.
Bottom Line
How to fix “The VPN connection failed due to unsuccessful domain name resolution”? You can try modifying your DNS settings — enable the Obtain DNS server address automatically option via Control Panel — or reinstalling your operating system to kill the unknown causes of the issue.
If you have any other useful solutions to this issue, please share them with us in the comment zone.
About The Author

Position: Columnist
Vicky is a website editor who has been writing tech articles since she was graduated from university. Most of her articles talk about Windows PC and hard disk issues. Some of her articles also touch on YouTube usage and issues.
During her spare time, she likes to spend time reading, watching videos, and sitting on her Yoga mat to relax.
[Solved] how to resolve the Cisco Anyconnect error message “VPN connection failed due to unsuccessful domain name resolution”
The above message is a very common message caused by the local internet provider DNS resolution failure and cane be fixed very easily.
below is the error message that you may get when trying to connect to the VPN while connected to the home internet.
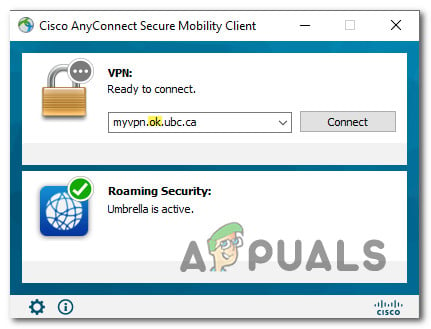
You will see that Cisco Anyconnect displays an error message where it is not able to connect to the VPN host using the hostname.
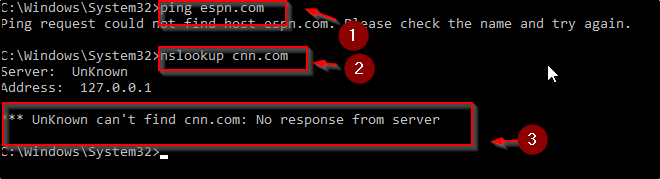
The first thing you will need to confirm is if the DNS resolution is working and in order to confirm that you will need to run the command prompt.
Launch the command prompt by going “start” “run” and type “cmd” – see the screenshot for reference.

You can test the resolution by pinging espn.com.
- type “ping” and you can see Ping espn.com is not resolving.
- nslookup for cnn.com does not resolve and shows a loopback address as a DNS server.
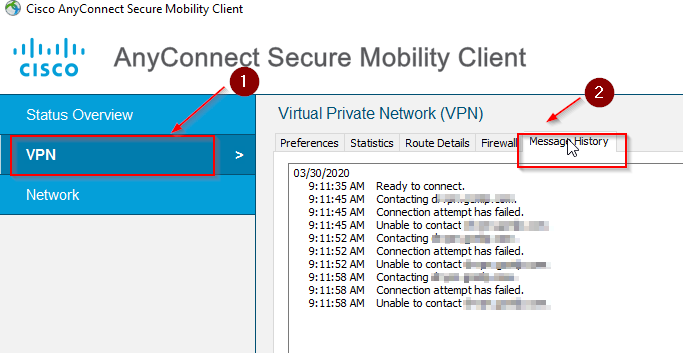
One good place to see more logs is by going to the gear icon on the Cisco Anyconnect. see the screenshot below for reference.

Go to the VPN tab and message history and you can see how many times, the client tried to connect and failed.
Start the command prompt again to test the DNS resolution.
This time use the DNS lookup using the google DNS server and you will see a response that confirms that it is the DNS server.
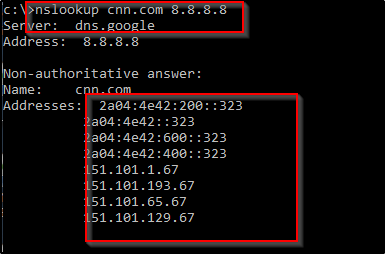
You can update the DNS server by manually adding the google DNS server for a temporary fix until your internet provider fixes the issue.
Thanks for ready this.