
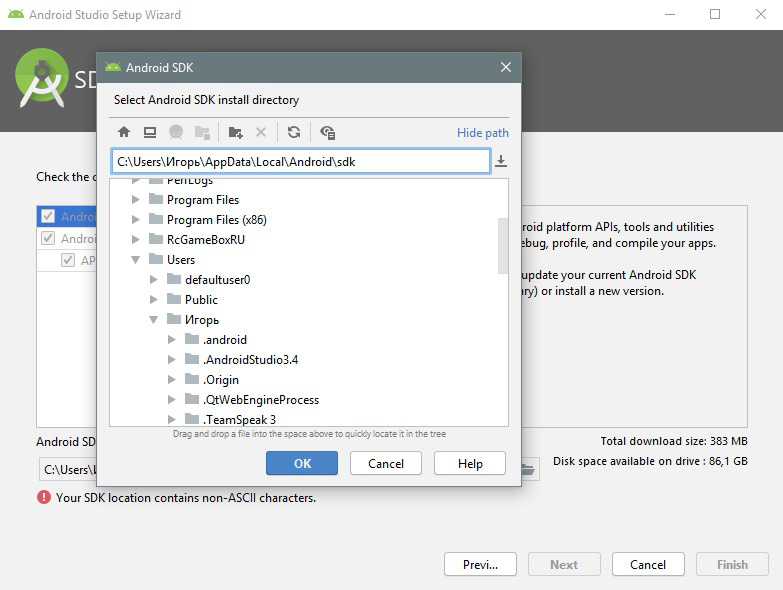
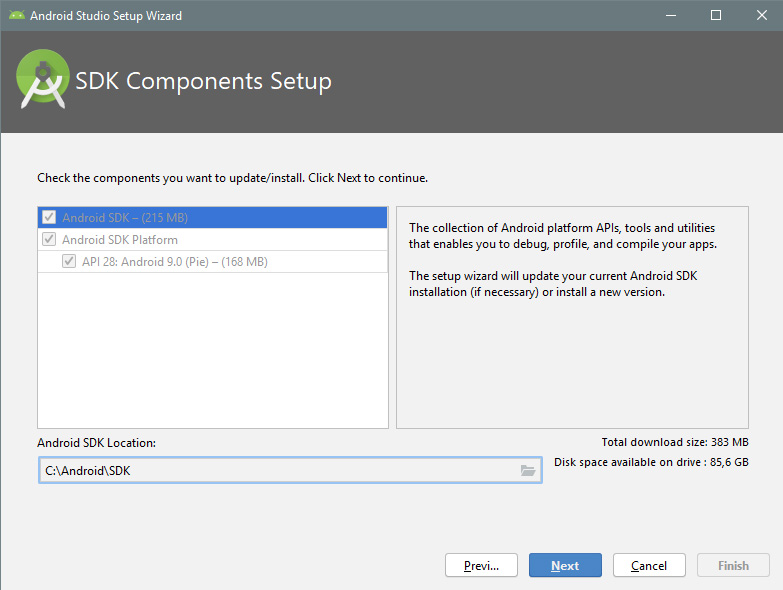
При установке Android Studio столкнулся с проблемой установки SDK. Нажать кнопку «Next» нельзя, а внизу с пометкой «внимание» находится надпись: Your SDK location contains non-ASCII characters. Что делать в такой ситуации? Я нашел два рабочих решения.
Содержание:
- Причина ошибки
- Варианты устранения ошибки
- Вариант 1: изменение пути
- Вариант 2: смена имени пользователя
Причина ошибки
Она банальна. Имя вашей учетной записи Windows написано не на английском. А программа брезгует устанавливать файлы в директорию, если папка в ней указана на другом языке (русский, турецкий, испанский, арабский и прочее).
Варианты устранения ошибки
Процесс устранения сводится к тому, чтобы обеспечить англоязычный путь к Android SDK.
Вариант 1: изменение пути
Банальный способ, который помог обойти ошибку:
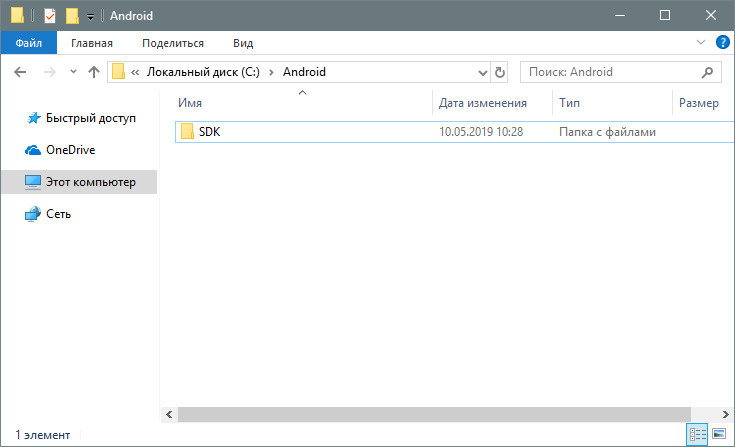
- Зайдите на диск C: и создайте две папки AndroidSDK.

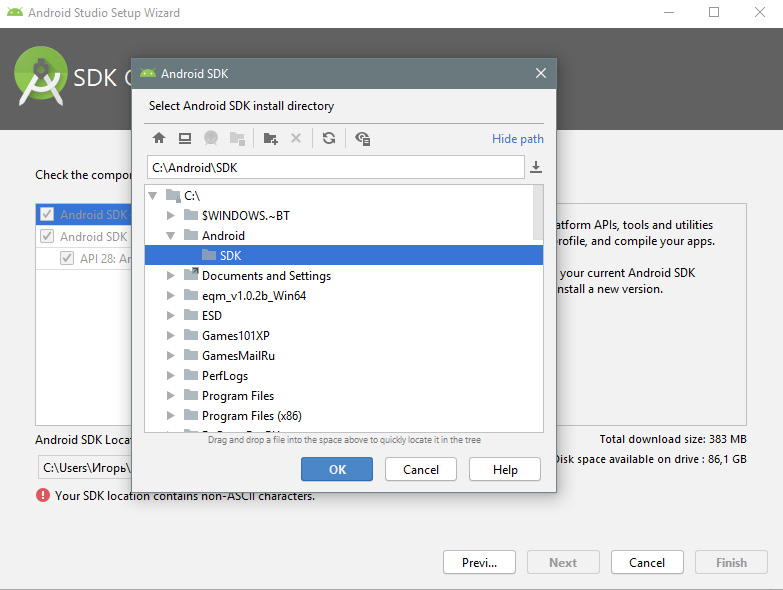
- Вернитесь в Android Studio Setup Wizard.
- В пути Android SDK Location выберите путь установки C: Android SDK.
- Нажимайте Next и ждите завершения установки.
Вариант 2: смена имени пользователя
Более замороченный способ со сменой имени профиля на англоязычное. Пока вы находитесь в этой учетной записи, переименовать папку невозможно. Поэтому:
- Через поиск найдите CMD и откройте от имени администратора.
- Введите команду net user Администратор /active:yes
- Выйдите из системы и зайдите в профиль только что включенной учетки администратора.
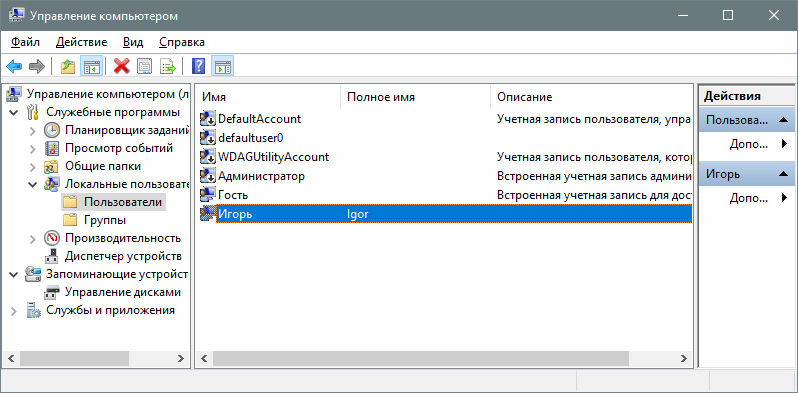
- Нажмите ПКМ на Пуск и выберите «Управление компьютером».
- Перейдите в раздел Управление компьютером — Локальные пользователи — Пользователи, нажмите ПКМ по имени учетной записи и отредактируйте ее.
- Далее перейдите в Проводник — Диск C: — Пользователи и переименуйте папку на такое же имя, как редактировали до этого.
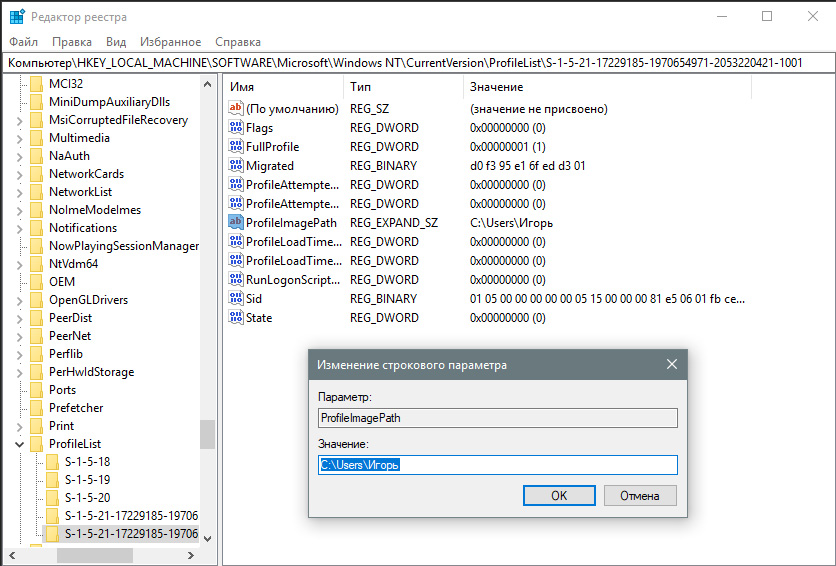
- Теперь откройте строку Выполнить (Win+R) и введите regedit
- Перейдите по директории HKEY_LOCAL_MACHINE SOFTWARE Microsoft Windows NT CurrentVersion ProfileList
- Измените параметр вашего старого имени на новое.
- Выйдите из учетной записи Администратора и зайдите в свою.
- Вновь откройте командную строку и пропишите net user Администратор /active:no.
- Приступайте к установке Android Studio.

Кстати говоря, способ, который находится в поиске, на первой странице в ютубе, не работает. По отзывам видно, что не у одного меня.
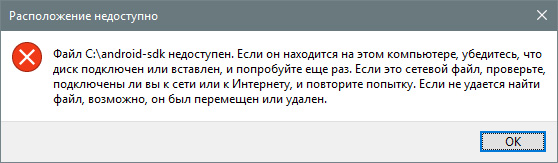
При создании символической ссылки командой mklink /D «C: android-sdk» «C: Users Игорь AppData Local Android sdk, она не отображается в пути установщика, а через проводник выдает «расположение недоступно».
В общем, устаняйте ошибку Android Studio, а сайт добавляйте в закладки. И до скорых встречь!
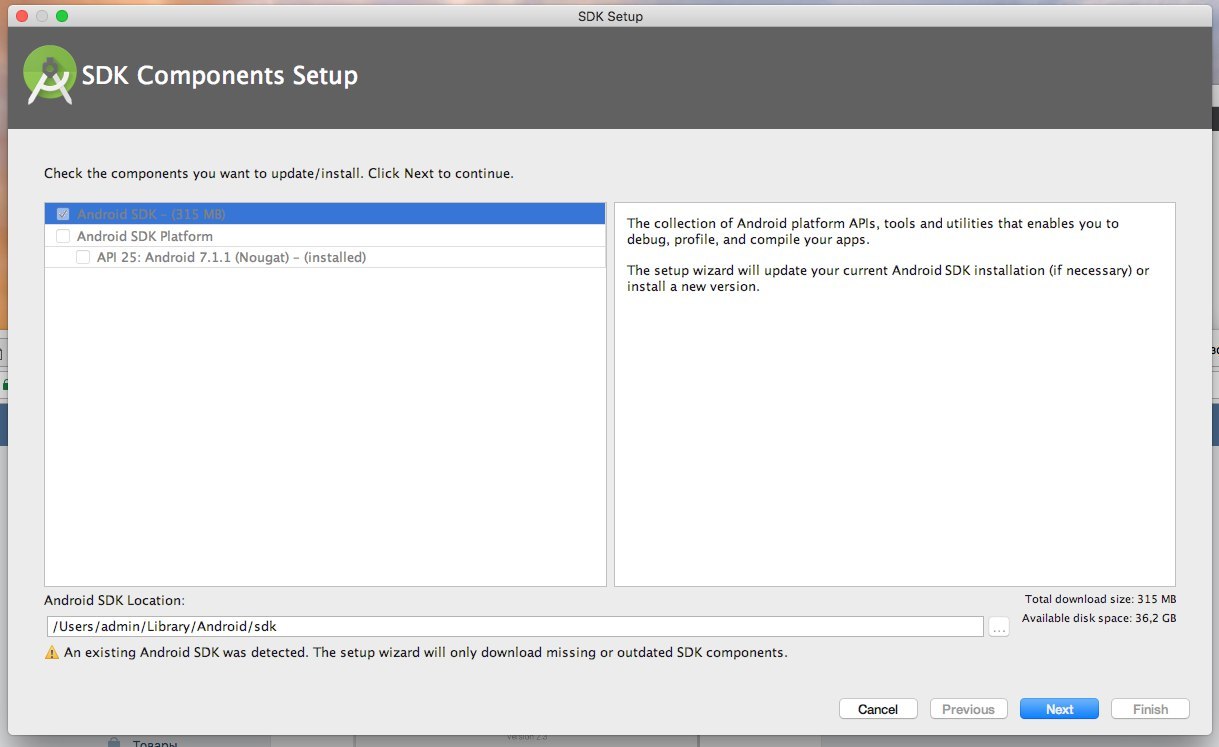
The link you quote is the link to SDK tools, not to the complete SDK. You need to put this tools folder into an existing SDK (given that the tools version supports the SDK version).
You need an SDK first (replace tools folder there or, much better, use SDK Manager.exe provided with the SDK, to update tools to the desired version).
AFAIK, for standalone SDK 25 there is not official standalone download link (for 24 there was). Install studio, use SDK manager from there (or run as exe in SDK installed with Studio), then go to SDK folder and grab the complete SDK after update if you need it separately for offline installation. You can replace tools directly in this folder or in copy, but better use the SDK manager.
Note there are various non-official sites for downloading offline SDK separately, you can easily google for them but it is the question of how much do you trust these sites to download executables. This is definitely a questionable path in an enterprise environment. I’m not sure why can’t you just download the studio and install with SDK. If you need SDK later in other installations, install, configure and update, grab the SDK folder and uninstall.
See also this question
First of all :
uninstal android SDK then check to remove any traces folder related to android and remove it manually from Program Files folder and from Documents and Settings folder ,
then uninstall java JDK also and eclipse ,
( which mean clean your computer from any thing related to android development preparation ) ,
now start again as follow :
1- Download latest java from this link : http://jdk7.java.net/download.html
then install it .
2- download latest android SDK from this link: http://developer.android.com/sdk/index.html
then install it , once finish install dont run it .
3- download latest eclipse from this link : http://www.eclipse.org/downloads/packages/eclipse-ide-java-ee-developers/junor
copy zip file to C folder and extract it in C folder it self ,
RUN ECLIPSE THEN :
1-Downloading the ADT Plugin :
a) Start Eclipse, then select Help > Install New Software.
b) Click Add, in the top-right corner:
In the Add Repository dialog that appears write this
for the Name : ADT Plugin,
and the following URL for the Location:http://dl-ssl.google.com/android/eclipse/
Then Click OK.
d) in the software dialog, select the checkbox next to
developer tools and clicks next.
e) in the next window, you will see a list of the tools to download ,
click next.
f) Read and accept the license agreements, click Finish.
H) When the installation completes, restart Eclipse.
2- Select Window > Preferences… to open the Preferences panel
a) Select Android from the left panel.
b) For the SDK Location in the main panel
click browse… and locate your downloaded SDK directory
then Click Apply, then OK.
3-open in eclipse: window then Android SDK manger and download any platform you want to start development with it .
some times maybe due to busy server of android site it gave error then later time it will fetch all download package you predetermined and download it succesfully .
hope this help .

Попыталась установить, и вот что получилось:
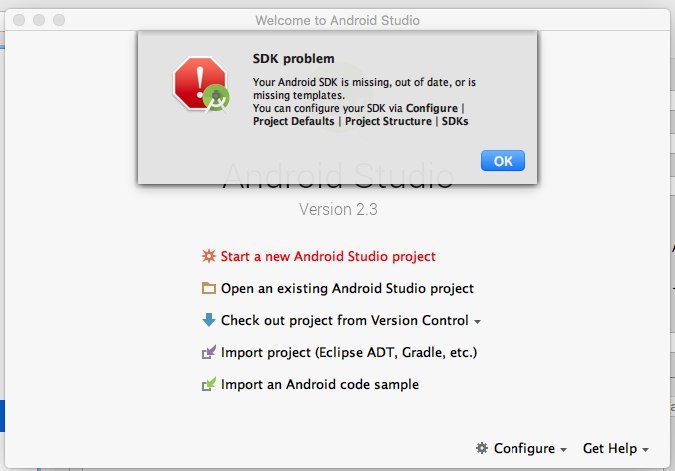

Как установить?
-
Вопрос заданболее трёх лет назад
-
5856 просмотров
Комментировать
Пригласить эксперта
Ответы на вопрос 2

Там же написано чёрным по белому, и ещё красный восклиицательный знак. Укажите директорию, куда вы поставили android sdk.
Похожие вопросы
-
Показать ещё
Загружается…
08 июн. 2023, в 22:08
50000 руб./за проект
08 июн. 2023, в 22:01
3000 руб./за проект
08 июн. 2023, в 21:41
5000 руб./за проект
Минуточку внимания
Android SDK is one of the most useful components which is required to develop Android Applications. Android SDK is also referred to as the Android Software Development Kit which provides so many features which are required in Android which are given below:
- A sample source code.
- An Emulator.
- Debugger.
- Required set of libraries.
- Required APIs for Android development with their documentation.
- Tutorials required for Android OS development.
What’s the Error?
Sometimes when the developer import an Eclipse-Android-Project into Android Studio then there may be a possibility of getting the following error
“Please select Android SDK”
Now the point that comes here is how we can fix the “Select Android SDK” error in Android Studio. So in this article, we are going to discuss four different methods to fix the “Select Android SDK” error in Android Studio.
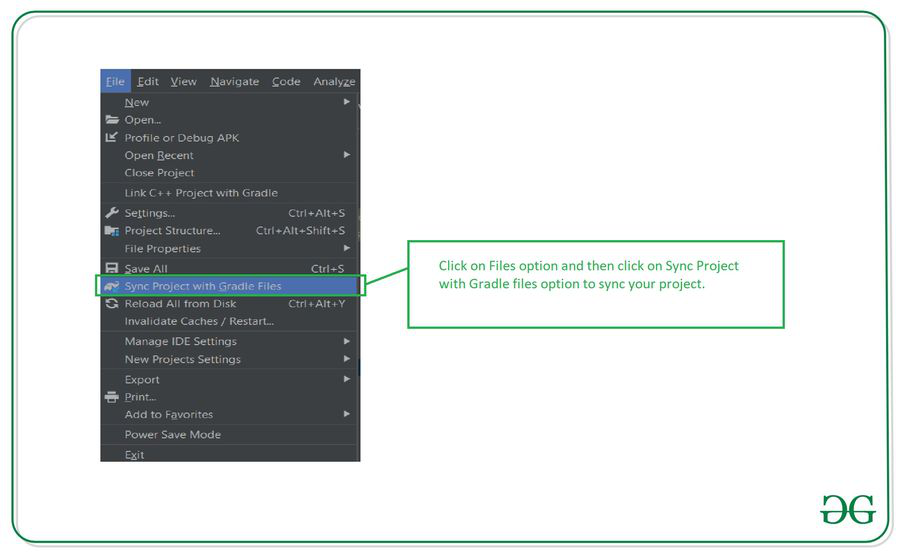
Method 1
Sync your project with Gradle files
When you open your project now simply sync your project. To sync your project. Click on the Files option. In that option, you will get to see the option as Sync Project with Gradle Files. Click on that option to sync your project. After your project sync, this issue will be resolved. Please refer to the below screenshot.
Method 2
Step 1: Opening project structure
Navigate to the File > Click on Project structure which is shown in the list and click on the Project structure option. After clicking that option you will get to see the below screen.

Inside the above screen, click on the SDK Location option you will get to see the below screen.
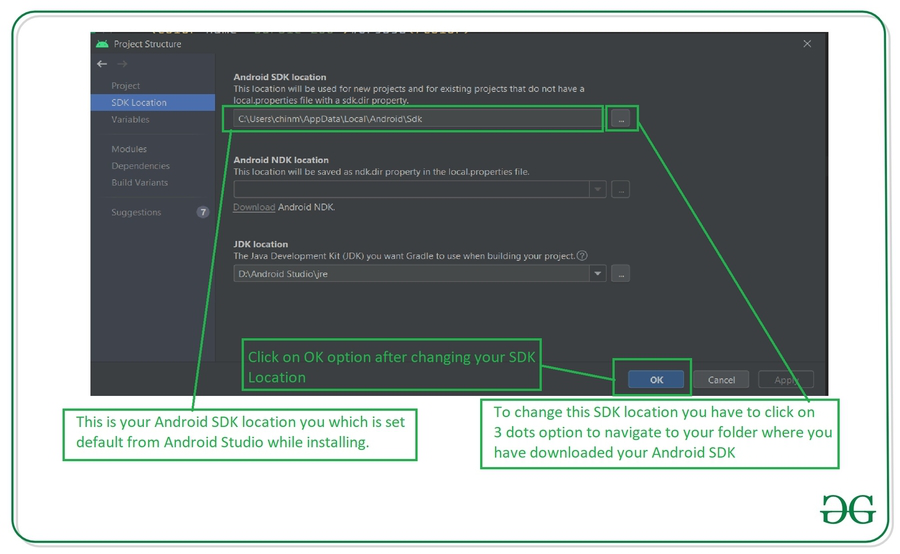
In the above image, you will get to see the current SDK location for your Android Studio. To change this SDK location you have to click on the 3 dots which are being displayed and then select your SDK location folder. After selecting this folder click on the OK option to save your SDK path.
Step 2: Sync your project after adding your SDK path
Now sync your project with Gradle files to check that SDK is working fine. To do this click on File > you will get to see the option as Sync Project With Gradle files option click on that option and sync your project. On successful sync of your project, your SDK location is set perfectly and now you are good to go in developing Android Applications.
Method 3
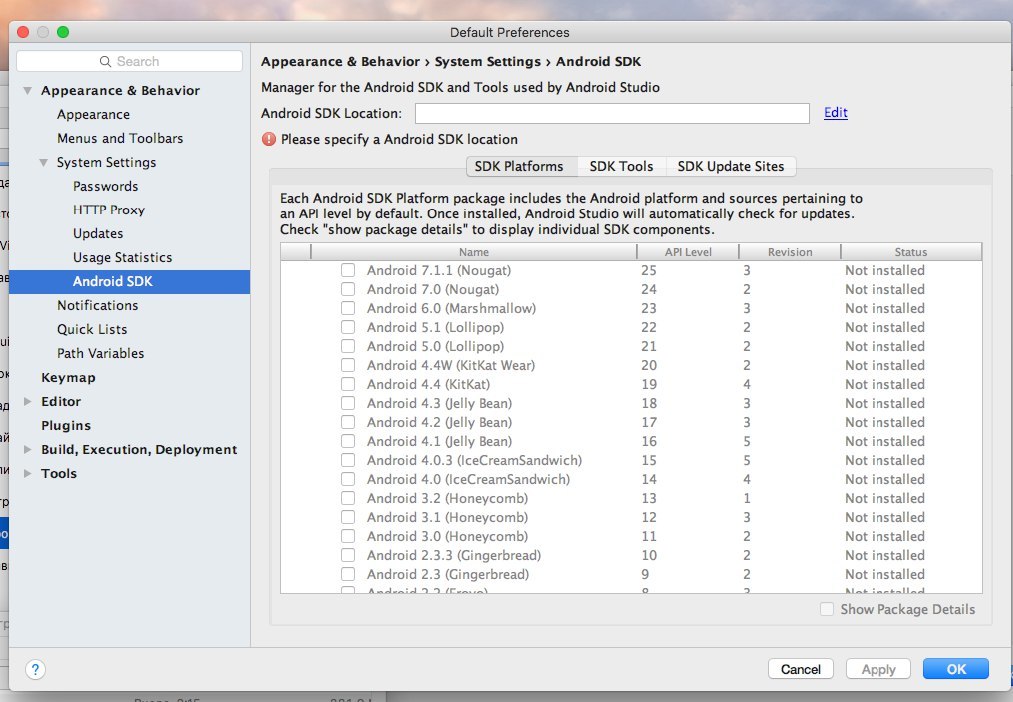
Step 1: Opening Android Studio Settings
Navigate to the File > Settings option you will get to see below dialog screen. Inside that screen. Click on Appearance and Behavior option > System Settings options and then click on the Android SDK option to get to see the below screen.

Inside this screen, you will get to see your SDK path. You can update your SDK path by clicking on the Edit option. After that select your SDK path, then click on Apply option, and then click on the OK option.
Step 2: Sync your project after adding your SDK path
Now sync your project with Gradle files to check that SDK is working fine. To do this click on File > you will get to see the option as Sync Project With Gradle files option click on that option and sync your project. On successful sync of your project, your SDK location is set perfectly and now you are good to go in developing Android Applications.
Method 4
Step 1: Opening project structure
Inside your Android Studio in the top right corner, You can get to see the icon below the image for opening the project structure. Click on that option to open your project structure option. You will get to see the below screen. For opening this Project Structure we can also use a shortcut key as:
|
Operating System |
Shortcut Key |
|---|---|
| Windows | Ctrl + Alt + Shift + S |
| Mac OS | Command + ; (semi-colon) |
| Linux | Ctrl + Alt + Shift + S |

After clicking on this option we simply have to follow Step 1 to update our Android SDK.
Inside the above screen, click on the SDK Location option you will get to see the below screen.
In the above image, you will get to see the current SDK location for your Android Studio. To change this SDK location you have to click on the 3 dots which are being displayed and then select your SDK location folder. After selecting this folder click on the OK option to save your SDK path.
Step 2: Sync your project after adding your SDK path
Now sync your project with Gradle files to check that SDK is working fine. To do this click on File > you will get to see the option as Sync Project With Gradle files option click on that option and sync your project. On successful sync of your project, your SDK location is set perfectly and now you are good to go in developing Android Applications. On successful sync of your project, your SDK location is set perfectly and now you are good to go in developing Android Applications.
Last Updated :
31 Oct, 2022
Like Article
Save Article